

-
Welcome to Tacoma World!
You are currently viewing as a guest! To get full-access, you need to register for a FREE account.
As a registered member, you’ll be able to:- Participate in all Tacoma discussion topics
- Communicate privately with other Tacoma owners from around the world
- Post your own photos in our Members Gallery
- Access all special features of the site
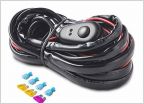 Lef wiring harness. Help please!!!
 Need help with code p1135
 What Oil Filter Strap or Cap Wrench Works Best For You On The 1st Gen 2.4?
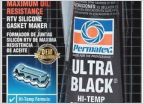 Changing auto transmission filter. Have gasket. RTV needed?
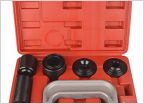 Suspension refresh - what to replace at 200k?
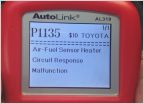 P1135 error code. Where to buy part?
Timing Belt Change: Royal Screw Up (pics)
Discussion in '1st Gen. Tacomas (1995-2004)' started by james, Jul 28, 2013.
Page 1 of 3
Page 1 of 3


