1. Welcome to Tacoma World!

    You are currently viewing as a guest! To get full-access, you need to register for a FREE account.

    As a registered member, you’ll be able to:
    • Participate in all Tacoma discussion topics
    • Communicate privately with other Tacoma owners from around the world
    • Post your own photos in our Members Gallery
    • Access all special features of the site

hirod build

Discussion in '2nd Gen. Builds (2005-2015)' started by hirod, Aug 8, 2013.

  1. Aug 8, 2013 at 7:56 PM
    #1
    hirod

    hirod [OP] Well-Known Member

    Joined:
    Jun 3, 2013
    Member:
    #105540
    Messages:
    1,245
    Gender:
    Male
    hawaii
    Vehicle:
    16 double cab short bed OR
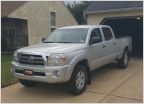
    Hey guys. Started making progress on my build. Working with a double cab long bed. 2012. Was only available as a pre runner so we had/have some issues. Wanted something more of a street truck but Toyota didn't offer anything close to what I was looking for.

    I'll post some pics of the different projects in others posts. My pics are all in my gallery for now but hopefully I can get them organized and make it easier to see the different stages the truck has been through.

    sorry, my notes aren't in order. Decided to make a build thread after I had done some of my stuff. Sorry. Hope it helps.


    Added notes: as of 8/17/13
    Stuff done:

    Chassis and suspension
    Tundra racing lowering kit (rear only) also added a 1" block also from tundra racing in addition to the original kit's block
    Hell wig rear sway bar 3/4" (removed)
    Factory OEM three leaf springs.
    1" spindle spacers
    XII performance 1-1/16" rear sway bar with
    Tundra racing sway bar mounting kit
    Added shaft collars to help locate rear sway bar
    Hell wig 1-3/8" front sway bar
    Qa1 rear shocks
    Xrunner trans cross member braces
    Light racing upper control arms.
    Airlift/ridetech airbags in the rear (final setup still pending)
    Spindle chop (final design still pending)

    Lighting
    Aux fuse panel (not hooked up yet)
    Vleds
    dtrl(switchbacks) 5k white/amber tritons
    Amber parking lights
    5k reverse lights
    Red/red triton brake lights
    5k white/amber triton rear turn signal
    Custom rear taillight harness

    Interior leds are all from jumper

    Ambiguous hid headlights

    Engine/performance
    Urd maf cal
    Intake manifold spacer
    Afe intake

    Wheels and tires
    18" limited wheels
    Goodyear ... no idea which ones.

    Snugtop camper


    Old pic (but with original tundra racing drop).
    [​IMG]

    Companies I've worked with/dealt with on this project that I've had positive experiences with:

    XII performance. Great guys to work with. They will find out the best way to ship your stuff. Plus they know their products and tacomas very well. Pleasant, quick, and quality parts.

    Tundra racing. Very knowledgeable and willing to work with you. I hate nylocks and tom ended up sending me a ton of standard nuts to double nut my axle. Wanted a thicker spacer for my sway bar to clear my spring, no problem. Wanted just the swasy bar mounting kit without the sway bar, no problem. He also made me some 1"rear blocks when I wanted to go lower. Plus found me the correct u-bolts to fit the spacers. Flat rate box USPS.

    Csjumper. Really accommodating. Knowledgeable. Values customer service and willing to sit down and walk you through issues over the phone. Great customer service. Has pride in his product line.

    Cboy808. Patient guy. If you want to design your own stickers, see this guy. For the amount of time he spent trying to get my logo just right, I didn't pay him enough. Spent about 3 days and over 30 emails to get it how I wanted it. But its perfect. Going for round two and same great service.

    Fat bobs garage and spc. Got my light racing control arms from fat bobs. Unfortunately it came from china with the wrong ball joints. Within two days of letting them know, I had the correct ones in hand. Good product and good customer service. The guys at fat bobs are willing to flat rate box your stuff if it'll fit. That's plus points in my book.

    Amazon. If they got it and it qualifies for free shipping, I'm almost guarantee buying it from them. Sorry, can't beat it. What customer service? Do they know their product? No. But cheap!

    Vleds. tritons are awesome. so good I switched to the red lens tail lamp housings.

    Urd. great customer service, great products, great prices. gadget was willing to help me figure out what I was looking for and keep me in budget.
     
    Last edited: Apr 23, 2015
  2. Aug 8, 2013 at 8:44 PM
    #2
    tinker_troy

    tinker_troy Well-Known Member

    Joined:
    Sep 17, 2007
    Member:
    #2718
    Messages:
    14,692
    Gender:
    Male
    First Name:
    T R O Y
    WY/SD
    Vehicle:
    #3, 2015 SR AC 4x4 V6 6 speed
    shackle brace, rear sway bar, 3 gen seats, Coupe Shifter, 3rd gen OR front springs + shocks, 17" TuRD PRO replica wheels
  3. Aug 9, 2013 at 12:17 AM
    #3
    hirod

    hirod [OP] Well-Known Member

    Joined:
    Jun 3, 2013
    Member:
    #105540
    Messages:
    1,245
    Gender:
    Male
    hawaii
    Vehicle:
    16 double cab short bed OR
    [​IMG]

    [​IMG]

    Here's my aux fuse panel. Not wired yet. 100 amp breaker by the firewall. Same fuse box everyone else running next to that. Forward of that are two switches. One will be for my 12 volt outlet. Haven't decided what the other will be for yet. Was running out of room so I made a vertical section to mount relays to. Had to omit the section that could've made more room inboard cause hopefully someday I'll be able to mount a catch can over there.

    Made it out of some thick polycarbonate I found. Don't know yet if it'll need any reinforcement/support yet. Just gonna keep an eye on it.

    Built this to keep me busy while more funds were being raised or waiting for more parts to come in.
     
    Last edited: Aug 9, 2013
  4. Aug 9, 2013 at 12:38 AM
    #4
    BAMFTACO

    BAMFTACO Another day another beer

    Joined:
    Feb 3, 2010
    Member:
    #30639
    Messages:
    10,907
    Gender:
    Male
    First Name:
    Juan
    Woodlandland hills , CA
    Vehicle:
    2007 Tacoma AC Prerunner
    Kings bruh
    Subd for pics. When I got my truck (sr5 prerunner) I was debating on lowering it. Now I'm wishing I went that route I like the look of lowered tacos.
     
  5. Aug 9, 2013 at 12:39 AM
    #5
    hirod

    hirod [OP] Well-Known Member

    Joined:
    Jun 3, 2013
    Member:
    #105540
    Messages:
    1,245
    Gender:
    Male
    hawaii
    Vehicle:
    16 double cab short bed OR
    [​IMG]

    [​IMG]

    This was my first try. Tundra racing drop kit. Flip kit and flipped shackle.

    Added the hellwig rear sway bar. 3/4" if I recall. Big difference over no sway bar. Wasn't impressed with the rubber bushings on the sway bar side of the end link. Was considering going with polyurethane mounts and bushings but decided to try something else instead. Highly recommend going to home depot and getting regular nuts instead of the deformed thread nut they give you. Plain old double nut. 9/16" fine thread I think. Then would suggest plastic dip spraying everything. The end links rust in no time. Plus the shiny new hardware kinda stands out.
    I also added hellwig helpers to keep from sagging as soon as I put anything in the bed. Jury is still out on those. May try running without them after I finish the front just to see. Couldn't just add a leaf since it is a flip kit. No way to be sure the lift from the spring would compensate for the amount it raised the axle or dropped the body depending how you look at it.
     
  6. Aug 9, 2013 at 1:11 AM
    #6
    hirod

    hirod [OP] Well-Known Member

    Joined:
    Jun 3, 2013
    Member:
    #105540
    Messages:
    1,245
    Gender:
    Male
    hawaii
    Vehicle:
    16 double cab short bed OR
    [​IMG]

    [​IMG]

    [​IMG]

    This is the new setup. 1-1/16" rear sway and qa1shocks from XII performance. Mounting kit is from tundra racing. Both companies were awesome to deal with. Us Hawaii guys forget about time zones. Amy at XII was worried that everything wouldn't work which was kinda true. Out of the box, no go. But I knew that before I even decided to go this route.

    Sway bar was massive. Wider, thicker, and heavier than the hellwig. A lot brighter too. Not my thing but since they went through all that work I can't see myself painting it black ... yet. Came with the poly mounts. From energy suspension. Greasable. Worked pretty well with the tundra racing ubolt and mount. A little tight. Like it took me 30 minutes just to get em where I could thread the nuts on. The endlink-sway bar bolt doesnt quite fit in the sway bar. Gotta remove the powdercoating. Was a you gotta be shittin me moment. Then, never mind, i got this. Oh, and there's an up and down for the bar. Mounted the wrong way, the bar blocks the rear end plug. After I finished the first endlink-frame mount and was mocking up the second I noticed that issue.

    The tundra racing kit was pretty straight forward. Had to drill one hole on each side of the frame to mount the bracket. Took me about an hour and a half. I'm weak, had the wrong bits, had the wrong drill, first extension cord didn't reach ...etc. The end links are massive. The bracket will bend before they do. The hardware is all nylocks. And I hate nylocks. But nearly everything from tundra racing is nylock so if you want to run regular double nuts, let em know when you order. They also sell the kit with the Toyota sway bar but after I saw the XII bar I couldn't bring myself to get the Toyota one.

    Qa1s. I never had shocks I liked this much. You dial em in for what's comfortable for you. First I had em harsh around 11 clicks but worked my way down. Now I'm at 7 clicks and there's no harsh ride. Combined with the new bar, bushings, and end links, the truck rear end wise drives better than my 06 mustang gt. If I can get the front like this I'll be impressed.

    one week later. Noticing a bump sound in the back going over speed bumps. The sway bar-endlink bolt is a little undersized and has some room in the end link bushing. Can't just get a bigger bolt cause it won't fit through the sway bar. When I have time maybe I can see if I can change the bushing on that side to a smaller diameter. Spayed everything with plasti-dip and noticed the sway bar is actually moving side to side. Paint pushed back near the axle mount bushings. Ordered a couple of collar clamps like the fronts' to see if that makes a difference.
     
    Last edited: Aug 14, 2013
  7. Aug 9, 2013 at 1:20 AM
    #7
    hirod

    hirod [OP] Well-Known Member

    Joined:
    Jun 3, 2013
    Member:
    #105540
    Messages:
    1,245
    Gender:
    Male
    hawaii
    Vehicle:
    16 double cab short bed OR
    I can't say my truck is really lowered that much. By itself, it just looks like a leveled pre runner. Parked next to a stock sr5, it looks like I need to put air in my tires. If I ran xrunner sized tires I'd prob be another inch lower and then itd be more noticeable. But my tires got lots of tread left so that's a no go. Hoping to change wheels and tires in a couple years. Then I'll get street tires and bigger wheels. The stock tires add a little to the mushy ride. I wish I could go lower but the roads here suck. Got some big ass potholes that they only fix election years.
     
  8. Aug 9, 2013 at 6:08 PM
    #8
    hirod

    hirod [OP] Well-Known Member

    Joined:
    Jun 3, 2013
    Member:
    #105540
    Messages:
    1,245
    Gender:
    Male
    hawaii
    Vehicle:
    16 double cab short bed OR
    [​IMG]

    Did the spindle spacer mod this morning. Kinda big difference both visually and dynamically. Camber is starting to make me uncomfortable but it ain't as bad as what those guys do to Hondas. Brought it down about an inch. Now my truck has rake. The caster is way off, especially noticeable when I turn the wheel. No word on my control arms, would like for those to come in soon to adjust the camber at least. Handling wise the truck seems to rock forward and back less. Less diving when braking and less rocking back when you step the gas.

    [​IMG]

    [​IMG]

    For the spindle spacer mod I used the 70 mm length bolts. M16-1.5 x 70 mm. For the spacer itself I used a 3/4" nut sandwiched between two 3 mm thick m16 washers. Came out to about 1". I started by breaking the two bolts to the spindle. Needed a breaker bar and a pipe. Then broke the lug nuts. Then jacked the truck up, took off the wheel and unbolted the spindle mount. Used a long bolt to maintain alignment in one hole and then used the pry bar to wiggle the spindle so I could get the three spacer pieces in. After that, loosely bolted that portion in before removing the other bolt. Repeated the prying to get the next set in and then tightened everything down. Repeat for other side.

    One thing I would've done differently would be to disconnect the sway bar. I dunno but it seemed it added a little tension. So far the sway bar isn't hitting the springs. Which was happening before I shimmed the sway bar mount. Might change when I put the bigger sway bar in.
     
    Last edited: Aug 9, 2013
  9. Aug 9, 2013 at 6:25 PM
    #9
    hirod

    hirod [OP] Well-Known Member

    Joined:
    Jun 3, 2013
    Member:
    #105540
    Messages:
    1,245
    Gender:
    Male
    hawaii
    Vehicle:
    16 double cab short bed OR
    To add to my to try list: ride tech posi-links. Make my own sway bar end links. Then hopefully I don't need to use spacers and shims to avoid having the sway and springs hitting. After I figure out what works best I may go and get a set of moogs or something.
     
  10. Aug 10, 2013 at 2:04 AM
    #10
    jmarquez808

    jmarquez808 Large Member

    Joined:
    May 22, 2012
    Member:
    #79323
    Messages:
    1,497
    Gender:
    Male
    First Name:
    Jess
    Hawaii
    Vehicle:
    07 4x2 reg cab / 12 4x4 double cab
    **Afe cold air intake w/pro dry filter, Yellow tint fogs, Daytime running lights, led dome light, led license plate lights, Led tail lights, 3 inch carbon antenna, spec d projector headlights, carbon fiber look interior trim pieces, Djm control arms, Djm notch, 4x4 leaf springs, beefed taco 2 inch blocks with offset pin, Rear Qa1 Shocks, Sittin sic stock height coils, x runner bilstein front shocks, weathertech digital fit floor mats, debadged.
    Slam the pre runner!!!!
     
  11. Aug 10, 2013 at 9:58 AM
    #11
    hirod

    hirod [OP] Well-Known Member

    Joined:
    Jun 3, 2013
    Member:
    #105540
    Messages:
    1,245
    Gender:
    Male
    hawaii
    Vehicle:
    16 double cab short bed OR
    I wish. But you start running into problems when the wheels are that far apart. I'm thinking along the lines of parking structures and bottoming out. Don't think I'll last too long dragging my gas tank. Damn. Handles pretty good right now. The s-turn coming off the freeway just before the main gates at work is boring now. Hellwig 1-3/8" front install this morning.
     
  12. Aug 10, 2013 at 1:08 PM
    #12
    jmarquez808

    jmarquez808 Large Member

    Joined:
    May 22, 2012
    Member:
    #79323
    Messages:
    1,497
    Gender:
    Male
    First Name:
    Jess
    Hawaii
    Vehicle:
    07 4x2 reg cab / 12 4x4 double cab
    **Afe cold air intake w/pro dry filter, Yellow tint fogs, Daytime running lights, led dome light, led license plate lights, Led tail lights, 3 inch carbon antenna, spec d projector headlights, carbon fiber look interior trim pieces, Djm control arms, Djm notch, 4x4 leaf springs, beefed taco 2 inch blocks with offset pin, Rear Qa1 Shocks, Sittin sic stock height coils, x runner bilstein front shocks, weathertech digital fit floor mats, debadged.
    Lol yah these trucks don't wanna be slammed without heavy modification. I have the pre runner leafs and 3 inch blocks out back, had to remove the screw from my rear wheel well. Bend the bracket back on top of the rear axle release my brake lines from the brackets on the rear axle and the only problem I have now is the drive shaft rubbing the e brake lines that were retardedly routed right under the driveshaft. I have no idea how that problem could be fix without majorly modifying my truck. If I can figure a way around that I can stay this low and still haul stuff in the bed. Probably just put my Roadmaster system back on and just live with it an inch higher in the back then it is now. We shall see. All you need now is some rims!
     
  13. Aug 10, 2013 at 6:46 PM
    #13
    hirod

    hirod [OP] Well-Known Member

    Joined:
    Jun 3, 2013
    Member:
    #105540
    Messages:
    1,245
    Gender:
    Male
    hawaii
    Vehicle:
    16 double cab short bed OR
    [​IMG]

    [​IMG]

    Out with the old, in with the new. Old. Stock front sway bar. Mounted on a bunch of spacers. New. Hellwig 1-3/8" front sway bar. Had to get longer bolts. M10-1.25 x60mm. Had to make taller sway bar mount spacers. Temporarily a bunch of washers and 1/8" aluminum plate. Double checking that there's no interference while driving then going to ask a favor and get a correct one made. I'm hoping to make a custom sway bar end link. Currently running the skid plate bracket on 4 washers. Should've just removed the whole thing but ... where to store it? Will see where the sway bar sits after I figure out the end link solution.

    May switch the mount bushing back to the one that came with the sway bar. Running into some issues with the collar hitting the spacers. Wanted to try the energy mounts but they actually seem more narrow than the hellwig one.

    Handling wise the truck of course seems better. Definitely a nice flat ride. The truck feels a lot like driving a go kart minus the accerlation. Its easy to forget the truck is as long or high as it is. Kinda takes the fun out of driving. The opportunity to try it out hasn't presented itself yet. Can't really take too many turns quickly in kalihi.

    Hmm... the new bar appears smaller in the pic. Its actually 1/4" larger. And a lot heavier.

    switched in the bushings that came with the bar. They're wider and taller so I was able to take out all those washer/spacers. There is a clunking noise when I crank the steering wheel which I'll try check out tomorrow. A shim or two may have to go back.
     
    Last edited: Aug 14, 2013
  14. Aug 10, 2013 at 7:23 PM
    #14
    hirod

    hirod [OP] Well-Known Member

    Joined:
    Jun 3, 2013
    Member:
    #105540
    Messages:
    1,245
    Gender:
    Male
    hawaii
    Vehicle:
    16 double cab short bed OR
    I'm still doing my shakedown. Will take a look under everything over the next couple weeks to see if anythings loose or rubbing. Right now I got the hellwig helper springs. Thinking of taking it off to see how my truck sits. Kinda similar goal of the roadmaster but a lot more simple. Would like to get new rims and tires but the budget was destroyed by the latest string of parts. Still need to get a camper. Not an aesthetic mod but more of a convenience issue. Got a family so this more like a limo/project supply hauler.

    My goal for wheels was the TRD 18" wheels blacked out. Keeping an eye on Craigslist for that. Hopefully I can build up some funds before then.
     
  15. Aug 11, 2013 at 12:26 PM
    #15
    hirod

    hirod [OP] Well-Known Member

    Joined:
    Jun 3, 2013
    Member:
    #105540
    Messages:
    1,245
    Gender:
    Male
    hawaii
    Vehicle:
    16 double cab short bed OR
    Kinda skipped the pics for the tundra racing front drop kit. Its pretty simple and a straight forward drop in kit. If you can take off the shocks and take them apart then you can do this. You're replacing the original spring perch with a sleeve and another perch. If you're using TRD shocks there's a third sleeve since the of of those are smaller than the plain sr5 ones. From what I've gathered on here, the TRD shocks are the same but the springs are different between the of road and sport. I have an sr5 which is supposed to be the same springs as the sport. I found the sr5 shocks to be a little too soft so my next project is to swap out the shocks. Throwing my springs on some TRD shocks.

    [​IMG]

    [​IMG]

    The other part of the kit is to relocate the sway bar. In the kit is a 1/2" spacer I think. I still had some interference issues between the spring and the sway bar so in lowered the bar another 1/4". This maybe could've been avoided by rotating the spring a little in either direction but I was using a shops spring compressor and my truck was back at my house. Next time I plan to try to orient the spring a little differently to see if I can get away from using the spacers or reduce the thickness of the spacers.

    [​IMG]

    Here's what the upper ball joint looks like after. From outside since the wheels are so big, its hard to notice any camber difference. Can tell on the tire wear though.

    [​IMG]
     
    Last edited: Aug 11, 2013
  16. Aug 11, 2013 at 7:57 PM
    #16
    hirod

    hirod [OP] Well-Known Member

    Joined:
    Jun 3, 2013
    Member:
    #105540
    Messages:
    1,245
    Gender:
    Male
    hawaii
    Vehicle:
    16 double cab short bed OR
    Catching up on the tundra drop kit. Here's what I recall about the rear.

    [​IMG]

    [​IMG]

    The rear was a pain not because it was complicated but because everything is heavy and awkward. You have to jack up the truck, take off the leafs, and break em apart. Flip the pin around and try get it back under the truck. Hook up the new shackle and try to wiggle everything to line it back up. The axle sits on a block over the springs and the shackle goes from on top the frame shackle mount to hanging below it. The shock goes from attached to the axle to attached to the plates below the axle.

    Like I said, its a simple job but just a pain. Just make sure you got a lot of time. Everything will fit but you gotta do a bunch of shaking and kicking. Worth it though. Truck ride quality remains essentially unchanged. Springs are under the same load as before and even the rear shock retains its original range. The front shock is a little compressed and the uca's ball joint is a little off but aside from that. Pretty much stock.
     
  17. Aug 11, 2013 at 10:02 PM
    #17
    hirod

    hirod [OP] Well-Known Member

    Joined:
    Jun 3, 2013
    Member:
    #105540
    Messages:
    1,245
    Gender:
    Male
    hawaii
    Vehicle:
    16 double cab short bed OR
  18. Aug 12, 2013 at 3:51 PM
    #18
    hirod

    hirod [OP] Well-Known Member

    Joined:
    Jun 3, 2013
    Member:
    #105540
    Messages:
    1,245
    Gender:
    Male
    hawaii
    Vehicle:
    16 double cab short bed OR
    [​IMG]

    [​IMG]

    [​IMG]

    Using the hellwig helper spring. It does bring the ass up a little but barely. Before and after bounce test on the rear bumper really shows how much of a difference it makes. Haven't hauled anything since I put em on but i think it helps to keep the truck flat. Bought it to try kill some of the forward-back rocking on the braking and accelerating which I don't think it did.

    When using with the tundra racing kit its difficult to get it close to the axle. Need to cut off some of the threads to allow the nut to get in there. Doesn't look that close in the pics but was a bit challenging when I did it. I wish I could cut off the unused threads on the rear clamp but being that its a spring, it'd be impossible to bolt it back together after. If you were planning to never adjust them or remove and reinstall then I guess you could do that. Wouldn't have all these bolts hanging off the bottom of the truck like cow udders. Bugs me every time I walk by the truck.

    Given the time and money I would've gotten airbag helpers instead. Out of the box they won't work with tundra racings kit but I believe only the bottom plate of the airbag kit would have to get modified. I hope to give this a try soon. Been putting off the camper purchase for a while now so I really need to start saving for that.

    [​IMG]

    [​IMG]

    added couple more pics showing the interference from the bottom plate and the forward set of clamps for the helper spring. Gotta use an open end wrench 11/16" to crank those down. Helps to start the nuts with the spring a little back then slide the whole thing foward just before it comes snug.
     
    Last edited: Aug 12, 2013
  19. Aug 12, 2013 at 3:55 PM
    #19
    hirod

    hirod [OP] Well-Known Member

    Joined:
    Jun 3, 2013
    Member:
    #105540
    Messages:
    1,245
    Gender:
    Male
    hawaii
    Vehicle:
    16 double cab short bed OR
    Hopefully coming in within the next week or so would be the light racing control arms and the xrunner transmission cross member braces. Hopefully those line up and bolt right in.
     
  20. Aug 12, 2013 at 9:21 PM
    #20
    hemitruk

    hemitruk Old man , young boi truk

    Joined:
    Oct 17, 2009
    Member:
    #24461
    Messages:
    2,270
    Gender:
    Male
    First Name:
    Kurt
    Hawaii
    Vehicle:
    2010 Dbl Cab Sport,
    A few
    Nice build thread hirod. Will check out things you do maybe try some of those mods latter .Going pick up the helwigs and try um out for now.

    Truck looking good now . Looks lower than mine
     

Products Discussed in

To Top