1. Welcome to Tacoma World!

    You are currently viewing as a guest! To get full-access, you need to register for a FREE account.

    As a registered member, you’ll be able to:
    • Participate in all Tacoma discussion topics
    • Communicate privately with other Tacoma owners from around the world
    • Post your own photos in our Members Gallery
    • Access all special features of the site

**2005+ Tacoma Double Cab Complete Audio Install Tutorial**

Discussion in 'Audio & Video' started by Mr Marv, Oct 11, 2008.

  1. Mar 31, 2009 at 6:37 PM
    #61
    Mr Marv

    Mr Marv [OP] 1-831-383-0308 7am-10pm pst Vendor

    Joined:
    Mar 6, 2007
    Member:
    #1009
    Messages:
    992
    Gender:
    Male
    First Name:
    Marv
    Monterey Bay California
    Vehicle:
    Custom Built Enclosures/speaker adapters etc
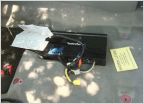
    In this truck I actually removed the rear side plastic and there was a piece of metal at the bottom which allowed me to drill a hole so I could use a bolt/washer/nut to hold the wire lug securely. Wherever you decide to ground be sure to sand to bare metal so you can be assured a good contact. :)
     
  2. Apr 24, 2009 at 10:30 AM
    #62
    Mr Marv

    Mr Marv [OP] 1-831-383-0308 7am-10pm pst Vendor

    Joined:
    Mar 6, 2007
    Member:
    #1009
    Messages:
    992
    Gender:
    Male
    First Name:
    Marv
    Monterey Bay California
    Vehicle:
    Custom Built Enclosures/speaker adapters etc
    I promise the rest will come later today after I have a few minutes to edit it again! :)
     
  3. Apr 24, 2009 at 10:49 AM
    #63
    Hotdog

    Hotdog My hair is all natural Moderator

    Joined:
    Feb 9, 2007
    Member:
    #872
    Messages:
    10,245
    First Name:
    Hotdog
    Vehicle:
    2007 PreRunner SR5 Double Cab
    Wet Okole Underwear
    thanks Marv!
     
  4. Apr 24, 2009 at 11:50 AM
    #64
    Chickenmunga

    Chickenmunga Nuggety

    Joined:
    Apr 10, 2008
    Member:
    #5877
    Messages:
    7,574
    Gender:
    Male
    First Name:
    Mike
    Keizer, Oregon
    Vehicle:
    08 TRD Offroad DC 4x4 with stuff
    All the normal TW BS
    Hey all, there's one suggestion I would like to make about the wiring:

    If you drill the hole and feed wire through like Marv did, you may run into problems down the road - what happens if that wire gets crimped? What if the wire develops a short? What if you cut the wire and it gets to short for your install?

    Instead, I suggest the use of a terminal cup. Simply cut a length of wire as before, then use spade connectors (or solder) to connect to the inside of the cup (the backside, can't see it in the picture below). For the outside, just use more wire. If the wire ever goes bad, you just remove it from the cup and replace. No more holes or taking things apart.

    To install the terminal cup, you need to use a hole saw (or a cutting tool if your cup is square) and perhaps some sandpaper. Measure to make sure your terminal cup will fit before cutting!

    I recommend a terminal cup with banana clips (like the picture below), which can screw down onto the wire. You can use spade connectors, or there is usually a small eyelet in the bolt to thread your wire through. Banana plugs on the wires themselves aren't very ideal, though ;)

    The cup below sells for about $10, and you can find them most anywhere. I got mine at Radio Shack for... $6?


    h1257001-f.jpg
     
  5. Apr 24, 2009 at 1:33 PM
    #65
    Mr Marv

    Mr Marv [OP] 1-831-383-0308 7am-10pm pst Vendor

    Joined:
    Mar 6, 2007
    Member:
    #1009
    Messages:
    992
    Gender:
    Male
    First Name:
    Marv
    Monterey Bay California
    Vehicle:
    Custom Built Enclosures/speaker adapters etc
    I have found that the procedure I described works very well based on actual experience ;) as well as suggesting it to others countless times over the years without ever having one of those "what if's" happen and in any case.......

    ... if the wire gets crimped you did something wrong ie not properly routing/securing/protecting wires.

    ...if the wire develops a short you did something wrong ie not properly routing/securing/protecting wires.

    ... if you cut the wire to short again you ;) did something wrong which has nothing to do with the procedure being flawed ;)

    On the other hand.....

    What if the nut comes loose and you find you don't have the proper size nut driver/socket to tighten it?

    What it you strip/break one of the plastic nuts and don't have banana plugs?

    What if the terminal cup cracks from over tightening the mounting screws?

    What if the terminal cup develops a leak and starts whistling?

    What if the terminal nut comes loose on the inside?

    What if your inside connection pops off or your solder joint comes loose?

    What if you find the need to replace the terminal cup for one of these or other reasons however the only terminal cup you can get right now has a small square cutout yet the enclosure already has a 3" hole drilled in it?


    BTW, I am not saying terminal cups can't be a viable solution for terminating the wires (I put them in for those who ask) however I am saying I have experienced all of the above at one time or another! :eek:
     
  6. Apr 27, 2009 at 6:11 AM
    #66
    Jace

    Jace Well-Known Member

    Joined:
    Feb 18, 2009
    Member:
    #13801
    Messages:
    82
    Gender:
    Male
    New Jersey
    Vehicle:
    09 4x4 DBL Cab TRD Sport
    Mr. Marv,

    Thanks for the updates on your tutorial. I am using
    this thread as a base for my own install.

    Appreciate the information and pictures.

    I only wished you lived on the East Coast so I could
    hassle you in person! :D
     
  7. Apr 28, 2009 at 8:05 PM
    #67
    Jimirich

    Jimirich Well-Known Member

    Joined:
    Mar 1, 2009
    Member:
    #14195
    Messages:
    237
    Gender:
    Male
    Hawaii
    Vehicle:
    08 4x4 Dbl cab shorty O.R. pkg
    DTRL, Debadged, Donkey tethered in the bed that rips 142 db farts so I can piss off the neighbors and rattle the windows on my house when I'm parked in front.
    Hi Marv.
    I cant wait to post up pix of the sub/deck your making for me now.
    Thanks so much for the time in making sure I'm gonna get what I'm thinking of. I'l also be posting up some pix/tips for prepping for and applying damplifier type sound deadener. I've got 2 1/2 doors done.
    Thanks for getting my baffles done.
    Rich.
     
  8. May 1, 2009 at 11:55 AM
    #68
    Mr Marv

    Mr Marv [OP] 1-831-383-0308 7am-10pm pst Vendor

    Joined:
    Mar 6, 2007
    Member:
    #1009
    Messages:
    992
    Gender:
    Male
    First Name:
    Marv
    Monterey Bay California
    Vehicle:
    Custom Built Enclosures/speaker adapters etc
    OK guys I know I promised a tuning tutorial based on procedures I have developed over the years in conjunction with tips I learned from some of the best tuners out there however after much debating with myself I have decided not to post them. Unfortunately numerous people and a certain website have been plagiarizing my posts for some time and although I don't care if they give me credit it does irritate me when they take credit for the information themselves! :mad: I will however still be available by phone on the weekends/evenings as I have always been to help those that would like to learn the tips in order to get the most from their system! :) (unfortunately they will NOT be available by email or PM as I have also found it works best when I can speak to the person while they do it!)

    BTW, someone recently sent me a link to a tutorial article on one of the largest car audio sales websites (who's name I probably shouldn't/probably won't mention!) that was copied word for word from something I had written on another forum years ago! :eek:
     
  9. Jun 12, 2009 at 2:20 PM
    #69
    sr5boy

    sr5boy Well-Known Member

    Joined:
    Sep 1, 2008
    Member:
    #8921
    Messages:
    77
    Gender:
    Male
    tallahassee florida
    Vehicle:
    06 tacoma 4x4
    demudflapped, debadged, relocated the 7-pin, 3'' fatbobs garage lift in front
    Hey Marv I know alot of people have asked but i was wondering if you could hook me up with the dimensions of the side pieces of the box. Thanks
     
  10. Jul 2, 2009 at 3:10 PM
    #70
    JoeSchmuck

    JoeSchmuck Well-Known Member

    Joined:
    May 19, 2009
    Member:
    #17443
    Messages:
    315
    Gender:
    Male
    First Name:
    Joe
    Virginia
    Vehicle:
    09 PreRunner SR5 2x4 O.R., Timberline Green
    Pop & Lock, Access LE Rollup Cover, Alpine PDX-5 Amp, Image Dynamics CS-6/CX-6 & 10" Sub
    Marv,
    Someone linked me to this thread (giving you credit) and I can see you put considerable effort and time into making this for everyone. Nice Job!

    Your photos have convinced me I should quit being a tight wad and pry open my wallet to let some of that green purchase a set of speakers (4 mains + 2 tweeters) and a small digital Amp. I'm not looking for bone crushing audio, just maybe a third louder than the stock unit with a nice solid sound.

    -Joe
    [​IMG]
     
  11. Jul 2, 2009 at 4:08 PM
    #71
    Mr Marv

    Mr Marv [OP] 1-831-383-0308 7am-10pm pst Vendor

    Joined:
    Mar 6, 2007
    Member:
    #1009
    Messages:
    992
    Gender:
    Male
    First Name:
    Marv
    Monterey Bay California
    Vehicle:
    Custom Built Enclosures/speaker adapters etc
    Glad you found the tutorial useful Joe! Give me a call at the number below or drop me a PM/email and I'll help you find what works best for you!
     
  12. Jul 10, 2009 at 12:45 AM
    #72
    zero niner

    zero niner romeo oscar bravo

    Joined:
    Aug 21, 2008
    Member:
    #8681
    Messages:
    527
    Gender:
    Male
    First Name:
    Rob
    Pacific Northwest
    Vehicle:
    09 DC SB Prerunner
    All Pro front plate bumper, 5100 1.75" Bilstein up front, 1" block and TSB in rear, UWS lowpro tool box, Toyota Side Steps
    Marv,

    I looked and didn't see a reply, how does the tweeter stay in place? I'm pre-fitting my parts and can't see how these tweeter will hold in the mounting bracket... Also, in the pics of the midbass in the doors, the baffles looked doubled up, is it just an illusion? And lastly, the mounting bolts for the midbass bracket looked recessed, if I just get plain standard headed bolts will those work without interfering with the door panel? Thought I'd ask in this thread as it's a very complete tutorial! Thanks in advance!

    Rob
     
  13. Jul 10, 2009 at 8:17 AM
    #73
    Chickenmunga

    Chickenmunga Nuggety

    Joined:
    Apr 10, 2008
    Member:
    #5877
    Messages:
    7,574
    Gender:
    Male
    First Name:
    Mike
    Keizer, Oregon
    Vehicle:
    08 TRD Offroad DC 4x4 with stuff
    All the normal TW BS
    I had the same question when installing mine. Others here clued me in: In some cases, the tweeter will have a collar that snaps together and holds the tweeter to the bracket. For those that don't have this, simply use silicone glue.
    This worried me at first - I like to be able to take things back apart easily - but it's more likely that the speakers will go out or the truck will fall apart before I would want to mess with my tweeters again.


    The MDF has a line through it. I'm not sure if they pressed two boards together at the lumber mill or what, but that's how they end up looking. Rest assured, use only 1 baffle per door.


    I bought the bolts/washers/nuts Marv suggested on page 2.
    I did not recess anything
    I recommend removing the plastic inserts, and also recommend nylon threaded nuts to prevent anything from loosening.
     
  14. Jul 10, 2009 at 8:33 AM
    #74
    zero niner

    zero niner romeo oscar bravo

    Joined:
    Aug 21, 2008
    Member:
    #8681
    Messages:
    527
    Gender:
    Male
    First Name:
    Rob
    Pacific Northwest
    Vehicle:
    09 DC SB Prerunner
    All Pro front plate bumper, 5100 1.75" Bilstein up front, 1" block and TSB in rear, UWS lowpro tool box, Toyota Side Steps
    Paying if forward! Thank you for the answers, I appreciate it.

    Rob
     
  15. Jul 10, 2009 at 9:06 AM
    #75
    Mr Marv

    Mr Marv [OP] 1-831-383-0308 7am-10pm pst Vendor

    Joined:
    Mar 6, 2007
    Member:
    #1009
    Messages:
    992
    Gender:
    Male
    First Name:
    Marv
    Monterey Bay California
    Vehicle:
    Custom Built Enclosures/speaker adapters etc
    Rob, some tweeters come with metal hardware to hold them however your particular tweeter gets pressed in and as Mike mentioned a little silicone or hot glue will hold it. On the midbass I did some experimenting with that one so it has a 1" baffle adapter made from 2 pieces of 1/2" MDF with the speaker recessed (didn't make any difference in sound). Also, the only reason the bolts are countersunk is because they were the only ones I could find in the shop that day that were the correct size. :D
     
  16. Jul 10, 2009 at 9:09 AM
    #76
    Hotdog

    Hotdog My hair is all natural Moderator

    Joined:
    Feb 9, 2007
    Member:
    #872
    Messages:
    10,245
    First Name:
    Hotdog
    Vehicle:
    2007 PreRunner SR5 Double Cab
    Wet Okole Underwear
    Most people use "hot" hot glue, but make sure you use high temp hot glue when you plan on keeping something in your truck. The low temp hot glue will soften in your truck.
     
  17. Jul 10, 2009 at 9:14 AM
    #77
    Mr Marv

    Mr Marv [OP] 1-831-383-0308 7am-10pm pst Vendor

    Joined:
    Mar 6, 2007
    Member:
    #1009
    Messages:
    992
    Gender:
    Male
    First Name:
    Marv
    Monterey Bay California
    Vehicle:
    Custom Built Enclosures/speaker adapters etc
    Good point! :)
     
  18. Jul 10, 2009 at 9:28 AM
    #78
    zero niner

    zero niner romeo oscar bravo

    Joined:
    Aug 21, 2008
    Member:
    #8681
    Messages:
    527
    Gender:
    Male
    First Name:
    Rob
    Pacific Northwest
    Vehicle:
    09 DC SB Prerunner
    All Pro front plate bumper, 5100 1.75" Bilstein up front, 1" block and TSB in rear, UWS lowpro tool box, Toyota Side Steps
    Mr. Marv, to the rescue AGAIN! Thanks! I'm going to try to work on as much as possible before seeing you. Take care!

    Rob
     
  19. Jul 10, 2009 at 10:23 AM
    #79
    Mr Marv

    Mr Marv [OP] 1-831-383-0308 7am-10pm pst Vendor

    Joined:
    Mar 6, 2007
    Member:
    #1009
    Messages:
    992
    Gender:
    Male
    First Name:
    Marv
    Monterey Bay California
    Vehicle:
    Custom Built Enclosures/speaker adapters etc
    See you in a couple of weeks! :)
     
  20. Aug 8, 2009 at 2:05 PM
    #80
    BradleyJ33

    BradleyJ33 Geaux Tigers

    Joined:
    Jun 17, 2009
    Member:
    #18594
    Messages:
    493
    Gender:
    Male
    First Name:
    Brad
    Brandon, MS
    Vehicle:
    2010 TRD Sport 4x4 DCSB S/C'd
    TRD Supercharger with URD 2.825" Pulley, Toytec Ultimate Lift, LR UCAs, BFG All Terrain 275/70R17s on Procomp 7089 17" wheels, BAMF rock sliders, Viper 5902 alarm/remote start with smartstart, Pioneer Avic-Z110BT dvd/navi head unit, 2 Pioneer 7" monitors in headrests, 2 Rockford Fosgate Shallow-mount 10" subs pushed by RF Punch 500.2 amp, RF 5.25 components (front doors) and 5.25 full range (back doors) pushed by RF Power 400.4 amp, sound deadened, Whistler pro remote radar detector, scangauge II, debadged, Sockmonkey decals, blacked headlights with FX-R projectors, DDM Tuning HID fogs, Grillcraft upper and lower MX grill with Hella 500ffs converted to HIDs behind, AFE Stage 2 Cold Air Intake, Walbro 255 Fuel Pump upgrade, Dynomax Super Turbo muffler, Bestop Supertop, Wet Okole seat covers, Weathertech floor liners, Pop & Lock tailgate handle, Lighted 4x4 switch mod, 2 110v AC outlets in cab mod, Always at 400W mod, Maplights on with dome light mod, homelink in headliner mod, foglight
    Mr. Marv, could you give me an estimate on this box for the 13TW5 with 2 amps that also keeps the child seat hooks functional? I'm still a little while from purchasing but I think this is definitely the way I would like to go. Thanks so much!
     

Products Discussed in

To Top