

-
Welcome to Tacoma World!
You are currently viewing as a guest! To get full-access, you need to register for a FREE account.
As a registered member, you’ll be able to:- Participate in all Tacoma discussion topics
- Communicate privately with other Tacoma owners from around the world
- Post your own photos in our Members Gallery
- Access all special features of the site
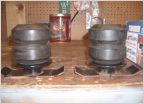 Timbrens for sale
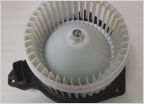 FS: Blower Motor 2005+ Tacoma
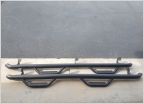 2005-2015 - NFab Step Bars - 3" Main Tube - T0580CC-TX
 SoCal* 2nd Gen 6’ Long Bed Super White Leer 180 Series Camper Shell
BenWA's 2005+ Power Sliding Rear Window Quick Install Kit
Discussion in '2nd Gen Tacoma Parts Marketplace (2005-2015)' started by BenWA, Aug 13, 2011.
Page 69 of 92
Page 69 of 92

