1. Welcome to Tacoma World!

    You are currently viewing as a guest! To get full-access, you need to register for a FREE account.

    As a registered member, you’ll be able to:
    • Participate in all Tacoma discussion topics
    • Communicate privately with other Tacoma owners from around the world
    • Post your own photos in our Members Gallery
    • Access all special features of the site

My Ride rite with compressor install

Discussion in '2nd Gen. Tacomas (2005-2015)' started by HolyHandGrenade, Oct 23, 2013.

  1. Oct 23, 2013 at 7:00 PM
    #1
    HolyHandGrenade

    HolyHandGrenade [OP] NOOB

    Joined:
    Mar 25, 2013
    Member:
    #100579
    Messages:
    11,797
    Gender:
    Male
    First Name:
    Tim
    Garage Most Likely
    Vehicle:
    DCFB (RIP)
    Some Stuff
    Been lurking for awhile. Figured I'd contribute...

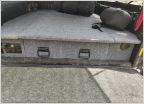
    I stole the idea of putting the compressor and gauge in the bed storage box from another thread found here: http://www.tacomaworld.com/forum/2n...stalled-firestone-ride-rite-w-compressor.html

    Thanks ScottG...

    IMG_20131023_203144_026_zps33fa3902_b5c61c35f909d4219e23c0d88d8a4b1d882cb6e5.jpg

    IMG_20131023_203219_178_zps27e976b9_c344f37a3302e1d4959567d446e729c2bb86de5c.jpg

    Probably overkill here... I used both supplied heat shields on the passenger side because of the exhaust bend. It protects both sides that way. I then made another heat shield to protect the air line out of a license plate and heat tape. THEN, I covered some wire tubing with the same heat tape and put it on the air line. Peace of mind? :D

    IMG_20131023_204217_843_zps32fdb0e0_c094f5a699e1adc7897f2ecc207b7776f3f1bfa3.jpg

    IMG_20131023_204206_607_zps9d2356de_a74ca6532fa1494ea01d0d7341f66448f63ca3e4.jpg

    Drivers side
    IMG_20131023_203736_635_zpsc5b1be4a_f965a4340b01d27c007a72e3f47398eaf4d1243d.jpg

    EDIT:
    I added cradles tonight (over a year later). Tired if worrying while it's on a lift... I've seen multiple people asking what's involved adding cradles after the bags are installed, so I figured I'd add it to this thread. I'm also going to put the cradle write up in the suspension section.

    Forgot to snap a pic of the cradles prior to install, so I borrowed this one from the web...
    imagejpg1_zps1e5070cf_03d8eb894ebb619ba1fa3f7354285a5aed74f4cb.jpg

    Let the air out of the bags:
    IMG_20141218_165620_122_zps63cqqnu2_19cc9b226fb0d38a3baae4d5d2317e2cbf63d740.jpg

    Removed the bolt holding the bottom of the bag to the leaf spring bracket on both sides:
    IMG_20141218_165657_004_zpspxd7qje9_5ba6a7ce2cf9f4bad40858b147a4f8c1100299a3.jpg

    Put the floor jack under the tow hitch, and jacked the back of the truck up high enough to slide the cradles in and bolt them down to the leaf spring bracket.
    IMG_20141218_170625_065_zpsk1hlm7e3_5818068ed0e331f5fe286967a381f912a3b16a84.jpg

    Drop the jack. Add air. Bring entire family out to the garage so they can see how manly you are!
    IMG_20141218_172154_358_zpsv4bqe5dl_1f4d9ac31359c224690be43021e90f10a03ae7ce.jpg
     
    Last edited: Dec 18, 2014
    jsev, WPNZ and UssMoGn like this.
  2. Oct 23, 2013 at 7:31 PM
    #2
    EdinCincinnati

    EdinCincinnati Well-Known Member

    Joined:
    Mar 11, 2013
    Member:
    #99457
    Messages:
    2,379
    Gender:
    Male
    First Name:
    Ed
    Ohio
    Vehicle:
    2014 4x4 TRD OR
    Looks good. Did you keep both sides separated (air hose) or did you tie both side together with a "T" that then connects to the compressor?
     
  3. Oct 23, 2013 at 8:05 PM
    #3
    HolyHandGrenade

    HolyHandGrenade [OP] NOOB

    Joined:
    Mar 25, 2013
    Member:
    #100579
    Messages:
    11,797
    Gender:
    Male
    First Name:
    Tim
    Garage Most Likely
    Vehicle:
    DCFB (RIP)
    Some Stuff
    Thank you. The compressor kit that I got had the option to go single or dual path. I opted to go single path. So, to answer you question, both bags are tied together.
     
  4. Oct 23, 2013 at 9:20 PM
    #4
    jmg256

    jmg256 Calmer than you are

    Joined:
    Sep 1, 2009
    Member:
    #22100
    Messages:
    1,807
    Gender:
    Male
    First Name:
    Al Tonter
    Vehicle:
    TRD Offroad
    Bilstein 5100 front/rear (front at .85), Hayden 678 Trans Cooler, 20% tint, Curt Hitch/Wiring Harness, Weathertech Digital Fit Floor Mats (Black), Wet Okole Seat Covers (Black), Cooper Discoverer ATP 265/75/16, LED Map/Dome lights, ImMrYo bracket, Debadged, Extang Tuff Tonno.
    You should really keep them separate...as one bag compresses under load, it will send the air to the other bag. This will effectively lower the pressure in the compressed bag, lowering it's load capacity and effectiveness.
     
  5. Oct 24, 2013 at 10:48 AM
    #5
    HolyHandGrenade

    HolyHandGrenade [OP] NOOB

    Joined:
    Mar 25, 2013
    Member:
    #100579
    Messages:
    11,797
    Gender:
    Male
    First Name:
    Tim
    Garage Most Likely
    Vehicle:
    DCFB (RIP)
    Some Stuff
    Yeah, I considered this. It was more expensive for the dual path kit. This will work fine for what I need it for.

    Thank you though.
     
  6. Oct 24, 2013 at 12:51 PM
    #6
    jmg256

    jmg256 Calmer than you are

    Joined:
    Sep 1, 2009
    Member:
    #22100
    Messages:
    1,807
    Gender:
    Male
    First Name:
    Al Tonter
    Vehicle:
    TRD Offroad
    Bilstein 5100 front/rear (front at .85), Hayden 678 Trans Cooler, 20% tint, Curt Hitch/Wiring Harness, Weathertech Digital Fit Floor Mats (Black), Wet Okole Seat Covers (Black), Cooper Discoverer ATP 265/75/16, LED Map/Dome lights, ImMrYo bracket, Debadged, Extang Tuff Tonno.
    Just be mindful of what pressure you run your system at, you're not going to want to run it near the upper limit. Running It near capacity could result in a blow out of either bag when the axle articulates, resulting in an over pressure situation on the non compressed bag or supply lines.
     
  7. Oct 24, 2013 at 12:56 PM
    #7
    jmg256

    jmg256 Calmer than you are

    Joined:
    Sep 1, 2009
    Member:
    #22100
    Messages:
    1,807
    Gender:
    Male
    First Name:
    Al Tonter
    Vehicle:
    TRD Offroad
    Bilstein 5100 front/rear (front at .85), Hayden 678 Trans Cooler, 20% tint, Curt Hitch/Wiring Harness, Weathertech Digital Fit Floor Mats (Black), Wet Okole Seat Covers (Black), Cooper Discoverer ATP 265/75/16, LED Map/Dome lights, ImMrYo bracket, Debadged, Extang Tuff Tonno.
    You should be fine if only hauling mild loads on relatively flat surfaces though...
     
  8. Oct 24, 2013 at 3:29 PM
    #8
    Tuctaco

    Tuctaco Well-Known Member

    Joined:
    Jul 6, 2011
    Member:
    #59417
    Messages:
    694
    Gender:
    Male
    First Name:
    Todd
    Tucson, AZ
    Vehicle:
    2012 MGM TRD OR 4x4
    Katzkins, Redline hood struts, Pop & Lock,285/75/16 Toyo Open County ATll, 16X8 Konig Countersteer, Icon extended coilovers, Icon rear shocks, Icon progressive leaf pack, LR UCA's, extended brake lines,
    That is a great spot for the compressor.
     
  9. Oct 24, 2013 at 4:03 PM
    #9
    TFLT

    TFLT Active Member

    Joined:
    Jan 26, 2010
    Member:
    #30101
    Messages:
    31
    Gender:
    Male
    Central New York
    Vehicle:
    10 tacoma Reg cab 4x4
    Yellow Wire, Hella DE Fogs, Firestone airbags
    I installed ride rites as one of my first mods, and think they're great. I installed them with separate lines for each bag, and use a bike pump to air them up, only takes a few pumps. The Schrader valves are in the driver side rear storage compartment. I highly recommend ride rites, they make a huge difference in load carrying, you can actually carry mgvw, and easily overload it should you dare! You'll be happy with them.
     
  10. Oct 24, 2013 at 4:05 PM
    #10
    Drainbung

    Drainbung Somedays you are the show....

    Joined:
    Sep 2, 2010
    Member:
    #42629
    Messages:
    9,115
    Gender:
    Male
    First Name:
    Bob
    Fallabama, NV
    Vehicle:
    10 DCLB
    TRD Fleshlight
    OP nice job on the install. In reference to the axle articulation mentioned above check out the Daystar Cradles and never worry about it again:

    http://www.amazon.com/Daystar-KU09140BK-Cradle-Polyurethane-Convoluted/dp/B0084ROJBM
     
  11. Oct 24, 2013 at 4:26 PM
    #11
    jmg256

    jmg256 Calmer than you are

    Joined:
    Sep 1, 2009
    Member:
    #22100
    Messages:
    1,807
    Gender:
    Male
    First Name:
    Al Tonter
    Vehicle:
    TRD Offroad
    Bilstein 5100 front/rear (front at .85), Hayden 678 Trans Cooler, 20% tint, Curt Hitch/Wiring Harness, Weathertech Digital Fit Floor Mats (Black), Wet Okole Seat Covers (Black), Cooper Discoverer ATP 265/75/16, LED Map/Dome lights, ImMrYo bracket, Debadged, Extang Tuff Tonno.

    Those cradles only allow for full suspension travel of the given system...they will do nothing for the pressure differential that I was referring to. In fact, they could exacerbate the problem as they will cause the compressed bag to further compress due to the added height of the cradle
     
    Last edited: Oct 25, 2013
  12. Oct 24, 2013 at 5:19 PM
    #12
    Drainbung

    Drainbung Somedays you are the show....

    Joined:
    Sep 2, 2010
    Member:
    #42629
    Messages:
    9,115
    Gender:
    Male
    First Name:
    Bob
    Fallabama, NV
    Vehicle:
    10 DCLB
    TRD Fleshlight
    Correct, if the bags are plumbed together it will pump from one to the other, regardless of the cradles. If plumbed separately they remove any worry of over articulation, which is nice.
     
  13. Oct 24, 2013 at 5:21 PM
    #13
    jmg256

    jmg256 Calmer than you are

    Joined:
    Sep 1, 2009
    Member:
    #22100
    Messages:
    1,807
    Gender:
    Male
    First Name:
    Al Tonter
    Vehicle:
    TRD Offroad
    Bilstein 5100 front/rear (front at .85), Hayden 678 Trans Cooler, 20% tint, Curt Hitch/Wiring Harness, Weathertech Digital Fit Floor Mats (Black), Wet Okole Seat Covers (Black), Cooper Discoverer ATP 265/75/16, LED Map/Dome lights, ImMrYo bracket, Debadged, Extang Tuff Tonno.
    OP has the bags linked on a single feed :thumbsup:
     
  14. Nov 12, 2013 at 11:10 AM
    #14
    Dragons Taco

    Dragons Taco Well-Known Member

    Joined:
    Jan 19, 2012
    Member:
    #70993
    Messages:
    2,976
    Gender:
    Male
    First Name:
    Derek
    Cary/Raleigh NC
    Vehicle:
    06 Black TRD-S 4WD 4D 6SPD and MINE!
    Can ya spell Tonneau
    OP, nice job. Looks really good.

    By the way, there are some low security examples of cabinet lock mods in case you are at all worried about someone fooling with it.
     
  15. Nov 12, 2013 at 11:16 AM
    #15
    TIM.TRDSparks

    TIM.TRDSparks Well-Known Member

    Joined:
    Aug 10, 2012
    Member:
    #84487
    Messages:
    611
    Gender:
    Male
    Myrtle Beach, SC
    Vehicle:
    08 Taco DCLB RR
    CBI BUSHMASTER, BUDBUILT SKIDS SET, OME SUSPENSION, DAKAR LEAFS, TRD EXHAUST AND CAI PLUS MORE
    Looks really clean and great install!
     
  16. Dec 18, 2014 at 6:26 PM
    #16
    HolyHandGrenade

    HolyHandGrenade [OP] NOOB

    Joined:
    Mar 25, 2013
    Member:
    #100579
    Messages:
    11,797
    Gender:
    Male
    First Name:
    Tim
    Garage Most Likely
    Vehicle:
    DCFB (RIP)
    Some Stuff
    Bump for update with cradle install ^^^
     
  17. Dec 19, 2014 at 1:53 AM
    #17
    RKCRUZA

    RKCRUZA Well-Known Member

    Joined:
    Oct 3, 2014
    Member:
    #139609
    Messages:
    1,080
    Gender:
    Male
    First Name:
    Bob
    Placerville, Ca
    Vehicle:
    2015 TRD Pro in the Garage!

    Check with Firestone, you will not have any "excessive pressure, blown up bags etc. from a single line system. It is simple Physics, with a single line system the pressure is equal in the entire system. As one bag compresses the air transferred to the other bag will cease transferring when the pressure is equal. Firestone only recommends dual air lines for when you are going to be carrying an "offset" load as with a Camper or such that is usually much heavier on one side than the other. For most towing and general use they recommend the single line "tied together" air bag set up. This is not my opinion, it is direct from Firestones site. There has been a lot of misinformation concerning the Firestone Air bags argued around on this site. Best recommendation is to check the mfgs site for the "Correct" information.
     
  18. Dec 19, 2014 at 5:20 AM
    #18
    hotrod53

    hotrod53 Well-Known Member

    Joined:
    Aug 22, 2013
    Member:
    #110971
    Messages:
    1,281
    Gender:
    Male
    First Name:
    Lynd
    Pittsburgh, PA
    Vehicle:
    ‘14 DCLB Sport, ‘18 TCH, ‘13 TCH
    Weathertech floor liners moded to hold OEM floor mats, weathertech vent visors, Toyota bed mat, LEER 100XL cap, hood gasket mod to stop whistling.
    There should never be a reason to run anywhere near max pressure that would make him vulnerable to a blow out. I never had more that 15 psi in mine for any haul. He will however experience one of the rear wheels lifting off the ground during tough articulation as I did.
     
  19. Dec 19, 2014 at 6:16 AM
    #19
    dilligaff82

    dilligaff82 Well-Known Member

    Joined:
    Nov 2, 2013
    Member:
    #115724
    Messages:
    572
    Gender:
    Male
    New Hampshire
    Vehicle:
    2014 TRD Off Road DCSB
    Is there any way to weather proof the storage pocket the pump is in? I like this install, but whatever I put in those containers comes out filthy with road grime.
     
  20. Dec 20, 2014 at 3:08 PM
    #20
    HolyHandGrenade

    HolyHandGrenade [OP] NOOB

    Joined:
    Mar 25, 2013
    Member:
    #100579
    Messages:
    11,797
    Gender:
    Male
    First Name:
    Tim
    Garage Most Likely
    Vehicle:
    DCFB (RIP)
    Some Stuff
    Not easily, it's been in there for over a year now. No problems, even through last years LONG winter... I'm not worried
     

Products Discussed in

To Top