

-
Welcome to Tacoma World!
You are currently viewing as a guest! To get full-access, you need to register for a FREE account.
As a registered member, you’ll be able to:- Participate in all Tacoma discussion topics
- Communicate privately with other Tacoma owners from around the world
- Post your own photos in our Members Gallery
- Access all special features of the site
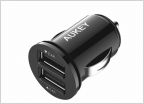 USB charging ports
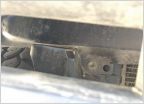 Core Support is Tearing Itself Apart
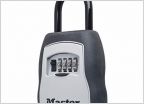 Hide a key- emergency key dilemma
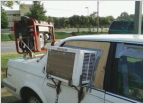 A/C - post your alternative cooling setups
 2005 tacoma prerunner to 4x4 conversion
 Fuel Tank Door Scratching
I want your retrofit helpful tips/advice!!
Discussion in '2nd Gen. Tacomas (2005-2015)' started by itzyoboipaul, Nov 19, 2013.
Page 2 of 5
Page 2 of 5


