-
Welcome to Tacoma World!
You are currently viewing as a guest! To get full-access, you need to register for a FREE account.
As a registered member, you’ll be able to:- Participate in all Tacoma discussion topics
- Communicate privately with other Tacoma owners from around the world
- Post your own photos in our Members Gallery
- Access all special features of the site
 1st Gear vibration cause?
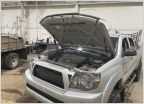 DIY hood strut - possible?
 [Fixed! - Bellows replaced] Need to replace tie rod bellows...while I'm at it...
 Best Bed Extender?
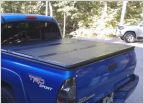 Tonneau Covers
 Fluid Film
Double Row LED bar in Lower Valance **PIC HEAVY**
Discussion in '2nd Gen. Tacomas (2005-2015)' started by Colt562, Nov 24, 2013.