1. Welcome to Tacoma World!

    You are currently viewing as a guest! To get full-access, you need to register for a FREE account.

    As a registered member, you’ll be able to:
    • Participate in all Tacoma discussion topics
    • Communicate privately with other Tacoma owners from around the world
    • Post your own photos in our Members Gallery
    • Access all special features of the site

The Frankenstein Build! LT/Expo/Trail rig..and BS

Discussion in '1st Gen. Builds (1995-2004)' started by Blackdawg, May 28, 2011.

  1. Jan 11, 2014 at 9:34 AM
    #6001
    IDtrucks

    IDtrucks Unhinged and Fluid

    Joined:
    Jun 2, 2010
    Member:
    #38254
    Messages:
    23,536
    Gender:
    Male
    First Name:
    Mark "Buck"
    Jackson Wyoming
    Vehicle:
    96' X-Cab 4x4 TRD Off Road Clusterfuck
    JVC Deck, 10" sub mountd in rear seat cubby, 2 LED off road lights mounted in grille, amber raptor style grille lights, LED rock lights, square led bed light, custom made fuse block tray, 12 blade Blue Sea fuse block, 100a marine circuit breaker, black plasti dipped full grille, tinted tail lights + third, Uniden 520 with 4' firestik, Bilstein 5100s with 620lb Eibach coils, Diff drop, Chevy 63 leaf swap, TG creeper joints, 14" triangulated biletein 5125s, 8" extended steel braided brake line, TG Rock Sliders, CBI Moab 1.0 front bumper, custom fabbed bed rack, full TRD E-Locker axle swap and matching re-gear with custom stand alone wiring circuit, 29 spline pinion flange from an 06 wishbone runner, tubbed for 35x12.5" general grabbers on Ultra type 181 wheels, crush sleeve eliminator, Mini ARB compressor, front ARB locker, garage fab aluminum front skid plate, custom built high clearence rear bumper, removable mothafuckin doors
  2. Jan 11, 2014 at 9:38 AM
    #6002
    45acp

    45acp Paint me back in Wyoming again...

    Joined:
    Aug 9, 2009
    Member:
    #20861
    Messages:
    6,705
    Gender:
    Male
    First Name:
    Jonathan
    Boring, Wisconsin
    Vehicle:
    1981 Long bed 4x4
    Meh. They look better on Madjik's lowrider.

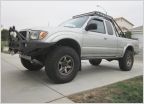
    35s_zpseecefdee_c60626c190f00263f82b8267b61e82dcfbb38864.jpg
     
  3. Jan 11, 2014 at 9:39 AM
    #6003
    BradyT88

    BradyT88 Well-Known Member

    Joined:
    Nov 3, 2011
    Member:
    #66419
    Messages:
    36,722
    Who needs up travel and steering when you have 35's! :cool:
     
  4. Jan 11, 2014 at 9:41 AM
    #6004
    45acp

    45acp Paint me back in Wyoming again...

    Joined:
    Aug 9, 2009
    Member:
    #20861
    Messages:
    6,705
    Gender:
    Male
    First Name:
    Jonathan
    Boring, Wisconsin
    Vehicle:
    1981 Long bed 4x4
    Bling. Boulder, CO style!:taco:
     
  5. Jan 11, 2014 at 10:42 AM
    #6005
    NoTown98Yota

    NoTown98Yota Whiskey Throttle FTW!

    Joined:
    May 5, 2012
    Member:
    #78259
    Messages:
    647
    Gender:
    Male
    First Name:
    Scott
    Reno, NV
    Vehicle:
    '98 Tacoma 3.4L V6 W/E-Locker
    -Leer shell with Yakima MegaWarrior -K&N FIPK -18" Magnaflow dumped after axle -Clear headlights -Blacked out bumpers, wheels, badges, mirrors, fuel door, door handles, tail lights, corner markers and turn signals -White LED gauge lights -SpiderTrax 1.5" Spacers -Pinch Weld Mod -Ultra Gauge -6 Switch Plate under single din stereo -Custom Battle Born bedside decals -Eibach 620# coils -Bilstein 5100's -Dakars -Toytec 1" Lift Shackles
    Damn that looks good! Looks like all that hard work paid off.
     
  6. Jan 11, 2014 at 4:57 PM
    #6006
    MapleMoose

    MapleMoose Drunk Canadian

    Joined:
    Feb 15, 2011
    Member:
    #51211
    Messages:
    8,575
    Gender:
    Male
    First Name:
    Ian
    West Kootenays
    Vehicle:
    1996 Tacoma SR5
    3" Eibach Coils, 3" AP Springs, AP 6" Shackles Toytec Diff drop, BAMF Sliders, Deck plate mod,Volt meter, Highbeam mod, PIAA fogs, 18" Magnaflow, LED dash swap, Color matched Satoshi Grille, Custom Rear Plate Bumper
    Looks killer man! So mean looking. And the glass goes well with 35s
     
  7. Jan 11, 2014 at 5:10 PM
    #6007
    Blackdawg

    Blackdawg [OP] Dr. Frankenstein

    Joined:
    Dec 31, 2010
    Member:
    #48500
    Messages:
    81,586
    Gender:
    Male
    First Name:
    Monte
    Wyoming/St. Louis
    Vehicle:
    The Trifecta of Taco's
    ALL OF THEM!...Then some more.
    Thanks guys! Can't wait already to wheel with them
     
  8. Jan 11, 2014 at 5:38 PM
    #6008
    Digiratus

    Digiratus Adventurer

    Joined:
    Mar 26, 2010
    Member:
    #34006
    Messages:
    23,754
    Gender:
    Male
    First Name:
    Mike
    Roaming the PNW
    Vehicle:
    The RedHead
    2002 XtraCab TRD 4x4 SCv6 AutoTrans With Lots of Mods ADS COs w/Compression Adjusters Camburg Uniball UCAs Whiteline Lower Control Arm Bushings Kartek 7" Limit Straps Plastics Guy Front Bumpstops Total Chaos Sprindle Gussets Custom Alcan Springs +800 lbs +3" ADS 10" Stroke Triple Bypass w/Resi Rear Shocks Custom Rear Shock Relocate All-Pro U-bolt Flip w/Timbren Bumpstops 4.88 Nitro Gears ARB Front Locker ARB Twin Compressor Black 17x8 Konig Countersteer Type X 285/70r17 Falken A/T3w Gunmetal 16x8 SCS Ray10s 255/85r16 Maxxis Bighorns Limited Edition (Relentless) Elite Front Bumper Smittybilt X2O 10K Winch Diode Dynamics SS3 Sport Selective Yellow Fog Lights in the Bumper Diode Dynamics SS3 Pro 4,000 Kelvin SAE Driving Lights with Clear Lenses on the Bumper Morimoto D2S Projectors XB35 Ballasts + 4300K Bulbs Badland Sliders FrankenFab Tire Carrier Swingout bumper w/kitchen BudBuilt Front & Bellypan Skids BAMF Rear Diff Skid Dometic CFX 55im Fridge/Freezer Alpha II Hardshell RTT Badland Custom Bed Rack Denso 210-0461 105 amp alternator Dual Northstar 24F AGM batteries BlueSea 7622 ML-ACR Battery controller Peak DBI Dual Battery Voltage Monitor Haltech IC-7 Display with Mako Dash Insert Haltech Elite 2500 Standalone ECU Magnuson MP62 Supercharger w/URD 2.2" Pulley Denso 650cc Fuel Injectors Aeromotive Stealth 340 Fuel Pump TransGo A340F Reprogramming Shift Kit Doug Thorley Headers 2.5" Magnaflow Hi-Flow CAT Magnaflow 18" Muffler w/Vibrant Resonator 13WL Brake Calipers Braided Steel Brake Lines Kenwood TM-71A Dual Band Ham Radio Larson 70CM/2M Antenna Midland MTX275 GMRS Radio w/Roof Mount Antenna Uniden 520xl CB radio 3' Firestik Adjustable tip antenna Pioneer DEH-P9400BH HU Alpine Amps & Type R components (F) and coaxials (R) Wet Okole Seat Covers Weathertech Digital Liners Deck Plate Mod 1" Diff Drop Carrier Bearing Drop
    Did you get to drive it around some?
     
  9. Jan 11, 2014 at 5:42 PM
    #6009
    Blackdawg

    Blackdawg [OP] Dr. Frankenstein

    Joined:
    Dec 31, 2010
    Member:
    #48500
    Messages:
    81,586
    Gender:
    Male
    First Name:
    Monte
    Wyoming/St. Louis
    Vehicle:
    The Trifecta of Taco's
    ALL OF THEM!...Then some more.
    Yea a bit. Nothing faster then 30. Seems fine for that. 4lo feels fast tho. I'm sure the hwy will suck. 4.88s are a must now.
     
  10. Jan 11, 2014 at 5:45 PM
    #6010
    Madjik_Man

    Madjik_Man The Rembrandt of Rattle Can

    Joined:
    Dec 2, 2009
    Member:
    #26893
    Messages:
    19,609
    Gender:
    Male
    Colorado Front Range
    Vehicle:
    1998 Ext Cab 3.4 4x4 TRD 5MT, 2004 DC 3.4 4x4 TRD
    Gotta love it when mods beget more mods.
     
  11. Jan 11, 2014 at 5:46 PM
    #6011
    Blackdawg

    Blackdawg [OP] Dr. Frankenstein

    Joined:
    Dec 31, 2010
    Member:
    #48500
    Messages:
    81,586
    Gender:
    Male
    First Name:
    Monte
    Wyoming/St. Louis
    Vehicle:
    The Trifecta of Taco's
    ALL OF THEM!...Then some more.
    Ya..and gears..means lockers

    Finally!
     
  12. Jan 11, 2014 at 5:46 PM
    #6012
    Digiratus

    Digiratus Adventurer

    Joined:
    Mar 26, 2010
    Member:
    #34006
    Messages:
    23,754
    Gender:
    Male
    First Name:
    Mike
    Roaming the PNW
    Vehicle:
    The RedHead
    2002 XtraCab TRD 4x4 SCv6 AutoTrans With Lots of Mods ADS COs w/Compression Adjusters Camburg Uniball UCAs Whiteline Lower Control Arm Bushings Kartek 7" Limit Straps Plastics Guy Front Bumpstops Total Chaos Sprindle Gussets Custom Alcan Springs +800 lbs +3" ADS 10" Stroke Triple Bypass w/Resi Rear Shocks Custom Rear Shock Relocate All-Pro U-bolt Flip w/Timbren Bumpstops 4.88 Nitro Gears ARB Front Locker ARB Twin Compressor Black 17x8 Konig Countersteer Type X 285/70r17 Falken A/T3w Gunmetal 16x8 SCS Ray10s 255/85r16 Maxxis Bighorns Limited Edition (Relentless) Elite Front Bumper Smittybilt X2O 10K Winch Diode Dynamics SS3 Sport Selective Yellow Fog Lights in the Bumper Diode Dynamics SS3 Pro 4,000 Kelvin SAE Driving Lights with Clear Lenses on the Bumper Morimoto D2S Projectors XB35 Ballasts + 4300K Bulbs Badland Sliders FrankenFab Tire Carrier Swingout bumper w/kitchen BudBuilt Front & Bellypan Skids BAMF Rear Diff Skid Dometic CFX 55im Fridge/Freezer Alpha II Hardshell RTT Badland Custom Bed Rack Denso 210-0461 105 amp alternator Dual Northstar 24F AGM batteries BlueSea 7622 ML-ACR Battery controller Peak DBI Dual Battery Voltage Monitor Haltech IC-7 Display with Mako Dash Insert Haltech Elite 2500 Standalone ECU Magnuson MP62 Supercharger w/URD 2.2" Pulley Denso 650cc Fuel Injectors Aeromotive Stealth 340 Fuel Pump TransGo A340F Reprogramming Shift Kit Doug Thorley Headers 2.5" Magnaflow Hi-Flow CAT Magnaflow 18" Muffler w/Vibrant Resonator 13WL Brake Calipers Braided Steel Brake Lines Kenwood TM-71A Dual Band Ham Radio Larson 70CM/2M Antenna Midland MTX275 GMRS Radio w/Roof Mount Antenna Uniden 520xl CB radio 3' Firestik Adjustable tip antenna Pioneer DEH-P9400BH HU Alpine Amps & Type R components (F) and coaxials (R) Wet Okole Seat Covers Weathertech Digital Liners Deck Plate Mod 1" Diff Drop Carrier Bearing Drop
    Yeah, 4lo, going slo is one of the places regearing pays off.

    Not too hard getting rolling in 2hi eh?
     
  13. Jan 11, 2014 at 6:21 PM
    #6013
    4banger4x4

    4banger4x4 Probably should'nt have done that.

    Joined:
    Apr 24, 2012
    Member:
    #77528
    Messages:
    2,540
    Gender:
    Male
    First Name:
    Eric
    Whorelando, Fl
    i wish i did at least one locker when i geared:mad:
     
  14. Jan 11, 2014 at 11:07 PM
    #6014
    Blackdawg

    Blackdawg [OP] Dr. Frankenstein

    Joined:
    Dec 31, 2010
    Member:
    #48500
    Messages:
    81,586
    Gender:
    Male
    First Name:
    Monte
    Wyoming/St. Louis
    Vehicle:
    The Trifecta of Taco's
    ALL OF THEM!...Then some more.
    Yea not horrible. Tad more clutch burning. But drives okay. Not as bad as I thought it would be. But gears are definitely on the list for this summer

    Yea I'm not gonna screw around. 4.88s and F/R lockers haha
     
  15. Jan 12, 2014 at 12:59 AM
    #6015
    Slodgetto

    Slodgetto Über Posre

    Joined:
    Jan 18, 2011
    Member:
    #49483
    Messages:
    9,276
    Gender:
    Male
    First Name:
    Silas
    :woot: Looks great! :)
     
  16. Jan 12, 2014 at 5:49 PM
    #6016
    TRDtexasTaco

    TRDtexasTaco Well-Known Member

    Joined:
    Oct 11, 2012
    Member:
    #88770
    Messages:
    487
    Gender:
    Male
    First Name:
    JP
    Sunnyvale Trailer Park
    Vehicle:
    06 TRD PreRunner
    Billy shocks, Maxtrac spindels, AllPro standard leafs, BAMF shock relocation, King 2.5 smoothies
    :drool:love the build. this is my dream truck
     
  17. Jan 12, 2014 at 5:57 PM
    #6017
    4banger4x4

    4banger4x4 Probably should'nt have done that.

    Joined:
    Apr 24, 2012
    Member:
    #77528
    Messages:
    2,540
    Gender:
    Male
    First Name:
    Eric
    Whorelando, Fl
    ARBs?
     
  18. Jan 12, 2014 at 6:16 PM
    #6018
    Blackdawg

    Blackdawg [OP] Dr. Frankenstein

    Joined:
    Dec 31, 2010
    Member:
    #48500
    Messages:
    81,586
    Gender:
    Male
    First Name:
    Monte
    Wyoming/St. Louis
    Vehicle:
    The Trifecta of Taco's
    ALL OF THEM!...Then some more.
    Thanks :D

    Haha thanks man! Pretty much my dream one too :p

    Hell yea :cool:
     
  19. Jan 14, 2014 at 12:24 AM
    #6019
    Blackdawg

    Blackdawg [OP] Dr. Frankenstein

    Joined:
    Dec 31, 2010
    Member:
    #48500
    Messages:
    81,586
    Gender:
    Male
    First Name:
    Monte
    Wyoming/St. Louis
    Vehicle:
    The Trifecta of Taco's
    ALL OF THEM!...Then some more.
    Okay. So i really wanted to do a decent write up on cutting the front up..but i ran short on time so my photos aren't exactly what i wanted for this..but i have enough to give you all an idea.

    There will be holes in it though unfortunately due to just getting the job done.

    Its much more difficult then i thought it would be and i have come to the concussion its due to the 35x12.5r15 size. If your getting 315/75r16s, you won't have near as bad a time from what i can see of others jobs and such.


    Things you'll NEED:


    -35s..duh :p haha
    -Nice comfortable place to work thats roomy
    -Grinder
    -Cut off wheel for grinder or a seperate angle grinder
    -Sawzall
    -Flap disks or some sort of power tool that can clean the metal off. Yes, power tool. Your good ole elbow grease aint gonna do shit to the toyota undercoating :p haha
    -regular tools, ie. Sockets, wrenches, screw drivers
    -pry bar
    -Tape
    -Same cool tool you used for the rear fenders
    -lots of extra blades and disks for cut off tools
    -20 ga steel sheet. I bought a sheet that was like 4'x2' for 10 bucks. More then enough
    -welder and all welder gear( better be pretty good a welding..welding on the body SUCKS. Not a first time project thing..)
    -Jack
    -Jackstands
    -Your old mud flaps from the rear..or some sort of rubber mat or wet towl for the inside.
    -Hammers. Big, little, flat heads and round heads.
    -hand anvil helps
    -Shears
    -Seam sealer
    -Undercoating spray/or paint..


    -Plasma cutter can't hurt if you want it to be one big piece like mine..or be REALLY good with saws and grinders haha


    and above all..


    a lot of time..more then you think.

    But here we go.


    Of course, take the tire off and get a jackstand on the frame of the truck.


    [​IMG]
    IMG_7986.jpg by Monte Nickles Photos, on Flickr
    [​IMG]
    IMG_7999.jpg by Monte Nickles Photos, on Flickr


    Now you will want to take out your front Coil over. This is important as you will need to cycle the suspention a LOT to check for clearances. Its pretty simple. You should know how to do this as you probably installed your own lift..but here is a quick how too..


    three bolts on top. Think they were 14s..either that or 12s..duh :p haha


    [​IMG]
    IMG_8006.jpg by Monte Nickles Photos, on Flickr


    then undo the lower nut. Its a 19 I believe..or 17mm..


    [​IMG]
    IMG_8008.jpg by Monte Nickles Photos, on Flickr


    Now here is a cool trick. Get your pry bar and slip it under where the UCA bolt runs and pry down on the UCA. This will allow you to take the weight off the CO for easier removal and installation.


    [​IMG]
    IMG_8009.jpg by Monte Nickles Photos, on Flickr


    Now test fit a 35 with the fender on! You do this by putting the jack under the LCA or LBJ and jacking it up with the tire on it. Do it ALL the way to the bump stops and even a bit higher so its off the jack stand a tad. Why? Bump stops compress so you'll want to cut enough to clear the tire if you even hit the bumps while offroading and that'll mean the full weight of the rig will be on it.


    BEAST!


    [​IMG]
    IMG_7955.jpg by Monte Nickles Photos, on Flickr


    You'll find you cant turn..even a little bit due to the fender and maybe bumper like me. So lets start cutting :cool:


    Now you'll recall how we did the tape and drew a line with the rear fenders from a few pages back? Do that here too!


    [​IMG]
    IMG_7998.jpg by Monte Nickles Photos, on Flickr


    You'll see my Elite bumper is too long and I also had to cut 1.75'' out of it. This will vary with trucks/bumper makes/tire makes..so make sure you test fit the 35 you have first. Make sure that you take into account what a new tire would be like if you bought used ones.


    Anyways. Cut like you did the rear. You'll have to cut more of the rear portion of the fenders later..but we will get to that.


    Now slap the tire on again and make sure it fits!


    [​IMG]
    IMG_7957.jpg by Monte Nickles Photos, on Flickr


    now take the fender off. All bolts are 10mm. Be three bolts up here
    [​IMG]
    IMG_7988.jpg by Monte Nickles Photos, on Flickr


    One here behind the grill filler plate


    [​IMG]
    IMG_7989.jpg by Monte Nickles Photos, on Flickr


    and two down here if your on stock fenders unlike me


    [​IMG]
    IMG_7997.jpg by Monte Nickles Photos, on Flickr


    and one up here behind the door


    [​IMG]
    IMG_8000.jpg by Monte Nickles Photos, on Flickr


    You will also have to take off the corner lights..which..you should know how to do if your doing this anyways.


    On the driver side, you'll be able to turn it passenger usually fine. But you'll hit the fire wall quickly when turning passenger. On the passenger side though, at least with my tires, you'll see you still can't turn very far either way due to the wind shield washer bottle. You can even see my 33s have rub a hole straight through the plastic guard...it has to go!
    [​IMG]
    IMG_8001.jpg by Monte Nickles Photos, on Flickr


    It's pretty simple to remove. First, disconnect this plug.


    [​IMG]
    IMG_8002.jpg by Monte Nickles Photos, on Flickr


    There are 4 10mm bolts down here to remove. This shows you what i'll look like AFTER I have removed them. Obviously..just easier to see the holes. The plastic guard will pull right off after you have removed them.


    [​IMG]
    IMG_8003.jpg by Monte Nickles Photos, on Flickr


    Now this baby is ready to come out. All thats holding it in is two big plastic tabs on the neck up in here..sorry for the shit photo :eek:


    [​IMG]
    IMG_8004.jpg by Monte Nickles Photos, on Flickr


    HOWEVER!


    You now have a choice to make..either pull the pump out of the resivour..or pull some of the tubing off the pump..


    if your resivour is fullish..pull some tubing. If its not..just pull the pump.


    KEEP THE PUMP! You'll want it later for a simple tank that I will show you all how to make when I get back to Wy after school. I pulled the pump and the rubber gasket in the bottle. I then pulled the wire harness and tubes back through the hole they were coming out of and just left them sitting in front of the air box.


    Either way..make a decision and then just push the tabs in and let the bottle out. Much more roomy!


    [​IMG]
    IMG_8005.jpg by Monte Nickles Photos, on Flickr


    Put the 35 back on(get used to taking it on and off..on and off..on and off :p ) and turn it so its cutting into the fire wall..im sure you have noticed by now im using photos from both sides..i was NOT doing both sides at the same time..nor would I recommend doing that. Remember to jack the tire all the way up on the bump stops.


    Draw your line where you think you'll have to cut. Every truck is a bit different..but a line like this is a good place to start.


    [​IMG]
    IMG_8016.jpg by Monte Nickles Photos, on Flickr


    Take the tire off and now prep the cab for cutting.


    Sadly..i did not take any photos of this part :frusty: my interior is already not 100% there so wouldn't have done much good.. But I can talk you through it.


    You'll need to remove the kick panels and the carpet. To do that. Remove the inner plastic part along the kick panel. It'll be held in with 4 philips screws I believe. The kick panel should just pop out after that. Now pull up the carpet. On the rocker panels there are white clips holding it down. Get a screw driver to help you or even needle nose pliers and pull about 3 of them. The carpet should just pull away form the upper corners of the cab. Pull it as far as possible!


    Now you 'll notice all the wires and such running along the outer wall. I will get photos of them when I get home as my interior is NOT put back together yet..ha but they are the wire harnesses for the doors mainly and other in cab features. You will have to pop off the retainer clips and pull those wire out of the way the whole time your doing this. This is where a 2nd set of hands is handy. Plus they are good for fire watch.


    I used my old rear mud flap to help block the sparks that shot into the cab from cutting. Worked great really! You can also use a damp rag or welding blanket or something.


    Now you should be ready to start cutting. But where to start??


    Here is the best place to start. Up high. There is only one/two layers of sheet metal here and its fairly easy to cut.


    [​IMG]
    IMG_8017.jpg by Monte Nickles Photos, on Flickr


    we did little notches like that so we could start to see inside as well.


    Now continue down.


    [​IMG]
    IMG_8020.jpg by Monte Nickles Photos, on Flickr


    I wish I could say it was easy but if you look you'll see there are lots of lays going on there..its not easy. And it'll take a long time to get to that point. My dad found the sawzall worked great for that part..but he ended up cutting a long line through my floor board we had to re weld :laugh: so watch your cutting!! blade length on the sawzall is big. Id keep it under 6''. 4'' was best I though.


    Now you can start cutting out further and further towards the frame. This again will vary by truck due to tire size/rim backspacing/make/even alignment.


    [​IMG]
    IMG_7961.jpg by Monte Nickles Photos, on Flickr


    it'll take a LOT of trial and error of removing the tire over and over and checking if it clears. You'll most likely have to cut out wider and further into the cab then your originally though. Even the body mounts a bit may be necessary as it was on one side for me.


    Eventually tough you will triumph and get it so it all clears all good. The first hole takes MUCH longer then the second one as you'll kinda know where to cut the first time on the second hole.


    But now its time to fill it!


    There are several ways to do this..some guys use several different small pieces of metal. And a few use one big piece. I like the used the single piece myself. Looks cleaner! But much harder to make work with a hole my size and shape I ended up with.


    so. I got some cardboard and made a trace on it. MAKE SURE TO NOT LEAVE IT FLAT! Remember..your tires are round..it need to be in an arc. Your new sheet metal needs to arc. Not be straight. So you need to push in the cardboard and make it arc to make your trace. Otherwise it'll be too small.


    After I traced it. I kinda just eye balled it and put an 1'' or so extra on each side.


    [​IMG]
    IMG_7964.jpg by Monte Nickles Photos, on Flickr


    traced that out on the sheet metal and used a plasma cutter to cut it. As you can see..that would not exactly be the easiest shape to cut out with a grinder and cut off wheel..impossible? no. But not very quick. So it make be easier to do it in different sections for you.


    [​IMG]
    IMG_7965.jpg by Monte Nickles Photos, on Flickr


    Once again, I don't have a ton of pic of this next part. It does take a long time and my dad and I just ground through it as I had to get it done.


    Make sure you use your flap disk or sander or whatever to get all the undercoating off the body and get good metal exposed to weld on. I mean it. Clean as a whistle. The cleaner it is the beter you life is gonna be when you weld. I want you to want to eat off it!...okay maybe not..but clean of all paint and undercoating. Don't afraid to grind off more then you'll need. You'll be re painting it..it'll be okay! Haha


    this was the basic process for welding it though. HIGHLY recommend a second person for this part. Hand bend it so its kinda close and there is enough over lap all around. Work from the inside out and make sure there is lots extra on the outside cause remember..you will be shaping it into an arc so the metal will get “pulled” in more so to speak.


    Started by finding a spot the metal sat flush without to much hammering and taced it in.


    Now. Let me talk about welding this stuff. Its super thin! So you can't just sit there and burn it in like you would 1/8'' or thicker stuff. You have to do continuous spot welding. So you just pull the trigger for a second or so to let it get hot enough to fuse the new sheet with the body and let it off! BUT before it stops glowing red, move your gun so the wire is just touching the bottom of the puddle that is cooling off and hit it again. Just do that over and over again as fast as you can. You'll get better as you go and eventually should beable to get the stacked dimes look but doing that.


    Anyways.


    So once the new metal is tacked in a bit. We used a hand anvil and held it on the inside of the cab against the body metal. Then smack the living shit out of it with a flat head body hammer so then new metal would form up like the old metal. Once the edge was close. My dad would use the hammers handle and push then new metal into the body metal and I would tac it on.


    We did this over and and over little by little. If there was too much overlap. We just cut it off with shears.


    For the big arcs. We cut them into tabs to help shape it a bit more.


    Before you do the whoel outer edge make sure you beat on the new metal in the center a bunch while your tacking stuff together. Again, you don't want it straight but arced.


    Eventually it should all look like this :


    [​IMG]
    IMG_7974.jpg by Monte Nickles Photos, on Flickr
    [​IMG]
    IMG_8021.jpg by Monte Nickles Photos, on Flickr


    my passenger side welds were WAY better then the driver side. But it all worked out and should hold fine. Figure with the amount of hammering they took..they aren't going anywhere haha


    mount the 35s for one last check for clearances and you should be good to burn in all the edges. Have your buddy watch the cab for fire. Mine did catch fire once or twice. Nothing bad though.


    Now get your seam sealer and go to town on the edges inside the cab and outside.


    [​IMG]
    IMG_8022.jpg by Monte Nickles Photos, on Flickr
    [​IMG]
    IMG_8024.jpg by Monte Nickles Photos, on Flickr


    Let it sit for a bit. The stuff I used said it could be painted after 30mins. Think it sat for an hour while we ate dinner.


    Then paint it up with the undercoating spray. Both inside and out


    [​IMG]
    IMG_7991.jpg by Monte Nickles Photos, on Flickr
    [​IMG]
    IMG_7992.jpg by Monte Nickles Photos, on Flickr


    Mount your coil overs again and put the new tires on and your interior together..and your done! :cool:


    now for some before and after shots!


    33s


    [​IMG]
    IMG_7869.jpg by Monte Nickles Photos, on Flickr
    [​IMG]
    IMG_7875.jpg by Monte Nickles Photos, on Flickr
    [​IMG]
    IMG_7877.jpg by Monte Nickles Photos, on Flickr


    35s


    [​IMG]
    IMG_8028.jpg by Monte Nickles Photos, on Flickr
    [​IMG]
    IMG_8029.jpg by Monte Nickles Photos, on Flickr
    [​IMG]
    IMG_8027.jpg by Monte Nickles Photos, on Flickr
    [​IMG]
    IMG_8026.jpg by Monte Nickles Photos, on Flickr


    and some clearances!


    Front edge of my front skid with my 33s


    [​IMG]
    IMG_7888.jpg by Monte Nickles Photos, on Flickr
    [​IMG]
    IMG_7892.jpg by Monte Nickles Photos, on Flickr


    with 35s


    [​IMG]
    IMG_8030.jpg by Monte Nickles Photos, on Flickr
    [​IMG]
    IMG_8031.jpg by Monte Nickles Photos, on Flickr


    rear diff with 33s


    [​IMG]
    IMG_7890.jpg by Monte Nickles Photos, on Flickr
    [​IMG]
    IMG_7891.jpg by Monte Nickles Photos, on Flickr


    and with 35s


    [​IMG]
    IMG_8032.jpg by Monte Nickles Photos, on Flickr
    [​IMG]
    IMG_8033.jpg by Monte Nickles Photos, on Flickr


    so there ya go guys!


    Sorry it wasn't as detailed and nice as the rear. But wasn't a lot of ways to shoot it. Plus it really is one of those things that you just kinda..do..:eek: its not THAT bad..but it is NOT something I recommend for everyone. Was much more difficult then I though it would be. But I think it'll pay off :D


    :cheers: guys. Won't have much to post for a while as im back in louie ville for school..:pout:
     
    rngr and FirstGen Jer like this.
  20. Jan 14, 2014 at 3:28 AM
    #6020
    TacoMX

    TacoMX TW's Official anti body-lift pundit

    Joined:
    Aug 24, 2011
    Member:
    #62240
    Messages:
    4,825
    Gender:
    Male
    First Name:
    Jonathan
    Deltona, Florida

Products Discussed in

To Top