1. Welcome to Tacoma World!

    You are currently viewing as a guest! To get full-access, you need to register for a FREE account.

    As a registered member, you’ll be able to:
    • Participate in all Tacoma discussion topics
    • Communicate privately with other Tacoma owners from around the world
    • Post your own photos in our Members Gallery
    • Access all special features of the site
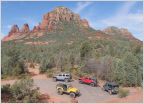
AZ BS Thread 2.0

Discussion in 'Arizona' started by Kyouto42, Oct 3, 2010.

Thread Status:
Not open for further replies.
  1. Feb 5, 2014 at 11:32 AM
    emelianenkov

    emelianenkov Santa/Alex Emeliahoweveryouspellhislastname

    Joined:
    May 3, 2012
    Member:
    #78151
    Messages:
    21,516
    Gender:
    Male
    First Name:
    Alex
    NORTH POLE
    Vehicle:
    Alex's Shitbox Emporium
    NE Special Rust Edition

    Yeah snow is awesome! Going on an adventure soon!

    They're all like "stay home!!! Natural emergency!!!" And I'm like "lol no because 4Runner"
     
  2. Feb 5, 2014 at 11:32 AM
    cytocycle

    cytocycle Well-Known Member

    Joined:
    Mar 16, 2012
    Member:
    #75039
    Messages:
    610
    Gender:
    Male
    First Name:
    Chris
    Scottsdale, Arizona
    Vehicle:
    Expedition Build - 2012 TRD Off-Road
    4.88, Radflo 2.5" Resi,ARB Front Bumper with fogs, TJM 9,000 synthetic rope winch with Pro-Link, AllPro Bolt on Sliders with fill plates, Asfir Aluminum Front Skid, Mid Skid, Gas Skid, Transfer Skid, AllPro Shackle flip kit with Timbern, CBI HC rear Bumper, Rigid Mesh Grill with 20" LED bar, White Sport Grill Opening, ARB Dual Compressors and 2 gallons of air tanks for air tools, Dakar Leaf Pack+2,front sway bar delete, Camburg UCA's, Stainless Steel Brake Lines on all wheels fixed mushy brakes, UltraGuage
    spring compressors are free to rent at autozone..
     
  3. Feb 5, 2014 at 11:35 AM
    emelianenkov

    emelianenkov Santa/Alex Emeliahoweveryouspellhislastname

    Joined:
    May 3, 2012
    Member:
    #78151
    Messages:
    21,516
    Gender:
    Male
    First Name:
    Alex
    NORTH POLE
    Vehicle:
    Alex's Shitbox Emporium
    NE Special Rust Edition

    I use mine so much I decided to buy a set from autozone
     
  4. Feb 5, 2014 at 11:53 AM
    Kyouto42

    Kyouto42 [OP] Iron Beard

    Joined:
    Aug 18, 2008
    Member:
    #8614
    Messages:
    9,120
    Gender:
    Male
    First Name:
    Jake
    Ahwatukee, AZ
    Vehicle:
    BSP '10 4x4 TRD Off-Road DC
    See build thread in signature
    Any time you alter the suspension geometry you should do an alignment, pending you care about tread wear (half the time I don't personally lol).

    As for the LCA method... it works... I did it with my busted fox and tons of pre-load. One thing I do highly recommend if you do that method... use a jack on the LCA. Slowly loosen the two bolts holding the ball joint side until you get all pressure on the jack (separate the lca with a block of wood to jack). Then ease the jack down.

    Note, when loosening the bolts, keep the spindle between you and the coil, so if something happens it won't hit you. When loosening the jack.. stay behind the front bumper for the same reason.


    It's a bit sketchy but if you plan it all out.... it's not that bad.
     
  5. Feb 5, 2014 at 12:15 PM
    Phil Dammit

    Phil Dammit Well-Known Member

    Joined:
    Mar 11, 2012
    Member:
    #74688
    Messages:
    8,305
    First Name:
    Your Mom
    Tempe, Arizona
    Vehicle:
    05 5 lug minitrucker
    4.5/5.5 drop, DJM arms, QA1 coilovers, 6lug leafs, QA1 18-way, rear swaybar, Batwing Big brakes, high flow cat, indy/hurst shifter, memphis amps, focal 3-ways, Eclipse AV unit, SunDown 10" custom box, TRD bucket swap.
    yes new alignment. I take it the spacer you are trying to install goes within the strut and not on the tophat? Didn think they still did spacers within the strut assembly itself.
     
  6. Feb 5, 2014 at 12:18 PM
    2ndGenJonny

    2ndGenJonny Well-Known Member Vendor

    Joined:
    Jan 3, 2013
    Member:
    #94306
    Messages:
    18,457
    Gender:
    Male
    First Name:
    Jon
    Gilbert, AZ
    Or do it the right way with no risk? It's that or chris4x4 changes your name to el nubs when you lose a finger. Just saying, if its sketch and you have any doubt... Don't risk it. Saving a few bucks isn't worth personal injury.
     
  7. Feb 5, 2014 at 12:22 PM
    Phil Dammit

    Phil Dammit Well-Known Member

    Joined:
    Mar 11, 2012
    Member:
    #74688
    Messages:
    8,305
    First Name:
    Your Mom
    Tempe, Arizona
    Vehicle:
    05 5 lug minitrucker
    4.5/5.5 drop, DJM arms, QA1 coilovers, 6lug leafs, QA1 18-way, rear swaybar, Batwing Big brakes, high flow cat, indy/hurst shifter, memphis amps, focal 3-ways, Eclipse AV unit, SunDown 10" custom box, TRD bucket swap.
    Dont listen to this guy, live on the wild side brotha
     
  8. Feb 5, 2014 at 12:28 PM
    05TacoRunner

    05TacoRunner You say tomato.......... I say fuck you!

    Joined:
    Apr 26, 2011
    Member:
    #55578
    Messages:
    4,220
    Gender:
    Male
    First Name:
    Jason
    Peoria, Az
    Aftermarket nuts and bolts
    Ok from what I have read here, I am assuming you are just adding a 1/4" spacer on the top of your coilover between the top hat and the coilover bucket. May just need to do like Phil said and loosen your lower arm bolts to take the bushings out of tension allowing the arm to droop further. If not disconnect the spindle.
     
  9. Feb 5, 2014 at 12:32 PM
    05TacoRunner

    05TacoRunner You say tomato.......... I say fuck you!

    Joined:
    Apr 26, 2011
    Member:
    #55578
    Messages:
    4,220
    Gender:
    Male
    First Name:
    Jason
    Peoria, Az
    Aftermarket nuts and bolts
  10. Feb 5, 2014 at 12:51 PM
    2ndGenJonny

    2ndGenJonny Well-Known Member Vendor

    Joined:
    Jan 3, 2013
    Member:
    #94306
    Messages:
    18,457
    Gender:
    Male
    First Name:
    Jon
    Gilbert, AZ
    :rofl:I don't know where you get this shit Jason
     
  11. Feb 5, 2014 at 1:06 PM
    Phil Dammit

    Phil Dammit Well-Known Member

    Joined:
    Mar 11, 2012
    Member:
    #74688
    Messages:
    8,305
    First Name:
    Your Mom
    Tempe, Arizona
    Vehicle:
    05 5 lug minitrucker
    4.5/5.5 drop, DJM arms, QA1 coilovers, 6lug leafs, QA1 18-way, rear swaybar, Batwing Big brakes, high flow cat, indy/hurst shifter, memphis amps, focal 3-ways, Eclipse AV unit, SunDown 10" custom box, TRD bucket swap.
    That's what I thought till Jake started talking about spring compressors and what not.
    LOL cant tell if staged or not but hilarious. And GOOGLE Jon, the infinite expanses of GOOGLE.
     
  12. Feb 5, 2014 at 1:11 PM
    Phil Dammit

    Phil Dammit Well-Known Member

    Joined:
    Mar 11, 2012
    Member:
    #74688
    Messages:
    8,305
    First Name:
    Your Mom
    Tempe, Arizona
    Vehicle:
    05 5 lug minitrucker
    4.5/5.5 drop, DJM arms, QA1 coilovers, 6lug leafs, QA1 18-way, rear swaybar, Batwing Big brakes, high flow cat, indy/hurst shifter, memphis amps, focal 3-ways, Eclipse AV unit, SunDown 10" custom box, TRD bucket swap.
    Then you dont need to worry about the coil exploding. The strut is one piece, all you got to do is loosen the lowers to get the tension off the LCA bushings to get those struts out.
     
  13. Feb 5, 2014 at 2:01 PM
    JerryTaco

    JerryTaco Well-Known Member

    Joined:
    Jan 28, 2013
    Member:
    #96315
    Messages:
    6,862
    Why not just break the upper control arm ball joint free from the spindle, and do it that way? That's how I've always done it..
     
  14. Feb 5, 2014 at 2:06 PM
    Phil Dammit

    Phil Dammit Well-Known Member

    Joined:
    Mar 11, 2012
    Member:
    #74688
    Messages:
    8,305
    First Name:
    Your Mom
    Tempe, Arizona
    Vehicle:
    05 5 lug minitrucker
    4.5/5.5 drop, DJM arms, QA1 coilovers, 6lug leafs, QA1 18-way, rear swaybar, Batwing Big brakes, high flow cat, indy/hurst shifter, memphis amps, focal 3-ways, Eclipse AV unit, SunDown 10" custom box, TRD bucket swap.
    Because he still needs the lowers to drop out of the way, pulling the upper usually does not allow the upper to drop. Loosening, not removing, the caster and camber bolts will take the tension off the bushings to do so as when they are snugged the vehicle is at ride height on the alignment rack. Thus the allowable movement in the vertical direction of the rubber bushing will only allow but so much when tight and full movement when loose.
     
  15. Feb 5, 2014 at 2:52 PM
    JTS2016TACO

    JTS2016TACO Well-Known Member

    Joined:
    May 1, 2013
    Member:
    #103303
    Messages:
    6,272
    Gender:
    Male
    First Name:
    Jamie
    Chandler, AZ
    Vehicle:
    2016 MGM 4x4 TRD Off Road Double Cab Short Bed
    See my build thread in my signature
  16. Feb 5, 2014 at 2:57 PM
    Infra

    Infra Well-Known Member

    Joined:
    Apr 29, 2010
    Member:
    #36238
    Messages:
    2,951
    Gender:
    Male
    First Name:
    Jason
    Az
    Vehicle:
    2010 MGM DCSB 4x4 TRD OR 6spd
    CBI Bushmaster 2.0 rear bumper with swing out tire carrier & fold down camp table, CBI Moab 2.0 front bumper, Warn M8000-S, Icon 2.5 RR CDC Extended travel CO's with 700lb springs, Icon 2.5 RR CDC rear shocks, Icon hydro bumps, Total Chaos uniball UCA's, All Pro Expo leafs, U-bolt flip kit, Softopper, diff breather mod, extended rear brake lines, Grillecraft mesh grille, Elusive Elements behind grille light bar with B.A.M.F. LED light bar brackets, okLEDlightbars.com 20" double row LED light bar, Relentless Fabrication hood cb antenna mount, Wilson Silver Load CB antenna, Uniden 520 Pro XL CB radio, Wet okole seat covers, Weather tech floor liners, Weather tech in channel window deflectors, trasharoo spare tire trash bag carrier, Box Rocket 2nd gen bed rack with (2) 2 gallon gas rotopax mounted on drivers side, (2) 2 gallon water rotopax mounted on passenger side, (1) 3 gallon gas rotopax & (1) 2 gallon gas rotopax mounted on CBI swing out, Avid weld on sliders, Mattgecko LED bed light
    Just took delivery of my CBI Moab 2.0 front bumper along with Warn M8000-S winch :D

    [​IMG]


    During bumper install Mike and I will also install my full Pelfreybilt skids that I primed, painted, and coated with Rustoleum spray on bedliner :D


    [​IMG]
     
  17. Feb 5, 2014 at 3:00 PM
    Aw9d

    Aw9d That one guy

    Joined:
    Nov 7, 2011
    Member:
    #66635
    Messages:
    19,326
    Gender:
    Male
    The spring compressor we rented to use on Josh's truck didn't work as it didn't fit into the coils.
     
  18. Feb 5, 2014 at 3:10 PM
    XPOTRPR

    XPOTRPR CNC Programmer/Machinist

    Joined:
    May 29, 2011
    Member:
    #57449
    Messages:
    31,171
    Gender:
    Male
    First Name:
    Josh
    Chandler, AZ
    Vehicle:
    [2009 Supercharged Adventuretruck] & [1986 22r Minitruck]
    > BUILD LINKS >
    Yeeuup

    Floorjack FTW
     
  19. Feb 5, 2014 at 3:11 PM
    Brian007Taco

    Brian007Taco 007Taco

    Joined:
    May 16, 2012
    Member:
    #78964
    Messages:
    19,922
    Gender:
    Male
    First Name:
    If you ask. You don't know me very well!
    Mesa, AZ to NM to OK to UT back to Mesa
    Vehicle:
    2012 Red TRD OR 4x4 DCSB (aka Clifford the Big Red Truck)
    12 OR DCSB 4x4 265/75/16 Goodyear Ultra Terrain wrapped on MB352's. OME 886's w/5100's front and back, and Dakars. Derped Emblems. KM Fab sliders, Mobtown Front and back bumpers w/tire gate, KM Fab Bed Rack, Bestop Supertop, Matt Gecko bed lights. Tree Smashed Taco 06 OR AC Prerunner! OME 885 with 5100's in front, TSB and AAL with 5125's in back. 30" light bar in the valance.
    Lookin good
     
  20. Feb 5, 2014 at 3:19 PM
    XPOTRPR

    XPOTRPR CNC Programmer/Machinist

    Joined:
    May 29, 2011
    Member:
    #57449
    Messages:
    31,171
    Gender:
    Male
    First Name:
    Josh
    Chandler, AZ
    Vehicle:
    [2009 Supercharged Adventuretruck] & [1986 22r Minitruck]
    > BUILD LINKS >
    Remove the nuts from the top 3 bolts on the coilover. Remove the 2 bolts on the bottom of the hub assembly that hold the lower arm and spindle together. Loosen lower shock eyelet bolt. Lower the lower control arm. You'll get enough clearance to add the top plate (it goes between the coil bucket and top hat. Reverse steps. Done.

    Have done this so many damn times with my truck. Will be doing it again soon once my replacement coils come in.
     
Thread Status:
Not open for further replies.

Products Discussed in

To Top