

-
Welcome to Tacoma World!
You are currently viewing as a guest! To get full-access, you need to register for a FREE account.
As a registered member, you’ll be able to:- Participate in all Tacoma discussion topics
- Communicate privately with other Tacoma owners from around the world
- Post your own photos in our Members Gallery
- Access all special features of the site
 2014 Tacoma Oil Change & Valve Chatter
 Best headlight bulbs??
 Blower fan plug fried!
 Fluid pump suggestions for REDLINE quart bottles
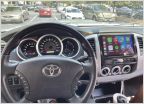 Best Radio console upgrade for Apple/iPhone use???
 Need info of my truck
Pop and Lock PL8521 Power Tailgate Install (2012 Tacoma)
Discussion in '2nd Gen. Tacomas (2005-2015)' started by JTyfz450, Apr 13, 2012.
Page 17 of 26
Page 17 of 26
Products Discussed in


