

-
Welcome to Tacoma World!
You are currently viewing as a guest! To get full-access, you need to register for a FREE account.
As a registered member, you’ll be able to:- Participate in all Tacoma discussion topics
- Communicate privately with other Tacoma owners from around the world
- Post your own photos in our Members Gallery
- Access all special features of the site
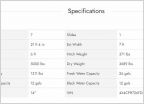 2016 Forest River RV Rockwood High Wall Series HW296
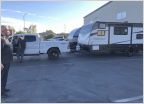 Advice on travel trailer weight
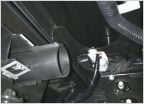 2017 SR trailer wiring
 Looking for advice on brake controllers. What brands and models are good?
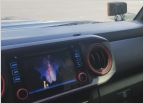 Reviews with different backup camera systems for travel trailer
 Harmful towing?
2011 Tacoma & Tekonsha Prodigy P2 Trailer Brake Controller Install
Discussion in 'Towing' started by DenisSeattle, Sep 6, 2012.
Page 1 of 2
Page 1 of 2


