

-
Welcome to Tacoma World!
You are currently viewing as a guest! To get full-access, you need to register for a FREE account.
As a registered member, you’ll be able to:- Participate in all Tacoma discussion topics
- Communicate privately with other Tacoma owners from around the world
- Post your own photos in our Members Gallery
- Access all special features of the site
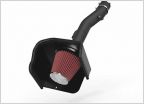 K&N 63-9037 Cold Air Intake
 AEM Dryflow Filter for TRD CAI intake! Finally!
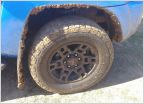 Are the Cooper Discoverer AT3 4S Sufficient for Off Road?
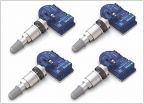 TPMS Batteries on the way out '06
 Cordless Impact Recommendations
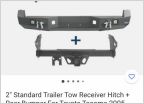 Hooke Road steel rear bumper, who here has one?
ND4's Bed Lights and Bed 12v socket
Discussion in '2nd Gen. Tacomas (2005-2015)' started by nd4spdbh, Mar 23, 2014.
Page 1 of 2
Page 1 of 2
