1. Welcome to Tacoma World!

    You are currently viewing as a guest! To get full-access, you need to register for a FREE account.

    As a registered member, you’ll be able to:
    • Participate in all Tacoma discussion topics
    • Communicate privately with other Tacoma owners from around the world
    • Post your own photos in our Members Gallery
    • Access all special features of the site

How to: Front shock/spring removal

Discussion in 'Suspension' started by chris4x4, Mar 28, 2009.

  1. Oct 24, 2013 at 11:22 AM
    #461
    NumNutz

    NumNutz One of the original 7928

    Joined:
    Jul 14, 2008
    Member:
    #7928
    Messages:
    4,899
    Gender:
    Male
    Virginia Beach, VA
    Vehicle:
    07 Tacoma 4x4 - Kings, TC, Dakars, broken stuff
    Lots.
    Pictures are on page 8.
     
  2. Dec 27, 2013 at 10:51 AM
    #462
    JDR07

    JDR07 Well-Known Member

    Joined:
    Feb 23, 2012
    Member:
    #73481
    Messages:
    1,363
    Gender:
    Male
    Colorado
    Vehicle:
    2016 DCSB TRDOR
    Duct Tape
    http://youtu.be/w58_1Ugk4KY

    these guys looked like they just removed the two lower ball join bolts and the shock mount bolt….i was gonna follow this write-up and do it in my drive way but i feel like this way looks easier so should i just take it to a rent-a-bay shop?
     
  3. Dec 29, 2013 at 10:05 PM
    #463
    JDR07

    JDR07 Well-Known Member

    Joined:
    Feb 23, 2012
    Member:
    #73481
    Messages:
    1,363
    Gender:
    Male
    Colorado
    Vehicle:
    2016 DCSB TRDOR
    Duct Tape
    disregard that last post..lol
     
  4. Feb 9, 2014 at 4:57 PM
    #464
    TacoBrah

    TacoBrah Well-Known Member

    Joined:
    Dec 31, 2013
    Member:
    #119596
    Messages:
    1,517
    Gender:
    Male
    First Name:
    Sean
    Icon stage 1, 255/85/16 KM2
    I am going to do UCAs the same time as putting on COs. At what point do I do that? First get the strut out then install UCA?
     
  5. Feb 13, 2014 at 8:45 AM
    #465
    MTopp

    MTopp Professional bear handler

    Joined:
    Aug 12, 2013
    Member:
    #110295
    Messages:
    5,815
    Gender:
    Male
    First Name:
    Matt
    Vehicle:
    05 SR5 4x4
    trifecta tonneau, pop n' lock, Depo black bezel headlights, mb 352 wheels, 265/75r16 cooper at3s, visors, colormatched 2011 grille with raptor LEDs, much LEDs in and out Future/wanted: black valence, hood scoop, catback, CAI, 285/75r16s, OMD leaf pack mod
  6. Feb 13, 2014 at 11:54 AM
    #466
    VE7OSR

    VE7OSR нет войне

    Joined:
    Dec 12, 2011
    Member:
    #68608
    Messages:
    5,777
    Gender:
    Male
    First Name:
    Rob II
    Okanagan, Canada
    Vehicle:
    05 DCLB TRD Sport
    Armour: All-Pro Skid plates - IFS, transmission, and transfer case. Pelfreybilt rear standard plate bumper, Metal Tech Sliders w/ kickout and dimple die filler plates. Front Suspension: OME 885 + NitroCharger 9000 shocks + 1/2" spacers for a 3" lift. Superbumps replacing stock bumpstops. Camburg ball joint UCA SS braid brake lines Future: ADS Extended length, extended length UCA BJ to increase droop capability Rear Suspension: All-Pro Expedition rear leafs, Walker Evans 27" rear shocks, extended rear brake lines (Wheelers Offroad), U -bolt flip kit, rear Timbren bumpstops. Future: Hammer Hangers, Shock relocate, ADS 12" or 14" shock. Interior: Weatherteck floor liners - front, Wet Okoles- front, ScanGauge, LED interior & map lights. Power moonroof. Exterior: Raider Cobra canopy, retrofit headlight by Insight, LED bulbs all around, modified flasher unit for LEDs. Rear diff breather mod. Front diff vibe problem, driver's side needle bearing replaced with ECGS bushing. yet to install: HID Blazer Fog Retrofit, LED Flood & Spot, + switches, fuse panel. swaybar relocate blocks (build my own)
    Sure. strut out first make sense, then UCA then the new CO, but the strut is not an impediment either way. May give you more working room, but the real PIA part is getting the long bolt out on the UCA.
     
  7. Feb 15, 2014 at 7:54 AM
    #467
    VinTaco

    VinTaco Well-Known Member

    Joined:
    Feb 14, 2014
    Member:
    #123059
    Messages:
    386
    Gender:
    Male
    Burnaby bc
    Vehicle:
    2016 Black Tacoma TRD OR
    Can you not just buy something cheap to compress your shocks and do it yourself..?
     
  8. Feb 15, 2014 at 8:49 AM
    #468
    VE7OSR

    VE7OSR нет войне

    Joined:
    Dec 12, 2011
    Member:
    #68608
    Messages:
    5,777
    Gender:
    Male
    First Name:
    Rob II
    Okanagan, Canada
    Vehicle:
    05 DCLB TRD Sport
    Armour: All-Pro Skid plates - IFS, transmission, and transfer case. Pelfreybilt rear standard plate bumper, Metal Tech Sliders w/ kickout and dimple die filler plates. Front Suspension: OME 885 + NitroCharger 9000 shocks + 1/2" spacers for a 3" lift. Superbumps replacing stock bumpstops. Camburg ball joint UCA SS braid brake lines Future: ADS Extended length, extended length UCA BJ to increase droop capability Rear Suspension: All-Pro Expedition rear leafs, Walker Evans 27" rear shocks, extended rear brake lines (Wheelers Offroad), U -bolt flip kit, rear Timbren bumpstops. Future: Hammer Hangers, Shock relocate, ADS 12" or 14" shock. Interior: Weatherteck floor liners - front, Wet Okoles- front, ScanGauge, LED interior & map lights. Power moonroof. Exterior: Raider Cobra canopy, retrofit headlight by Insight, LED bulbs all around, modified flasher unit for LEDs. Rear diff breather mod. Front diff vibe problem, driver's side needle bearing replaced with ECGS bushing. yet to install: HID Blazer Fog Retrofit, LED Flood & Spot, + switches, fuse panel. swaybar relocate blocks (build my own)

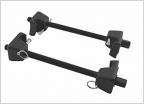
    The cheap spring compressors are dangerous. Spring rate is around 600lbs/in. The truck's weight, and amount of travel is much more than a small car.
     
  9. Feb 16, 2014 at 6:53 AM
    #469
    VinTaco

    VinTaco Well-Known Member

    Joined:
    Feb 14, 2014
    Member:
    #123059
    Messages:
    386
    Gender:
    Male
    Burnaby bc
    Vehicle:
    2016 Black Tacoma TRD OR
    Makes sense... Thanks
     
  10. Mar 26, 2014 at 8:14 PM
    #470
    yota20000

    yota20000 Member

    Joined:
    Feb 24, 2014
    Member:
    #123893
    Messages:
    18
    Gender:
    Male
    Monroe, WA
    Vehicle:
    00 4X4 SR5 V6
    Chris I called the local dealership today for new washers and bushings-actually they call them retainers and cushions-and they told me I needed (3) retainers and (2) cushions for each side and quoted me $108 so I was going to buy the set that Wheelers sells but their set only has (2) retainers and they told me they will work on a 1st gen. Who's right? I want to assemble my new struts before removing the old so I want to get it right the first time.
    Thanks-you are the Tacoma professor!
     
  11. Mar 26, 2014 at 8:27 PM
    #471
    chris4x4

    chris4x4 [OP] With sufficient thrust, pigs fly just fine. Moderator

    Joined:
    May 8, 2008
    Member:
    #6497
    Messages:
    112,751,526
    Gender:
    Male
    First Name:
    FlimFlubberJAM
    Tenoe, AZ
    Vehicle:
    2019 Rubicon 4 Door,
    4.10 gears, sliders, and lots of buttons.
    I would trust wheelers, but make sure they have the info for the correct year.
     
  12. Mar 26, 2014 at 8:38 PM
    #472
    yota20000

    yota20000 Member

    Joined:
    Feb 24, 2014
    Member:
    #123893
    Messages:
    18
    Gender:
    Male
    Monroe, WA
    Vehicle:
    00 4X4 SR5 V6
    Do you happen to have photos of when you removed the strut mount to see the order that the bushings and washers were in? Toyota says it has (3) washers and (2) bushings but Wheelers set has only (2) washers?
     
  13. Apr 27, 2014 at 3:22 PM
    #473
    Eric05774

    Eric05774 Active Member

    Joined:
    Feb 16, 2011
    Member:
    #51250
    Messages:
    27
    Gender:
    Male
    vermont
    Vehicle:
    99 tacoma
    I just replaced struts on my 99 tacoma. Rented a compressor from advanced auto took me 20 min per. I am uncertain how much torque is needed on the top nut the nut that's part of the strut.anyone know?
     
  14. Apr 28, 2014 at 5:18 AM
    #474
    VinTaco

    VinTaco Well-Known Member

    Joined:
    Feb 14, 2014
    Member:
    #123059
    Messages:
    386
    Gender:
    Male
    Burnaby bc
    Vehicle:
    2016 Black Tacoma TRD OR
    There isn't a torque per say, once the bushing is compressed that nut wont move because of the pressure against it. I watched the guy at the shop put them on and he just tightened them until the bushing flattened out a bit.

    Taco.jpg
     
  15. Apr 28, 2014 at 9:41 PM
    #475
    Eric05774

    Eric05774 Active Member

    Joined:
    Feb 16, 2011
    Member:
    #51250
    Messages:
    27
    Gender:
    Male
    vermont
    Vehicle:
    99 tacoma
    Oh cool,the bushing compressed quite a bit. The old ones were probably original I was guessing how much to tighten based off where the nut was on old ones. Not sure if I want to tighten them all the way. I installed kyb gas adjust if that makes a difference
     
  16. Apr 29, 2014 at 12:08 AM
    #476
    4WD

    4WD cRaZy oLdmAn

    Joined:
    Jul 2, 2009
    Member:
    #19185
    Messages:
    23,542
    Gender:
    Male
    First Name:
    Doug
    Lakeside, Ca / Gardnerville, Nevada
    Vehicle:
    2004 DC TRD 4x
    Grey wire MOD, deck plate, diff breather MOD, 2nd gen. OME 883# on Tundra 5100's, OMD custom 3" leafsprings, rear shock relocation, Ivan Stewart TRD rims w/285/75/16's, '02 bumper MOD, Famous Fabrications sliders , LED interior/exterior lights, bed bar, Custom tube bumper, Old school KC day lighters,Red Ring 8" HID flood, Kenwood vhf 2M.. umm some other shit I'm forgetting right now
    Don't know if your still looking but the bushing config is : metal washer/grommet/grommet/metal washer....nut/tighten to about 35-40 ft.lbs
     
    gregzz likes this.
  17. May 4, 2014 at 4:18 PM
    #477
    Greenroom69

    Greenroom69 New Member

    Joined:
    May 4, 2014
    Member:
    #129115
    Messages:
    2
    Gender:
    Male
    Just completed front spring/shock replacement. Rented spring compressors from advance for $50 deposit. The ones provided are a real challenge to install properly, kinda scary but survived it! For the other side I used a jack at the lower control arm to decompress the spring and install the new shock. Worked like a champ. Stoked to have saved some money and really interesting to be in there understanding how it all works! Thanks to all the posters on here with great tips and links.
     
  18. May 11, 2014 at 10:23 AM
    #478
    nrm

    nrm Well-Known Member

    Joined:
    Dec 13, 2010
    Member:
    #47639
    Messages:
    120
    Gender:
    Male
    NC
    Vehicle:
    2011 4.0 DCSB TRD Off-Road
    4-leaf TSB and Eibach 620 coils with Bilstein 5100's set to 0". AFE intake and Gibson cat-back exhaust. Bestop canvas topper
    Just did this last night in my garage for both sides. After reading about other guys going this route and watching a video, I decided there was no need to pay for a compressor. Worked great and I didn't even disconnect my swaybar, just let the shock drop out from inside the coil, pulled it, then pulled the coil, no issues. Super easy reinstall as well.
     
  19. May 16, 2014 at 5:09 AM
    #479
    double_b

    double_b Well-Known Member

    Joined:
    Jul 14, 2010
    Member:
    #40165
    Messages:
    194
    Gender:
    Male
    Red Lion, PA
    Vehicle:
    '14 DCab Tacoma TRD Off Road
    Wanted to give my method for installing my pre-assembled coil overs from Wheelers. They were OME884 with Bilstein 5100s.

    I had a buddy who is a body man(for 30 years) help me. I explained to him the several different ways of doing the front coil over removal and install from here on TW. I liked the method of loosening the cam bolts and removing the two bolts from the LCA and ball joint "knuckle".

    We did a little bit of each method in this thread. By a little bit we basically did one step only from each method.

    First: We removed the sway bar brackets to allow the sway bar some room to move out of the way. Only the brackets not the joint.

    Second: We removed the two bolts holding the LCA to the ball joint area(sorry, not sure of the term) like shown in the video earlier in this thread. We did not loosen the cam bolts for the LCA.

    Third: I took a 2x4 and slid it between the portion of the LCA nearer to the cab and then pushed down with my foot to force the LCA down and out of the way while he removed the factory coil over then slid the new one in. When we did the first side I had a pry bar and a shorter 2x4 then on the driver side we couldn't quite get enough distance down with that combo and we realized a longer 2x and no pry bar was the ticket and this worked perfect and was easy. Lots of leverage. Just watch the axle boot so you don't rip it or pinch it with the 2x4.

    Overall was an easy process, yes bigger jack, bigger jack stands and air tools help but still pretty straight forward. Glad I didn't take it to a shop and pay 300 or 400 to get it and the AAL installed.

    Here is a pic I took while pushing the LCA down.

    Sorry, its the only pic I took while we were doing it but its the only thing that is slightly different than has already been shown in the thread.

    [​IMG]
     
  20. May 24, 2014 at 7:56 PM
    #480
    MTopp

    MTopp Professional bear handler

    Joined:
    Aug 12, 2013
    Member:
    #110295
    Messages:
    5,815
    Gender:
    Male
    First Name:
    Matt
    Vehicle:
    05 SR5 4x4
    trifecta tonneau, pop n' lock, Depo black bezel headlights, mb 352 wheels, 265/75r16 cooper at3s, visors, colormatched 2011 grille with raptor LEDs, much LEDs in and out Future/wanted: black valence, hood scoop, catback, CAI, 285/75r16s, OMD leaf pack mod
    Where is this video earlier in the thread? I'm going to be changing shock in the next couple days possibly
     

Products Discussed in

To Top