1. Welcome to Tacoma World!

    You are currently viewing as a guest! To get full-access, you need to register for a FREE account.

    As a registered member, you’ll be able to:
    • Participate in all Tacoma discussion topics
    • Communicate privately with other Tacoma owners from around the world
    • Post your own photos in our Members Gallery
    • Access all special features of the site

Let's see your frugal DIY mods!

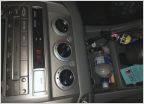
Discussion in '2nd Gen. Tacomas (2005-2015)' started by LUSETACO, Nov 24, 2013.

  1. Jul 18, 2014 at 11:09 AM
    #61
    BeaverYota

    BeaverYota Oregon State Edition

    Joined:
    Apr 15, 2014
    Member:
    #127721
    Messages:
    2,541
    Gender:
    Male
    First Name:
    Josh
    Lake St. Louis, MO
    Vehicle:
    Sold...
    This really help that much?
     
  2. Jul 18, 2014 at 11:15 AM
    #62
    Ostrichsak

    Ostrichsak Don't taze me bro!

    Joined:
    Apr 5, 2012
    Member:
    #76327
    Messages:
    9,123
    Gender:
    Male
    First Name:
    Jer
    Northern Colorado, USA
    Vehicle:
    Supercharged '10 Tacoma 4x4 TRD
    TRD Supercharger + too much stuff to list. Click sig pic
    A few links in my sig for some frugal yet useful mods.
     
  3. Jul 24, 2014 at 9:38 AM
    #63
    LUSETACO

    LUSETACO [OP] Here for the Taco Pron

    Joined:
    Jun 27, 2009
    Member:
    #18991
    Messages:
    11,315
    Gender:
    Male
    First Name:
    Dennis
    South Central Pee A
    Vehicle:
    2005 PIMP MOBILE
    Yes
    Knock off Beer Snap with a cozy new home. Total cost $1.50.

    [​IMG]

    [​IMG]

    [​IMG]
     
    B Wess08 and Smaypotter like this.
  4. Jul 24, 2014 at 11:08 AM
    #64
    skootx

    skootx Well-Known Member

    Joined:
    Apr 20, 2014
    Member:
    #128066
    Messages:
    663
    Gender:
    Male
    Erie, CO
    Vehicle:
    2014 Tacoma TRD Off Road Double Cab Short Bed
    Icon Stage 1 Shocks & coils Deaver AAL Light Racing UCA's PAC SNI-35 line output converters, miniDSP, Rockford Fosgate R600X5, Rockford Fosgate Punch P3 P3SD210, Helix Blue B62C speakers, HELIX Blue B5X 5 speakers G4 Elite Fold A Cover Rear Diff Breather Relocation
    No need to hide it if you did!
     
  5. Jul 24, 2014 at 11:09 AM
    #65
    geekhouse23

    geekhouse23 The "Liftman" - @DrFunker

    Joined:
    Jul 14, 2013
    Member:
    #108251
    Messages:
    15,685
    Gender:
    Male
    Vehicle:
    2GMGMDCSB4WDTRDFTMFW!! TL;DR
    mostly stock, grocery gettin' Prius
    Awesome! :thumbsup:
     
  6. Jul 26, 2014 at 11:16 AM
    #66
    Parrothead1809

    Parrothead1809 Well-Known Member

    Joined:
    May 18, 2013
    Member:
    #104414
    Messages:
    61
    Gender:
    Male
    Please post details on the False bottom center console - Love to know how you did it !

    Thanks,
    -PH


  7. Jul 26, 2014 at 8:55 PM
    #67
    LUSETACO

    LUSETACO [OP] Here for the Taco Pron

    Joined:
    Jun 27, 2009
    Member:
    #18991
    Messages:
    11,315
    Gender:
    Male
    First Name:
    Dennis
    South Central Pee A
    Vehicle:
    2005 PIMP MOBILE
    Yes
    I just laid a CB bracket down on the bottom of the console and put the carpet bottom back in.
     
  8. Jul 26, 2014 at 9:37 PM
    #68
    chadwimc

    chadwimc Member

    Joined:
    May 23, 2014
    Member:
    #130430
    Messages:
    19
    Gender:
    Male
    earth
    Vehicle:
    2014 Tacoma
    Another false bottom hiding spot. 'Cuz every once in a while, one has to hide something. Like a pay check from the wife or what not.
    I lifted the felt liner from the bottom to use as a stencil...
    65f_zps4b7f2ddc_84967168ed6d06dec8078cd9d261cd9805c8335c.jpg

    I cut a piece of 3/8 inch foam core to fit. I measured several items to check for fit. I then cut small corner pieces to raise the foam core to the right height. I then cut a thin piece of foam to line the bottom of the console, to keep from scratching things like pay checks...

    65c_zpsdd2984de_da4305aaa30106dec2191f0423dd2685505e7598.jpg

    Stash the item to be kept out of sight, place the foam core over it, then the original felt liner...
    65b_zpsc78a3f94_02180a606ee662f30c18748a22bf8844b5b9c44c.jpg

    65d_zps8eebe2ec_7f8b64953525948a80dded35a83ab3311da0cb42.jpg

    Throw the usual junk on top to camoflauge it...

    65a_zps9a038966_652b953f9f6b33a876fb086cc4840da847a023ae.jpg
     
  9. Jul 26, 2014 at 10:08 PM
    #69
    Square

    Square Well-Known Member

    Joined:
    Nov 10, 2013
    Member:
    #116330
    Messages:
    733
    Gender:
    Male
    First Name:
    Brian
    Mission Viejo, CA
    Vehicle:
    '14 DCSB SR5 4WD MGM
    Slightly flawed logic. I've bent a steal rim badly enough that it couldn't be used anymore. That's what a spare tire is for. Nothing is un-breakable and lots of people don't need super hardcore gear to get out and enjoy off roading. I have loads of friends who rock crawl with 37"-42" tires and use alloy wheels with no problems.
     
  10. Jul 27, 2014 at 4:36 AM
    #70
    LUSETACO

    LUSETACO [OP] Here for the Taco Pron

    Joined:
    Jun 27, 2009
    Member:
    #18991
    Messages:
    11,315
    Gender:
    Male
    First Name:
    Dennis
    South Central Pee A
    Vehicle:
    2005 PIMP MOBILE
    Yes
    Nice! You could take that a step farther and cut out the center portion of the foam and just leave the perimeter. That way you could stash larger things. Just a thought. Looks good.
     
    xxTacocaTxx, wahoobie and cmyersgo like this.
  11. Jul 27, 2014 at 4:39 AM
    #71
    DrFunker

    DrFunker Well-Known Member

    Joined:
    Feb 3, 2014
    Member:
    #122158
    Messages:
    42,919
    That was my thought too.
     
  12. Jul 27, 2014 at 5:25 AM
    #72
    chadwimc

    chadwimc Member

    Joined:
    May 23, 2014
    Member:
    #130430
    Messages:
    19
    Gender:
    Male
    earth
    Vehicle:
    2014 Tacoma
    I must not 'splained it too well. There *IS* space for other "things" under the false bottom. Use your imagination...:D

    console1a_zps5d051ddd_803c2de83e13ce44d2cbf4662b17d6082d754a8a.jpg
     
  13. Jul 27, 2014 at 7:51 AM
    #73
    Zednix

    Zednix Well-Known Member

    Joined:
    Jun 14, 2014
    Member:
    #131952
    Messages:
    73
    Gender:
    Male
    Edmonton, Alberta, Canada
    Vehicle:
    14 TRD Sport

    I would love to know what you did to mount this bar and how much space from the bar to the gate you ended up with.
     
  14. Jul 27, 2014 at 8:10 AM
    #74
    LUSETACO

    LUSETACO [OP] Here for the Taco Pron

    Joined:
    Jun 27, 2009
    Member:
    #18991
    Messages:
    11,315
    Gender:
    Male
    First Name:
    Dennis
    South Central Pee A
    Vehicle:
    2005 PIMP MOBILE
    Yes
    It's just an extendable ice scraper. It extends onto those black nubs then I tighten it down. It works even better now with the net.

    [​IMG]
     
  15. Jul 28, 2014 at 12:53 AM
    #75
    Justus

    Justus fucks not given

    Joined:
    Jan 4, 2013
    Member:
    #94417
    Messages:
    9,230
    Gender:
    Male
    First Name:
    Nabisco the kid
    In ur toolbox
    Vehicle:
    not so low, not so slow 2006 6 lug
    stockish
    yes
     
  16. Jul 28, 2014 at 3:25 PM
    #76
    Zednix

    Zednix Well-Known Member

    Joined:
    Jun 14, 2014
    Member:
    #131952
    Messages:
    73
    Gender:
    Male
    Edmonton, Alberta, Canada
    Vehicle:
    14 TRD Sport
    The points where you mounted the bar on the side-wall are what I was most curious about. How did you go about mounting them? What parts did you use? that sort of info would be handy.
     
  17. Jul 28, 2014 at 3:44 PM
    #77
    yota243

    yota243 Well-Known Member

    Joined:
    Aug 22, 2012
    Member:
    #85267
    Messages:
    21,621
    Gender:
    Male
    First Name:
    E.J.
    north Alabama
    Vehicle:
    turbo 05 prerunner trd off road DC
    Bw s256 turbo with 3 in glass pack dumped pre axle raptor liner bed and top rails and fenderflares and rocker panels. Hunter side steps. Plasti-dipped upper fenders and emblems. satin black spray paint here and there inside and out. 5100's set to 1.75" up front . C channel front bumper. Maxxis bighorn 255/85/16
    [​IMG] ok so i technically have almost $200 in this bumper, metal and paint and grinding disk, but i had to buy 20' pieces, which means i have enough to build another one (except the skid plate which was donated scrap from a local fab shop i had connection with) so $100 for a full metal 3/16 front bumper. Pretty frugal
     
    bprout and Jckdnls like this.
  18. Jul 28, 2014 at 4:11 PM
    #78
    SMKYTXN

    SMKYTXN If it can't be overdone it's not worth doing Vendor

    Joined:
    Mar 11, 2011
    Member:
    #52810
    Messages:
    14,040
    Gender:
    Male
    First Name:
    Nathan
    Houston
    Vehicle:
    11, 4dr, TRD Sport, 6sp
    DCFB
  19. Jul 28, 2014 at 4:12 PM
    #79
    LUSETACO

    LUSETACO [OP] Here for the Taco Pron

    Joined:
    Jun 27, 2009
    Member:
    #18991
    Messages:
    11,315
    Gender:
    Male
    First Name:
    Dennis
    South Central Pee A
    Vehicle:
    2005 PIMP MOBILE
    Yes
    I got some D-rings from the hardware store and screwed them right to the bed. The nubs, I have no idea where I got those but they fit on the bar perfect. You could probably use some stacked up washers or something and get the same effect.

    Looks good! Wish I had a welder and tools to work metal.
     
  20. Jul 28, 2014 at 4:17 PM
    #80
    CanisLupus

    CanisLupus Member since 2011

    Joined:
    May 17, 2011
    Member:
    #56826
    Messages:
    6,327
    First Name:
    Matt
    Stokesdale | NC
    Vehicle:
    ‘19 Honda Civic Hatchback
    You could care less?

    Matt
     
    TRDSmacker and nocturne like this.

Products Discussed in

To Top