1. Welcome to Tacoma World!

    You are currently viewing as a guest! To get full-access, you need to register for a FREE account.

    As a registered member, you’ll be able to:
    • Participate in all Tacoma discussion topics
    • Communicate privately with other Tacoma owners from around the world
    • Post your own photos in our Members Gallery
    • Access all special features of the site

Deeezy's Locked Sport Grocery Getter Build

Discussion in '2nd Gen. Builds (2005-2015)' started by deeezy, Aug 26, 2014.

  1. Aug 26, 2014 at 3:40 PM
    #1
    deeezy

    deeezy [OP] Well-Known Member

    Joined:
    Sep 1, 2013
    Member:
    #111645
    Messages:
    5,253
    Gender:
    Male
    First Name:
    Dana
    Hawaii
    Vehicle:
    2013 4x4 DC, 6 spd, TRD Sport
    King ext travel coilovers, Icon tubular UCA's Rear-King "Tundra" 2.5's, Allpro Expos, TRD cat-back, Hurst/Core short shift kit, etc...
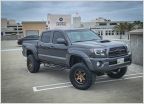
    I bought this 2013 4x4 sport last year and one mod led to another and another and another.............

    How it looks today on 37's:


    How it looked on 35's:


    On 33's:


    [​IMG]


    [​IMG]

    [​IMG]

    [​IMG]

    [​IMG]

    Truck Info: 2013 Sport, 4x4
    Pyrite Mica

    Location: Oahu, Hawaii

    Suspension: ADS 2.5 Coilovers, extended travel, w/resis/clickers, 650lb springs
    ADS 2.5 rear shocks, w/resis/clickers, 26.5" ext, 16.25" coll.
    Icon tubular UCA's
    Dirt king V1 LCA's with Kartek limit straps
    Icon 2.0 VS Alum extended rear shocks w/resi's. 26.8" ext, 15.9" coll. (sold)
    Allpro Expo leaf pack
    Allpro U-bolt flip
    Front super bumps w/one-off aluminum spacer made by Bullaculla
    Rear super bumps
    Sway bar removed
    Defined Engineering shackle hangar brace

    Drivetrain/Engine:
    Core/Hurst short shift kit w/relocation bracket
    Yellow wire mod
    Redline MT-90 transmission fluid
    Extended front/rear braided brake lines
    Volant intake
    HP Tuners software w/custom NA tune
    3 degree retarded exhaust cam gears
    Rear diff breather relocated behind tail-light.
    ECGS Rear 3rd member w/4.88 gears and ARB air locker. Front clamshell w/4.88 gears and ARB air locker
    Intake manifold spacer, 1/2"
    URD competition Y-pipe.
    TRD cat back exhaust, chopped after rear axle w/tip reinstalled
    Engine oil temperature gauge, Glowshift
    Oil pressure gauge, Glowshift
    Steering rack oil cooler, Mishimoto

    Wheels/Tires: 37x12.5x16 Irok ND's on Ultra 103 Beadlocks
    315/75/16 Super Swamper Irok ND
    FN Wheels, 16x8 -20 offset Countersteer Type X, Graphite Gunmetal
    315/75/16 Procomp MT2's (2nd set)
    .75" BORA hubcentric wheel spacers (for 2nd set)
    TRD bronze beadlock wheels (2nd set)
    Fenders trimmed/cut 2"
    TPMS disabled for Irok set

    Exterior: Softtopper
    Leer 100xq
    Homertaco ghost raptor grill

    Armor: Exocage
    Pelfreybilt steel front bumper w/ fog and led cut-out.
    Pelfreybilt IFS aluminum skid
    Homemade steel mid skid
    Pelfreybilt standard rear bumper with hidden hitch, led cut-outs,
    and swing-out.
    BAMF rock sliders at 10*

    Lighting: Rigid Dually fogs
    Rigid SRQ flush mount reverse lights
    Rigid 20" light bar for front bumper **sold**
    Baja Designs S8 20" driving/combo light bar w/amber drl
    Tacodane's led strips under doors wired together with ORO rock
    lights.
    ORO rock lights
    HID retrofitted D2S headlights. 35W

    Recovery: 10 lb co2 tank
    48" Hilift jack mounted on bed rail
    9500 lb Smittybilt XRC winch w/synthetic rope.

    Misc: Battery relocated to the bed

    Day I brought it home:
    [​IMG]

    Threw on some 5100's, TRD bronze wheels with 265/75/16 KM2's, and some N-fab steps.
    [​IMG]

    Installed Core/Hurst shift kit which was a gift from my wife:
    [​IMG]
    [​IMG]
    [​IMG]

    Took the 5100's off and installed some Icon stuff:
    [​IMG]

    Installed my Leer 100XQ:
    [​IMG]

    Sold my 265/75 KM2's for some 285's:
    [​IMG]

    Got a matching wheel for full size spare:
    [​IMG]

    Crown Extended brake lines:
    [​IMG]

    Wheeler Super Bumps:
    [​IMG]

    LED fog assemblies from Retrofit Source:
    [​IMG]

    Installed some BAMF sliders:
    [​IMG]
    [​IMG]

    BHLM:
    [​IMG]

    Black tail lights from Amazon to match BHLM:
    [​IMG]

    LED courtesy lights:
    [​IMG]

    Ghost Raptor grill from Homertaco:
    [​IMG]

    Next update will be some Pelfrey gear!:cool:

    Got my front bumper on:
    [​IMG]

    Also got the rear w/swingout on:
    [​IMG]


    [​IMG]

    [​IMG]

    Wired the Rigid SRQ reverse lights. Used the 3-position switch that came with the lights. The switch can be always on/ off/ on with back-up reverse/camera. The switch illuminates if the lights are on.

    [​IMG]

    [​IMG]

    I'm going to replace the switches with ones from OTRATTW soon.

    SRQ lights are brighter than I thought they were going to be:

    [​IMG]

    [​IMG]

    Relocated the reverse camera to the swing-out.

    [​IMG]

    Got my bumper light bar covers and rocker switch. Just need the light bar.

    [​IMG]

    Bumper led bar switch got installed next to the stock fog light switch. Tapped into the AC control dimming circuit so the lights on the switch can be dimmed with the rest of the dash lights.

    [​IMG]

    SR20 mounted and wired today:

    [​IMG]

    OTRATTW custom 3-position reverse switch installed. The Rigid srq wiring was used, just have to add a couple illumination wires so the bottom leds come on with AC control lights.

    [​IMG]

    Got my fog light and bumper led bar switches (matching brands) installed:

    [​IMG]

    [​IMG]

    Did the reverse camera on anytime mod. Used the dpdt switch that came with the rigid reverse lights.

    [​IMG]

    Installed a custom OTRATTW switch for the "camera anytime". Up is on, middle is off, and down goes on when in reverse
    [​IMG]

    Picked up a 10 lb Co2 tank. It fills tires fast!
    [​IMG]

    Installed extended Icon 2.0 VS rear shocks w/ resis. 26.8" ext, 15.9" coll. Way more travel now but the leaf pack is limiting it. These shocks are actually for the Allpro leaf pack I have on order. Should be perfect for it.

    [​IMG]

    [​IMG]

    [​IMG]

    [​IMG]

    I cut down a polyurethane bump stop to the height needed to keep the shocks from bottoming out until the Allpro leaf pack gets here.
    [​IMG]

    Flexed it out and there's a lot more down travel than before:

    [​IMG]

     
    Last edited: Oct 21, 2020
  2. Aug 26, 2014 at 3:44 PM
    #2
    rka

    rka PAVEMENT PRINCESS

    Joined:
    Feb 21, 2013
    Member:
    #98064
    Messages:
    881
    Gender:
    Male
    First Name:
    Rylan
    H A W A I I
    Vehicle:
    2013 SPORT DCLB
    100% Stock
    Sick build! I can't wait for our Pelfreybilt gear to get here!!
     
    FarNorthTaco14 and Tac007 like this.
  3. Aug 26, 2014 at 3:46 PM
    #3
    SMKYTXN

    SMKYTXN If it can't be overdone it's not worth doing Vendor

    Joined:
    Mar 11, 2011
    Member:
    #52810
    Messages:
    14,038
    Gender:
    Male
    First Name:
    Nathan
    Houston
    Vehicle:
    11, 4dr, TRD Sport, 6sp
    DCFB
    That's cheating!

    [​IMG]

    I've often wished for a mag drill when putting holes in the frame. Good looking truck!
     
    Slashaar and kgarrett11 like this.
  4. Aug 26, 2014 at 3:50 PM
    #4
    deeezy

    deeezy [OP] Well-Known Member

    Joined:
    Sep 1, 2013
    Member:
    #111645
    Messages:
    5,253
    Gender:
    Male
    First Name:
    Dana
    Hawaii
    Vehicle:
    2013 4x4 DC, 6 spd, TRD Sport
    King ext travel coilovers, Icon tubular UCA's Rear-King "Tundra" 2.5's, Allpro Expos, TRD cat-back, Hurst/Core short shift kit, etc...
    2/22/15: Trimmed mud flaps today. The bottoms of them were getting shredded so this should do the trick.

    [​IMG]

    [​IMG]

    [​IMG]

    I think it looks better anyway.

    2/28/15: Got my co2 bottle mounted with large Quick Fists


    [​IMG]

    [​IMG]

    [​IMG]

    3/8/15: Installed shackles on front and rear bumper. I had to take the powder coat off the shackle pins for the front bumper. The pin was too thick with the powder coat on the pin and the bumper so it couldn't slide in the 7/8"hole.

    [​IMG]

    3/25/15: Installed Allpro standard leaf springs. Install went smooth and the ride is very comfortable too. I got a little over 2" of lift, just what I was expecting.

    [​IMG]

    [​IMG]

    [​IMG]

    6/19/15: Volant intake installed. Smog pump wouldn't bolt up nicely because of the holes were prepped on the intake so I had to improvise with some stainless bolts and stuff.


    6/20/15: Shifter relocation bracket installed. This moved the shifter about an inch to the rear and toward the driver. Seems like a more comfortable shift for me now.


    Droop with the extended Icon 2.0 RR and Allpro Standard leaf springs:


    Rear Icons at bump:


    7/14/15: Got my shipment from ECGS. 3rd member geared 4.56 w/ARB air locker and front clamshell w/ECGS bushing.


    The rear swap wasn't that bad:


    The front clamshell was very time consuming and I think requires two people. There's a lot of nuts and bolts and crap that has to come off before you can drop the clamshell:


    There's a gear and shaft that has to get swapped over to the new assembly. This is the diff before the gear was swapped over:


    Mounted the compressor:


    Ran the air lines along the brake likes all the way to the rear end:


    Installed the compressor and locker activation switch under the AC controls. I'll be getting OTRATTW switches to match the rest soon:


    8/1/15: Trimmed fenders is preparation for the 35's


    Test fit the front


    Front


    Front and rear


    Installed a threaded plug for the fender intake tube since the fender liners were removed. I can easily plug the tube if there's a chance of water or a lot of dust. The intake has another port in the front of it, in the engine bay.


    8/8/15: Made some aluminum brackets to secure the front of the front-fender flares. I didn't like the idea of having just the plastic clips holding them on.


    All the hardware was painted black:


    Each flare is secured with bolts in the front and rear of each fender now.


    9/24/15: Installed Rokblokz Universal XL mud flaps. Just the rears needed for inspection here. I used some scrap aluminum L-angle to make some brackets to bolt them to. It seems to be the only way since I cut my fenders.


    I also cut cut my exhaust tip off. It's a TRD "turn down" now.

     
    Last edited: Sep 25, 2015
  5. Aug 26, 2014 at 3:51 PM
    #5
    deeezy

    deeezy [OP] Well-Known Member

    Joined:
    Sep 1, 2013
    Member:
    #111645
    Messages:
    5,253
    Gender:
    Male
    First Name:
    Dana
    Hawaii
    Vehicle:
    2013 4x4 DC, 6 spd, TRD Sport
    King ext travel coilovers, Icon tubular UCA's Rear-King "Tundra" 2.5's, Allpro Expos, TRD cat-back, Hurst/Core short shift kit, etc...
    9/30/15: Got my 35's in! Going to get them mounted and balanced with Dyna Beads:


    10/1/15: Mounted and on the truck


    The truck also passed recon and safety inspection like this. The tire rubs the UCA slightly so I installed .75" BORA hub centric wheel spacers.


    Here's some shots with the .75" spacers:


    10/11/15: Installed U-bolt flip. Thanks to Kumz for the plates and Boss 4x4 for the bolts.


    10/15/15: Took the truck to flex it out and check tire clearance. One side rubs the cab mount by a hair and both sides has some minor rubbing on the firewall. I'll start clearancing the firewalls this weekend. Very happy with how it turned out. I will be testing/wheeling the truck at Peacock Flats in a few weeks so that gives me some time to fix the firewall rub.

    Cab mounts at lock and stuffed as much as I could on this ramp:


    11/27/15: Made some Hilift bedrail mounts. I used 3/8-16 stainless steel hardware and bullaculla aluminum bedrail inserts. I bent it out of 1/8" steel I had laying around.


    11/29/15: Got a good deal on a Pelfreybilt mid skid. Primed, painted, and installed:


    12/5/15: Came up with some fender liners from vinyl flooring. This idea came from NYCO's build. I used a full rubber/vinyl type commercial garage sheet flooring. It's sprayed over with rubber undercoating to waterproof it.


    1/17/16: Scored some rear Super Bumps from @rka . They were almost perfect height for the ext travel shocks I have. Driver side needed a small spacer just to be safe and passenger side was spot on with about 5/8" of shaft left before bottoming out.


    ORO Lightspot rock lights wired with tacodane led strips I already had under each door. I have them on a 3 pos switch, on/off/on with dome light.


    1/24/16: ATO HD stock length shackles. What I thought was going to be a 20 minute job turned out to be a 2 hour job. Swapping shackles using the stock hangars required unmounting the leaf springs to get the top shackle bolt out. Oh well, it's done. All leaf bushings are poly now and the shackle has a greasable fitting on it. It's definitely beef compared to the stock shackles.


    New HD shackle at ride height:


    2/27/16: Finished up my retrofit. D2S projectors w/Apollo shrouds and backlit amber halos.


    Some wheeling vids:


    5/30/16: Memorial Weekend Wheeling


    Some wheeling pics taken by @rka


    7/30/16: Defined Engineering's shackle hangar support brace installed:


    8/13/16 Front diff swap w/ARB air locker. Fresh out of the box:


    I had to clock the air compressor to fit under the brake line hoses:


    Front locker switch wired up:


    Removed cv's:


    Unbolted front driveshaft:


    This is the wire harness connector on the passenger side of the diff that needs to be unhooked and it's bracket unbolted. There is also a bracket on the driver's side that needs to be unbolted and have the vacuum lines unhooked. These are both on the top side so it helps to unbolt the front of the diff supports so you can swing the diff down to make a little room.


    Old diff w/ tube unbolted to be swapped over to the new diff:


    This stub shaft has to be removed from the old diff to be swapped over also:


    And finally, I plumbed the new air line and tested for leaks:


    9/2/16: Total Chaos bed stiffener/tie down brackets:

    It bolts in using one factory bed bolt on the bottom and a 10 mm bolt up top. Three 5/16" holes need to be drilled on the vertical sheetmetal side of the bedside and bolted down with bolts supplied with the kit.


    I figured this might help with the bed twisting when wheeling with the Leer cap on.

    9/22/16 Got my Countersteer Type X's and Super Swamper Irok ND's mounted. I used 12 oz of Dynabeads per tire. The 16x8 wheels are about a 3.75 bs.


    I opted to disable the TPMS system and use "shorty" rubber valve stems.


    The hill climb, locked front and rear:


    The build continues on post #7 below
     
    Last edited: Dec 31, 2017
    b_r_o, Slashaar, Npizano and 8 others like this.
  6. Aug 26, 2014 at 4:00 PM
    #6
    SMKYTXN

    SMKYTXN If it can't be overdone it's not worth doing Vendor

    Joined:
    Mar 11, 2011
    Member:
    #52810
    Messages:
    14,038
    Gender:
    Male
    First Name:
    Nathan
    Houston
    Vehicle:
    11, 4dr, TRD Sport, 6sp
    DCFB
    Yeah, drilling the frame by hand is not a fun task. This is my poor man's version of the mag drill.

    [​IMG]
     
  7. Aug 26, 2014 at 4:22 PM
    #7
    deeezy

    deeezy [OP] Well-Known Member

    Joined:
    Sep 1, 2013
    Member:
    #111645
    Messages:
    5,253
    Gender:
    Male
    First Name:
    Dana
    Hawaii
    Vehicle:
    2013 4x4 DC, 6 spd, TRD Sport
    King ext travel coilovers, Icon tubular UCA's Rear-King "Tundra" 2.5's, Allpro Expos, TRD cat-back, Hurst/Core short shift kit, etc...
    The build continues................

    Battery relocated to the bed for weight distribution reasons and not wanting to damage the sheetmetal fenders and core support with the heavy battery bouncing around on it. I had all the wire and battery tray put together in a custom kit by Offgrid Engineering.
    1/0 wire was used from the bed to the stock battery location where it splices together with the factory negative and positive wires that used to go to the battery. I ordered Blue Sea bus bars to terminate all of the big wire. A 250A fuse was used to protect the long run of power wire from the bed. This 250A fuse is fine for even running my winch because of how that type can handle more than the rated amps for a preiod of time.


    After relocating the battery, I could take all of the extra preload off of the driver's side coilover that was needed for "tacolean". The truck is totally level with the same preload on both sides.


    3/30/17

    Installed ADS coilovers and rear 2.5" shocks:


    I had to grind and clearance the lower rear shock mounts on the axle for the larger shocks to clear at full bump:


    Since I had my steering fade on the last wheeling trip, I installed a steering rack fluid cooler I got from bullaculla:


    Picked some flexible air duct and fittings to route to my intake box so it wasn't sucking hot air from under the hood. I routed it behind the passenger headlight so it gets blocked from rain and what not:


    The Donaldson filter I'm using did a good job of keeping crap out. The engine side of the filter was spottless:


    8/5/17 Swapped in some 650lb springs instead of the 700's with help from bullaculla. My truck is right in between needing 650 and 700lb springs so I chose the lighter rate. The 650's required 1/4" more preload than the 700's to maintain the same ride height.


    9/9/17 Installed URD Y-pipe and intake manifold spacer:


    10/1/17 Got new Osram HID bulbs and OEM Toyota ballasts to replace my old setup. The new Nightbreaker bulbs are less blue than the old CBI bulbs and should provide more visibility in rain/hazy conditions. And the OEM ballasts are waterproofed from the dealer and should last a long time.


    Afterstaring at and comparing the amount of shock shaft on the rear of my truck, I noticed that the Allpro leaf springs locate the axle more rearward than stock. This wouldn't be a issue if I had relocated shock mounts, but I am using the stock mounts that have the pass angled to the front and the driver to the rear. I picked up these axlerelocation plates andmoved the axle forward 3/4".

    [​IMG]

    It was a bigger project than expected because I had to relocate the u-bolt flip plate forward also, which needed another 5/8" hole drilled/relocated. I also needed to cut off the excess threads on the center bolt that holds the leafs together so the Wheeler's bump stops could go back on.

    [​IMG]


    It worked out and now the axle is located equally between the top shock mounts and wheel wells, and the shocks now have close to the same shock shaftshowing. It also keeps both the rear shocks closer to the same angle instead of before which had the pass side angled more than the driver's.

    Before:

    [​IMG]


    After:

    [​IMG]

    The plates also added 3/8" of shock shaft because it added that thickness to the leaf pack. So, I will be cutting down the rear bumpstops to not waste any shock travel.
     
    Last edited: Dec 31, 2017
    Slashaar, buckmaster243 and Pirhett like this.
  8. Aug 26, 2014 at 11:16 PM
    #8
    deeezy

    deeezy [OP] Well-Known Member

    Joined:
    Sep 1, 2013
    Member:
    #111645
    Messages:
    5,253
    Gender:
    Male
    First Name:
    Dana
    Hawaii
    Vehicle:
    2013 4x4 DC, 6 spd, TRD Sport
    King ext travel coilovers, Icon tubular UCA's Rear-King "Tundra" 2.5's, Allpro Expos, TRD cat-back, Hurst/Core short shift kit, etc...
    3/5/18: I've been cutting and "tubbing" the inner fenders in preparation for the 37's.


    37's!:


    4/1/18: New Northstar NSB-AGM31 installed


    Alternator voltage booster from Singer Alternators installed:


    5/28/18: Clutch master cylinder crapped out. Kind of shitty to change out since it is under the clutch pedal in the cab and hard lines travel through the firewall.


    Also changed the slave cylinder:


    6/23/18: Installed Dirt King LCA's and Dirt Designs LCA mount gussets.


    Installed shorter 7" limit straps since the new arms tabs are located in a different position:


    8/27/18: Lowered the ride height front and rear. Welded up some Dirt King spindle gussets, installed them, and went to get an alignment. I was able to get better alignment #'s this time, which I think is because of the new lower ride height, LCA's, and spindles.


    Last edited: Sep 22, 2018
  9. Aug 26, 2014 at 11:48 PM
    #9
    kh7nm

    kh7nm Stay Boosted

    Joined:
    Nov 1, 2011
    Member:
    #66227
    Messages:
    4,235
    Gender:
    Male
    First Name:
    Miles
    Ewa Beach, Hawaii
    Vehicle:
    2011 MGM DC 4x4 TX PRO Off Road
    What have you done to your truck lately
    Nice build
    :popcorn:
     
  10. Aug 26, 2014 at 11:59 PM
    #10
    deeezy

    deeezy [OP] Well-Known Member

    Joined:
    Sep 1, 2013
    Member:
    #111645
    Messages:
    5,253
    Gender:
    Male
    First Name:
    Dana
    Hawaii
    Vehicle:
    2013 4x4 DC, 6 spd, TRD Sport
    King ext travel coilovers, Icon tubular UCA's Rear-King "Tundra" 2.5's, Allpro Expos, TRD cat-back, Hurst/Core short shift kit, etc...
    Thanks....The next time I update this build will be for my bumpers.
     
  11. Aug 29, 2014 at 2:16 AM
    #11
    squint0241

    squint0241 OVRLND

    Joined:
    Jan 4, 2014
    Member:
    #119916
    Messages:
    6,872
    Gender:
    Male
    First Name:
    Rick
    Tropics
    Vehicle:
    '14 DCSB/Off-Road 4X4
    Bone Stock
    Need the MAG drill!!...lol Get it so I can use it this weekend!...:D
     
  12. Aug 30, 2014 at 8:20 PM
    #12
    Vanguard

    Vanguard No can remember!

    Joined:
    May 31, 2013
    Member:
    #105340
    Messages:
    1,854
    Gender:
    Male
    First Name:
    Brooks
    Kailua, Hawaii
    Vehicle:
    13' TRD Sport 4x4
    Icon Extended C/O's non resi, OME 60091/Dakar Leaf Pack, All Pro U-bolt Flip, Timberens, 17" SR8's, 285/70/17 Duratracs, AFE Stage II Intake, Magnaflow Cat back w/Resonator, BHLM, Grillcraft, 15/5 Tint, All-Pro HD Sliders @10 degr, OEM Roof Racks, TRD Skid Plate, Wet Okole's, Scan guage II, Optima Yellow
    You don't rub your UCA's at all? Maybe the after market UCA's make the difference...?
     
  13. Aug 30, 2014 at 9:15 PM
    #13
    squint0241

    squint0241 OVRLND

    Joined:
    Jan 4, 2014
    Member:
    #119916
    Messages:
    6,872
    Gender:
    Male
    First Name:
    Rick
    Tropics
    Vehicle:
    '14 DCSB/Off-Road 4X4
    Bone Stock
    Dana...should have posted a pic showing the wood block leverage drill press...lol That one is the Caveman version...:D
     
  14. Aug 31, 2014 at 1:31 AM
    #14
    deeezy

    deeezy [OP] Well-Known Member

    Joined:
    Sep 1, 2013
    Member:
    #111645
    Messages:
    5,253
    Gender:
    Male
    First Name:
    Dana
    Hawaii
    Vehicle:
    2013 4x4 DC, 6 spd, TRD Sport
    King ext travel coilovers, Icon tubular UCA's Rear-King "Tundra" 2.5's, Allpro Expos, TRD cat-back, Hurst/Core short shift kit, etc...
    No rubbing on UCA's, fenders, or cab mount, at all.
     
  15. Aug 31, 2014 at 1:33 AM
    #15
    deeezy

    deeezy [OP] Well-Known Member

    Joined:
    Sep 1, 2013
    Member:
    #111645
    Messages:
    5,253
    Gender:
    Male
    First Name:
    Dana
    Hawaii
    Vehicle:
    2013 4x4 DC, 6 spd, TRD Sport
    King ext travel coilovers, Icon tubular UCA's Rear-King "Tundra" 2.5's, Allpro Expos, TRD cat-back, Hurst/Core short shift kit, etc...
    Hey man, you gotta do what you gotta do.;)
     
  16. Sep 1, 2014 at 9:56 AM
    #16
    J1Time

    J1Time That guy...

    Joined:
    Aug 6, 2014
    Member:
    #135531
    Messages:
    268
    Gender:
    Male
    Atlanta
    Vehicle:
    2014 Tacoma TRD Off Road 4x4
    Good looking truck thus far. Jelly.
     
  17. Sep 1, 2014 at 11:19 AM
    #17
    deeezy

    deeezy [OP] Well-Known Member

    Joined:
    Sep 1, 2013
    Member:
    #111645
    Messages:
    5,253
    Gender:
    Male
    First Name:
    Dana
    Hawaii
    Vehicle:
    2013 4x4 DC, 6 spd, TRD Sport
    King ext travel coilovers, Icon tubular UCA's Rear-King "Tundra" 2.5's, Allpro Expos, TRD cat-back, Hurst/Core short shift kit, etc...
    Thanks man.
     
  18. Sep 19, 2014 at 9:39 PM
    #18
    ready6delta

    ready6delta REGULAR GUY

    Joined:
    Mar 16, 2014
    Member:
    #125448
    Messages:
    5,716
    Gender:
    Male
    First Name:
    JACOB
    Finally back in the PNW! Lake Stevens/ Olympia
    Vehicle:
    Black pinstriped 2014 DCSB 4x4 TRD SPORT
    IT NEVER ENDS..........
    Dude sweet build love the color match rim combo and tires looks so mean! Nice cap as well how have you liked it? One of my new favorites on TW!
     
  19. Sep 20, 2014 at 10:52 AM
    #19
    deeezy

    deeezy [OP] Well-Known Member

    Joined:
    Sep 1, 2013
    Member:
    #111645
    Messages:
    5,253
    Gender:
    Male
    First Name:
    Dana
    Hawaii
    Vehicle:
    2013 4x4 DC, 6 spd, TRD Sport
    King ext travel coilovers, Icon tubular UCA's Rear-King "Tundra" 2.5's, Allpro Expos, TRD cat-back, Hurst/Core short shift kit, etc...
    My family really likes the cap. It keeps everything in the bed nice and dry. The only drawback is if you have to haul an oversized load that won't fit under it. That's not a problem for me because I have a smaller Tacoma work/company truck that I can use for that.;)
     
  20. Sep 20, 2014 at 11:41 AM
    #20
    ready6delta

    ready6delta REGULAR GUY

    Joined:
    Mar 16, 2014
    Member:
    #125448
    Messages:
    5,716
    Gender:
    Male
    First Name:
    JACOB
    Finally back in the PNW! Lake Stevens/ Olympia
    Vehicle:
    Black pinstriped 2014 DCSB 4x4 TRD SPORT
    IT NEVER ENDS..........
    Do you recommend a new leaf pack or an aal if adding the cap?
     

Products Discussed in

To Top