1. Welcome to Tacoma World!

    You are currently viewing as a guest! To get full-access, you need to register for a FREE account.

    As a registered member, you’ll be able to:
    • Participate in all Tacoma discussion topics
    • Communicate privately with other Tacoma owners from around the world
    • Post your own photos in our Members Gallery
    • Access all special features of the site

2014 Tacoma Access cab 4 ch amp + Homegrown Stealthbox install

Discussion in 'Audio & Video' started by timothom, Oct 12, 2014.

  1. Oct 12, 2014 at 12:55 PM
    #1
    timothom

    timothom [OP] Well-Known Member

    Joined:
    Aug 24, 2014
    Member:
    #136879
    Messages:
    863
    Gender:
    Male
    Vehicle:
    2014 Tacoma Access cab sr5
    Kenwood DMX7705S PrecisionPower Phantom 900.4 Alpine type-r 8" Image Dyanmics CXS64.2
    So far I really dig my new Tacoma. Everything except the stereo. I made it about 1500 miles before I decided something had to be done. Taking out the stock speakers (per the ********* youtube videos) gave a good chuckle in my driveway. The stock speakers have plastic nylon frames and tiny little magnet. I threw them in the trash. After all, this is the endgame:

    [​IMG]


    Stage 1 was putting a set of these JL audio TRs and a Clarion VX-404 deck in:
    http://www.crutchfield.com/p_020VX404/Clarion-VX404.html

    http://www.crutchfield.com/p_136TR650CS/JL-Audio-TR650-CSi.html

    This made a huge improvement, but I had to have some bass. So stage 2 was adding an amp and a sub. I think the JL audio stealth box is pretty dang cool, but it has two things going against it. Price and it's 2 ohm. I want to get a 4 channel amp and bridge channels 3 and 4 into 4 ohms. Not going to happen with a stealth box, they want you to use a mono amp.

    So I decided to make a stealthbox. I basically followed the directions in the JL manual. I couldn't cut out the storage bin in the center console, I had to have the local car audio dealer do it. They did a great job, far better than I could have done.

    For a sub, I am going with a single 8". There are two realistic choices I found. An Alpine Type-R SWR-8D2 or a JL audio 8W3v3-4. Both of them recommend having .3 cubic feet net volume in a sealed box, which is about what I will have with no polyfill. Since the Alpine handles more RMS, is about 1/2" smaller on bolt-to-bolt reach, I went with the Type R. I really really wanted to go with that JL, but I thought it would be harder to make it fit in the box.

    http://www.crutchfield.com/p_500SWR8D2/Alpine-SWR-8D2.html?tp=111

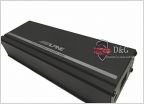
    And after lots of checking around, I went with an Alpine PRD-f50 amp:

    http://www.crutchfield.com/p_500PDRF50/Alpine-PDR-F50.html

    As far as this amp goes, I have no measuring stick. It seems to be very loud and clear. I have it running in 3-channel mode, with the rear 2 channels bridged to the Type-R 8" sub. I also have the 'boost' set at +6db. Hats off to Alpine for this fine product. After a 4-hour loud listening session, the amp is hot, but you can still hold your hand on it no problem.

    The test sheet on the amp says it is rated to make 125W into 2 ohms stereo. The actual is 182W RMS. That's a ratio of 1.456. Does that mean that I'm getting 123W RMS into 4 ohms stereo (rated for 85W) and that I'm getting 364W bridged into 4 ohms? (stock rating is 250W bridged)? I have no idea. I also have no idea what to set my gains to and my crossovers. The gains are at about half, I hear no distortion. The Clarion has 2V pre-amp outs. Pics of my crossover settings will follow in the next post.


    As I go over what I have spent on this so far, I am still below $1000. I think I'm somewhere in the $900s (bought all this stuff on Amazon from Vendors) after all parts, shipping.

    Full item list:
    • 12 gauge and 14 gauge OFC speaker wire, 50' was enough with some extra (EDIT: Don't go 12 gauge, it is too big. Go 14 or 16, and get some decent car-audio stuff that will bend and be flexy in the cold. 12 gauge is fail, even for 300 watts rms, 16 gauage wire would be just fine)
    • Amp terminal cup from Parts Express with a gasket on the inside
    • Fosgate twisted-pair RCA cables 12'
    • Earthquake 4 gauge amp install kit with a 18' RCA
    • 4-gauge ground terminal with 3 self-tapping screws (I think it was Metra)
    • ANL 60 amp and 100 amp fuses
    • Metra 40-LX11 antenna adapter
    • Metra 95-8235CHG Charcoal high gloss. Great match for a 2014 Tacoma SR5
    • Metra 70-1761 wiring harness, solder, shrinkwarp, electrical tape
    • Clarion VX404 and a microbyass
    • Made my own backup camera and turn on wire with radio shack parts, don't have it hooked up yet not sure which wires to use in the harness
    • HDMI cable and MHL adapter
    • Metra Axxess ASWC-1 steering wheel control
    • Metra Axxess AX-TOY28SWC wireing harness
    • Metra AX-TOYUSB-2 Toyota USB adapter
    • Alpine Type-R SWR-8D2 wired in series for 4 ohm.
    • Alpine KTE-8G grill
    • Alpine PDR-F50 class d 4ch 85watts per channel
    • JL audio TR650-CSi 6-1/2" and some crappy brackets from the internet
    • 1 sheet of 3/4 MDF from Home Depot
    • 1 package black speaker box carpet Polymat 3ftx54" (enough to do 2 boxes)
    • Contact cement
    • Misc hardware: Plummer's tape, metric bolts, glue for the box, wood screws, self-tapping screws


    This was my first car install in about 20 years, man things have changed. Lots more harnesses, less room.

    My favorite thing so far is the amp. These new class-d amps are amazing and small. My second favorite thing is the JL audio TRs. I can't believe how good a $110 set of speakers sounds these days. On new CDs I can drown these out with the sub, but not by much. I am very happy with this setup right now.

    Stage 3 of the install won't happen until next Spring. I will be doing the RAAM mat on the front doors and installing some Hybrid Audio Unity components.

    Pictures to follow in the next post. I'll also post some info about the Stealthbox build.

    I have no idea if I have a lot of bass or not. I have nothing to benchmark this build against. I'll tell you I don't have so much bass that the back of my pickup shakes. But I do know that I have never heard definition in individual bass notes like I do with the Alpine sub. Maybe it's because it's 8" and it functions more like a mid-bass? It sounds pretty amazing and has more than enough boom when I rock some House music or The Chemical Brothers. And I LOVE the way it sounds when I play rock music. Old or new, I can hear definition I've not heard before in bass notes and drums.
     
    Last edited: Jan 28, 2016
  2. Oct 12, 2014 at 1:37 PM
    #2
    timothom

    timothom [OP] Well-Known Member

    Joined:
    Aug 24, 2014
    Member:
    #136879
    Messages:
    863
    Gender:
    Male
    Vehicle:
    2014 Tacoma Access cab sr5
    Kenwood DMX7705S PrecisionPower Phantom 900.4 Alpine type-r 8" Image Dyanmics CXS64.2
    Here's some additional pics to document my install.

    First of all, here's what the head unit looks like with the Metra Dark Charcoal. This is pretty much a spot-on match for the color of the stock bezel that I took out.


    20141012_112901.jpg


    Next, some pics of the amp. I put 1" hardwood spacers under the 4 corners to allow for better cooling. At first I wanted to have the amp with the controls facing backwards so I could get at them with the seat moved all the way forward. However with this amp, that means pointing the wires toward the back and somebody could potentially kick it with they put their feet under the seat. So I had to mount the amp with the wires facing the front of the vehicle. Also, with the spacers under it, theres a bar under the passenger seat that won't allow the seat to clear the amp when moved back. It just barely hits with the spacers under the amp. Good thing I test-fit before I did any wire pulling.

    I ended up mounting the amp under the driver's seat. The seat must be unbolted at tipped backward to allow adjustments to the amp. Also, there is a lot of extra speaker wire and an extra wire pulled for both sides. This is for the eventual upgrade to the Hybrid Audio Unity (or Clarus...hehe) speakers. Crossovers will go under the seat close to the amp. Wire pair with red zip-ties is right, pair with white is left. Clear wires are 12 gauge monopiece, home audio speaker wire, connected to the drivers. The JL audio TRs don't have a crossover, they have a wire with a cap going to the tweeter. Good enough for now. Second wire is a 14 gauge Sky-high car audio cable. Both are pulled thru the door jam harness and in front doors.


    Ground wire goes towards the drivers side door and is about 4" away from the speaker wires in the door sill.


    20141012_110910.jpg

    20141012_110926.jpg

    20141012_110946.jpg

    Next, the speaker box. This took a lot of time to make, I estimate about 20 hours or so, and that's because I had my friend who is a carpenter do the wood working and gluing.

    The first step was taking out the console, cutting out the plastic storage bin, and removing the metal bracket bolted to the floor (save the bolts). I had to have my local car-audio dealer do the cutting of this console. I made 2" and 2.5" blocks, marked all the cuts with liquid paper, and took it down there. They did a fine job.

    After that, I made a cardboard mock-up with all the Amazon boxes I had laying around from getting this gear shipped to me. I used duct tape and did plenty of test fitting to get it right. This gave me the biggest ouside dimensions I could go. I have those measurements on a sheet of paper I lost. When I find it, I will post the external box measurements, as I'm sure there are some other people on this forum that might want to try this :).

    For the fabrication, we used 3/4 MDF, pin nails, and wood glue. The front plate is a bit bigger than the sides of the box, about 1.5" bigger. We had to do a lot of sanding/hacking to get the Alpine sub to fit in the hole. There are 5 big spokes cast into its frame and they go back quite a ways. On the sides I had to shave down a lot to get it to fit in the box. I will post box measurements and cubic feet calculations in the next post.

    All and all I'd have to say it looks and performs great. I bolted the sub box into the frame on 4 corners with plummer's tape and bolts. The Tacoma already had 4 pre-tapped holes. The ones in the back I re-used the metal mounting bracket screws, and in the front, I bought my own bolts and used some unused holes under the drink holder. I think these were holes for the 450 watt 110AC converter, which my pickup does not have. I have a bass box instead :)

    The box is wedge shaped to clear the e-brake cables and follow the contour of the transmission channel between the seats. Here's a pic of the box before I clamped it:

    20140928_182357.jpg

    Here's a pic as we were test-fitting the sides. I cut the top, bottom, and speaker plate (back of the box) to the full sizes, and I subtracted all the 3/4s off the sides:

    20140928_182407.jpg


    Had to turn the sub a bit to get those damn frame castings to fit in the box. Note the R-mark I used as a reference. I had to take off wood with a saw-zall for about a hour to get it to fit. I estimate there's still just a bit under 1/2 of wood left under the thinnest part. Hind-site is 20/20, but maybe using 1/2" MDF might have been better.

    20140928_182416.jpg


    Some pics of the finished install. I did get some glue marks/stains on the visible carpet by the speaker. And I have some wood showing on the top of the speaker plate. But still..it cost me about $120 dollars to make with the sub. The JL stealthbox is $650. I'd like to claim a win here, but I'd have to hear a stealthbox before I could. Maybe my bass sucks and I just don't know it :)

    20141012_110241.jpg

    20141012_110308.jpg

    Here is a pic of the inside of the center console. The box is sloped down about 1/4" at the back of the console by the drink holders. I didn't cut the bottom of the drink holders off, I made the box so it would just clear it.

    I plan to seal up a few channels and holes in the center console soon, but it is not as bad as I thought it would. Even pens don't fall down the sides. The console is almost 3" deep, and still plenty usable. It does vibrate a lot when I have the tunes kicked up...but that is the whole point.

    20141012_110406.jpg

    20141012_110446.jpg

    Finally, here's a pic of the system with the seat tilted so I can make amp adjustments. This isn't as much of a pain as I thought it would be. Eventually when I have the car audio dealer who does the HATs set the crossovers and gains, I'll be able to re-hook that plastic anchor that carries the seat wireing harness and never have to tilt it again.

    20141012_111226.jpg

    20141012_110936.jpg
     
    Last edited: Oct 12, 2014
  3. Oct 12, 2014 at 1:44 PM
    #3
    Ihatetacomas

    Ihatetacomas Because tacomas hate me

    Joined:
    Aug 18, 2014
    Member:
    #136475
    Messages:
    988
    Gender:
    Male
    First Name:
    Dylan
    Elko NV
    Vehicle:
    '12 White LB TRD Sport
    Used @ 23,283 Volant Intake (w/ scoop)(removed August 2016), BAKFlip G2 Tonneau Cover, (drain tube mod), Pop & Lock Tailgate Lock, Stampede Vigilante Premium VP Series Hood Protector, 5lb Extinguisher, Shovel & Axe mounted in bed, Shok Industries Sound Deadener, Mercury: (K62, MGR-1200, MGR-495) Triton 8" Subs, Custom-Made: Sub Box, Speaker Templates, Vapor Barrier, All-Pro Bumper w/Kickouts, hidden trailer hitch, wooden cup-holder Misc: Knukonceptz RCA, speaker, and power wires, Big 3 Upgrade, a very full Husky technician tool box
    awesome set up!
     
  4. Oct 12, 2014 at 1:45 PM
    #4
    manethon

    manethon TTAS

    Joined:
    Oct 9, 2013
    Member:
    #114161
    Messages:
    3,579
    Gender:
    Male
    First Name:
    Steven
    Unknow
    Many
    nice setup and good thinking outside the box.
    Im actually creating a custom console kinda like what you did but its to hold my amps :)_
    The steal box won't sound any better
     
    timothom[OP] likes this.
  5. Oct 12, 2014 at 1:53 PM
    #5
    timothom

    timothom [OP] Well-Known Member

    Joined:
    Aug 24, 2014
    Member:
    #136879
    Messages:
    863
    Gender:
    Male
    Vehicle:
    2014 Tacoma Access cab sr5
    Kenwood DMX7705S PrecisionPower Phantom 900.4 Alpine type-r 8" Image Dyanmics CXS64.2
    Thanks guys. The biggest goal I had in mind when doing this was to not loose any more cab room in an already small cab. Also, I wanted to keep it looking as stock as possible.

    <><><><><><><><><><><><><><><><><><>
    2014 Tacoma SR5
    4.0L V6, 6-speed manual, 4wd
    Alpine PDR-f50
    Alpine Type-R 8"
    JL Audio TR650-i
    Clarion VX-404
     
    Last edited: Oct 19, 2014
  6. Oct 18, 2014 at 11:49 AM
    #6
    THE CALICO

    THE CALICO Well-Known Member

    Joined:
    Apr 1, 2014
    Member:
    #126772
    Messages:
    1,298
    Gender:
    Male
    First Name:
    Colton
    Nashville
    Vehicle:
    Black 2014 TRD SPORT ACCESS CAB
    Nice man. I thought about going that route but didn't want to lose the console space. I ended up having this built to match the interior colors, and added rear door speakers. Those speakers alone made a whole world of difference plus it was pretty simple because there was already brackets back there.

    6d5a08d7966b6020f3ab7f4f70680934_zpsd945_6cc76ba1acb3372d66870d814d611d3422deb851.jpg
     
  7. Oct 18, 2014 at 7:12 PM
    #7
    timothom

    timothom [OP] Well-Known Member

    Joined:
    Aug 24, 2014
    Member:
    #136879
    Messages:
    863
    Gender:
    Male
    Vehicle:
    2014 Tacoma Access cab sr5
    Kenwood DMX7705S PrecisionPower Phantom 900.4 Alpine type-r 8" Image Dyanmics CXS64.2
    Found my sheet I made with my measurements to build the box.

    All the measurements in this graphic are exterior dimensions. You have to subtract off 3/4" of an inch from some pieces to account for the size of the MDF walls. I subtracted it off all measurements for the sides, and I think I did from the top and bottom of the front piece. The Top, bottom, and back pieces are full size. The back piece (the part with the speaker hole cutout in it), has to be full size and glued onto the end of the top,bottom so you can make the sides about 1.5" longer than the main width of the box. The speaker needs the extra wood to make a good seal. For my speaker, an Alpine type-r 8", the cutout diameter was 6 15/16". But the full exterior diameter of the screw holes is 7 5/8". That's about a half inch wider than center console is. No problem as this back piece sticks out of the end of the center console.

    Basically in the center console, you have about 7.25 inches of usable width, and 14.5" of depth. My pickup has a manual shifter, but I think these measurements will be about the same for the automatic based on some 2015s I was looking at today at the dealership today.

    The little red circles in the picture are the speaker cutout and a cutout for the terminal cup. The speaker was 6 15/16", the terminal cup was either 2.75 or 3, I forget which one. Terminal cup was easy to cut with a hole saw. The speaker cutout was harder.

    One more thing, you'll have to bevel cut the bottom and front pieces to make the wedge shaped bottom properly seal.

    boxDimensions.jpg


    The manual for the subwoofer indicates that the ideal sealed box volume is .3 cubic feet. So let's figure out the volume of the interior of this box. Since its wedge-shaped, we'll figure out the volume of the rectangle and then subtract off the triangle that makes the bottom of the box.

    Exterior dimensions are 14.5" long, 8.75" high, and 7.25" wide. For interior dimensions, subtract 1.5" from each measurement, because we have 6 walls of 3/4" MDF that make up this box.

    Volume of a box is Length * Width * Height

    13" long * 5.75" wide * 7.25" high = 542 cubic inches.

    But the box is 2" shorter on the front than the back. So we have to subtract off a triangle that is 2" base and 14.5" high:

    triangle.jpg

    Area of a triangle is 1/2 * base * height.

    14.5" * 2" * .5 = 14.5 cubic inches.

    Now since it's a triangle shaped box, multiple the 'depth' of the box times the area of the triangle. Depth is the width, 5.75"

    14.5" * 5.75" = 83.4 cubic inches

    So, the final volume is 542 - 14.5 = 458.6 cubic inches. That converts to 0.265 cubic feet. That's a decent sized box, but I should put some fill in it to make it 'bigger'. I probably should have went with 1/2" MDF too, the 3/4" seems like it is overkill on this kind of a box. I'll have 300 watts RMS going to it out of my amp, so I would think 1/2" MDF would handle that, right?

    The JL audio W3 8" sub also has an ideal sealed box volume of .3 cubic feet.

    <><><><><><><><><><><><><><><><><><>
    2014 Tacoma SR5
    4.0L V6, 6-speed manual, 4wd
    Alpine PDR-f50
    Alpine Type-R 8"
    JL Audio TR650-i
    Clarion VX-404
     
    Last edited: Oct 19, 2014
  8. Oct 18, 2014 at 7:25 PM
    #8
    timothom

    timothom [OP] Well-Known Member

    Joined:
    Aug 24, 2014
    Member:
    #136879
    Messages:
    863
    Gender:
    Male
    Vehicle:
    2014 Tacoma Access cab sr5
    Kenwood DMX7705S PrecisionPower Phantom 900.4 Alpine type-r 8" Image Dyanmics CXS64.2
    After the glue holding the box together was dry, I glued on the carpet with contact cement. After that dried, I mounted the box in my pickup.

    This was the easiest step of the whole process. I just cut 4 peices of plumbers tape, bolted them to existing pre-tapped bolt holes that were hidden under the center console. I think these holes are there to hold the optional DC to AC inverter.

    The main thing to remeber is to use a wood shim on the front of the box. I think I ended up about a 1/2" thick. You will only know how thick you need after you test fit the box and console over the top of it a few time. Screw the shim it to the bottom front before you mount the box. This shim is there to 'float' the box above the parking brake cables and keep them from getting messed up. Also, it makes things easier for the RCAs and turn on wire that is running to the amp. I didn't put any shims on the back of the box, that is sitting on top of the carpet. I didn't have to cut any carpet out.

    Anchoring the box at all 4 corners with plummer's tape is essential for good bass and no rattles. My coffee thermos and loose change in the cup holders of the center console do rattle around quite a bit when I have this sub cranked up. As does loose things in the door pockets. But I think that's just how it is having a sub in your car, right? :)

    The center console fits over the box like a glove. It doesn't vibrate or make flappy plastic sounds. I'm a believer in carpeting the whole box, it really does help with that sort of thing even though you can't see most of the carpet when it is installed.

    The whole system sounds so good, and I am really happy with how well it turned out. Now next spring when I get my Hybrid Audio speakers for the doors...I will truely have reached the next level for maximum win.

    <><><><><><><><><><><><><><><><><><>
    2014 Tacoma SR5
    4.0L V6, 6-speed manual, 4wd
    Alpine PDR-f50
    Alpine Type-R 8"
    JL Audio TR650-i
    Clarion VX-404
     
    Last edited: Oct 19, 2014
  9. Oct 18, 2014 at 7:36 PM
    #9
    timothom

    timothom [OP] Well-Known Member

    Joined:
    Aug 24, 2014
    Member:
    #136879
    Messages:
    863
    Gender:
    Male
    Vehicle:
    2014 Tacoma Access cab sr5
    Kenwood DMX7705S PrecisionPower Phantom 900.4 Alpine type-r 8" Image Dyanmics CXS64.2
    That is a damn-fine looking job those guys did. For a 10" sub you have way more volume than I do

    <><><><><><><><><><><><><><><><><><>
    2014 Tacoma SR5
    4.0L V6, 6-speed manual, 4wd
    Alpine PDR-f50
    Alpine Type-R 8"
    JL Audio TR650-i
    Clarion VX-404
     
    Last edited: Oct 18, 2014
  10. Oct 25, 2014 at 1:34 PM
    #10
    timothom

    timothom [OP] Well-Known Member

    Joined:
    Aug 24, 2014
    Member:
    #136879
    Messages:
    863
    Gender:
    Male
    Vehicle:
    2014 Tacoma Access cab sr5
    Kenwood DMX7705S PrecisionPower Phantom 900.4 Alpine type-r 8" Image Dyanmics CXS64.2
  11. Apr 8, 2015 at 6:58 PM
    #11
    Taco Suave

    Taco Suave Taco Fever

    Joined:
    Aug 14, 2014
    Member:
    #136131
    Messages:
    708
    Gender:
    Male
    First Name:
    Griffin
    Oxnard
    Vehicle:
    2012 TRD Off Road
    Go fast stuff
    Nice Build! Considering Stealth box but after seeing this (and the price) I might try to do something similar.
     
  12. Apr 8, 2015 at 7:02 PM
    #12
    Taco Suave

    Taco Suave Taco Fever

    Joined:
    Aug 14, 2014
    Member:
    #136131
    Messages:
    708
    Gender:
    Male
    First Name:
    Griffin
    Oxnard
    Vehicle:
    2012 TRD Off Road
    Go fast stuff
    So for the stealth box what is bad about having a 2 ohm sub? I don't know a whole lot about speakers and electronics so please forgive me if that was a dumb question haha.
     
  13. Apr 13, 2015 at 6:49 PM
    #13
    timothom

    timothom [OP] Well-Known Member

    Joined:
    Aug 24, 2014
    Member:
    #136879
    Messages:
    863
    Gender:
    Male
    Vehicle:
    2014 Tacoma Access cab sr5
    Kenwood DMX7705S PrecisionPower Phantom 900.4 Alpine type-r 8" Image Dyanmics CXS64.2
    Well, when I got into car audio back in the 90s, I always heard that 4 ohm speakers 'sound' the best for mobile audio speakers. The ohm rating is kind of like a light bulb rating, but in reverse. A 50 watt light bulb is half as bright as a 100 watt light bulb... So 2 ohm speakers are twice as loud as 4 ohm speakers because they have less resistance and the amp pumps more current into the circuit. But with most (probably all) amps, sound quality suffers with a 2 ohm load vs 4 ohm load.

    This is not as much of a problem for subs. You can't hear as much detraction when you go lower in ohms vs mid and high range speakers. So in setups where people run a dedicated subwoofer amp, you'll see them run mono into a 2, 1 or even half ohm load. This will get some MAJOR watts out of your amp.

    So to actually answer your question, I wanted to run my system with just one 4 channel amp. Most 4 channel amps in the consumer price range will only bridge into a 4 ohm load. I wanted to bridge channels 3 and 4 of my amp, so I got a sub that had 2x 2 ohm voice coils and wired them in a series. This gives a 4 ohm load.

    It sounds really great too. I'd recommend you do you own box out of 1/2" MDF. All you need is some glue, clamps, a mider box to make the angle cuts, a pin nailer to help it hang together before you clamp it. You might want to do a mock-up out of cardboard and duct tape first to be sure it fits right.
     
  14. Apr 13, 2015 at 8:46 PM
    #14
    Taco Suave

    Taco Suave Taco Fever

    Joined:
    Aug 14, 2014
    Member:
    #136131
    Messages:
    708
    Gender:
    Male
    First Name:
    Griffin
    Oxnard
    Vehicle:
    2012 TRD Off Road
    Go fast stuff
    Awesome, Thanks for the info!
     
  15. Nov 5, 2015 at 6:17 AM
    #15
    timothom

    timothom [OP] Well-Known Member

    Joined:
    Aug 24, 2014
    Member:
    #136879
    Messages:
    863
    Gender:
    Male
    Vehicle:
    2014 Tacoma Access cab sr5
    Kenwood DMX7705S PrecisionPower Phantom 900.4 Alpine type-r 8" Image Dyanmics CXS64.2
    Just wanted to update for safety. The Alpine PDR-F50 (long with two other amps, the PDR-M65 and the PDR-V75) has been recalled due to safety issues. Apparently you can get them to start on fire if you push them really hard. Now I have pushed mine really hard for hours with one side bridged and I don't feel I've came close to setting it on fire. I did get hot, but not exceptionally hot. I've seen amps start on fire before and they tend to let you know before it happens with smells and clipping.

    Anyway, I'm still on the fence if I'll send my amp in or not. Alpine says you have to take it to a local dealer, and the local dealers say to send it into Alpine. Hardly any place has any of these amps in stock right now, probably due to the recall.

    Any advice if I should do this or not? I think my amp is just fine. I also have my power cable fused with a 60 amp fuse. I doubt I have much of a fire hazard.

    https://supportalpineusa.custhelp.com/app/answers/detail/a_id/71/kw/Recall

    http://www.forums.bestbuy.com/t5/Ca...DR-F50-amp-recall-what-to-do-next/td-p/931158
     
  16. Nov 5, 2015 at 9:21 AM
    #16
    Ihatetacomas

    Ihatetacomas Because tacomas hate me

    Joined:
    Aug 18, 2014
    Member:
    #136475
    Messages:
    988
    Gender:
    Male
    First Name:
    Dylan
    Elko NV
    Vehicle:
    '12 White LB TRD Sport
    Used @ 23,283 Volant Intake (w/ scoop)(removed August 2016), BAKFlip G2 Tonneau Cover, (drain tube mod), Pop & Lock Tailgate Lock, Stampede Vigilante Premium VP Series Hood Protector, 5lb Extinguisher, Shovel & Axe mounted in bed, Shok Industries Sound Deadener, Mercury: (K62, MGR-1200, MGR-495) Triton 8" Subs, Custom-Made: Sub Box, Speaker Templates, Vapor Barrier, All-Pro Bumper w/Kickouts, hidden trailer hitch, wooden cup-holder Misc: Knukonceptz RCA, speaker, and power wires, Big 3 Upgrade, a very full Husky technician tool box
    I would side on safety for this one, whenever you can get it fixed I would if not for the safety of your equipment and truck but for the safety of yourself. :) If your amp isn't getting too hot from what you've put it through I wouldn't say it's #1 top priority to do but it's better to be safe than sorry. @timothom
     
  17. Nov 20, 2015 at 10:11 AM
    #17
    _gray_knight_

    _gray_knight_ Well-Known Member

    Joined:
    Aug 10, 2010
    Member:
    #41508
    Messages:
    1,702
    Gender:
    Male
    SoCal
    Vehicle:
    '18 Mall Crawler
    Just washed
    I would suggest you do it and get it swapped out. Updated my sounds earlier this year in March (stealth box with PDR-V75 and a few other goodies). I too thought it was normal, didn't pay too much attention to all the heat figuring it's due to the lack of ventilation from the mounting location and what not. Though I didn't run things hard, it was HOT! After getting my replacement the heat from the amp isn't "normal". The replacement doesn't produce the amount of heat that the old one did. With that being said, im glad i got mine swapped and very lucky it didnt get worse and it actually catching on fire. Can't imagine fire in the cabin while in the middle of the road you know...and i noticed is mounted yours right under your seat. I too was like it's fine, but now after getting my new one...I say it's not fine...get it swapped. Was soundless for 10 days but glad I did it.

     
    Last edited: Nov 20, 2015
  18. Jan 23, 2016 at 9:11 AM
    #18
    timothom

    timothom [OP] Well-Known Member

    Joined:
    Aug 24, 2014
    Member:
    #136879
    Messages:
    863
    Gender:
    Male
    Vehicle:
    2014 Tacoma Access cab sr5
    Kenwood DMX7705S PrecisionPower Phantom 900.4 Alpine type-r 8" Image Dyanmics CXS64.2
    Had the amp swapped out yesterday at my local Alpine dealer. The one thing that held us up was the dealer was talking directly with Alpine. They were supposed to go thru their rep. So if your having to go thru this too, make sure your dealer works with their Alpine rep to get a replacement amp.

    New amp birth sheet is 162 watts. Old one was 182 :\. But oh well, this new one still seems as loud and won't start on fire, so it's a win for me I guess. Damn fine amplifier, the Alpine PDR-f50
     

Products Discussed in

To Top