1. Welcome to Tacoma World!

    You are currently viewing as a guest! To get full-access, you need to register for a FREE account.

    As a registered member, you’ll be able to:
    • Participate in all Tacoma discussion topics
    • Communicate privately with other Tacoma owners from around the world
    • Post your own photos in our Members Gallery
    • Access all special features of the site

Map/Dome Light Help

Discussion in '2nd Gen. Tacomas (2005-2015)' started by RedSox10NG, Sep 28, 2009.

  1. Sep 28, 2009 at 5:57 PM
    #1
    RedSox10NG

    RedSox10NG [OP] Active Member

    Joined:
    Sep 4, 2009
    Member:
    #22264
    Messages:
    42
    Gender:
    Male
    First Name:
    Nick
    Orlando, FL
    Vehicle:
    '13 PreRunner SR5 Spruce Mica
    Hey guys, found this on TN

    "I did some testing on the map lights and noticed that they each have a dual position, Single Throw switch. This means that when the map light is switched on, it is disconnected from the dome light circuit.[​IMG] There is no requirement for a diode, transistor, or anything other than a piece of wire and a #6 screw and nut.

    I ran a wire from the silver side of the dome light (gets ground whenever dome light is ON) to the empty spot on the map light connector. I did swap the two wires so that pos is in the middle and ground is on the right. Switched ground from the map light is on the left.

    Total cost: about .50 of wire and hardware I already had lying around. No soldering required."

    This method is a little more appealing to me since I don't have any experience soldering, nor do I even have a kit to do so. Anybody see any problems I may encounter using this method? Just put new LED's into the lights, and the Dome Light itself isn't exactly as bright as I had hoped. But with all 3 it will be more than sufficient.


    As always, thanks for your help!

    EDIT: This is in a 2007 PreRunner Access Cab, if that means anything :D
     
  2. Sep 28, 2009 at 6:12 PM
    #2
    skistoy

    skistoy Make mine a Double!

    Joined:
    Jul 6, 2009
    Member:
    #19356
    Messages:
    2,004
    Gender:
    Male
    First Name:
    Mike
    Western New York
    Vehicle:
    09 4X4 SR5 BSP Double Taco
    Rear Spring TSB,Billy 5100@.85,Bull bar,Nerfbar,Painted Grill,Painted Rims,Bed D-rings,Compustar Starter,Goodyear Duratrac's,Transmission TSB,Brake Overide
    Any photos?
     
  3. Sep 28, 2009 at 8:40 PM
    #3
    RedSox10NG

    RedSox10NG [OP] Active Member

    Joined:
    Sep 4, 2009
    Member:
    #22264
    Messages:
    42
    Gender:
    Male
    First Name:
    Nick
    Orlando, FL
    Vehicle:
    '13 PreRunner SR5 Spruce Mica
    Quote:
    Originally Posted by Herculean [​IMG]
    So if I understand all of this properly, it seems like the best/easiest/pro way to do this mod would be:
    1. Swap the two existing wire positions on the map light connector.
    2. Get another metal insert for the dome light connector and crimp it on a wire to run to the dome light. Insert into unused maplight position and reinstall connector.
    3. Crimp a circular connector on the other end of the wire and attach it with a screw/nut (as PB did) to the silver side of the dome light.
    The only real difference from futile's method is no soldering or bending of pins required. Any dissent?


    That is correct Herculean, I opted not to buy the crimp connector for the map lights, I'm sure it is like $5 at dealer. I just used friction between the white plastic connector and the pin to place the wire between.
    On the dome light, I made the hole slightly bigger and threaded a screw through it. Attached a nut at the top near the head to bring it flush so that I could attach a wire. I also crimped in a blue disconnect that I had lying around so that the dome light could be removed easily without tools.
    Got a camera now, so I went down and took it apart to get some pics for you all:

    [​IMG]
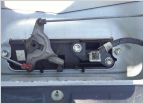
    backside of Map lights, with red wire feed from Dome light. Even though wire is red, it actually closes the ground side of the circuit.


    [​IMG]
    Back of dome light, with screw, nut, wire, and disconnect. If you use disconnect, always have female end on side thats live when disconnected, to prevent shorts

    [​IMG]

    [​IMG]

    Fuzzy Picture of screw thread coming through grommet in socket

    [​IMG] [​IMG]
    Again, taken from TN. Looking to do this mod tomorrow morning, so any help "asap" would be GREAT! Thanks again, guys!
     
  4. Sep 28, 2009 at 10:06 PM
    #4
    RedSox10NG

    RedSox10NG [OP] Active Member

    Joined:
    Sep 4, 2009
    Member:
    #22264
    Messages:
    42
    Gender:
    Male
    First Name:
    Nick
    Orlando, FL
    Vehicle:
    '13 PreRunner SR5 Spruce Mica
    Selfishly bumping :eek:

    Thanks!
     
  5. Sep 29, 2009 at 6:38 AM
    #5
    RedSox10NG

    RedSox10NG [OP] Active Member

    Joined:
    Sep 4, 2009
    Member:
    #22264
    Messages:
    42
    Gender:
    Male
    First Name:
    Nick
    Orlando, FL
    Vehicle:
    '13 PreRunner SR5 Spruce Mica
    Bump.

    Thanks!
     
  6. Sep 29, 2009 at 3:40 PM
    #6
    RedSox10NG

    RedSox10NG [OP] Active Member

    Joined:
    Sep 4, 2009
    Member:
    #22264
    Messages:
    42
    Gender:
    Male
    First Name:
    Nick
    Orlando, FL
    Vehicle:
    '13 PreRunner SR5 Spruce Mica
    Bump. I'm looking to confirm if this should work or not. Thanks!
     

Products Discussed in

To Top