

-
Welcome to Tacoma World!
You are currently viewing as a guest! To get full-access, you need to register for a FREE account.
As a registered member, you’ll be able to:- Participate in all Tacoma discussion topics
- Communicate privately with other Tacoma owners from around the world
- Post your own photos in our Members Gallery
- Access all special features of the site
 Time chain cover stud doesn't hold threads (socket stripped)
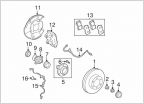 Dust Seal replacement and O-ring placement?
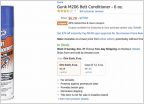 Serpentine belt ? Do you treat it ?
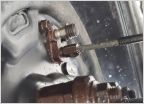 Wheel Cylinder
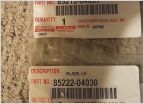 OEM Wiper Arm
 2nd Gen DBL Cab Speaker System Recommendations.
Power sliding window..again
Discussion in '2nd Gen. Tacomas (2005-2015)' started by scratch, Dec 26, 2014.
Page 6 of 11
Page 6 of 11
