1. Welcome to Tacoma World!

    You are currently viewing as a guest! To get full-access, you need to register for a FREE account.

    As a registered member, you’ll be able to:
    • Participate in all Tacoma discussion topics
    • Communicate privately with other Tacoma owners from around the world
    • Post your own photos in our Members Gallery
    • Access all special features of the site

Lucky 07 PreRunner to 4x4 Conversion

Discussion in '2nd Gen. Tacomas (2005-2015)' started by lucky, Jan 16, 2014.

  1. Jan 27, 2015 at 5:52 AM
    #161
    lucky

    lucky [OP] Well-Known Member

    Joined:
    Jun 21, 2008
    Member:
    #7468
    Messages:
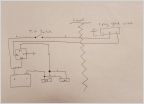
    488
    Gender:
    Male
    NB, TX
    Vehicle:
    07 PreRunnerX4
    NB = New Braunfels. Between Austin and San Antonio.

     
  2. Jan 27, 2015 at 6:14 PM
    #162
    lucky

    lucky [OP] Well-Known Member

    Joined:
    Jun 21, 2008
    Member:
    #7468
    Messages:
    488
    Gender:
    Male
    NB, TX
    Vehicle:
    07 PreRunnerX4
    Torqued the tc to flywheel, starter back on, pan bolts torqued. Front driveshaft cleaned up and installed. Built the crossmember. It isnt completely done - need to add the center section, but I'll tack that in before lunch tomorrow. My welds look like drunk dirt-dobbers. I'll grind them down and make sure fusion is good, then lay down some pretty beads. I'm getting close to the end.

    [​IMG]
     
    not_nick likes this.
  3. Jan 28, 2015 at 6:34 AM
    #163
    Timbo's Customs

    Timbo's Customs Well-Known Member

    Joined:
    Aug 8, 2013
    Member:
    #110078
    Messages:
    7,265
    Gender:
    Male
    First Name:
    Timothy
    Lakeland FL
    Vehicle:
    2019 f250 6”lift 37s deleted 1997 T4r, tons and 4ds
    1997 t4r has super duty axles, 5.13s locked front and rear. 3 link front with 14" kings. Rear 63s.
    Thanks makes sense now you say it. Throw it in 1st and manually shift it up
     
  4. Jan 28, 2015 at 5:42 PM
    #164
    lucky

    lucky [OP] Well-Known Member

    Joined:
    Jun 21, 2008
    Member:
    #7468
    Messages:
    488
    Gender:
    Male
    NB, TX
    Vehicle:
    07 PreRunnerX4
    Almost done. I need 4 more driveshaft nuts for the front shaft. And I totally forgot about modifying or replacing the exhaust crossover pipe. Other than that I need to top off fluids and bleed the brakes

    [​IMG]

    [​IMG]


    I ended up using a d-cab 4x4 rear driveshaft. I used some angle iron to make the relocate bracket that not only allows the carrier bearing to move back a couple inches, it also facilitates a slight drop. I only had mild vibration before the swap - we'll see how this goes.

    [​IMG]
     
    not_nick likes this.
  5. Jan 30, 2015 at 5:49 AM
    #165
    lucky

    lucky [OP] Well-Known Member

    Joined:
    Jun 21, 2008
    Member:
    #7468
    Messages:
    488
    Gender:
    Male
    NB, TX
    Vehicle:
    07 PreRunnerX4
    Finally!! The truck will drive today. One of the last pieces to this project, Exhaust... Getting a piece made this morning that routes around the back of xfer case instead of the stock design that goes under it. Here's the exhaust mounted with the crossover cut out.

    [​IMG]

    [​IMG]


    View of the twin stick FJ case shift cables. I still have to fab the mount that will secure the cables and shifters on the inside.

    In cab
    [​IMG]

    Pass through

    [​IMG]
     
    not_nick likes this.
  6. Jan 30, 2015 at 6:05 AM
    #166
    ExpoFishTaco

    ExpoFishTaco Well-Known Member

    Joined:
    Jul 21, 2013
    Member:
    #108746
    Messages:
    226
    Gender:
    Male
    Charlotte NC
    Vehicle:
    '13 4X4 SR5 Double Cab
    None yet!
    Sub'd. Awesome thread OP. Cant wait to see the finished product!
     
  7. Jan 30, 2015 at 6:48 PM
    #167
    lucky

    lucky [OP] Well-Known Member

    Joined:
    Jun 21, 2008
    Member:
    #7468
    Messages:
    488
    Gender:
    Male
    NB, TX
    Vehicle:
    07 PreRunnerX4
    Didnt get the exhaust done today, but I drove it anyway. So far so good.

    Final pics and PreRunner de-badging tomorrow.
     
  8. Feb 1, 2015 at 4:17 PM
    #168
    lucky

    lucky [OP] Well-Known Member

    Joined:
    Jun 21, 2008
    Member:
    #7468
    Messages:
    488
    Gender:
    Male
    NB, TX
    Vehicle:
    07 PreRunnerX4
    Its pretty smooth, but short throw, so it feels a little harsh.

     
  9. Feb 1, 2015 at 4:20 PM
    #169
    lucky

    lucky [OP] Well-Known Member

    Joined:
    Jun 21, 2008
    Member:
    #7468
    Messages:
    488
    Gender:
    Male
    NB, TX
    Vehicle:
    07 PreRunnerX4
    Still dont have my crossover pipe. Should have it tomorrow morning. Everything else is going pretty good and is functioning as expected.

    Heres what the cable shift setup looks like on the inside. The shift levers are still raw - I'm going to round them out and polish a little and thread the ends for shift knobs.

    [​IMG]

    [​IMG]

    Both shifters come up through the right side cup holder.

    [​IMG]

    [​IMG]


    Heres a support I added to the twist lock cable controlling my ADD.

    [​IMG]

    [​IMG]
     
    not_nick likes this.
  10. Feb 1, 2015 at 4:25 PM
    #170
    lucky

    lucky [OP] Well-Known Member

    Joined:
    Jun 21, 2008
    Member:
    #7468
    Messages:
    488
    Gender:
    Male
    NB, TX
    Vehicle:
    07 PreRunnerX4
    A couple more of the cable bracket I fab'd up.

    [​IMG]

    [​IMG]
     
    not_nick likes this.
  11. Feb 1, 2015 at 5:24 PM
    #171
    jetta.the.hut

    jetta.the.hut B4nn3d

    Joined:
    Aug 8, 2013
    Member:
    #110077
    Messages:
    1,539
    Gender:
    Male
    First Name:
    Aren
    Aberdeen,NC
    Vehicle:
    2013 Access Cab Long Bed 4x4
    Wow this pretty badass. A complete list of parts would be great for members thinking of doing this. I don't have the free time for this so I'd probably trade my truck in for a 4x4. But great job on the conversion
     
  12. Feb 1, 2015 at 5:48 PM
    #172
    lembowski

    lembowski Well-Known Member

    Joined:
    Jul 29, 2009
    Member:
    #20347
    Messages:
    6,882
    Gender:
    Male
    First Name:
    Matt
    Rolando, CA
    Vehicle:
    Jeeper Creeper

    A complete list can be found by searching. Quite a few threads on it already.
     
  13. Feb 1, 2015 at 5:51 PM
    #173
    PSU Taco85

    PSU Taco85 Señor Member

    Joined:
    Jun 21, 2014
    Member:
    #132394
    Messages:
    2,011
    Gender:
    Male
    First Name:
    optional
    Vehicle:
    '10 TRD OR mostly stock
    Plasti dipped hootus
    Shifter assembly looks badass, nice work!


    [​IMG]

    [​IMG]
     
  14. Feb 2, 2015 at 6:51 AM
    #174
    lucky

    lucky [OP] Well-Known Member

    Joined:
    Jun 21, 2008
    Member:
    #7468
    Messages:
    488
    Gender:
    Male
    NB, TX
    Vehicle:
    07 PreRunnerX4
    Exhaust done. NIcely tucked up out of the way.

    [​IMG]
     
  15. Feb 5, 2015 at 3:12 PM
    #175
    lucky

    lucky [OP] Well-Known Member

    Joined:
    Jun 21, 2008
    Member:
    #7468
    Messages:
    488
    Gender:
    Male
    NB, TX
    Vehicle:
    07 PreRunnerX4
    Have about 300 miles on the truck since putting it all back together. All good. No leaks, creaks, vibration from the driveshaft or shudder when taking off. Had a chance to mess with the center console today. Me and the dremel salvaged a cup holder. I'll work on the shift levers and boots this weekend, along with some wiring to get the dash indicators for 4wd, 4lo. I also need to wire up my elocker.


    [​IMG]

    [​IMG]
     
    not_nick likes this.
  16. Feb 7, 2015 at 5:37 AM
    #176
    lucky

    lucky [OP] Well-Known Member

    Joined:
    Jun 21, 2008
    Member:
    #7468
    Messages:
    488
    Gender:
    Male
    NB, TX
    Vehicle:
    07 PreRunnerX4
    The 6061 stock I used for shift levers is pretty easy to shape - going to cut some threads later today. I decided to go with stock FJ Cruiser x-fer case shift knobs. Their pattern matches the dimple texture in the tacoma. I had 1, another picked up on ebay. I popped the J-pattern disk off the top of the shifter. Havent decided if I will replace them with my patterns or put in a blanks.

    2WD.......HI
    ..|...........|
    4WD........N
    ..............|
    .............LO


    I put a small bend in the left shifter, leaning it towards the driver side, the levers with knobs will definitely clear each other.

    Hi-Lo lever is disconnected from its linkage right now, so I had to hold it up in the position it will be in.

    [​IMG]

    [​IMG]

    [​IMG]
     
    This site contains affiliate links for which the site may be compensated.
    not_nick likes this.
  17. Feb 7, 2015 at 5:47 AM
    #177
    toomanytoys84

    toomanytoys84 Well-Known Member

    Joined:
    Nov 6, 2014
    Member:
    #141789
    Messages:
    524
    Gender:
    Male
    Stock
    Very nice!
     
  18. Feb 9, 2015 at 5:15 AM
    #178
    lucky

    lucky [OP] Well-Known Member

    Joined:
    Jun 21, 2008
    Member:
    #7468
    Messages:
    488
    Gender:
    Male
    NB, TX
    Vehicle:
    07 PreRunnerX4
    All thats left is the transfer case dash indicator lights and diff lock light, my second FJ shift knob that isnt here yet, and a twin stick boot.


    AS far as the wiring, according to the FSM, the C10 (right side) connector on the instrument cluster has the wires for 4x4, 4Lo and Diff Lock lights, located at pins 15-red wire, 16 Brown-white and 14 Blue-yellow, respectively.

    Since my truck was a prerunner, open diff truck, it doesnt have the 4wd or elocker ECU's and I didnt buy either of them for this conversion.

    No problem on the locker as far as engaging and dis-engaging, I easily got it wired up per 12voltguy's diagram using a DPDT on-on switch. I actually used a DPDT on-off-on 7 post switch, with #7 post assigned to the light on the switch. I dont really care if the switch lights up when locked though, I'd prefer to have the dash indicator. I'm going to try to take Blue-Yellow from the locker position indicator switch and run it to Blue-Yellow on C10-14 on the instrument cluster and see what I get.

    The xfer case 4lo switch has 2 wires, White-Black and Yellow-Black. Similar to above, I will try taking Yellow-Black to C10-16 Brown-white and white-black to ground.

    The xfer case 4WD switch has White-Black and Red-Blue. I'll try Red-blue to C10-15 Red, white-black to ground.

    If anyone has any wisdom on the wiring, please share. I read in one of Wyatt's posts that they had to wire indicators straight to the cluster on Ray's prerunner conversion, but I couldnt find any posts here or on RST on how they did it.

    Diagram from FSM showing pins on the C10

    connector[​IMG]

    Here's the elocker diagram I used:
    [​IMG]

    My harness for the locker:
    [​IMG]

    Rocker for the locker
    [​IMG]


    Twin Sticks in cupholder, minue one FJ shift knob and boots
    [​IMG]
     
    not_nick and Ricardo13x like this.
  19. Feb 9, 2015 at 5:19 AM
    #179
    lucky

    lucky [OP] Well-Known Member

    Joined:
    Jun 21, 2008
    Member:
    #7468
    Messages:
    488
    Gender:
    Male
    NB, TX
    Vehicle:
    07 PreRunnerX4
    Correction: My patterns are:

    2WD.......LO
    ..|...........|
    4WD........N
    ..............|
    .............HI


    This site contains affiliate links for which the site may be compensated.
  20. Feb 9, 2015 at 8:04 AM
    #180
    ajohnson

    ajohnson Glamour Shot

    Joined:
    Apr 19, 2009
    Member:
    #16145
    Messages:
    8,496
    Gender:
    Male
    First Name:
    Andy
    Charlotte, NC
    Vehicle:
    07 DCLB TRD Sport Prerunner 4x4
    Things and stuff and such
    Very nice work! I have most of my parts for the conversion, just need a shifter(s) and rear driveshaft. I am only into it $1500 so far and have a taco tcase to sell.
     

Products Discussed in

To Top