

-
Welcome to Tacoma World!
You are currently viewing as a guest! To get full-access, you need to register for a FREE account.
As a registered member, you’ll be able to:- Participate in all Tacoma discussion topics
- Communicate privately with other Tacoma owners from around the world
- Post your own photos in our Members Gallery
- Access all special features of the site
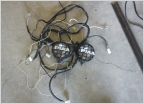 PIAA 510 ATP pattern
 SOLD: 12-15 OEM All Weather Floor Mats
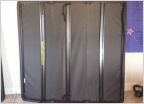 Extang Trifecta-Tonneau-Cover - 100 OBO Local Pick Only - Bay Area
Body Mount Relocate Kit (RedGoatFab & Haws)
Discussion in '2nd Gen Tacoma Parts Marketplace (2005-2015)' started by Haws, Feb 9, 2015.
Page 3 of 23
Page 3 of 23

