

-
Welcome to Tacoma World!
You are currently viewing as a guest! To get full-access, you need to register for a FREE account.
As a registered member, you’ll be able to:- Participate in all Tacoma discussion topics
- Communicate privately with other Tacoma owners from around the world
- Post your own photos in our Members Gallery
- Access all special features of the site
 Extang Revolution Roll-up Truck Bed Tonneau Cover
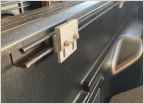
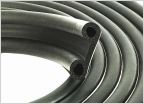 Super Seal Cap Gasket - Installed Thickness
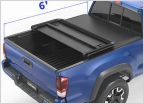 Budget friendly bed covers?
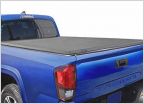 Reason for new model/part number of Tyger T3 Tri-Fold for 2019
 Suggestions on a tonneau cover?
 Tonneau cover UV protectant
Antenna pass-through connectors for FWC Project M
Discussion in 'Tonneau Covers, Caps and Shells' started by DarkSkyGuy, Dec 7, 2020.

