

-
Welcome to Tacoma World!
You are currently viewing as a guest! To get full-access, you need to register for a FREE account.
As a registered member, you’ll be able to:- Participate in all Tacoma discussion topics
- Communicate privately with other Tacoma owners from around the world
- Post your own photos in our Members Gallery
- Access all special features of the site
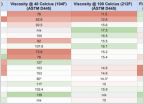 Gear/Differential Oil Spec Comparison (nerdy data stuff)
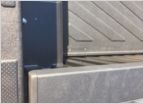 2017 Tacoma bed rail gap leaking camper shell
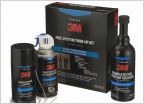 3M Fuel System cleaning kit
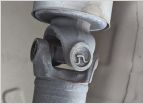 Greasing Sealed U-Joints?
 Rooftop tent modified install
Cheap/Free Mods
Discussion in 'Technical Chat' started by piercedtiger, Dec 28, 2007.
Page 9 of 123
Page 9 of 123
Products Discussed in


