1. Welcome to Tacoma World!

    You are currently viewing as a guest! To get full-access, you need to register for a FREE account.

    As a registered member, you’ll be able to:
    • Participate in all Tacoma discussion topics
    • Communicate privately with other Tacoma owners from around the world
    • Post your own photos in our Members Gallery
    • Access all special features of the site

Shortround's '04 Double Cab TRD AT

Discussion in '1st Gen. Builds (1995-2004)' started by shortround13, Apr 1, 2015.

  1. Apr 1, 2015 at 9:33 PM
    #1
    shortround13

    shortround13 [OP] Well-Known Member

    Joined:
    Dec 10, 2014
    Member:
    #144048
    Messages:
    202
    Gender:
    Male
    Sacramento
    Vehicle:
    04 DblCab TRD 4x4
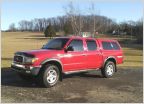
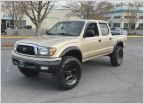
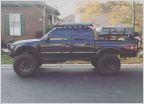
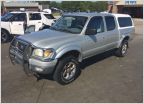
    I started out with a 2001 XtraCab 4x4 TRD 5 speed. Luckily, she's still in the family with my parents, for now, but my growing family demanded more room than the XtraCab afforded us.

    Enter: *no name* 2004 Double Cab 4x4 TRD (auto trans....for now :what to do: )

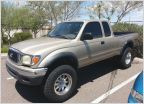
    The day we brought it home
    [​IMG]image posting

    How she sits now
    [​IMG]image posting

    On freezing winter morning last year, with semi warm coffee in hand, several friends braved the elements to help me transfer suspension parts over from the 2001 to the 2004.

    SUSPENSION
    Front:
    Toytec 16" coilovers
    Tundra Bilstein 5100s
    LR UCA
    Rear:
    Old Man Emu leafs
    Bilstein 10" travel 5125s
    Toytec 1" shackles
    Extended brake line
    BAMF LSPV
    Tires/Wheels:
    Cooper ST Maxx 255/85/r16 on stock steelies

    ARMOR
    Addicted Offroad Front Plate Bumper
    RCI Metalworks 1/4" aluminum IFS/Transmission skid
    3/16 steel T-case and Fuel tank skid

    RECOVERY
    Warn M8000S
    48" Hi-Lift

    UPGRADES
    Tundra Brake swap 231mm 13WL Calipers
    -Toyota OEM rotors, OEM pads, OEM caliper rebuild kit, Wheelers braided steel lines
    ABS Delete

    COMMS
    Cobra 18 WXSTII

    ELECTRICAL
    unknown 30" LED bar on roof rack

    STORAGE
    Yakima Load Warrior Basket
     
    Last edited: Jan 19, 2018
    -40 likes this.
  2. Apr 1, 2015 at 9:34 PM
    #2
    shortround13

    shortround13 [OP] Well-Known Member

    Joined:
    Dec 10, 2014
    Member:
    #144048
    Messages:
    202
    Gender:
    Male
    Sacramento
    Vehicle:
    04 DblCab TRD 4x4
    so I'll keep this pretty short, not a lot to it. Bought a Cobra 18 WXSTII since it fits in single DIN slots, took out the old radio (it needed to go anyways) and installed a new single DIN stereo above with the CB below. Ran constant power to the battery with fuse at the battery, ran the antenna up to the passenger side front bumper with a flush mount.
    right now I'm running a 5' firestik. It gets a little swingy on the trail....thinking about getting a 4' to see if that helps.

    stereo%20bracket_zpsw1rpywt6_b606e6c16185cdcf96d4fc820e54b4ac9c2978a8.jpg

    cb%20in%20dash_zps1ehlzilt_fea4922dfc14d1855721e93c10ab4fbef56ab2e9.jpg

    antenna%2001_zpsezvyqebg_ae74360eefb0bca3bee238f0ad3a211aa5a9038e.jpg
     
    Last edited: Apr 1, 2015
  3. Apr 1, 2015 at 9:34 PM
    #3
    shortround13

    shortround13 [OP] Well-Known Member

    Joined:
    Dec 10, 2014
    Member:
    #144048
    Messages:
    202
    Gender:
    Male
    Sacramento
    Vehicle:
    04 DblCab TRD 4x4
    1st trip back in March to China Wall, still stock, no lift

    trail%20shot%203_zpsfi8orpkj_c58f33d898c92d0b527fee09ffb8bf6d9c6ad3ba.jpg

    trail%20shot%204_zpsskfxx6yl_6fa4a7636d8ca3859299f2d3457a00edf886b09e.jpg

    trail%20shot%201_zpsulalhx8z_790e349c77422821d870aabdc67cfefc83cc0d2d.jpg
     
    Last edited: Apr 1, 2015
  4. Apr 1, 2015 at 9:34 PM
    #4
    shortround13

    shortround13 [OP] Well-Known Member

    Joined:
    Dec 10, 2014
    Member:
    #144048
    Messages:
    202
    Gender:
    Male
    Sacramento
    Vehicle:
    04 DblCab TRD 4x4
    so, got the suspension a month ago, was just too busy to start working on it. Kind of glad though, was good to run the trail stock and now see the difference (hopefully better!)

    the parts
    suspension%20parts_zpsigrvhvkj_d665dab4622d44f7603845d7c5d21fcd5cd40c0d.jpg

    wheels off, just starting on Day 1
    old%20coils_zpspvp0opim_9106c9ef9c79864ea54def87c08d0c6f58eca71d.jpg

    side by side comparison of the old/new
    side%20by%20side_zpskin6l9mx_5f1be16651c3704b2ecabc5f969ee5b0dd0b314d.jpg

    everything I read said some penetrating oil and a whack with a BFH would free this little guy up. Nope....
    uca%202_zpsjopiq9rj_f1386fa459bb82d3804fba28bfcc5e179e56349b.jpg

    had to make 2 trips to the store for this (1st trip, the box was missing the bolt....wasn't too happy)
    ubj%20separator_zpsrof2tvw2_3fb45cfa2764d25cfcec30da610034af1986a3ef.jpg

    then once it was free used a 2 jaw puller to pop the ball joint out. Didn't take a pic of it, but had to take my grinder to the spindle and cut the threads off so I could fit a socket onto the ball joint with the puller pushing onto that, transmitting the force onto the wide base. When I was just pushing on the spindle, all that was happening was some bulging on the bottom side of it. Decided to re-think my approach at the point.
    puller%20ubj%202_zps027irg28_3c054910e5f8b6681156f1565849abcbbb9601b0.jpg
    puller%20ubj_zpszylqfffj_713aa69c1b6248d5d7780ef1810c4ac1e49e9cd7.jpg

    got it out, new coils and UCA installed
    uca%20and%20coils_zpsjjvbd1qt_d4356ac0e177b6b386a7c2268f939f68fea28d05.jpg

    old/new rear shocks side by side
    5125%20side%20by%20side_zpsw1vxtuzn_d3c9bd6247ee6bc9073e8e6087a3ac3f515c27fe.jpg

    old/new leafs side by side
    new%20leafs_zpsdnxhwf6o_22cf4438ddec5c615e202c927e1181ba16a55b8a.jpg

    just a friendly piece of advice to anybody else doing their own suspension. loosen the rear shackle bolts of the leaf springs BEFORE taking out the front bolt from the hanger. whoops. set me back a few minutes while I tried to man-handle this back in by myself. had to use a 4x4 to wedge it back in position while I inserted the bolt back thru.
    oops%202_zpsod6exdia_7a0779b6bb35b7fbb24f711df687ffdbc9d362b3.jpg

    leafs%20in_zps3nxlnxen_0fdbc9229a7caab9a2af3ab7b95e3df431ef802e.jpg

    ....and you can probably see what's wrong with this picture. Installed the driver's side shock first, boot up. Went to do the passenger side and the clearance by the exhaust was minimal, and was hitting the boot...so, boot down. had to flip the driver's side the next day as the wifey was calling me in for dinner...
    driver%20in_zpscbqagap1_5760c4d69fc0290739f57b80eb551b35bf33eeef.jpg

    and, all wrapped up sitting pretty outside on the street
    ds_zpskf2dd1tr_06c31b900906ecb923337e672e8046cd70e1a3da.jpg

    ps_zpskzk2omld_db9389bccb465023b09bc6890ae74ab2bb463b4e.jpg
     
    Last edited: Apr 1, 2015
  5. Apr 1, 2015 at 9:41 PM
    #5
    shortround13

    shortround13 [OP] Well-Known Member

    Joined:
    Dec 10, 2014
    Member:
    #144048
    Messages:
    202
    Gender:
    Male
    Sacramento
    Vehicle:
    04 DblCab TRD 4x4
    and, moment of truth. some articulation tests. took some measurements while I was out, but need to do it again 'cuz I forgot to take 2 more that would be helpful.
    the rear shocks have a compressed length of 15.9" and my bump stops have not been extended yet, so I wanted to know "how low can I go" basically and see how much wiggle room I had. Got some pretty good compression on the rear with the wheel pretty stuffed, and measured at 17" shock length....so I had another inch to go. not bad. but, peace of mind I will be getting the stops shortly.
    I should have measured the gap with the existing bump stop...would have been helpful.
    Also wanted to measure when I was at full droop (got the wheel off the ground) to see if I was at full extension (25.9") or if my leafs were limiting the droop. next time....
    but here's some pics

    getting some measurements
    20150331_174007_zpsxg5jvxta_b09724f0bf7332cad16dcd2337e05532837077f4.jpg

    taco%20ditch%20pass%20rear%203_zpsbtowvs_6f7a6cdbdd46486c3779b36dfbe193f0cceb0a30.jpg

    taco%20ditch%20drvr%20side_zpsjgjk6uva_a710d803f362927f0707f9e693d56994fc1f2848.jpg

    taco%20rock%20pass_zps7c5gikhz_b45869bef7c14064b8e372cc65e6a9a3a060d69d.jpg

    taco%20rock%20drivr%20frnt_zpspgsslspx_4298bc1661fc2b186a15b565acd961cd26896a10.jpg

    taco%20rock%20drvr%20rear%202_zpsnmur9uy_6469b08a295d4fc059dc45d3c144e196b3a304d8.jpg

    maybe you recognize the middle truck?
    3%20on%20rock%20frnt_zpss8mpezlk_9713d61fa603bec3f355d403011573014a9ad100.jpg
     
    Last edited: Apr 1, 2015
  6. Apr 2, 2015 at 5:24 AM
    #6
    Lumpskie

    Lumpskie Independent Thinker

    Joined:
    Apr 20, 2013
    Member:
    #102450
    Messages:
    1,978
    Gender:
    Male
    New Hampshire
    Vehicle:
    '96, 4x4, v6, manual hub
    Toytec 16" coilovers with Tundra Bilstein 5100s, Light Racing UCAs, Alcan Leafs with Orbit Eyes, 12" Bilstein 7100 short Bodies, ARB rear locker, 33x12.5 Duratracs, CBI sliders, Bushwacker fender flares, self made front bumper, M8000, Vision X 6.7" Hi/Lo Beam HIDs, full skids, Inchworm dual case setup - 15º clocking
    I do!

    Subbed.
     
  7. Jun 19, 2015 at 12:43 AM
    #7
    shortround13

    shortround13 [OP] Well-Known Member

    Joined:
    Dec 10, 2014
    Member:
    #144048
    Messages:
    202
    Gender:
    Male
    Sacramento
    Vehicle:
    04 DblCab TRD 4x4
    Finished up the Tundra brake upgrade this afternoon.


    Started with this, picked up 2 calipers from Ebay off a junked 2005 Tundra. These are the 231mm 13WL calipers. Aside from being dirty, they were in pretty good shape. No significant rusting or pitting and the pistons/chambers were smooth.

    1_zpsfapwt5os_41f3474b2d12f7b9857b5a49a09fe6aecf12513d.jpg


    A little work with a wire wheel and a lot of brake cleaner got me this

    2_zpsgnhdpqsg_74adfb0f00c7d8a8690f314623656bca72f4db84.jpg


    I used Duplicolor’s brush on caliper paint. I’d heard good things about it and the G2 caliper paint, but my local auto store had the Duplicolor on the shelf. I don’t think I’d use it again, it was really thick and goopy and hard to get good coverage. I’m happy with how they turned out, it’s not show quality, but they look a heck of a lot better than when they started. And they match my springs J Cleaned up the pistons and got them nice and shiny too. Next time, I will probably just use some spray can stuff. Time will tell how well this holds up though. At least I have extra paint for touch ups.

    3_zpsc54edhcj_38be032a2b7e8edcdb5d6bed16d170c8e175cd7d.jpg


    And the rebuild kit with new dust boots/gaskets installed….

    4_zps4kiytfnb_d3b7cf08f08dbcd8b290520df230f584cfc890b2.jpg


    Had to trim the dust shield a little bit, and massage it to clear the larger Tundra rotors.

    5_zpsx8wbqbkf_f3f4b3fcc6d265fb69d1bf277264a669b32ce394.jpg


    Had an issue with a hard brake line hex nut that rounded off. I think the flare wrench I bought from said local auto store is junk, should have gone with craftsman. Oh well.

    6_zpsm3t4p6pi_c52f4974f9af5d16945ba65e958ec1f7c4b071e4.jpg


    Lying awake last night I recalled once upon a time helping my dad run brake lines on the trailer for our boat, so I decided to give it a go. Bought a new hard line, bent it to shape, cut to size and flared it. Old line on top, new on bottom

    7_zpsgkskxves_7a6cc21c728bba0a1b9daee262887b7604603813.jpg


    All installed looking shiny and red….I didn’t think I’d like the red. I thought it was too much like a high performance race car color, but I really like how it matches the springs and adds some color up front.

    New braided lines up front as well.

    8_zpsyqzqeffx_7c9d482381e7d4fa06681d2ed0329a12c3e72c6a.jpg


    9_zpsjfmhqsdp_83594e1c8408207cf32e1985754ba84aaaf98558.jpg

    From reading other posts, I had read the stock wheels clear the calipers. Had a moment of doubt as I was installing the wheels.... it fits but its close!
    10_zpskskzqftk_1670e344e009be1fc5b91f5ae5c5f5c9134d30e4.jpg
     
    This site contains affiliate links for which the site may be compensated.
    #7
  8. Jun 19, 2015 at 3:23 AM
    #8
    JonEvans56

    JonEvans56 Well-Known Member

    Joined:
    Sep 13, 2014
    Member:
    #138216
    Messages:
    94
    Gender:
    Male
    First Name:
    Andrew
    Vehicle:
    Dead Truck
    Rust, dents, cracking plastic, oxidized paint...
    Swaybar still on?
     
  9. Jun 19, 2015 at 8:32 AM
    #9
    shortround13

    shortround13 [OP] Well-Known Member

    Joined:
    Dec 10, 2014
    Member:
    #144048
    Messages:
    202
    Gender:
    Male
    Sacramento
    Vehicle:
    04 DblCab TRD 4x4
    Yea. I've never actually had the sway bar off. Still learning about the truck just haven't had an opportunity/need to take them off. I'd like to figure out a "quick disconnect" set up though.
     
  10. Jun 22, 2015 at 6:53 AM
    #10
    Lumpskie

    Lumpskie Independent Thinker

    Joined:
    Apr 20, 2013
    Member:
    #102450
    Messages:
    1,978
    Gender:
    Male
    New Hampshire
    Vehicle:
    '96, 4x4, v6, manual hub
    Toytec 16" coilovers with Tundra Bilstein 5100s, Light Racing UCAs, Alcan Leafs with Orbit Eyes, 12" Bilstein 7100 short Bodies, ARB rear locker, 33x12.5 Duratracs, CBI sliders, Bushwacker fender flares, self made front bumper, M8000, Vision X 6.7" Hi/Lo Beam HIDs, full skids, Inchworm dual case setup - 15º clocking
    You new brake setup looks really good! What brake lines did you go with?
     
  11. Jun 24, 2015 at 11:43 PM
    #11
    shortround13

    shortround13 [OP] Well-Known Member

    Joined:
    Dec 10, 2014
    Member:
    #144048
    Messages:
    202
    Gender:
    Male
    Sacramento
    Vehicle:
    04 DblCab TRD 4x4
    used the brake lines from Wheelers
     
  12. Jun 25, 2015 at 6:40 AM
    #12
    Lumpskie

    Lumpskie Independent Thinker

    Joined:
    Apr 20, 2013
    Member:
    #102450
    Messages:
    1,978
    Gender:
    Male
    New Hampshire
    Vehicle:
    '96, 4x4, v6, manual hub
    Toytec 16" coilovers with Tundra Bilstein 5100s, Light Racing UCAs, Alcan Leafs with Orbit Eyes, 12" Bilstein 7100 short Bodies, ARB rear locker, 33x12.5 Duratracs, CBI sliders, Bushwacker fender flares, self made front bumper, M8000, Vision X 6.7" Hi/Lo Beam HIDs, full skids, Inchworm dual case setup - 15º clocking
    Oooo... I like them!
     
  13. Jul 23, 2015 at 7:49 PM
    #13
    shortround13

    shortround13 [OP] Well-Known Member

    Joined:
    Dec 10, 2014
    Member:
    #144048
    Messages:
    202
    Gender:
    Male
    Sacramento
    Vehicle:
    04 DblCab TRD 4x4
    got my new tires a couple weeks ago Cooper ST Maxx 255/85r16

    so far I like the look, fills out the wheel well nicely, drives nice too. No 'hum' on the freeway, they feel responsive, and for being 32.9" tall I'm not noticing much difference in acceleration.
    I am however, getting some frame rub at the rear of the front at full lock....need to remedy that eventually.

    truck%20full_zpsnawoqqzy_71586a9eae3936e611c5761c577513b45a3114c2.jpg

    side_zpstq794z7j_a462685392b0f460c25c4447ad23a309582b35bc.jpg

    front%20full_zps2heyimux_f2142d113b56855430d366fd248c04cc23e900b4.jpg

    front%20by%20side_zpsrrd9zaul_c3807be96c449b9c99006b16ca7323ec382c5dd1.jpg

    and, under full compression the rear will rub the front of the fender too....might need to shim the axle more to the rear

    This is just shy of rubbing, but if I backed up the ramp any more it would touch
    rub_zpsnbolfag2_6930ee8560ee50c0526fc390d527aa0c46200d4c.jpg
     
  14. Jul 23, 2015 at 7:52 PM
    #14
    shortround13

    shortround13 [OP] Well-Known Member

    Joined:
    Dec 10, 2014
    Member:
    #144048
    Messages:
    202
    Gender:
    Male
    Sacramento
    Vehicle:
    04 DblCab TRD 4x4
    so been getting ready for my upcoming road trip thru Moab the last few days. Made a few changes/additions (some still in progress)

    the biggest one, I needed/wanted a way to carry my gas cans externally so as not to stink up or potentially spill in my bed/camping/sleep/cargo area, and not having a cool aftermarket bumper was very limiting. I looked into tow hitch carriers but did not really like how they changed departure angles. Then it hit me, I had a yakima rack system on my Honda that I haven't been using for the past year, and so began my quest online for the cheapest/best cargo basket I could find. Lo-and-Behold I found a Yakima basket on CL like 3 blocks from my house for a great price. And I had planned on an LED light bar eventually, but a good friend of mine is selling his boat and took 2 30" bars off of it and offered me one for a price I couldn't refuse.....so on to the rack that went!

    rack%201_zpsawycxsyv_67e30a04fea7007cb6ccc89a85a155f98cdf84ce.jpg
    rack%202_zpsjbru2nnd_385daffd508529d82ceb9c829837491a42a8226a.jpg

    I kind of like it actually. Although I'm considering trimming about 2 1/2" off each end of the cross bars. That will still leave me enough room to mount the bike carriers I have if I want to increase my road height by about 4' haha

    spent yesterday evening and this morning wiring it up. Fused it at the battery, used a relay, installed a 'temporary' switch (eventually I want to install a nice switch panel labeled for front/rear/fog/spot/flood whatever lights and winch) on the fuse panel cover on the dash. figured when I get around to doing the real lighting work that will be an easy piece to replace and return to stock.

    relay
    relay_zpsddk45ucg_24b4ac1f748cfbb53653aaaaa6cd397686a41466.jpg
    switch
    switch%20back_zpsnwladst9_b1cf9df641afa938517a3856e53d1d8df41f88d3.jpg
    switch%20front_zpsje2shqge_e7841fb17b691fae7333cefdadfe586ecfb93937.jpg

    nice and tidy on the rack
    tidy%201_zpsahil3zga_fb00375df77db4e5c27a9b573649a537a7242479.jpg

    and the moment of truth! haha I forgot I powered the switch on an ignition controlled accessory (cig lighter) and at first I was like F*$! it doesn't work.....oh yea....turn the key on! duh....love it when it works the first time....
    lights%20on_zps5rqdlhwb_455f8af0c2083741adb2060830e5edb1dfc3109e.jpg

    can't wait to get it out and see how much brighter it is at night. Currently the truck is immobile due to being halfway done with the axle relocation plate install. hopefully that alleviates the rub issue on the rear wheels. will button that up tomorrow morning, change the oil and start packing for my trip.....and tomorrow night will head out for an articulation/light test!
     
  15. Jul 23, 2015 at 8:11 PM
    #15
    Sje1124

    Sje1124 Well-Known Member

    Joined:
    Nov 1, 2010
    Member:
    #45564
    Messages:
    5,021
    Gender:
    Male
    First Name:
    Sean
    Louisiana
    Vehicle:
    2010 DBL Cab TRD OR 4x4
    Just a few
    Very nice truck man!
     
  16. Jul 24, 2015 at 1:37 AM
    #16
    JonEvans56

    JonEvans56 Well-Known Member

    Joined:
    Sep 13, 2014
    Member:
    #138216
    Messages:
    94
    Gender:
    Male
    First Name:
    Andrew
    Vehicle:
    Dead Truck
    Rust, dents, cracking plastic, oxidized paint...
    Nice roof rack. You can prevent/fix the rubbing in the front by flattening out the pinch weld
     
  17. Jul 24, 2015 at 6:56 AM
    #17
    shortround13

    shortround13 [OP] Well-Known Member

    Joined:
    Dec 10, 2014
    Member:
    #144048
    Messages:
    202
    Gender:
    Male
    Sacramento
    Vehicle:
    04 DblCab TRD 4x4
    Thanks I appreciate the compliment! Been coming together nicely....still have more I'd like to do but...little by little

    Actually the only spot the front tires rub is at full steering lock against the frame on the rear of the tire. When I did the alignment I rotated the adjustment plate on the LR UCA's to add more caster which moved the wheels/tires more towards the front of the wheel well, which actually alleviated all of the rub on the passenger side, and it just barely touches on the driver's side now at full lock to the left.
     
  18. Aug 31, 2015 at 9:49 PM
    #18
    Wadar

    Wadar Not Well Know, But Shows Up From Time to Time.

    Joined:
    Aug 9, 2015
    Member:
    #161403
    Messages:
    1,262
    Gender:
    Male
    First Name:
    Wade
    Western Slope, Colorado
    Vehicle:
    ‘02 XC TRD-OR, & ‘20 DCSB TRD-OR
    A few.
    I'm looking at your build and I noticed you have trimmed your exhaust. How is this working out for you? Any thoughts on doing it differently? The reason I ask is that I just added some Toytec shackles, and my leaf spring isn't playing nicely with my exhaust pipe at the 2" mark. I moved the shackles to 1.5" and it still rubs, however you seem to have solved the problem all together. Damn fine lookin' ride by the way!
     
  19. Aug 31, 2015 at 11:19 PM
    #19
    shortround13

    shortround13 [OP] Well-Known Member

    Joined:
    Dec 10, 2014
    Member:
    #144048
    Messages:
    202
    Gender:
    Male
    Sacramento
    Vehicle:
    04 DblCab TRD 4x4
    I just cut the exhaust at the point where it starts to turn down. Seems fine for a quick fix. I do need to eventually get the muffler replaced it has a small crack and I'll have them do a rerouted exhaust. But for now i haven't noticed any negative issues
     
  20. Jan 3, 2016 at 8:38 PM
    #20
    DustStorm4x4

    DustStorm4x4 BBC 2020

    Joined:
    Jul 2, 2015
    Member:
    #158634
    Messages:
    8,934
    Gender:
    Male
    U S A
    Vehicle:
    04 Jeep LJ
    Subd. Like the way this is going. It looks good man.
     

Products Discussed in

To Top