1. Welcome to Tacoma World!

    You are currently viewing as a guest! To get full-access, you need to register for a FREE account.

    As a registered member, you’ll be able to:
    • Participate in all Tacoma discussion topics
    • Communicate privately with other Tacoma owners from around the world
    • Post your own photos in our Members Gallery
    • Access all special features of the site

The Taco Project

Discussion in '2nd Gen. Builds (2005-2015)' started by Tango71, May 16, 2015.

  1. May 16, 2015 at 5:39 PM
    #1
    Tango71

    Tango71 [OP] Well-Known Member

    Joined:
    Aug 7, 2012
    Member:
    #84315
    Messages:
    65
    Gender:
    Male
    Hey guys! My name is Martin and I've been a long time lurker for years and lately started posting a lot more. My build is a 2010 Tacoma TRD Sport that my wife and I bought used with some mods already done to it. This truck is being built as a camping/expedition rig. We have already taken it on many small trips in the province of Alberta and on a cross country trip to see family in Ontario. We want to eventually go on longer expeditions around northern Canada and the USA including Alaska. Here is a list of modifications and there is plenty more to come.


    Exterior:

    ARB Bumper (hit 3 deer and still standing)
    Lightforce Blitz lights
    10,000lb Superwinch
    All Pro rock sliders
    Bushwacker fender flares
    Hood scoop painted with black plastidip to reduce glare from the sun
    LED center tail light
    LED Marker lights
    18" American Racing ATX Thug wheels (discontinued)
    Toyo Open Country AT2 Extreme 285/75/18 Tires (34.8X11.5 ish)


    Interior:

    Custom fit fabric seat covers (forget the brand) - need to upgrade to leather!
    Aftermarket Alpine MP3 player
    TRD Shifter
    LED Lighting (on order)

    Suspension:

    6" BDS drop bracket lift
    Toytec coilovers with bilstein 5100 shocks
    BCC shackle reversal brackets
    Extended and reinforced factory shackles
    OME Dakar leaf packs
    Air lift helper springs


    Other mods:

    Crown 6" extended steel braided brake lines
    TRD greasable balljoints/tie rod ends
    Toyota camber bolts (DIY greaseable)
    MOOG lower control arm bushings
    Modified factory exhaust to exit behind bumper

    Engine:

    Dual K&N air filter setup
    Upgraded to lead battery contacts


    The truck originally came with a spacer lift and AAL. Two years later I installed Toytec 3" coilovers in the front to get a better ride but kept the AAL. The truck performed good with them but I still wanted more lift and the ability to run 35" tires without cutting my fenders...So I opted to do a BDS 6" drop bracket lift and so this build thread was born and I will continue to update it as I go.

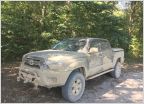
    My buddy and previous owner, took these when he had the truck a while before I bought it. I still have no idea why he traded it in. He regrets it now.

    163844_10150122830880701_5669841_n_zpspa_01e0279fc8a07863278b62a614960dc00ef08dac.jpg

    166319_10150122831005701_3963087_n_zpsnw_f75f9ba7f0f2f5e257c3363e946cd52244360aeb.jpg

    170080_10150127308995701_8139712_o_zps7w_a8fd2799849a926a2a2b510bf83ffd8f761cf1a9.jpg


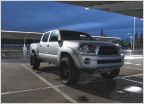
    This is pretty much how the truck looked since I took ownership. I bought it minus the rock sliders, and winch. I installed Toytec coilovers, a 10,000lb superwinch and the rock sliders. Its sitting on 32" Hankook Dynasport MT in that pic.

    IMG_2685_zpskgc5n3tm_237d4b01dd5b1e032df1e3dd8505ed5e21041604.jpg
    IMG_2683_zpsipx6p9lc_caa4dae44b205337d3d26569c9e4d75dfe2c65e3.jpg
    IMG_2688_zpsahbwjgix_2a08290703324e49ed421a7d9a677d2749108198.jpg


    Time for a 6" BDS lift

    I started off by tearing down the whole front end. Everything was getting replaced. Balljoints, tierod ends, wheel bearings, seals, etc.

    IMG_4058_zpsmnxuoh1x_d65597735f30dbf0613055e464057d8c20d187b8.jpg


    Subframe cut and capped then painted with POR15. I used silver because it was all I had from another project. The instructions did not call for welding in plates which is kind of stupid if you ask me. It looks much better and provides more strength. After the POR15 cured I went over it with gloss black rust paint.

    IMG_4062_zpsvt7kheh0_9ec10d1b029fbc9a4508910cdd3d67874bbc2d4d.jpg
    IMG_4067_zpsqi4ipguo_c4ef79be172143b0312074ce36335f25ea2e2f0d.jpg


    Rivet nuts installed according to the instructions. I do question where they came up with their torque specifications though. At 90ft-lbs they were still slightly loose. So I went a bit more till the impact gun stopped spinning. Use caution if you are doing this!

    IMG_4073_zpsx8ikgzfh_d3add24d0d8be96d154b24ef58301f2a990dff66.jpg


    The subframe will pull inwards a bit as soon as you cut it causing the brackets to not align. This is easily solved by a small bottle jack against the end caps that are welded in. Yet another reason to do it right and weld in the end caps!

    IMG_4075_zps8z8mgeql_0e7e96c3f95c73cb55afb45dd996f014ddf5d343.jpg
    IMG_4077_zpskjbojpxd_d2856f8cc49b449f5ce9d3f8ea39baf319b74fe6.jpg


    Drop brackets installed and the diff secured. I did have a problem with one of the welds on the front passenger side diff mounting tab. See thread for issue and fix:

    https://www.tacomaworld.com/threads...sition-check-your-welds.374323/#post-10261208


    IMG_4084_zpsrauo8ub5_db59cbc537dd4a3528a88fd871d081b07be9fa03.jpg
    IMG_4087_zpspha4ihza_110b3188498dbaf0d3c7fbb38eb1b55354a43712.jpg
    IMG_4088_zpsdj5vzlzx_b4c24fe1dfecc866a5ba2226151e39352377420b.jpg


    New balljoints installed all around along with new tierod ends. I installed the Toytec coilovers back in as well. I'm hoping these work as they're only 1/2" longer than factory from mounting plate to the eye on the bottom of the shock. The coilovers rely on a set preload to achieve the advertised 2.5" lift and can be cranked up more to get 3" which is where I was before the BDS lift. I figure if I take all the preload out they will work like factory units but with a nicer ride. I can drop the truck and adjust them later if I need to go any higher.

    IMG_4102_zpsd5nu6okd_85f5ba4ed8bd04ae9f8fedf86271ce033f2f3453.jpg
    IMG_4104_zpsvy9d2z2l_3b4563c2a71c49f118dc6164f00600b721182e5d.jpg
    IMG_4108_zpslbkcl8ho_a0d226b9386844db2b29f93e31ba6d6cd8861eee.jpg
    IMG_4107_zpspaiiyuec_7c059fc86eb5df910b2496457ebecd7a3e206a49.jpg


    That is it for now. I already tackled the rear end and will upload more pictures this weekend. I have been waiting on seals so I can do my wheel bearings so that is why I have not got my spindles on yet.
     
    Last edited: May 27, 2015
    SMHdavid likes this.
  2. May 16, 2015 at 5:56 PM
    #2
    SeanP

    SeanP Well-Known Member

    Joined:
    Apr 5, 2015
    Member:
    #152555
    Messages:
    66
    Gender:
    Male
    North Florida
    Vehicle:
    '15 DCSB
    3" lift w/ 5100's, 887s, AAL. 275/70/18's Hankook ATm 18x9 XD Monsters
    Great looking truck man! Nice to be able to buy it from a friend, hopefully you know what it's been through :D
     
  3. May 16, 2015 at 6:04 PM
    #3
    Tango71

    Tango71 [OP] Well-Known Member

    Joined:
    Aug 7, 2012
    Member:
    #84315
    Messages:
    65
    Gender:
    Male
    Thanks! It was actually from the Toyota dealership he worked at lol. We became friends after the purchase.
     
  4. May 18, 2015 at 12:54 AM
    #4
    Tango71

    Tango71 [OP] Well-Known Member

    Joined:
    Aug 7, 2012
    Member:
    #84315
    Messages:
    65
    Gender:
    Male
    My seals came in and I pulled an all nighter in the shop starting last night and managed to get the front end finished, apart from small stuff like zip tying the ABS wire to the spindle and painting my calipers red. I started off by installing the outer seals on the ball joint hub using an oil filter strap wrench. These work great in this application! Once the seal is on top of the hub you hit the clamp with a 2X4 around the perimeter. Using this method guarantees an even pressure all around and prevents damage to the rubber sealing surfaces.

    IMG_4157_zpsltfocj2q_52c710e88c8759d5e6074fd2f57ba507539a2d10.jpg
    IMG_4158_zpsw4snrefn_c6e4816c25f141b7e355f5808256832315f927fe.jpg
    IMG_4159_zpsd9ii7n7j_b709c464d5160ad8efa1e8decfe3dad20eb751da.jpg
    IMG_4160_zpsty32u55c_039fd5686be31f01580de6d0df82efe17360a34e.jpg


    Everything is assembled, torqued, and brakes installed. I opted out of using the brake line relocation brackets that came with the BDS kit which make you bend the steel hard line and got a 6" extended kit from Crown Performance. I'm also contemplating weather or not I want to run the sway bar with this kit. Once one hand I will have a safer on road rig, on the other hand I will get better performance out of the system with the sway bar removed.

    IMG_4165_zpsopi8gpm2_1aadfbad72bcded3e0ca13f5c65d7ab2a9376845.jpg
    IMG_4167_zps4qh51grh_709ea2433e4b65ed72652c01c4764ffc5cdb098d.jpg


    I dismantled the rear end and started removing the factory shackle mount brackets to make room for the BCC shackle reversal brackets. I started by trying to grind/drill the rivets but it was a no go. I ended up using a grinder to cut the head off a rivet which made it thin enough to pierce with a plasma cutter and then I would use the plasma cutter to pierce through the rivet and work my way around till I had a 1/4" hole. I then punched the weakened rivet out. I cleaned up the rust with a buffing disk on my grinder and painted the bare metal with POR15 then bolted the BCC brackets on and painted everything black.

    IMG_4162_zpsnes2nc9a_48bb0c4449d388e0d6333b5a42783eea726a5780.jpg
    IMG_4163_zpsb6ccuwwy_49306009fea71af71fc61522d8d869b1914ec3fc.jpg

    That is it for now. I'm going to be installing the leafs next. Hopefully I have this truck done within the next few days.
     
    Last edited: May 18, 2015
  5. May 18, 2015 at 1:02 AM
    #5
    ODNAREM

    ODNAREM MEMBER Of The Church Of @ODNAREM

    Joined:
    Feb 28, 2015
    Member:
    #149762
    Messages:
    41,292
    Gender:
    Male
    First Name:
    Ron
    Huntington Beach,CA.
    Vehicle:
    2012 TRD Sport Prerunner
    TRD catback exhaust,FJ Cruiser trail team wheels,BFG All Terrain K02 tires,Grillcraft front grill,Pelfreybilt IFS/Mid skids,sliders,standard rear bumper,Total Chaos bed stiffeners.TRD Pro Bilstein front/rear suspension.
    Very cool Tango71!
     
  6. May 25, 2015 at 4:35 AM
    #6
    Tango71

    Tango71 [OP] Well-Known Member

    Joined:
    Aug 7, 2012
    Member:
    #84315
    Messages:
    65
    Gender:
    Male
    So week two is finally here and I'm finally done! It was a long road but it was worth it :)
    After installing the OME springs I decided that I needed a bit more lift so I had to extend the shackles. I took the factory shackles and cut them in half then made a 3" extension using some 1/8" channel and plate. The shackles are reinforced and doubled up to get a 1/4" thickness in the high stress areas. There is also a brace/gusset inside the boxed channel.
    when welding I kept the bushings in water for a few minutes after every few bead passes to keep them cool and the rubber from melting.

    IMG_4182_zpsayihjjuc_0e0c46aca2b2a24a9e62b09e2ab7ffcf312407e3.jpg
    IMG_4183_zpsjtj0aoni_2a6de33168160b2c7c6e91801abe224527decbcb.jpg
    IMG_4184_zpsdzvkt0ad_c5ab336c2deb51e1ce0cd8c799aab731245c1bd2.jpg
    IMG_4185_zpswvz1wwrw_9a071d8ac33770a7bff0326df4352fa610ec75f7.jpg
    IMG_4188_zpscaisn2sj_e27b906a859f03c3bad8be8c99d398a34a4898b5.jpg


    I had to re-route the exhaust to exit at the back of the bumper instead of at the side. The longer shackle and leaf spring are in the way now. I think it looks clean. I painted the tip black so its not as eye catching. You can see the shackle angle is not too bad either. This is what a 6" BDS lift looks like when you want to use OME Dakar leaf packs and not the blocks that come with the kit.

    IMG_4205_zpskkes4mxp_2dbec2452cee2f91a6415f6e115ac35e6faf51d2.jpg
    IMG_4195_zpsfqy01m2f_8ea40d51e4db69d24ea51fd85d19c6dde215f90a.jpg


    And finally the lift is done and this is how she sits! This is almost exactly 8" total with tires over a stock Tacoma. I actually had to put some preload back in to the Toytec coilovers because they sagged quite a bit with all of it taken out. Right now I think I have the preload ring turned 1" from the bottom.

    IMG_4204_zpsijp6zxot_c5fc4f70d12b14a6feda2c5c5e0ad3584cf8070a.jpg
    IMG_4203_zpsbab1a0jf_e1f6e0eeababad64c97ca3326837597e5b8ee76f.jpg
    IMG_4201_zpsmjvwvyo8_2b891efc325d8c4c32a48c537c100969e4f2f8a4.jpg
    IMG_4200_zpsqv4iex5t_3336f1b4a5866c4919723c4f7c18278a472b8729.jpg
    IMG_4202_zpseo6fwhks_f33b8276625b8c51e51d9d88a965687a731d3ff1.jpg
     
  7. May 27, 2015 at 12:16 AM
    #7
    Tango71

    Tango71 [OP] Well-Known Member

    Joined:
    Aug 7, 2012
    Member:
    #84315
    Messages:
    65
    Gender:
    Male
    I originally got the MOOG camber bolts and they were garbage, the bolts started to chew through the washer. I see that everyone else has been having the same issues. I returned the kit and decided to go with the factory Toyota ones and modify them myself. I turned them on the lathe and made a 7/64" grease channel into down the bolt. I then drilled a small hole in the side of the bolt so it meets the end of the channel. For the front bolts I also drilled two small holes in the sleeve that goes through the bushing. I expanded the hole in the head and tapped it to accommodate the grease nipple.

    IMG_4174_zps1tswdcri_4f6625805e196cd7724c3c99da7e6eebfb2d6ca6.jpg

    IMG_4175_zpsuothdwyu_001371cb8fe1bb1c30392d6642cd0a9b9efc8895.jpg

    IMG_4176_zpslcylsgsr_2390d8d9cd6fff480c971bc494da1a935f036e26.jpg
     
  8. Nov 29, 2015 at 10:30 AM
    #8
    NABeast

    NABeast Un-Sub’d

    Joined:
    Jun 23, 2013
    Member:
    #106854
    Messages:
    1,585
    Gender:
    Male
    First Name:
    Paul
    Florida
    Vehicle:
    '08 4wD
    ImMrYo mirror bracket. A/C, P/W, PDL, Tilt, Cruise, AM/FM CD
    I just saw your post in the shackle flip thread,this is exactly what I was looking for. I have dakars that I want to run along with the ATO flip kit with my 6" lift. Could you give me your hub to fender measurement so I have an idea of how long of shackles I need to run? I'm trying to get rid of the lift blocks,I also might add a leaf to the dakars. Thanks for any help.
     

Products Discussed in

To Top