1. Welcome to Tacoma World!

    You are currently viewing as a guest! To get full-access, you need to register for a FREE account.

    As a registered member, you’ll be able to:
    • Participate in all Tacoma discussion topics
    • Communicate privately with other Tacoma owners from around the world
    • Post your own photos in our Members Gallery
    • Access all special features of the site

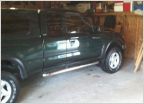
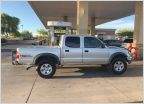
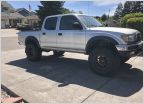
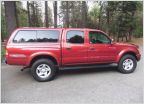
Igor: Double Cab 4x4. Frankenstein's Helper

Discussion in '1st Gen. Builds (1995-2004)' started by Blackdawg, Sep 8, 2015.

  1. Sep 8, 2015 at 8:04 PM
    #1
    Blackdawg

    Blackdawg [OP] Dr. Frankenstein

    Joined:
    Dec 31, 2010
    Member:
    #48500
    Messages:
    80,741
    Gender:
    Male
    First Name:
    Monte
    Wyoming/St. Louis
    Vehicle:
    The Trifecta of Taco's
    ALL OF THEM!...Then some more.
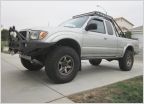
    So I guess its time to start this thread. Meet Igor:

    [​IMG]SCS Wheels-3.jpg by Monte Nickles Photos, on Flickr

    [​IMG]Front diff-2.jpg by Monte Nickles Photos, on Flickr
    [​IMG]RearLift-3.jpg by Monte Nickles Photos, on Flickr

    This is my Daily driver Tacoma but will slowly be modified to do my long distance more Overland/Expo trips. Frankenstein, while he has served me well on these trips, is just becoming too much of a true rig/race truck to drive long long distances on the highway. I'm hoping to take the knowledge and experience i have learned in building Frank to really make Igor and capable yet comfortable truck.

    [​IMG]RearLift-2.jpg by Monte Nickles Photos, on Flickr

    MODS:

    • Recovery
      • Basic tool kits
      • Viar 50p Portable air Compressor
      • Delta Tool Box
    More to come.
     
    Last edited: Aug 14, 2018
  2. Sep 8, 2015 at 8:08 PM
    #2
    Blackdawg

    Blackdawg [OP] Dr. Frankenstein

    Joined:
    Dec 31, 2010
    Member:
    #48500
    Messages:
    80,741
    Gender:
    Male
    First Name:
    Monte
    Wyoming/St. Louis
    Vehicle:
    The Trifecta of Taco's
    ALL OF THEM!...Then some more.
    My First mod was the Steelie Car mount. Works great. I love it! It uses a large steel ball bearing sort of and a magnet you attach to your phone. It works great with my phone but larger phones it doesn't work well on.

    [​IMG]Igor.jpg by Monte Nickles Photos, on Flickr

    This is all it is!

    [​IMG]Igor-2.jpg by Monte Nickles Photos, on Flickr
    [​IMG]Igor-3.jpg by Monte Nickles Photos, on Flickr
    [​IMG]Igor-4.jpg by Monte Nickles Photos, on Flickr

    This is where i mounted the ball

    [​IMG]Igor-5.jpg by Monte Nickles Photos, on Flickr
    [​IMG]Igor-6.jpg by Monte Nickles Photos, on Flickr
    [​IMG]Igor-7.jpg by Monte Nickles Photos, on Flickr
    [​IMG]Igor-8.jpg by Monte Nickles Photos, on Flickr

    Phone sticks right on! Yes..my screen is broken..well..was. I have since repaired it.

    [​IMG]Igor-9.jpg by Monte Nickles Photos, on Flickr
    [​IMG]Igor-10.jpg by Monte Nickles Photos, on Flickr

    Very easy to see when driving

    [​IMG]Igor-11.jpg by Monte Nickles Photos, on Flickr
    [​IMG]Igor-12.jpg by Monte Nickles Photos, on Flickr
     
    SSG (03)TACOMA, Pirhett and kuhndawg like this.
  3. Sep 8, 2015 at 8:10 PM
    #3
    Blackdawg

    Blackdawg [OP] Dr. Frankenstein

    Joined:
    Dec 31, 2010
    Member:
    #48500
    Messages:
    80,741
    Gender:
    Male
    First Name:
    Monte
    Wyoming/St. Louis
    Vehicle:
    The Trifecta of Taco's
    ALL OF THEM!...Then some more.
    Spent memorial day weekend with my good buddy Marc working on trucks. Mostly his. But he did show me how to rebuild a coilover, was pretty easy actually. And now i have Kings in my DD :cookiemonster:

    I bought these Kings used from a friend, he bought them used. They where leaking and he ended up buying some new ADS coilovers instead of rebuilding these. So i bought them and all the parts!

    [​IMG]Igor.jpg by Monte Nickles Photos, on Flickr

    Perfect start to a simple build of the other truck.

    First order of business was to get the coils off. Went and rented a coil compressor and alas..did not fit.

    [​IMG]Igor-2.jpg by Monte Nickles Photos, on Flickr

    I really need to build a coil compressor for the press..

    anyways, Marc had his own way of doing it. Which works quite well using ratchet straps.

    [​IMG]Igor-3.jpg by Monte Nickles Photos, on Flickr
    [​IMG]Igor-4.jpg by Monte Nickles Photos, on Flickr
    [​IMG]Igor-5.jpg by Monte Nickles Photos, on Flickr
    [​IMG]Igor-6.jpg by Monte Nickles Photos, on Flickr

    After looping three in, just start sucking doing the coil.

    [​IMG]Igor-7.jpg by Monte Nickles Photos, on Flickr

    And done!

    [​IMG]Igor-8.jpg by Monte Nickles Photos, on Flickr
    [​IMG]Igor-11.jpg by Monte Nickles Photos, on Flickr
    [​IMG]Igor-9.jpg by Monte Nickles Photos, on Flickr

    Getting the straps off the coil takes some team work though..

    [​IMG]Igor-10.jpg by Monte Nickles Photos, on Flickr

    Dissemble time

    [​IMG]Igor-12.jpg by Monte Nickles Photos, on Flickr

    But first we reset the preload on the King 600lb coils to almost nothing.

    before

    [​IMG]Igor-13.jpg by Monte Nickles Photos, on Flickr

    after

    [​IMG]Igor-14.jpg by Monte Nickles Photos, on Flickr

    Did 1 thread on the passenger side and 3 on the driver side to start.

    Now time to take them apart. Start with the tiny set screw. Don't strip it or you will have a sad sad day...also..gross seal!

    [​IMG]Igor-15.jpg by Monte Nickles Photos, on Flickr

    Then the blue cap unscrews revealing the innards. And for me, a slight problem.

    [​IMG]Igor-16.jpg by Monte Nickles Photos, on Flickr

    This is the snap rig that holds in the outer seal head....it is not supposed to be like this. No wonder it was leaking

    [​IMG]Igor-17.jpg by Monte Nickles Photos, on Flickr
    [​IMG]Igor-18.jpg by Monte Nickles Photos, on Flickr

    It did cause some damage...

    [​IMG]Igor-19.jpg by Monte Nickles Photos, on Flickr

    Nothing catastrophic though.

    We cleaned up the burrs and all was well.

    1 of the shafts was a bit pitted so we had new shafts to go in. However, due to a slight mix up...somewhere a long the line, we didn't get the right shafts...the new ones are a bit...long haha

    [​IMG]Igor-20.jpg by Monte Nickles Photos, on Flickr

    So we ended up not replacing the shafts.

    Note also in the photo above how things are laid out. As you dissemble things, lay them out in order. So you don't forget what goes where. Then just replace the seals you have with the new ones, oil them before install. And resemble the shock. Pretty easy.

    Setting the IPT in the body is important though. We calculated it out using the shaft and how deep the IPT sat bottomed out and raised it up about and inch i think it was with nitro.

    After some more cleaning we were done!

    [​IMG]Igor-21.jpg by Monte Nickles Photos, on Flickr

    so purty..

    then put the coils back on!

    [​IMG]Igor-22.jpg by Monte Nickles Photos, on Flickr

    After that, was a simple install. I am in dire need of some UCAs now though as these are extended travel. Luckily i don't go offroad with it so im not supper concerned about over extending the the uppers for now. But UCAs are in the works.

    I ended up having to remove the sway bar just to get them in ha..i was so sad :rolleyes:

    Before

    [​IMG]Igor-23.jpg by Monte Nickles Photos, on Flickr
    [​IMG]Igor-24.jpg by Monte Nickles Photos, on Flickr
    [​IMG]Igor-25.jpg by Monte Nickles Photos, on Flickr

    wore out stock crap..

    [​IMG]Igor-26.jpg by Monte Nickles Photos, on Flickr
    [​IMG]Igor-27.jpg by Monte Nickles Photos, on Flickr

    Old vs New

    [​IMG]Igor-28.jpg by Monte Nickles Photos, on Flickr

    I'll take the blue one please!

    [​IMG]Igor-29.jpg by Monte Nickles Photos, on Flickr
    [​IMG]Igor-30.jpg by Monte Nickles Photos, on Flickr


    For free...haha

    [​IMG]Igor-31.jpg by Monte Nickles Photos, on Flickr

    plenty of droop now..won't ever use it for quite a while though.

    [​IMG]Igor-32.jpg by Monte Nickles Photos, on Flickr

    Done!

    [​IMG]Igor-33.jpg by Monte Nickles Photos, on Flickr
    [​IMG]Igor-34.jpg by Monte Nickles Photos, on Flickr
    [​IMG]Igor-35.jpg by Monte Nickles Photos, on Flickr

    considering i was at like..negative amount of lift and gained about 2'' overall. Its perfect. Rides SOOOOOO much better then before its not even funny.

    Can't wait to get the rear setup dialed up.

    I also did some welding on Marcs rig :cool: put in a limit strap and spindle gusset. Im sure he will have the full details in his build for you to read, but i just wanna share weld porn :D

    [​IMG]BigCheeseWelding-5.jpg by Monte Nickles Photos, on Flickr
    [​IMG]BigCheeseWelding-6.jpg by Monte Nickles Photos, on Flickr
    [​IMG]BigCheeseWelding-8.jpg by Monte Nickles Photos, on Flickr
    [​IMG]BigCheeseWelding-9.jpg by Monte Nickles Photos, on Flickr


    Was a fun weekend!!
     
    Tour991, CS_AR, Crom and 2 others like this.
  4. Sep 8, 2015 at 8:16 PM
    #4
    zscott

    zscott Well-Known Member Vendor

    Joined:
    Jul 16, 2013
    Member:
    #108365
    Messages:
    3,742
    Gender:
    Male
    First Name:
    Zach
    Utah
    Vehicle:
    13 DCSB Off-Road 4x4
    subd
     
    Blackdawg[OP] likes this.
  5. Sep 8, 2015 at 8:17 PM
    #5
    Blackdawg

    Blackdawg [OP] Dr. Frankenstein

    Joined:
    Dec 31, 2010
    Member:
    #48500
    Messages:
    80,741
    Gender:
    Male
    First Name:
    Monte
    Wyoming/St. Louis
    Vehicle:
    The Trifecta of Taco's
    ALL OF THEM!...Then some more.

    Could use a roof rack eh? :boink:
     
    because_wumbo-truck likes this.
  6. Sep 8, 2015 at 8:55 PM
    #6
    Blackdawg

    Blackdawg [OP] Dr. Frankenstein

    Joined:
    Dec 31, 2010
    Member:
    #48500
    Messages:
    80,741
    Gender:
    Male
    First Name:
    Monte
    Wyoming/St. Louis
    Vehicle:
    The Trifecta of Taco's
    ALL OF THEM!...Then some more.
    It then took me a while to do the rear. Mike had given me his old 8 Leaf Alcans that Wheelers used to sell as part of a deal for the rear bumper i build him. I say used too, because while you can still get Wheelers 8 leafs they are not made by Alcan anymore. Mostly because i really wanted to do the TC rear relocation kit with 10'' shocks. But i ran out of time and kinda money so i settled for some used Foxes that will work just fine for at least a year.

    My rear leafs did NOT want to come out..had to cut them off. Must be an 01-04 thing because I had to do this to Bens leafs too but didn't to Franks original leafs...

    6'' Cut off wheel worked the best i found

    [​IMG]RearLift-30.jpg by Monte Nickles Photos, on Flickr

    On to the upgrade!

    [​IMG]RearLift-4.jpg by Monte Nickles Photos, on Flickr

    I started by pulling the poly bushings out of the leafs. Nothing was seriously wrong with them. But i figured, what the hell. Might as well put new ones in.

    [​IMG]RearLift-2.jpg by Monte Nickles Photos, on Flickr
    [​IMG]RearLift-3.jpg by Monte Nickles Photos, on Flickr


    Here is a tidbit that i think some people don't really know about. You are supposed to use Lithium based grease on Poly bushings. Other grease's can break down the poly and make the deteriorate quickly.

    [​IMG]RearLift-5.jpg by Monte Nickles Photos, on Flickr

    I used the Daystar front main eye bolts that are grease able with poly bushings

    [​IMG]RearLift-6.jpg by Monte Nickles Photos, on Flickr
    [​IMG]RearLift-7.jpg by Monte Nickles Photos, on Flickr

    Each bolt has a zert on it already. I found out later these are the press in kind.

    [​IMG]RearLift-8.jpg by Monte Nickles Photos, on Flickr

    Its good to try and clean these up as best as possible then apply as small amount of grease on the inside and to the bushings before pressing in by hand. A little grease will go a long ways and make this an easy install.

    [​IMG]RearLift-13.jpg by Monte Nickles Photos, on Flickr
    [​IMG]RearLift-9.jpg by Monte Nickles Photos, on Flickr

    Do the same to get the sleeve's in

    [​IMG]RearLift-10.jpg by Monte Nickles Photos, on Flickr

    For the rear i bought the wheelers Grease able shackle kit. Which really is just the OME kit with different bushings to fit OEM rear eyelets instead of the OME leafs.

    [​IMG]RearLift.jpg by Monte Nickles Photos, on Flickr
    [​IMG]RearLift-11.jpg by Monte Nickles Photos, on Flickr

    And would you look at that. See I wasn't lying

    [​IMG]RearLift-24.jpg by Monte Nickles Photos, on Flickr

    I really like how the OME grease able bolts have screw in zerts. You will see why later..

    [​IMG]RearLift-16.jpg by Monte Nickles Photos, on Flickr
    [​IMG]RearLift-17.jpg by Monte Nickles Photos, on Flickr

    Lil grease on the bushings to install again..

    [​IMG]RearLift-12.jpg by Monte Nickles Photos, on Flickr

    Seriously this is all it takes and it helps a ton. Shock bushings too!

    [​IMG]RearLift-14.jpg by Monte Nickles Photos, on Flickr

    Clean and grease the eyelet on the frame too...man..Missouri is being harsh to my once rust free frame :oops:

    [​IMG]RearLift-15.jpg by Monte Nickles Photos, on Flickr

    Put the bushings in first, then slide the bolt in. Apply a small amount of grease to everything as done before.

    [​IMG]RearLift-18.jpg by Monte Nickles Photos, on Flickr

    I put the zert on the outside for easy of access to grease.

    [​IMG]RearLift-19.jpg by Monte Nickles Photos, on Flickr

    Do the same on the rear eyelet of the leafs

    [​IMG]RearLift-20.jpg by Monte Nickles Photos, on Flickr

    Leaf spring issues...

    [​IMG]RearLift-21.jpg by Monte Nickles Photos, on Flickr
    [​IMG]RearLift-22.jpg by Monte Nickles Photos, on Flickr

    Nothing a sawzall can't fix!

    [​IMG]RearLift-23.jpg by Monte Nickles Photos, on Flickr

    Bolt up the shackles! The torque spec is 116ft lbs for the front bolt. 67ftlbs for the shackles

    [​IMG]RearLift-25.jpg by Monte Nickles Photos, on Flickr
    [​IMG]RearLift-26.jpg by Monte Nickles Photos, on Flickr

    I got new U bolts to boot. The WHeelers 7.75'' ones. Probably could have gotten the shorter ones, but these where fine.

    [​IMG]RearLift-27.jpg by Monte Nickles Photos, on Flickr
    [​IMG]RearLift-28.jpg by Monte Nickles Photos, on Flickr


    Then i got the grease gun and grease everything up. The gun pulled a zert out of one of the Daystar front bolts though...not cool. But i'll get a new one.

    [​IMG]RearLift-29.jpg by Monte Nickles Photos, on Flickr

    I scored some fox shocks off of here from @SlipperyTaco and even though the mail lost them for a bit he called the post office and they showed up a few days later! Thanks man :cheers: These things are practically new. I ended up installing them while camping actually..ha!

    [​IMG]RearLift-31.jpg by Monte Nickles Photos, on Flickr
    [​IMG]RearLift-32.jpg by Monte Nickles Photos, on Flickr
    [​IMG]RearLift-33.jpg by Monte Nickles Photos, on Flickr
    [​IMG]RearLift-34.jpg by Monte Nickles Photos, on Flickr

    Looking to get some UCAs next and still want to do the TC relocation out back with ADS shocks.
     
    CS_AR likes this.
  7. Sep 8, 2015 at 9:01 PM
    #7
    Blackdawg

    Blackdawg [OP] Dr. Frankenstein

    Joined:
    Dec 31, 2010
    Member:
    #48500
    Messages:
    80,741
    Gender:
    Male
    First Name:
    Monte
    Wyoming/St. Louis
    Vehicle:
    The Trifecta of Taco's
    ALL OF THEM!...Then some more.
  8. Sep 8, 2015 at 9:03 PM
    #8
    Sacrifice

    Sacrifice Motorcycle Goon

    Joined:
    Oct 8, 2013
    Member:
    #114093
    Messages:
    15,198
    Gender:
    Male
    First Name:
    Chris
    KS
    Vehicle:
    DCSB OR 4X4 LT
    Pelfreybilt Front Bumper,BAMF sliders, Airflow Snorkel,Mini D2S Retrofits, ADS Rear Shocks, Deaver U402 Leafsprings, 35s, AllPro +2LT
    Finally seeing igor :popcorn:
     
  9. Sep 8, 2015 at 9:04 PM
    #9
    Blackdawg

    Blackdawg [OP] Dr. Frankenstein

    Joined:
    Dec 31, 2010
    Member:
    #48500
    Messages:
    80,741
    Gender:
    Male
    First Name:
    Monte
    Wyoming/St. Louis
    Vehicle:
    The Trifecta of Taco's
    ALL OF THEM!...Then some more.
    What do you mean finally?? I have posted him before..sorta.
     
  10. Sep 8, 2015 at 9:06 PM
    #10
    AZoverlandTaco

    AZoverlandTaco How do I change my profile name?

    Joined:
    Sep 22, 2014
    Member:
    #138912
    Messages:
    473
    Gender:
    Male
    First Name:
    Eric
    Flagstaff
    Vehicle:
    2013 DCSB Taco 4x4 w/TRD Off-Road Pkg
    TRD Sport Grille, Baja Fog Lights, 285/75/16 Wildpeak Tires, Leer Shell, WeatherTech Floor Mats
    Looks like someone had a good holiday weekend!
     
  11. Sep 8, 2015 at 9:06 PM
    #11
    Sacrifice

    Sacrifice Motorcycle Goon

    Joined:
    Oct 8, 2013
    Member:
    #114093
    Messages:
    15,198
    Gender:
    Male
    First Name:
    Chris
    KS
    Vehicle:
    DCSB OR 4X4 LT
    Pelfreybilt Front Bumper,BAMF sliders, Airflow Snorkel,Mini D2S Retrofits, ADS Rear Shocks, Deaver U402 Leafsprings, 35s, AllPro +2LT
    Idk if i have seen those or not then. Looking good either way.
     
  12. Sep 8, 2015 at 9:10 PM
    #12
    AZoverlandTaco

    AZoverlandTaco How do I change my profile name?

    Joined:
    Sep 22, 2014
    Member:
    #138912
    Messages:
    473
    Gender:
    Male
    First Name:
    Eric
    Flagstaff
    Vehicle:
    2013 DCSB Taco 4x4 w/TRD Off-Road Pkg
    TRD Sport Grille, Baja Fog Lights, 285/75/16 Wildpeak Tires, Leer Shell, WeatherTech Floor Mats
    I almost want to stop the build on my silver ext cab and buy a green double cab. Every time I see a green Taco I don't want to look at mine for awhile. :facepalm:
     
  13. Sep 8, 2015 at 9:12 PM
    #13
    because_wumbo-truck

    because_wumbo-truck TTC#036 1st Degenerate Urban Off-Roader

    Joined:
    Jun 16, 2015
    Member:
    #157552
    Messages:
    50,209
    First Name:
    Jon
    Houston, Texas
    Vehicle:
    2006 Gordita Blanca V8 4x4 aka "Penelope"
    Sliders and bumper, DDI injectors, flowmaster 40
    I could have sworn Igor was Lunar Mist or Old Man Tan
     
  14. Sep 8, 2015 at 9:13 PM
    #14
    SconnieHailer

    SconnieHailer PutterClutch

    Joined:
    Aug 26, 2012
    Member:
    #85590
    Messages:
    9,737
    Gender:
    Male
    First Name:
    Marc
    West Central Wisconsin
    Vehicle:
    2012 TRD Off Road Double Cab V6 6Speed
    Gotta be so nice now!
     
  15. Sep 8, 2015 at 9:14 PM
    #15
    Blackdawg

    Blackdawg [OP] Dr. Frankenstein

    Joined:
    Dec 31, 2010
    Member:
    #48500
    Messages:
    80,741
    Gender:
    Male
    First Name:
    Monte
    Wyoming/St. Louis
    Vehicle:
    The Trifecta of Taco's
    ALL OF THEM!...Then some more.
    Well..Memorial day was fun haha. Labor day weekend, no way. I worked all weekend. Sucked.

    Well most of these are new. Save the Kings install, that was in Franks build. But yea, he isn't bad. Few dings and such but very smooth and comfy. Compared to Frank especially..lol

    Im the opposite :p I loved my Silver. Green is cool too though. Has a bad ass look too it when done right.

    Nope. Green Green!

    Its not bad! Bit stiff in the back..need some weight back there to settle the springs a bit. Rear bumper may need to be built or something idk. Still..MAJOR improvement over 160k wore out stock stuff haha
     
  16. Sep 8, 2015 at 9:17 PM
    #16
    Blackdawg

    Blackdawg [OP] Dr. Frankenstein

    Joined:
    Dec 31, 2010
    Member:
    #48500
    Messages:
    80,741
    Gender:
    Male
    First Name:
    Monte
    Wyoming/St. Louis
    Vehicle:
    The Trifecta of Taco's
    ALL OF THEM!...Then some more.
  17. Sep 8, 2015 at 9:18 PM
    #17
    Speedytech7

    Speedytech7 Toyota Cult Ombudsman

    Joined:
    Feb 20, 2014
    Member:
    #123587
    Messages:
    52,626
    Gender:
    Male
    First Name:
    ゼイン
    5520 E Sprague Ave, Spokane Valley, WA 99212
    Vehicle:
    93 80 Series LC & 96 Turbo V6 Taco 4WD
    I've done a mod or two
    Nicely done, Frank's younger brother looks good.
     
  18. Sep 8, 2015 at 9:18 PM
    #18
    because_wumbo-truck

    because_wumbo-truck TTC#036 1st Degenerate Urban Off-Roader

    Joined:
    Jun 16, 2015
    Member:
    #157552
    Messages:
    50,209
    First Name:
    Jon
    Houston, Texas
    Vehicle:
    2006 Gordita Blanca V8 4x4 aka "Penelope"
    Sliders and bumper, DDI injectors, flowmaster 40
    I forsee a Frank jumpin in your future, Monte.
     
  19. Sep 8, 2015 at 9:19 PM
    #19
    Blackdawg

    Blackdawg [OP] Dr. Frankenstein

    Joined:
    Dec 31, 2010
    Member:
    #48500
    Messages:
    80,741
    Gender:
    Male
    First Name:
    Monte
    Wyoming/St. Louis
    Vehicle:
    The Trifecta of Taco's
    ALL OF THEM!...Then some more.
    Thanks! Will be a fun simple build hopefully.
     
  20. Sep 8, 2015 at 9:20 PM
    #20
    Blackdawg

    Blackdawg [OP] Dr. Frankenstein

    Joined:
    Dec 31, 2010
    Member:
    #48500
    Messages:
    80,741
    Gender:
    Male
    First Name:
    Monte
    Wyoming/St. Louis
    Vehicle:
    The Trifecta of Taco's
    ALL OF THEM!...Then some more.
    I did jump him....about 1 second of flight time. Was an accident :anonymous: ..haha got the wheels off the ground a lot on the last trip. Few photos of it floating around.
     
To Top