1. Welcome to Tacoma World!

    You are currently viewing as a guest! To get full-access, you need to register for a FREE account.

    As a registered member, you’ll be able to:
    • Participate in all Tacoma discussion topics
    • Communicate privately with other Tacoma owners from around the world
    • Post your own photos in our Members Gallery
    • Access all special features of the site

Matt's Completed Stereo System

Discussion in 'Audio & Video' started by mbrogz3000, Sep 12, 2015.

  1. Sep 12, 2015 at 1:29 PM
    #1
    mbrogz3000

    mbrogz3000 [OP] Well-Known Member

    Joined:
    Oct 11, 2011
    Member:
    #65009
    Messages:
    1,086
    Gender:
    Male
    First Name:
    Matt
    Northern NJ
    Vehicle:
    2020 Toyota 4Runner Limited
    Hi All,

    I've attached a handful of pics of my audio system I installed over Labor Day weekend, and finished tuning this week. This setup sounds incredibly clear and can pump clean bass without any strain. I wish you guys could hear how clear, musical, tight and powerful my system is. The main speaker gains I have turned down their gains well below clipping level to about 65% of the amp's capability (only 1/4 to 1/3 above min), to preserve my own hearing. The mono amp is turned up to about 3/4 (which still does not clip according to my o-scope @ -7.5dB), and it sounds amazingly clear and precise. I did the sound deadening progressively over the weekends through July and early August. The sub is still breaking in :) and gets a little louder with each heat (usage) cycle. Its got maybe 2 more week's worth of break in (16 to 18 heat cycles @ 40 minutes per usage). Also, I tried making some FAST foam rings for the front speakers, but its very tedious and boring to cut out- I'm going to pay the $25 for a pair of these and just get them for a quick install. With my setup, you definitely can feel and hear all the bass notes cleanly, but don't expect it to be an SPL monster (like those 2 or 3 guys on youtube if you know who I mean). You can have one or the other, but not both with this truck...and you'll probably need a walled off SUV anyway if that's your goal.

    Equipment Listing:

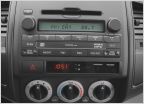
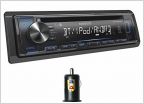
    Alpine CDE-W265BT (2015 Head Unit w/ bluetooth, Pandora, phone. Integrated amp is disabled.)
    Alpine PDX F4 (100w x 4)
    Alpine PDX M6 (600 w x 1)
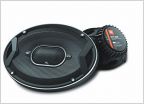
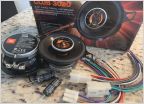
    Infinity Kappa 60.2cs (Front Component Speakers, from my college build in year 2000, powered with Infinity Kappa 54a2 amp)
    Infinity Kappa 62.11 (Rear Coaxials)
    JL Audio 13TW5v2 (Thin Sub, in exactly 0.806 Ft^3 volume, 'trapezoided' notch which helped shaved 1/8" off the box depth, 28" wide 3/4" MDF enclosure)

    Cables - 0 AWG NVX kit (OFC) split into 4 AWG (OFC) for each amp, NVX X-series RCA's (aluminum terminals), and 12 AWG Monoprice OFC speaker cable. Power on the left side, RCA's on the right side.

    Sound deadening - 5 rolls of Peel and Seal (so far) :) . Planning on finishing the roof and floor later. Ensolite is definitely needed. I may make a bunch of squares for application to the door card. Also, I didn't blindly apply the deadening across the complete inner panel as I didn't want to obstruct being able to access the window motor.

    Only lessons learned I have is that the Double Cab really does not need 'good' coaxials installed into the rear doors... you really can't hear these because of how low they are positioned, and the way they play into the front seats. If you are a young guy who still cruises around with friends, then go ahead and get them, but if your are out of that stage like me then you can save $100 and just use the factory speakers or otherwise fabricate 8" speakers into the doors. Also, although the sub is safe distance from the back seat, I would have preferred being able to fold down the seat to see it play and having the nice seat backing in place...but I'm not sure thats possible with this sub unless the box is widened.

    I can see myself making some nice fiberglass kick panels, putting my current Kappa 60.2 CS at my feet, and getting some Hybrid Clarus components into the front doors, then just running my rears off the clear sounding head unit amp. An Epicenter might be in my future as well to further enhance the bass...

    Enjoy!

    IMG_0895.jpg [/ATTACH] IMG_0890.jpg IMG_0892.jpg IMG_0898.jpg IMG_0900.jpg IMG_0901.jpg
     
    Last edited: Sep 12, 2015
    Biscuits likes this.
  2. Sep 12, 2015 at 1:42 PM
    #2
    Jake7246

    Jake7246 Third Member

    Joined:
    Dec 22, 2013
    Member:
    #119059
    Messages:
    20
    Gender:
    Male
    First Name:
    Jake
    Modesto, CA
    Vehicle:
    06 PreRunner SR5
    Fox COs/Rear 2.0, Total Chaos UCAs, K&N Air Intake, BHLM, Color Match Satoshi Grille and Bumper, Speedtech Lights, Rampage Light Bar, RCI skidplate, Wheeler's Superbumps, LED tail lights
    Nice set up!
     
  3. Sep 12, 2015 at 1:51 PM
    #3
    mbrogz3000

    mbrogz3000 [OP] Well-Known Member

    Joined:
    Oct 11, 2011
    Member:
    #65009
    Messages:
    1,086
    Gender:
    Male
    First Name:
    Matt
    Northern NJ
    Vehicle:
    2020 Toyota 4Runner Limited
    Thanks! Like I said to my family - its amazing how much longer this stuff takes when your the only person doing the work! For this truck, the majority of installation work is 'detail' work. Very slow if you want things to look good, sound good, and be safely installed the first time around.

    Routing 12 AWG into the doors (especially the driver's side) is a terribly slow process if you are conscious about poking the factory wiring with a fish or coat hanger.
     
  4. Sep 14, 2015 at 6:44 AM
    #4
    Mybigtaco

    Mybigtaco Well-Known Member

    Joined:
    May 20, 2014
    Member:
    #130269
    Messages:
    97
    Gender:
    Male
    Goodyear, AZ
    Vehicle:
    14 PreRunner
    Icon coil-overs, Maxtrac spindles, custom OMD inspired leaf pack,
    Do not use a coat hanger or anything sharp in the boot, a couple drops of dish soap and a pencil is all you need, add the soap, put the pencil through the boot, scrunch the boot and then push the wire through following the path the pencil has made in the boot only should take 5 minutes to do max.
     
  5. Sep 14, 2015 at 9:08 AM
    #5
    ike3000

    ike3000 Well-Known Member

    Joined:
    Apr 27, 2013
    Member:
    #103001
    Messages:
    307
    Gender:
    Male
    It looks good. Running cables through the door boot was a major PITA...and I only used 16AWG wires.

    I never bothered installing new rear speakers and just left the factory speakers in there not connected to anything. My 3 yr old son is my only back seat passenger most of the time and he can hear the front speakers perfectly fine.
     
  6. Sep 14, 2015 at 9:21 AM
    #6
    jester156

    jester156 Well-Known Member

    Joined:
    Oct 9, 2009
    Member:
    #24005
    Messages:
    1,517
    Gender:
    Male
    Cumberland, RI
    Vehicle:
    2021 GMC Sierra AT4. 3.0l Duramax
    I installed the same HU about 2 months ago. I also rewired all the doors and like previously stated, going through the boots was a PITA. It is all about the details.
     
  7. Sep 14, 2015 at 12:53 PM
    #7
    Ihatetacomas

    Ihatetacomas Because tacomas hate me

    Joined:
    Aug 18, 2014
    Member:
    #136475
    Messages:
    988
    Gender:
    Male
    First Name:
    Dylan
    Elko NV
    Vehicle:
    '12 White LB TRD Sport
    Used @ 23,283 Volant Intake (w/ scoop)(removed August 2016), BAKFlip G2 Tonneau Cover, (drain tube mod), Pop & Lock Tailgate Lock, Stampede Vigilante Premium VP Series Hood Protector, 5lb Extinguisher, Shovel & Axe mounted in bed, Shok Industries Sound Deadener, Mercury: (K62, MGR-1200, MGR-495) Triton 8" Subs, Custom-Made: Sub Box, Speaker Templates, Vapor Barrier, All-Pro Bumper w/Kickouts, hidden trailer hitch, wooden cup-holder Misc: Knukonceptz RCA, speaker, and power wires, Big 3 Upgrade, a very full Husky technician tool box
    I found that my iPod charging cord with some electrical tape to keep it around the cord worked wonders. Especially bringing the RCA's up to my head unit because it's flexible and the coat hanger would get hooked on everything. Although I have a 10ft cord:anonymous:
     
  8. Sep 15, 2015 at 5:02 AM
    #8
    mbrogz3000

    mbrogz3000 [OP] Well-Known Member

    Joined:
    Oct 11, 2011
    Member:
    #65009
    Messages:
    1,086
    Gender:
    Male
    First Name:
    Matt
    Northern NJ
    Vehicle:
    2020 Toyota 4Runner Limited
    Wiring the rear doors is lots of disassembly work since the lower b pillars need removed (they need removed any way though for Power and RCA cable routing). The toughest one was the drivers side because there is so much stuff crammed in that area. I have alot of experience working 'blindly' and by feel, and I eventually got it. Thats the only side I carefully used the coat hanger method on.

    I got a minor case of 'get what you pay for' with the speaker cabling - the jacket isn't as flexible as a major branded speaker cable, but the at the time I was only concerned that it was OFC (and it is real OFC as per my scrape test). Jacket aside, its good cable. The 12 gauge I used is just stiff enough to slide through the boots on all but the drivers side. Wish I would have picked up a small bottle of cable glide in the wire aisle - it would have significantly reduced the routing time.

    On the head unit - its an awesome unit. It has all the competition grade settings like time correction, 9 band parametric eq which allows you to set the frequencies for boost and reduction, crossover selection with slope adjustment, priority subwoofer volume (which avoids the need for a knob). I measured its Pre-amps with the o-scope, and they are actually 5-volt, turned up all the way without any clipping at all. The build in amp is very very clean and can be used with outboard amps if the bass is reduced. Its just a great all head unit with top level features for the price our low-to-mid level head units used to be back in the day. They need to do something about that tune-it app though.
     
    Biscuits likes this.

Products Discussed in

To Top