1. Welcome to Tacoma World!

    You are currently viewing as a guest! To get full-access, you need to register for a FREE account.

    As a registered member, you’ll be able to:
    • Participate in all Tacoma discussion topics
    • Communicate privately with other Tacoma owners from around the world
    • Post your own photos in our Members Gallery
    • Access all special features of the site

Rigging up safety lights

Discussion in 'Lighting' started by Missouriprerunner, Sep 9, 2015.

  1. Sep 9, 2015 at 5:18 PM
    #1
    Missouriprerunner

    Missouriprerunner [OP] Well-Known Member

    Joined:
    Sep 9, 2015
    Member:
    #163831
    Messages:
    249
    Gender:
    Male
    First Name:
    Adam
    STL MO
    Vehicle:
    2018 dbl cab sr5
    Alright so I've been watching these forums for a year since I got my tacoma and I joined this one today as I decided I liked it the best. You guys seems awesome.
    Enough of that though, I'm a contractor on state highway job and private quarry expansion projects so I have amber/white strobes around my work truck like crazy. My personal truck however- my tacoma- is getting them added on. But I want the to now be seen easily unless they are on because people drive like grandma's when they see lights on vehicles.
    I've been racking my brain for two weeks now on how to mount my two small strobes on my rear headrests and have them rock solid. I don't want brackets in my personal truck so this seems the best option.
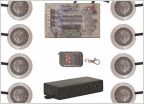
    The strobe lights are small and I'll post pics of them but I need some creative thinking here so they don't turn out like crap? 7be4a24d7b2b50949267721116552ef6_11264cebcedbc39e53ec4eabddaeba73ec781d30.jpg
     
  2. Sep 9, 2015 at 5:22 PM
    #2
    t_e

    t_e Well-Known Member

    Joined:
    Dec 6, 2009
    Member:
    #27078
    Messages:
    561
    Gender:
    Male
    First Name:
    Erik
    miami,fl
    Easy solution get yourself a piece of metal thin enough to shape by hand and long enough to mount onto the plastic behind the seat with double side tape. The seatback/headrest should sandwich it up against the glass. I did an install on a tacoma similar to this to not permanent mount anything.
     
  3. Sep 9, 2015 at 5:23 PM
    #3
    Missouriprerunner

    Missouriprerunner [OP] Well-Known Member

    Joined:
    Sep 9, 2015
    Member:
    #163831
    Messages:
    249
    Gender:
    Male
    First Name:
    Adam
    STL MO
    Vehicle:
    2018 dbl cab sr5
    Will that hold up to rough quarry terrain?
    Also, any pics? I'm trying to visualize after a long day haha
     
  4. Sep 9, 2015 at 5:40 PM
    #4
    fergyz

    fergyz Mmmm...Tacos

    Joined:
    Apr 25, 2012
    Member:
    #77624
    Messages:
    743
    Gender:
    Male
    49th State
    Vehicle:
    06' DBC 4x4 6spd
    velcro and zipties.... a little funny saying it but it works.

    run the velcro vertically around the headrest and use the zip ties through the screw holes and cinch it down on the velcro. adjust the velcro as needed. if the velcro is wide enough... you could put a hole in it and run the headrest posts through it. this will help keep it from sliding down.

    the other option that was posted was the first thing that came to my mind also.
     
  5. Sep 9, 2015 at 5:49 PM
    #5
    GHOST SHIP

    GHOST SHIP hates you.

    Joined:
    Mar 9, 2015
    Member:
    #150537
    Messages:
    22,392
    First Name:
    GHOST
    Sounds stupid, yes. But I can attest that Velcro sticks to the back of our headrests like a somebitch! For small lights like that, I wouldn't question the strength of the hold. You can get a small square of Velcro (somewhere like 4'x4') at fabric stores or by the roll or by the foot at hardware stores or army surplus stores (they use them when they sell patches and whatnot).

    On a side note, what are you using to control the strobes? I've been looking for something to add to my dust lights that can be turned on independently. So one switch will power on my dust lights to a solid state and a second switch will add the strobe function.
     
  6. Sep 9, 2015 at 5:54 PM
    #6
    Missouriprerunner

    Missouriprerunner [OP] Well-Known Member

    Joined:
    Sep 9, 2015
    Member:
    #163831
    Messages:
    249
    Gender:
    Male
    First Name:
    Adam
    STL MO
    Vehicle:
    2018 dbl cab sr5
    Strobe lights have 4 wires: ground, hot, delay and sync so if your lights don't have this then you need to buy something to hook up to them to force the patterns to them. I think Show-Me makes some good ones, I know they make good headlight kits. But the switch I have has two switches for my front and rear lights then a momentary delay to change the pattern of my lights through its 14 different patterns.

    Funny myself and my coworker haven't thought of that yet lol, what size aluminum do you think I'd need? 1/4in maybe? Lows sells that I think. I picked up velcro already but didn't know if it would stick to the headrest, though about buying some 3m spray adhesive, that stuff works well I know.
     
  7. Sep 9, 2015 at 6:34 PM
    #7
    Missouriprerunner

    Missouriprerunner [OP] Well-Known Member

    Joined:
    Sep 9, 2015
    Member:
    #163831
    Messages:
    249
    Gender:
    Male
    First Name:
    Adam
    STL MO
    Vehicle:
    2018 dbl cab sr5
    Alright, well since I know the velcro will hold up good I'm going to use that first.
    I'll use my two Code 3 lights, one on each main head rest and wire them together in, then run the wire in wire loom up to the front of the truck like you would if it where an amplifier. I'll post pics after its done tomorow. Thanks guys.
     
  8. Sep 10, 2015 at 9:14 AM
    #8
    Missouriprerunner

    Missouriprerunner [OP] Well-Known Member

    Joined:
    Sep 9, 2015
    Member:
    #163831
    Messages:
    249
    Gender:
    Male
    First Name:
    Adam
    STL MO
    Vehicle:
    2018 dbl cab sr5
    Well got everything going and one of the lights wasn't marked correctly so it's red rather than amber so I'll have to send it back. At least I tested them before I began working on the lights.

    I took the faceplate off, and on the metal backing measured where the wires came out, cut a hole in the fuzzy vecro to match up to it and then put the vecro on and rolled the extra vecro around the corners of the light. Then I put super glue on the inside of the faceplate, and fit it back onto the light and made sure the rolled over vecro slid up into the face plate.
    This was everything is clean and flush and I don't need screws to hold the face plate down. Came out better than I thought. And then the adhesive on the "industrial extreme" velcro is hardcore attached to the fabric so it's not going anywhere.

    Thank you guys for the help, it came out better than I expected and I'll post a link for a video of my lights in action one I get the replacement amber unit.
     
  9. Sep 10, 2015 at 9:16 AM
    #9
    Missouriprerunner

    Missouriprerunner [OP] Well-Known Member

    Joined:
    Sep 9, 2015
    Member:
    #163831
    Messages:
    249
    Gender:
    Male
    First Name:
    Adam
    STL MO
    Vehicle:
    2018 dbl cab sr5
  10. Oct 8, 2015 at 6:34 PM
    #10
    Missouriprerunner

    Missouriprerunner [OP] Well-Known Member

    Joined:
    Sep 9, 2015
    Member:
    #163831
    Messages:
    249
    Gender:
    Male
    First Name:
    Adam
    STL MO
    Vehicle:
    2018 dbl cab sr5
    So it took forever but the replacement light is in and I have a video here for you guys.
     
  11. Oct 8, 2015 at 6:54 PM
    #11
    Missouriprerunner

    Missouriprerunner [OP] Well-Known Member

    Joined:
    Sep 9, 2015
    Member:
    #163831
    Messages:
    249
    Gender:
    Male
    First Name:
    Adam
    STL MO
    Vehicle:
    2018 dbl cab sr5
  12. Oct 8, 2015 at 6:55 PM
    #12
    Missouriprerunner

    Missouriprerunner [OP] Well-Known Member

    Joined:
    Sep 9, 2015
    Member:
    #163831
    Messages:
    249
    Gender:
    Male
    First Name:
    Adam
    STL MO
    Vehicle:
    2018 dbl cab sr5

Products Discussed in

To Top