

-
Welcome to Tacoma World!
You are currently viewing as a guest! To get full-access, you need to register for a FREE account.
As a registered member, you’ll be able to:- Participate in all Tacoma discussion topics
- Communicate privately with other Tacoma owners from around the world
- Post your own photos in our Members Gallery
- Access all special features of the site
Quick Links: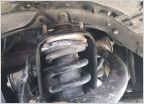 Old Man Emu Lift kit popping noise from Strut Mount
 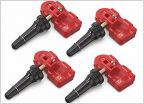 TPMS light won’t stop blinking
 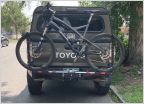 Where to relocate rear license plate for hitch bike rack
 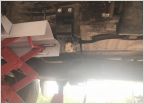 4.0 6spd Manual URD Stage 3 Clutch, TOB Sleeve & Lightweight Flywheel Install Write-Up
  Rust on cab starting, how to stop it
  Want to install a new radio
How To Remove CV Axle+Replace Front Wheel Bearing 2nd Gen
Discussion in '2nd Gen. Tacomas (2005-2015)' started by KenpachiZaraki, Nov 22, 2011.
Page 18 of 24
Page 18 of 24
Products Discussed in


