1. Welcome to Tacoma World!

    You are currently viewing as a guest! To get full-access, you need to register for a FREE account.

    As a registered member, you’ll be able to:
    • Participate in all Tacoma discussion topics
    • Communicate privately with other Tacoma owners from around the world
    • Post your own photos in our Members Gallery
    • Access all special features of the site

Wireless Charging Shifter Console MOD.

Discussion in 'Technical Chat' started by skygear, Dec 2, 2015.

  1. Dec 2, 2015 at 6:49 PM
    #1
    skygear

    skygear [OP]                    

    Joined:
    Nov 6, 2011
    Member:
    #66558
    Messages:
    8,414
    Some of the latest devices out there are able to be wirelessly charged. Most current Samsung devices and lots of others. This mod involves the teardown of a perfectly working product and covertly installing it in the vehicle under the plastic.

    You need.

    - Wireless charger
    - 12v usb charger
    - Razor
    - Pliers
    - Screwdriver
    - Torx Screwdrivers
    - Switch? or wire to ignition on.
    - Non slip pad / Micro Suction tape
    - optional - Soldering iron.
    - Length of wire
    - epoxy or hot glue

    Disassemble the Wireless charger and 12v charger.

    Here is the dump of photos and step by step from elsewhere.

    32924f3bdf65d46913e5a5a78131f988_b0ca6713bde01f2babb17cf53770664ec928a354.jpg1199726bfce5e83d456d4ab0bd7c04f4_36ff15c50257bfd38665d0b12b722b16cf3b3baa.jpg6f352592119dcf46ae1dd39cfeeac653_b7798ad2b227ca9be3438e3c03190988eaf43bdb.jpgb9e0335537c63b772bfadd392b975917_1cea646f8485d016c85004157f625b26cce83fee.jpg42c46548bb714623871294d8ad538ed1_8dfe5e9e94d7504fd49171a23ea1efb77317d1ab.jpged906669d9d0bc16bd3e345f885bdb3d_52ac7cd3e1e1e5d679d497a370a391b6b1189b1f.jpgd4f97a8746d2823c018a107da9f9e740_ec2063a6f48907bc8094fabdf86dbf8d8ea8596d.jpgf0ffc3e786cf2608001ff6795991397f_041e23bf608ffbe16d01e1ebd8956b972f4574bc.jpge3a3381e7e57932d5bbce677383bc2dd_5b4cd99ee075709a22f31902d0f197d274af9984.jpge7813e31e9423654be2f2552ea7377de_3d47f6accf9006042b317b2a0ecdc7ad33d4dbb3.jpgdb3ed35e757eacdf1790d456d8a0763f_5f9160e809e1829ac2de6ad24ba84a17b071d85b.jpg2fa03700e7fd5aba34179cf921b097f3_ff3b24f19dc82041ef1c8b604340d69b77a26e55.jpg37ab8ddc605db4e6f497aca8e7e305bf_8be65ee74882d9132431a1f5423b926e4b214bd2.jpg69e1e4fd9daa4ac57949ff05e9c2a7ee_aa64a5578157f7e19adf394502d1c8893f6c1483.jpg197f0012ae90f5558875c88cfeae56c9_d78bc8ced4d745febf60875b6f691ad8e40ab8ab.jpgc7c9d78a057ba478ed21ee2b1dc6464e_6c9438a3349ff162f379156276c9c805a962f83d.jpgb8db1d77419b1385c61461468f3317ac_9e97fee4b015802c368774f7c3639297f1b2b911.jpge044e0ce387440b16e416be293f9ef10_3ab62fb9d6d69138fb1ff10df14df106a4d32d09.jpg3291fcb341a3dc58bb25660439766a93_0f8562190bf837da7a01bad2751270cf416ff82c.jpg78180f6816a56304fa68f271415b6b70_66ad667ab5079cf0ed8dca6bc7d45f361ec9ec4f.jpg038b55533ad7e25f91fd7ca5781d05bc_f439bc1bacb1cd0078f443603d51c44584a61252.jpgf47361e2addb3195c6c7853514cdf861_cbe2a4790740423b928bff58e6a4356f0b26ec04.jpg1ad550bd95ce3190610a8c3d64a6814b_81613f5b26c18f19e46400342c62c087f9c9dc18.jpg878f158c5e484383cdb4a20b2d057572_40f554dd7b56c3b0b4a1f7b8ac5f14a1863b1ada.jpg121203f57611aad1c1d37023a4ddc49f_7674773472d3c2558ebcb5f884319debd1e6f3e9.jpge7c9ba24ad114e15c48945259bc093d8_8a79c2ddd31358745c5be73a4c5f45fccca08ae0.jpg9d00c75337cdded0543f3861782ae29f_852857121c1095ff97ff353443dc5767758178a0.jpg2644f40006d088f58780a9d3fb881d2f_3721cb4eecf9794e60b0d45fee88266b7a3d20d9.jpg2a0b4cf3f73fa265c819b84f2aec8ecb_011089b916d6a224081294655daeeb10f8e88d2f.jpgf528adbffc803d130cd5533a0df1398a_e9b6859dc18b1b4d098c41a3c16b5a00ed03056b.jpg9233979664b840f11ede60d09d1c90d3_2d33e6a9cc0c334ad4dd2d7cfbdf7294b6aa78d9.jpg52db0d6fc2971f471901e9feb19a1b5d_952603fe9963e472c6c74b30dc4a2928699dd8fd.jpg1967748700ee750608a90c7213349a1f_db835bea19279ef4a77d7f69df89a3de4f79c39f.jpgaf2f3002e14883786865d38de6e6e278_924891c0d07e443a2b945bb4cb7201a85f3d2267.jpgdab6404e43af4bf972571c2f04b30284_e0058b2380845e080a5937be2a7560861cd8518b.jpg08dbad07eeceb7cd3b6d06fc34095dbf_498679e801bcfd129ac528bf576168a3073849df.jpgcc5c52ec90d0836c5249793afec89a5b_c44590d7d36a386cbc1adb6705787b4d6b906458.jpg

    HOW TO TEARDOWN -

    Using a regular + screwdriver, you can move the rubber on both sides of the rubber on the bottom of the charger. There are just 2 screws there.

    Once they are unscrewed, flip over the charger and turn the top part of the charger counter clockwise. It should then lift right off.

    Now that the top is removed, there are 5 screws holding the middle section to the base. Remove them.

    Base should now easily lift away from the middle section.

    Flip over the middle section and you have an additional 5 screws to remove.

    Now to fully remove the electronics from the unit. You would need a Heat Gun and a Soldering iron if you planned on keeping it in a warrantable state. Otherwise, just use a heat gun and a pair of wire cutters.

    I used the heat gun to remove the coil from the frame as well as the ribbon cable LED daughter board. Then using the cutters, cut the section where the LED was out as to not have desolder the coil.

    DONE.


    As for the car charger, I used a knife and some pressure on the seams. "POP' in 4 places and I was done. Desoldered the 2 grounds and 1 positive. Soldered up some red and black 14gauge lead wires and I am off to install in the truck.

    I didn't put the Nokia modification up since I doubt there is any interest. Basically I gutted it, Used a heat gun and bent the arms in a manner that would hold my devices and allow for the thicker electronics. Then used some moldable plastic (polymorph) to make a BASE for the electronics to screw into / secure it. I had already added a Ram Ball mount to it so reassembly and plugging it back in were all that was needed. - Overly simplified explanation -


    3d36a7c40bed886ef68c4607531774ea_ed3b689e459cb874c75d13e76023ac9771eae0c6.jpg87cf1c0c44119f049e30e4d02e90a394_89e005624d8d488f901f64ce5e4a3bcc163b7f24.jpg963990319107464eab9adb999687bea5_219be826f85e5e042956cd16f809a3726bcc3b8e.jpg655110171183f1216785aa1f970add78_fc931550ed09701333aeabd644365a59d2ae7db3.jpg0e33d7a2afe0a265c398d412826de975_a40b86dba578dacc4688747548334bfd3fc6640a.jpgbac0fa0c7412131b85db0512634fa7f1_320280dfe4669ac2a02b0971273978dc00f739e9.jpg46c2a641b7856bd55e517ee9df14a467_f9d389bf253044ed0164cb404e05909fae8c0516.jpg932097ef4ec11ec3ec99f6f7e9127ce3_6d43fcae8df04cefca2f7b1fbb69e5cae32bbac4.jpg1e6a547ebbc3edfcb7412e5b27505d0c_2e2f50d0cd6092f1cecfac351c89f34170c8607f.jpg20d734fb646e08bcd917f9187047f29c_e65440234d0bdce915ec3d876025433bce0d527b.jpg

    4a4be659f855e98ade193163c8f9c0cd_ffcc0d18388c400c843676ce497ee793dabd575b.jpg
     
    Last edited: Dec 2, 2015
  2. Dec 2, 2015 at 6:50 PM
    #2
    skygear

    skygear [OP]                    

    Joined:
    Nov 6, 2011
    Member:
    #66558
    Messages:
    8,414
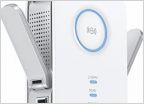
    This one is the Wireless FAST Charger. You can do the same with any of the pads on the market.
     
  3. Dec 2, 2015 at 9:45 PM
    #3
    skygear

    skygear [OP]                    

    Joined:
    Nov 6, 2011
    Member:
    #66558
    Messages:
    8,414
    1. yes.
    2. Yes and no - there is a distance in the standard https://en.wikipedia.org/wiki/Inductive_charging that is only within a few mm. Since the goal was to put some of the MicroSuction tape on the surface. I wanted to minimize any interference.
    3. you answered it. SPACE> - I wanted to maintain as much space as possible under there. Since I will NOT be removing it and making it a permanent fixture in the truck, it only made sense to me to do the complete teardown. In that compartment, it gets toasty since the transmission and power inverter are right there. Maximizing the airspace around the inductive charger and fan was also a goal for me.


    as for the charger you linked. YES. That would be fine or the standard wireless chargers or to use the Fast Wireless Charger in standard mode. The power requirements for each of the new Qualcomm Fast Charge 2.0 standard chipset are as follows. 5v/2a, 9v/1.67a, 12v/1.25a - The Wireless Fast Charger uses 2 of the standards, 5v/2a (regular mode) - 9v/1.67a(fast mode). Thus pairing both the Power supply and the inductive charger with equally spec'd equipment was key in this instillation.

    see also - https://en.wikipedia.org/wiki/Qi_(inductive_power_standard)
     
    Last edited: Dec 2, 2015
  4. Dec 2, 2015 at 9:50 PM
    #4
    skygear

    skygear [OP]                    

    Joined:
    Nov 6, 2011
    Member:
    #66558
    Messages:
    8,414
    On the USB cable used. You can use a regular LONG cable and minimize the length of wire you need for the charger install location.


    Another modification I did was to take one of the fast chargers and gut a Toyota USB/AUX outlet and replace it with the fast charger 12v. Charge only, no data right now. Might delve into that later but I doubt it since bluetooth is the preferred transfer method. This mod is for when I need FASTER charging than the wireless charger provide or someone wants to charge their device.
     
  5. Dec 2, 2015 at 9:52 PM
    #5
    skygear

    skygear [OP]                    

    Joined:
    Nov 6, 2011
    Member:
    #66558
    Messages:
    8,414
    I had a peak at the 3rd gens today. Definitely a Mod we can ALL do. I noticed that some of the toyotas already have the wireless charging in the cars. Like the switch they use. Maybe one day. Not anytime soon for the new switch though.
     
  6. Dec 2, 2015 at 10:00 PM
    #6
    skygear

    skygear [OP]                    

    Joined:
    Nov 6, 2011
    Member:
    #66558
    Messages:
    8,414
    I just realized here, I included the pic from an additional mod I did to an existing wireless charger by NOKIA>

    I liked the small form factor of the car dock cradle that nokia made. But wanted the Wireless Fast Charger tech for the latest devices. Nokia didn't update their dock with the newer tech so I decided to put the tech in there. Gutted it and used some of the polymorph to make an internal frame to screw it to.

    20d734fb646e08bcd917f9187047f29c_09d561915c03f636806ebaee51f4b8db98007823.jpg

    The white that you see through the dock is where the opposite side is also gutted to allow air flow.

    1e6a547ebbc3edfcb7412e5b27505d0c_5f42a237bdfafee863ef48088c900d7ea39e6a12.jpg
     
  7. Dec 2, 2015 at 10:03 PM
    #7
    skygear

    skygear [OP]                    

    Joined:
    Nov 6, 2011
    Member:
    #66558
    Messages:
    8,414
    Mine is hooked up to ignition on through an auxiliary on master switch I have installed. For everyone else, you can just tap the back of the cigarette lighter outlet behind the dash/ center console and it will be a clean simple install.
     

Products Discussed in

To Top