1. Welcome to Tacoma World!

    You are currently viewing as a guest! To get full-access, you need to register for a FREE account.

    As a registered member, you’ll be able to:
    • Participate in all Tacoma discussion topics
    • Communicate privately with other Tacoma owners from around the world
    • Post your own photos in our Members Gallery
    • Access all special features of the site

Boonie's Black Bomber Build

Discussion in '2nd Gen. Builds (2005-2015)' started by Boonie Buster, Apr 10, 2014.

  1. Apr 10, 2014 at 2:03 PM
    #1
    Boonie Buster

    Boonie Buster [OP] Well-Known Member

    Joined:
    Nov 10, 2013
    Member:
    #116316
    Messages:
    292
    Gender:
    Male
    PNWet
    Vehicle:
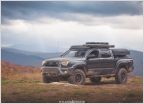
    2014 Access Cab TRD
    2014 Tacoma TRD Offroad 4x4 Access Cab w/ 6spd

    IMG_20160928_201043_zps6xpk6kcs_44a75337d1c734e401aa0581b761488334079262.jpg


    Updated: December 29th 2018

    Current Modifications:

    Suspension:

    -Stock Bilsteins

    Tires and Wheels:
    -265/75r16 Goodyear Duratracs
    -Factory 16" wheels

    Drivetrain:

    Gearing - 3.73s
    Rear - Factory E-Locker
    Front - Open Diff

    Exterior:

    -Snugtop Rebel Canopy w/ Yakima Tracks
    -PrInSu Designs Access Cab and Cap Racks
    -Truck Bed Mat
    -Tinted Side Windows
    -WeatherTech Side window deflectors

    Interior:
    -Salex Glove Box and Center Console Organizers
    -WeatherTech Digital Fit front floor mats
    -ScanGuauge II w/ bicycle light mount to rearview mirror
    -LED Light Strips inside Canopy
    -Large QuikGrips mounted to canopy ceiling for kayak paddles
    -Plastic Storage drawers behind front seats
    -ARB 50qt Fridge

    Recovery:
    -60" Hi-Lift Jack on Relentless Fab bed brackets
    -3"x30' Pro Comp 30,000lb Tow Strap
    -Fiskars D-Handle Shovel
    -Viking Offroad UTP Hitch and D-Ring Shackle
    -UTP Tire Repair Kit
    -(4) Maxtrax recovery tracks
    -(2) Rotopax 2gal gas cans

    Camping Gear:
    -Tepui Autana RTT w/ Anti-Condensation mat
    -ARB 1250 Awning

    Future Plans:
    -Hook up my Cobra CB or possibly go 2M.

    Service Logbook:
    5,000 Mile Service Completed
    10,000 Mile Service Completed
    15,000 Mile Service Completed
    20,000 Mile Service Completed
    25,000 Mile Service Completed
    30,000 Mile Service Completed
    35,000 Mile Service Completed
    40,000 Mile Service Completed
    45,000 Mile Service Completed
    50,000 Mile Service Completed

    States Visited with the truck:
    Washington (Hometown!)
    Oregon
    Idaho
    Montana
    Wyoming
    California

    National Parks Visited with the truck:
    Mt. Rainier (Every Year!)
    Olympic (2013)
    Crater Lake (2016, 2018)
    Yellowstone (2016, 2018)
    Redwoods (2018)
    Lassen Volcanic (2018)
     
    Last edited: Nov 5, 2019
    ChadsPride and Crom like this.
  2. Aug 21, 2014 at 8:48 AM
    #2
    Boonie Buster

    Boonie Buster [OP] Well-Known Member

    Joined:
    Nov 10, 2013
    Member:
    #116316
    Messages:
    292
    Gender:
    Male
    PNWet
    Vehicle:
    2014 Access Cab TRD
    Easter Weekend I will get better overall pictures of the truck.

    As we left the dealer:
    IMG_20140408_162410_495_zpsfpdtkngy_f66a9037fc8ea33426767a85974d1b03fe3a4f0d.jpg

    Easter Weekend after some backyard "testing". So many buttons, so little time!
    IMG_20140420_193644_379_zpsjcrqkxgz_f2b162b351ec8e8d362154a73a95c07682cf5f4f.jpg

    A little update from late august. that I forgot to post here: We now have just over 7,000 miles on the truck with multiple day trips and a nice week long tour of Oregon thrown in.

    First real unintentional modification to the truck, remove front mudflaps. One at a time...

    Now you see it.
    IMG_20140816_102629_002_zpspy8x0qmk_8418a6c80999fde522bd0b07323ce0faee7e53e5.jpg

    Now you don't.
    IMG_20140816_180748_168_zps2y7am54l_0c9101deba09db958729e0ebed05710fd20893b4.jpg

    We drove some pretty rough roads trying to find various lakes in the Mt Adams, Wa. area. We only found trouble. backing out of a washed out road I back over the mudflap as many have done and will continue to do. (I ripped one off my previous tacoma in my parents yard doing almost the same thing...:D) then continued to belly out the truck on those shiny new skid plates. It was a good way to justify the mods I have been talking to the wife about all these months. :D

    This is how we spent our 1 year anniversary together. and 10 years together total! :cool:
    IMG_20140816_113605_439_zps9q1nx7jh_2dcd9846f60e6a6efa384a6c5427dba7e0db4337.jpg
     
    Last edited: Feb 3, 2015
    ChadsPride and Crom like this.
  3. Jan 26, 2015 at 8:06 AM
    #3
    Boonie Buster

    Boonie Buster [OP] Well-Known Member

    Joined:
    Nov 10, 2013
    Member:
    #116316
    Messages:
    292
    Gender:
    Male
    PNWet
    Vehicle:
    2014 Access Cab TRD
    Had a Snugtop Rebel canopy installed last wednesday and then friday evening I fashioned up some lighting from some LED strip lights that a TacomaWorld member gave me for Christmas! Pics to follow soon!

    Have to give praise to Truck Builders LLC in Lynnwood, Wa. for all the help and job well done. Ted took the time to help us get a good price on options and show us some models with the features we were looking at. Also, Jim and his crew for a clean install and explanation of all the working functions of that cap before I left the shop.

    :D
     
    Last edited: Jan 26, 2015
    ChadsPride and Crom like this.
  4. Jan 29, 2015 at 10:01 PM
    #4
    Boonie Buster

    Boonie Buster [OP] Well-Known Member

    Joined:
    Nov 10, 2013
    Member:
    #116316
    Messages:
    292
    Gender:
    Male
    PNWet
    Vehicle:
    2014 Access Cab TRD
    With the canopy installed and LED lights wrapping the inside of the cap, it's picture time!

    IMG_1648_zpsrrjgqw7x_611ce6555a6f60342a9119fdd1c529d9314bbcf2.jpg

    The top is equipped with the Sportsman Package and Yakima Roof Tracks. The roof will support the added weight of a rack and roof top tent.

    IMG_1663_zpseumwjpaj_a28871c18784c81bc367a070ce011ce7a515240e.jpg

    The LED's seem to do a good job of lighting up the interior of the canopy. The true test will be a groggy-eyed midnight snack search!

    IMG_1613_zpsk7jqmfmx_abaf035ac00925aca88ac14fa7c804b230356cbd.jpg

    My sister gave me a battery pack and remote setup for a Christmas gift to compliment the light strips. I didn't want to hard wire the LED's into the truck at the moment

    IMG_1616_zpsqtwnblmf_35fbacc486744a730196decf9948962cedbc84cd.jpg
     
    ChadsPride, Pirhett and Crom like this.
  5. Jan 29, 2015 at 10:11 PM
    #5
    estarr

    estarr Well-Known Member

    Joined:
    Jan 18, 2013
    Member:
    #95480
    Messages:
    55
    Gender:
    Male
    First Name:
    Eric
    San Diego
    Vehicle:
    2014 DCSB 4x4
    Nice build so far..how do you like the 6speed?
     
  6. Feb 3, 2015 at 9:07 AM
    #6
    Boonie Buster

    Boonie Buster [OP] Well-Known Member

    Joined:
    Nov 10, 2013
    Member:
    #116316
    Messages:
    292
    Gender:
    Male
    PNWet
    Vehicle:
    2014 Access Cab TRD
    I really like the 6spd. I just like have total control over what gear I am in and not having to worry about my transmission overheating on me while hitting the pass loaded down with bikes or gear.
     
    ChadsPride likes this.
  7. Feb 3, 2015 at 9:07 AM
    #7
    Boonie Buster

    Boonie Buster [OP] Well-Known Member

    Joined:
    Nov 10, 2013
    Member:
    #116316
    Messages:
    292
    Gender:
    Male
    PNWet
    Vehicle:
    2014 Access Cab TRD
    Installed my Salex Glove Box and Center Console Organizers a week ago. A great product that solves an even greater problem, the mess that lives behind the hatch! The fit is very good and you can customize the amount of pockets you want by removing panels to create larger areas for storing bigger items. These are made in the USA. Denver, Colorado to be exact. They shipped fast and were VERY easy to assemble and install.

    Check out his products here:
    http://www.salexorganizers.com/

    Center Console:
    IMG_1620_zpslpxh5w4u_d04bac065cb6e1d01d1c7a4bd33775ce2979eb43.jpg

    Glove Box:
    IMG_1638_zpsiu6fgpde_58a36a0edd3e9f78bc8516993f18300411a2706f.jpg
     
    ChadsPride and Crom like this.
  8. Feb 3, 2015 at 11:23 AM
    #8
    muzzfactor

    muzzfactor Member

    Joined:
    Nov 7, 2014
    Member:
    #141863
    Messages:
    24
    Gender:
    Male
    First Name:
    Ryan
    San Antonio, TX
    Vehicle:
    2015 Tacoma DCSB SR5
    Limo tint, WeatherTech Digi Floor mats, G-Tek Fab Door Sills, Salex Console & Glovebox organizer, ....
    Hey Boonie nice truck! Just wondering what you had to give for your snugtop? I'm wanting one for my truck also but was quoted $2k without options. I've heard really good things about them though.
     
  9. Feb 3, 2015 at 12:07 PM
    #9
    Boonie Buster

    Boonie Buster [OP] Well-Known Member

    Joined:
    Nov 10, 2013
    Member:
    #116316
    Messages:
    292
    Gender:
    Male
    PNWet
    Vehicle:
    2014 Access Cab TRD
    You're in the right ballpark for price, just add some options. ;) It really depends on your budget and what you plan to do with the truck. We plan to keep this truck for a very long time, so this was a worthy investment for us. If you plan to get rid of the truck after a few years, i'd buy used.

    So far, we really like it! I have a bed mat that I got from the Secret Santa exchange installed and it makes crawling around in the back way better! We opted for the Rebel because we wanted the cab and cap to match heightwise and also the rear door has a better rain gutter system, which is a huge deal living in a wet climate. The Owner at Truck Builders showed us his canopy which is Cab-Hi model and it was conveniently raining when he opened it and water drips right into your bed. The only downside I see with the rebel is that it has a lower opening than the Cab-Hi or some other caps. so if you needed to stuff a taller couch inside, it may be a problem.
     
  10. Feb 4, 2015 at 12:52 PM
    #10
    Boonie Buster

    Boonie Buster [OP] Well-Known Member

    Joined:
    Nov 10, 2013
    Member:
    #116316
    Messages:
    292
    Gender:
    Male
    PNWet
    Vehicle:
    2014 Access Cab TRD
    Preface: One of my priorities when purchasing or making an item is Versatility. I like to have several uses for a single item if at all possible. Some would argue that you're sacrificing function, but it depends on what the sacrifice is. In this case it's portability. Something that is not permanently attached to the vehicle or is an irreversible modification like cutting fenders or in a lesser case, completely removing the rear jumper seats to build a storage platform.

    So I was cruising the storage area of Fred Meyer one day looking for a cheap drawer and found a Sterilite 16qt Stacking drawer. I have had these in the truck for at least 6 months now and they've been really helpful. It gives you a flat stable surface for camping bins on top and easy access to things you store in the drawers. The drawer will fit a pair of my size 12 hiking boots, but not much more. These cost maybe $15/ea. So for $30 you have a great storage setup that is easily removed for cleaning or carrying precious cargo.

    Link to drawers:
    http://www.sterilite.com/SelectProduct.html?id=631&ProductCategory=185&section=1

    I'm 6'-0" and have my seat slid back to just slightly touching the drawer and feel comfortable on long drives with the seat position.

    The top is almost flush with the factory storage areas under the jumper seats.
    IMG_1629_zps9qga3k4f_5965308a08781194c62df3ba28e342ababe050e4.jpg

    The sides have bowed inward from carrying heavier items in them, but they work regardless. I usually carry several ratchet straps for easy access when tying something down.
    IMG_1633_zpsspcb7flj_c8fc74bf9cd2f1efeff57ac8f5399a13a01502ad.jpg

    You can still fold down the rear jumper seat if needed.
    IMG_1634_zpswubyitgi_5789dbd8c9d8cfb49028633d92d022485e10c83c.jpg
     
    KLH, ChadsPride and Crom like this.
  11. Feb 6, 2015 at 8:45 AM
    #11
    Boonie Buster

    Boonie Buster [OP] Well-Known Member

    Joined:
    Nov 10, 2013
    Member:
    #116316
    Messages:
    292
    Gender:
    Male
    PNWet
    Vehicle:
    2014 Access Cab TRD
    Here is a fun mini restoration project. This all BRASS license plate frame came off my '96 Tacoma and will find a home on the new Tacoma once I get it cleaned up and looking nice...

    IMG_1552_zpswensmnjo_3a434b01b57d7b913af8d332377f6ea6d948ee69.jpg
     
    ChadsPride likes this.
  12. Sep 4, 2015 at 3:11 PM
    #12
    Boonie Buster

    Boonie Buster [OP] Well-Known Member

    Joined:
    Nov 10, 2013
    Member:
    #116316
    Messages:
    292
    Gender:
    Male
    PNWet
    Vehicle:
    2014 Access Cab TRD
    So, I have been in the process of moving again and not much has been done with the truck. But I have installed Prinsu Access Cab and canopy racks, which i think turned out really well, took some extra work to get the cab and canopy racks to align, but it was worth the extra monkeying around. We also purchased a Tepui Autana RTT at Mule Expeditions open house event at the beginning of the summer. Pics to follow...
     
  13. Dec 19, 2015 at 1:50 AM
    #13
    Boonie Buster

    Boonie Buster [OP] Well-Known Member

    Joined:
    Nov 10, 2013
    Member:
    #116316
    Messages:
    292
    Gender:
    Male
    PNWet
    Vehicle:
    2014 Access Cab TRD
    So I finally had a chance to go through some pictures and share my Prinsu Design Roof Rack install.


    I was really impressed with the design and quality of this rack, it’s one of the only rack setups that I have seen that is able to provide a seamless look and transition from cab to canopy.

    Here are some pictures or what you get when your gigantic package arrives.


    All of the bars and side plates. These were all nicely wrapped and arrived damage free.


    IMG_2858_zps5vgx7cc0_95c83cc86cdc3c239c3f8650176bb01432af1a68.jpg


    The Various Bags O’ Bolts…


    Spacers, nutserts, and bolts.

    IMG_2828_zps1kchxj7k_a54c3653c0a7c3cbb03a3e3011184cb2af88e548.jpg

    A Big Pile of Rack Bolts.


    IMG_2829_zps9cbjztys_902c07bd97e2f1ec03e788be6fb327dadb65d83c.jpg


    A Smaller pile or rack bolts.


    IMG_2847_zpsuqxin36w_536d14b6aed36434a0b416bed173c2a37a98f16b.jpg


    Canopy Track attachment bolts (these were replaced by Thule track nut kits).


    IMG_2839_zpszm4gixqg_b4067dda731107a7625d7dd11b22b30d944f5dd7.jpg


    Rack tie downs and extra track nuts.


    IMG_2838_zpspyf2onhl_b632890cc4d3c8f5e596b5cc94f1eb4713e84c78.jpg


    One of the things I changed was the rack attachment bolts and nuts for the canopy tracks. I found what I felt was a stronger option from Thule that fits the Yakima tracks that are installed on the Snugtop canopy. The nut is almost twice as thick and has a more positive lock up in the rack slot due to the angled cut.


    IMG_20150311_202156_180_zpsqmo2tb5n_a21a7c2d7a5a5cca55860278e5d4d50cc1b6505c.jpg


    Since no two canopies seem to be the same, I had to do some adjusting of the mounting feet to fit the profile of my canopy. In order to keep the powder coat pretty I used a shop towel and a large adjustable wrench to persuade the feet into place. The center tabs had to be bent up more than the outer tabs to follow the curve of the canopy.


    IMG_20150310_203525_933_zps8jwvwon4_3be6a157aae8243297000beac54242e17cbf6d53.jpg


    IMG_20150310_203623_435_zpssnpqwkbg_0e06bff1c788f0d5d41a759d3fc9ed856c6a5219.jpg


    Once I had the Cap Rack installed it was time to install the Access Rack on the cab of the truck. This took me a lot longer to do as I was taking my sweet time to do it right and not have any leaks in the future. After assembling the rack I started test fitting based on measurements given from Prinsu. Once I found the sweet spot I worked on leveling the rack to match the Cap Rack. This took some shimming with washers to determine the right height, from the front of the rack to the back there was a 1/2” difference in height. So I went on the hunt for spacers to match what was in the kit. I found some very similar with a thicker wall but the same outside diameter. As a result of getting taller spacers, I also had to get longer bolts as well. These were an easy find at the local hardware store.


    The front spacers are 1” tall, the center is 1 1/4” and the rear is 1 1/2” tall.


    IMG_20150318_195512_472_zpszhgf8z6z_02b4875d47153c6e5083ccf2d46a97be99c49195.jpg


    IMG_20150318_195503_070_zpsiyfbodmj_88cb528dbd1a7c75efcbbb0ceb673002efa69bef.jpg


    When it came time to drill the holes in the cab, I bought a three pack of stepped drill bits form Harbor Freight. These actually worked really well. One thing to be VERY careful of on the access cab is the side curtain airbags. I actually pulled the headliner down and drilled one step on the drill bit at a time, inspecting the hole with a piece of plastic hose to feel for any obstructions. There are 6 holes to be drilled per side. The two most rearward holes are the ones to be the most careful on. USE CAUTION when drilling these holes as they are VERY close to the side curtain airbags!


    IMG_20150316_205330_896_zpstjarpkrh_7b08c9978462d12dd351f43ae35670b48720ff20.jpg


    Once the holes were drilled, the nutserts were installed and glued in place with a sealant to help with waterproofing

    Next it was time to install the rack. I used a 3/4” O.D. leather hole punch for cutting the holes in the weather stripping. This made for a nice clean look and a nice seal around the spacers. I put a bit of sealant on the bottom of the spacers to help keep moisture away from the bolt holes. The same sealant was used on the bolt threads as well when installing them. I also added thin rubber fender washers on top of the spacers just under the rack feet.


    IMG_20150329_110220_265_zpsckjjair9_b07e017b2650343b56be5b411d7d162885e2b142.jpg


    Call me paranoid, but the PNW sometimes gets rain… And then it was time to bolt it all down like a cylinder head on a NHRA dragster. In the end I was really pleased with how it turned out. It’s been a great rack so far and has been used to haul the RTT, lumber, doors, noisy children, etc.


    Here is the finished product:


    IMG_20150329_110211_444_zps2g6wgqjw_1d066e14909b31daca2507a4382dadd438fac6ab.jpg


    Front View:


    IMG_20150329_110234_487_zpszyvooo9y_13e76f1117cdaacd48f652f53ace5c6960cf40d8.jpg


    Whole Setup:


    IMG_20150329_110125_361_zpsncf4bxr9_295a1508d4ec4a73f7a8a5c613f38612133f4117.jpg
     
    Last edited: Dec 23, 2015
    Matacoman, Z7Xtreme, olecoot and 6 others like this.
  14. Dec 19, 2015 at 3:27 AM
    #14
    jwctaco

    jwctaco Retired, going slow in the fast lane

    Joined:
    Sep 5, 2015
    Member:
    #163478
    Messages:
    9,926
    Gender:
    Male
    First Name:
    Jim
    SW Michigan
    Vehicle:
    23’ T4R
    wow that is a nice set up, love the cap and rack1
     
    ChadsPride likes this.
  15. Dec 23, 2015 at 12:00 PM
    #15
    Boonie Buster

    Boonie Buster [OP] Well-Known Member

    Joined:
    Nov 10, 2013
    Member:
    #116316
    Messages:
    292
    Gender:
    Male
    PNWet
    Vehicle:
    2014 Access Cab TRD
    We went out to Tahuya state Park to do some exploring.

    Here are some side shots of the rack setup.

    IMG_5018_zpshptlgsak_144f220e2ca32d2c71e8cab5e2f4e41cd5ed1629.jpg

    IMG_5017_zpswumeimic_f5c517e45bcf76ac250112855cba529a1748f692.jpg

    IMG_5014_zpsrw7iwtsr_f1d10a176f79b66b2462a063710464b39dad41b5.jpg

    IMG_5020_zpsjzifwhhj_dd95b8c0c5597bfa337b6bbf44768e4d7d6e97ca.jpg

    IMG_5021_zpsvpjfqtuz_44781fbbd13ce1a1f43617c3e9e661d5cd0a99f9.jpg
     
    olecoot, ChadsPride and Crom like this.
  16. Dec 29, 2015 at 9:11 AM
    #16
    Boonie Buster

    Boonie Buster [OP] Well-Known Member

    Joined:
    Nov 10, 2013
    Member:
    #116316
    Messages:
    292
    Gender:
    Male
    PNWet
    Vehicle:
    2014 Access Cab TRD
    After installing the rack this year, we heard about an open house event at Mule Expedition Outfitters in Issaquah, Wa. We had a great BBQ lunch and met with a lot of the crew and other folks at the shop that day. Super cool! It was a nice sunny day and by the time we got home to install it, it was raining like crazy, but it HAD to be installed and it HAD to be used, THAT NIGHT! So we set to work in the horse barn to get it installed and then set it all up in the backyard for the first night of testing.

    What better way to test than in the rain!

    In the barn...

    IMG_20150411_193719_739_zpsftwdubmv_74101e0ad0269589eeb48e6c5e521aa9d8cced01.jpg

    Out of the barn and into the light!...errr.....rain.......

    IMG_20150411_193947_839_zpss3kijwyo_dee3e9b915a4d239f99163b69cc90a9b3a131e10.jpg

    The morning after. Survived the night, nice and dry.

    IMG_20150412_092457_512_zpsrn3wlm6q_b255374112caa4b2039e6a2708b0bff68c544d3f.jpg

    IMG_20150412_092800_069_zpsc4upflcp_55d840e4c60da0a6829b7e0c2d0b9126ad5f7d81.jpg

    An aerial view from our other project....

    IMG_20150614_184844_940_zpskil6hywe_1a301b6540c036d9c05c8b17715abd87f822cd87.jpg

    And here are some pictures from our short trip to Idaho.

    Somewhere outside of Cle Elum, Wa.

    IMG_4421_zpsuzp2qzql_2b561326ddf03168b687e96994f05074d1557e3b.jpg

    Farragut State Park, Idaho

    IMG_4497_zpsf54mx6bf_c6dde7455c503b67f2b469f42560172c3cbb4095.jpg

    IMG_4479_zpsjemyju37_b0626ce72ef07fe11bf0dec75178d4e1c2e6097a.jpg
     
    ChadsPride and Crom like this.
  17. Mar 15, 2016 at 10:41 AM
    #17
    Boonie Buster

    Boonie Buster [OP] Well-Known Member

    Joined:
    Nov 10, 2013
    Member:
    #116316
    Messages:
    292
    Gender:
    Male
    PNWet
    Vehicle:
    2014 Access Cab TRD
    Well, a small update, about a month ago I noticed a leak around my canopy front fold-down window. I had to take it into the dealer I bought it from and they tried to reseal it, but it leaked again. Now i'm having a new window installed as it seems to be an issue with the window and not the seal around the canopy. It's going to be covered under warranty, thankfully the dealer I have been working with is VERY understanding and has been willing to go above and beyond for me. I'm a little bummed that it would have a leak after only 1 year, but happy it's getting resolved.
     
    ChadsPride and Crom like this.
  18. Mar 22, 2016 at 9:29 AM
    #18
    Boonie Buster

    Boonie Buster [OP] Well-Known Member

    Joined:
    Nov 10, 2013
    Member:
    #116316
    Messages:
    292
    Gender:
    Male
    PNWet
    Vehicle:
    2014 Access Cab TRD
    Took the truck in Saturday and had the front canopy window replaced. Now to make sure it doesn't leak, we need some more rain! Big thanks to Truck Builders LLC for doing this for me!
     
  19. Mar 22, 2016 at 10:04 AM
    #19
    Boonie Buster

    Boonie Buster [OP] Well-Known Member

    Joined:
    Nov 10, 2013
    Member:
    #116316
    Messages:
    292
    Gender:
    Male
    PNWet
    Vehicle:
    2014 Access Cab TRD
    Oh, and while loading plywood into the truck on Sunday, I felt the tail light needed a better venting system. So I fixed that problem...

    IMG_20160320_190530_770_zpsxaekehuw_92d5699030f1cd1b8e1c4f38d78a1411188469fb.jpg
     
    ChadsPride likes this.
  20. Jul 18, 2016 at 11:01 AM
    #20
    Boonie Buster

    Boonie Buster [OP] Well-Known Member

    Joined:
    Nov 10, 2013
    Member:
    #116316
    Messages:
    292
    Gender:
    Male
    PNWet
    Vehicle:
    2014 Access Cab TRD
    So We recently purchased an ARB 50qt fridge and ARB 1250 awning for the truck. I used @rkfoote instructions for doing a 12v system in the bed, since I'm not yet decided on a dual battery system and would rather build a SPOD style unit for in the engine bay.


    The parts I used were from Powerwerx, I got a 4.2 amp USB charger and an anderson powerpole dual plug for the ARB, I will eventually put a switch in for the USB charger so it doesn't drain the battery.

    Parts List:

    -25’ 10awg Black and Red Wire

    -50’ 16awg “zip-cord” style black/red wire
    https://powerwerx.com/red-black-bonded-zip-cord


    -PP15/30/45 Loose Piece Powerpole Colored Housing
    I bought 25 each black and red.
    https://powerwerx.com/anderson-powerpole-colored-housings

    -PP30 Loose Piece 30 Amp Powerpole Contact 1331
    I bought an equal amount of these to match the housings as well as some 15 amp contacts to accept 16-18awg wire
    https://powerwerx.com/anderson-1331-powerpole-contact-pp30

    -Powerwerx PanelPole
    https://powerwerx.com/panelpole-panel-mount-powerpole-housing

    -Powerwerx Panel Mount Dual USB 4.2A Device Charger for 12/24V Systems
    https://powerwerx.com/panel-mount-dual-usb-device-charger-high-output

    -Two Hole Panel Mounting Plate
    https://powerwerx.com/two-hole-panel-mounting-plate

    -Blue Sea 5025 6 Circuit Blade Fuse Block with Cover and Negative Bus
    https://powerwerx.com/blue-sea-5025-6-circuit-fuse-block

    So I started by making a 25ft wire loom from 10awg wire, I went from the battery around the back of the firewall and down the pass frame rail following the 110v bed outlet wiring to the back.

    IMG_20160717_153102_287_zpsjenutcuk_3828ba88da4ad8973a106607f039ef0aeb5f32d9.jpg

    Connections to the battery with inline 30amp fuse.

    IMG_20160717_153118_995_zps3d7zp0fx_f435b48324744bcf52d52cf09834f37cfa7ead0a.jpg

    Down the firewall to the frame.

    IMG_20160717_153054_708_zpsfblhs4fv_2238c7a19fa8662944441266b72ac51183f683bd.jpg

    Main power wired to the box.

    IMG_20160717_160131_538_zpst6z31a1k_b996292300296a7212e6719e2cd21fd113b77747.jpg

    There are two drain holes in the back of the box, I enlarged the one to get the wire loom through and attached a zip tie so it would fall back through.

    IMG_20160717_160122_555_zpsdy8g6nbv_be9b6057a859bfe4b0af481c1552740a6b9d4b8f.jpg

    Checking behind the side wall, there is a structural rib about ¾” from the storage bin opening, so I aligned the top of the panel with the top of storage bin and located the new panel over 2 ½” to the outside edge of it. I have allowed room for future expansion of items below the two that are currently installed. The only issue with mounting the panel vertically is the plugs are installed sideways to allow use of the covers.

    IMG_20160717_160636_084_zpsxdyfjrpb_5feab41da8394efff426fb70f8d2463b7d71a2d1.jpg

    Overall view

    IMG_20160717_160642_676_zpsfuao5wxa_19782cad7f593c64f7db92ca66dd3afc023a92dd.jpg

    Here is the USB charger wire loom ready to be installed, I drilled holes in the side of the storage bin for the wire looms to come through. And zip tied then on the inside as well so they would fall back through.

    IMG_20160717_173218_642_zpsruyy3cwh_d3fb1698cf956b0e247d9219493954d42bc7344d.jpg

    Wire loom through the side.

    IMG_20160717_172145_761_zpsfruvkmjd_23f915eb745a5a036c195a6aa0d7e8e3c3af181d.jpg

    This is looking up into the area behind the rear tire and fender area where the box is located.

    IMG_20160717_183408_625_zpsaexlfs3f_020f88199b1a73e27c6e860eca51db603002f72e.jpg

    Wires getting ready to be attached.

    IMG_20160717_172145_761_zpsfruvkmjd_23f915eb745a5a036c195a6aa0d7e8e3c3af181d.jpg

    EDIT:

    Here are some more pictures

    View of the plugs, (sorry for the washed out flash picture, it was getting dark out)
    IMG_20160718_212225_zpsxivr3w8a_ce7f88970b99438b517ff83c69dcdeed0b3778c7.jpg

    Wires connected. I would like to add a switch for the USB as it will always be a drain.
    IMG_20160718_200411_570_zpsg6nhxth6_d10c8bdf8f1295a15c2b04a2eb7994a290d537d4.jpg

    All buttoned up.
    IMG_20160718_200344_769_zps8fdpgr36_af33bfe7e5e09d3be9789267b6aebf95540111b8.jpg

    Thanks go out to rkfoote for his write-up and all the others who I have gleaned info from.
    Resources:
    rkfoote - Toyota Tacoma bed 12v outlet install
    https://www.tacomaworld.com/threads/12v-bed-outlet-install-write-up.378833/#post-10393059

    Next up, Awning brackets…
     
    Last edited: Jul 19, 2016
    ChadsPride and Crom like this.
To Top