1. Welcome to Tacoma World!

    You are currently viewing as a guest! To get full-access, you need to register for a FREE account.

    As a registered member, you’ll be able to:
    • Participate in all Tacoma discussion topics
    • Communicate privately with other Tacoma owners from around the world
    • Post your own photos in our Members Gallery
    • Access all special features of the site

Pbart617 MGM TRD Sport Build

Discussion in '3rd Gen. Builds (2016-2023)' started by pbar617, Jan 14, 2016.

  1. Jan 14, 2016 at 5:32 AM
    #1
    pbar617

    pbar617 [OP] Active Member

    Joined:
    Dec 6, 2015
    Member:
    #171600
    Messages:
    28
    Gender:
    Male
    First Name:
    Paul
    Vehicle:
    2016 Tacoma TRD Sport AC - Metallic Grey
    Hey guys,

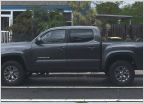
    Just wanted to start this thread. Just picked up my truck last night.

    My baby is a 2016 Toyota Tacoma MGM Access Cab MT.

    I have plenty of plans and got a couple parts from the wife for Xmas that I will be installing fairly shortly.

    uploadfromtaptalk1452778343105.jpguploadfromtaptalk1452778356624.jpg
     
  2. Jan 14, 2016 at 7:48 AM
    #2
    Jaybez

    Jaybez Well-Known Member

    Joined:
    Sep 7, 2015
    Member:
    #163607
    Messages:
    178
    Gender:
    Male
    Fort Mill, SC
    Vehicle:
    2016 Tacoma TRD Sport 4X4
    Nice Truck!

    I see you went with the Snow Capped package
     
    pbar617[OP] likes this.
  3. Jan 14, 2016 at 7:59 AM
    #3
    pbar617

    pbar617 [OP] Active Member

    Joined:
    Dec 6, 2015
    Member:
    #171600
    Messages:
    28
    Gender:
    Male
    First Name:
    Paul
    Vehicle:
    2016 Tacoma TRD Sport AC - Metallic Grey
    Got that right, seemed worth the money
     
  4. Jan 14, 2016 at 8:03 AM
    #4
    Jaybez

    Jaybez Well-Known Member

    Joined:
    Sep 7, 2015
    Member:
    #163607
    Messages:
    178
    Gender:
    Male
    Fort Mill, SC
    Vehicle:
    2016 Tacoma TRD Sport 4X4
  5. Jan 14, 2016 at 10:48 AM
    #5
    bearsman34

    bearsman34 Well-Known Member

    Joined:
    Dec 1, 2015
    Member:
    #171112
    Messages:
    167
    Gender:
    Male
    RVA
    Vehicle:
    2016 Inferno DCSB TRD OR 4x4
    I did the same thing you did. Black 2014 WRX to a 2016 TRD OR. Congrats. I do miss the Rex every now and then though, but I have an R6 to keep my speed demon alive haha
     
  6. Jan 14, 2016 at 10:55 AM
    #6
    pbar617

    pbar617 [OP] Active Member

    Joined:
    Dec 6, 2015
    Member:
    #171600
    Messages:
    28
    Gender:
    Male
    First Name:
    Paul
    Vehicle:
    2016 Tacoma TRD Sport AC - Metallic Grey
    Nice man, yeah I'm sure I'm going to miss WRX I love that car, however not practical at all right now.
     
    bearsman34 likes this.
  7. Jan 14, 2016 at 11:01 AM
    #7
    bearsman34

    bearsman34 Well-Known Member

    Joined:
    Dec 1, 2015
    Member:
    #171112
    Messages:
    167
    Gender:
    Male
    RVA
    Vehicle:
    2016 Inferno DCSB TRD OR 4x4
    Same exact reasoning for me. Needed something i can actually move stuff with.
     
  8. Jan 14, 2016 at 11:03 AM
    #8
    pbar617

    pbar617 [OP] Active Member

    Joined:
    Dec 6, 2015
    Member:
    #171600
    Messages:
    28
    Gender:
    Male
    First Name:
    Paul
    Vehicle:
    2016 Tacoma TRD Sport AC - Metallic Grey
    Do anything to the truck yet? My wife got me HID kit from TRS, had them on the WRX and loved them. Going to install my own led bed rail kit. Need to come up with sometime of snowboard rack for the bed.

    I plan on documenting all my mods
     
  9. Jan 14, 2016 at 11:17 AM
    #9
    bearsman34

    bearsman34 Well-Known Member

    Joined:
    Dec 1, 2015
    Member:
    #171112
    Messages:
    167
    Gender:
    Male
    RVA
    Vehicle:
    2016 Inferno DCSB TRD OR 4x4
    Yea so far I only have some RokBlokz mudflaps on mine. After doing some light off roading, I realized rocks were flying everywhere and mudflaps are a must. I would like to do some kind of headlight mod. Maybe halos? I'd like to get the AMP Research Moto X-Tender for throwing some bikes in the bed and making a trip to dragon's tail. And I want to do a bed rack with a RTT on it for camping. Unfortunately the bank account only allows for so many things at one time haha.
     
  10. Jan 14, 2016 at 11:29 AM
    #10
    pbar617

    pbar617 [OP] Active Member

    Joined:
    Dec 6, 2015
    Member:
    #171600
    Messages:
    28
    Gender:
    Male
    First Name:
    Paul
    Vehicle:
    2016 Tacoma TRD Sport AC - Metallic Grey
    Yeah for sure. Mudflaps are a must I'm finding out from driving in the snow
     
  11. Jan 15, 2016 at 3:12 AM
    #11
    SamChieftan

    SamChieftan Well-Known Member

    Joined:
    Sep 30, 2015
    Member:
    #165513
    Messages:
    814
    Gender:
    Male
    Dallas, Texas
    Vehicle:
    2016 TRD OR AUTO 4x4 Super White
    Interior LEDs, Truck Mat, Door sills
    Congrats on the new truck.

    Welcome to Tacoma World.

    :dancingbacon:
     
  12. Jan 19, 2016 at 2:57 PM
    #12
    pbar617

    pbar617 [OP] Active Member

    Joined:
    Dec 6, 2015
    Member:
    #171600
    Messages:
    28
    Gender:
    Male
    First Name:
    Paul
    Vehicle:
    2016 Tacoma TRD Sport AC - Metallic Grey
    Thank you very much.
     
  13. Jan 20, 2016 at 4:57 PM
    #13
    pbar617

    pbar617 [OP] Active Member

    Joined:
    Dec 6, 2015
    Member:
    #171600
    Messages:
    28
    Gender:
    Male
    First Name:
    Paul
    Vehicle:
    2016 Tacoma TRD Sport AC - Metallic Grey
    So an Amazon package arrived today. LED interior lighting kit

    Here is the link for anyone intrested:
    http://www.amazon.com/gp/product/B016XZ42HW?psc=1&redirect=true&ref_=oh_aui_detailpage_o01_s00

    I was going to order all of my lights from SuperBrightLEDs.com, however it was cheaper to go this route. LED's are LED's especially for the interior.

    Install was pretty easily, the map lights were a pain to get out, however i used a trick that I learned from doing my wife's car.

    Here is a picture of the package that I got from Amazon, as you can tell my dog Zoey, is interested in what I got.

    20160119_175054.jpg


    So lets get started on the install, I started with the Map Lights.
    There really isn't any access spot, so just take a small screwdriver and be easy on the plastic. Work your way around the entire plastic light cover

    20160120_172353.jpg

    So after you get the plastic light covers off, you will need to use my little trick to wiggle the bulbs out of the sockets.

    Take a piece of duct tape and slide it in on the inside of the bulb and wrap it around the bulb. Try it and see if you can get it out. NOTE: I turned the lights on and let the duct tape warm up, it seemed to help.

    20160120_174526.jpg

    I then moved to the vanity mirror lights, now I do have to say, they look great however my wife said they are really bright. So what i did was I twisted the LED's to face the inside of the visor, so you still get the color and light, but it dulls the light a bit.

    There is a little cut out on the bottom of the vanity plastic light covers, as shown below, then they just pop off

    20160120_173004.jpg

    Next I moved onto the dome light, they have a little cut out for your screwdriver as well

    20160120_174220.jpg

    Here is the final pictures with all the LED's installed, I'm always happy with the results, and have no idea why all cars don't come with them from the factory, LED's are so cheap it makes no sense.

    20160120_174947.jpg

    20160120_175005.jpg

    20160120_174952.jpg


    Hope you guys find this helpful, let me know if you have any questions.
     
    007TRUCK likes this.
  14. Jan 25, 2016 at 8:03 PM
    #14
    pbar617

    pbar617 [OP] Active Member

    Joined:
    Dec 6, 2015
    Member:
    #171600
    Messages:
    28
    Gender:
    Male
    First Name:
    Paul
    Vehicle:
    2016 Tacoma TRD Sport AC - Metallic Grey
    The Fed-Ex guy dropped off a package today in my driveway. I was at work when my wife sent me this picture.

    I ordered a Tri-Fold Soft Folding Tonneau from Gator Covers, got it for $230 w/ free shipping, couldn't really beat that price.

    Link: http://gatorcovers.com/p-1338-gator-tri-fold-tonneau-cover.aspx

    When I was looking at covers, I knew every cover wasn't going to guarantee that it would be completely waterproof, that is just unrealistic (if water wants in, it will get in). I also knew that I didn't want something that would be hard to remove completly and also make it fairly secure. I know that this soft cover can just be cut with a knife, however I don't ever plan on keeping anything very valuable in the bed.

    20160125_162324.jpg

    Onto the install, this cover was packaged very well, with soft foam bags on both sides and corners, to protect the cover rail supports.

    Install took about 30 mins and was fairly easy

    What's included:
    • Cover with rail supports
    • 4 sets of stainless steel bracket inserts into factory bed rail system
    • 2 Foam waterproofing squares (for cab bed rail)
    • 96 inch of tailgate waterproofing seal (cut to fit)
    • 8 stainless steel screws and washers (along with Allen key)

    20160125_171956.jpg
    20160125_172210.jpg

    Next take the 'J' shaped bracket, upside down, take the metal backing, and place two screws and washers into the top holes of bracket, and just get them started, I believe I did about 4 finger turns on each screw.

    20160125_172359.jpg

    20160125_172404.jpg

    Next step was to remove the cab facing bed rail, there are 5 T30 Torx screws under the bed rail, make sure you use the correct size torx bit, or you can strip the screw. I used a impact driver to remove and install the screws. 20160125_173804.jpg

    The cover came with two foam insulation squares, which are meant to be placed on the ends of the front cab rail.

    20160125_173816.jpg

    20160125_173842.jpg

    After the installation the front rail bits snug against both sides of the bed rails. Making a tight fit, not sure if it's tight enough to be completely water tight, but not worries

    20160125_174020.jpg

    Next is to remove end caps and tie down rail sliders

    20160125_174235.jpg

    20160125_174245.jpg

    Slide in the backing plate of the brackets, here's where making them loose works wonders
    20160125_174315.jpg

    Both sides slide them just guess where they should be, they can be moved when the cover is on
    20160125_174330.jpg

    Place the cover completely folded on top of the bed rails as well as the cab rail. Line it up on both sides and make sure it is lined up evenly

    20160125_174518.jpg
    Unfold the cover completely and line up the cover again. After this is done to your satisfaction, carefully fold the cover, you don't want to move it at all. NOTE: Unlock or Fold down both front side handles before you line up the cover

    Now that the cover is lined up, and the handles are folded down line up the handle with the metal bracket. When they are lined up move the handle out of the way (DON'T LOCK THEM IN, IT WILL MOVE THE COVER). Tighten down the metal brackets on both the driver and passenger side.

    Then adjust the handles as needed to make the cover as snug as you think it should be.

    20160125_180902.jpg
    20160125_180906.jpg

    NOTE: Don't mind the LED strips underneath the bed rails, they are for another project SNEAK Peek for my next write-up

    After both front handels are secured tight, move up to the top of the cover, and lightly tie the straps in a knot so they don't hang down in the bed when the cover is closed

    20160125_182152.jpg

    Now fold down the cover and now it's time to work on the back handles, same with the front, adjust the metal brackets as needed, as well as adjusting handles to making them as tight as you want to.

    20160125_181535.jpg

    Final step is to install the Tailgate weather stripping, I cut a small piece to see how I would like the stripping to be installed on the bottom of the tailgate crease as well as the sidewall crease

    20160125_182811.jpg

    As you can tell, the weather stripping is fully compressed meaning that it creates the best seal it can when the tailgate is closed

    20160125_182821.jpg

    Next is to measure the length that you want the weather stripping, here's the measurements I went with

    20160125_183111.jpg

    Next is install the weather stripping

    20160125_184406.jpg

    20160125_184421.jpg

    After the weather stripping is installed, firmly press down on the seal. Instruction say to wait 10 mins before the tailgate. My garage is heated, so what I did was installed the weather stripping in the garage, then pulled the truck out in 10 degree temp, waited some time and pressed on it firmly again, to ensure that it was stuck on there good.

    Closed the tailgate and here are the final results

    20160125_191744.jpg

    20160125_191749.jpg

    Overall the install was very easy, the cover looks awesome and just feels like it is very sturdy. I'm glad I went with this one.

    In the next couple days I will remove all the snow from the bed, and take it to a car wash to do a water leakage test, to see actually how much water gets in.

    Hope you guys find this helpful, and let me know if you have any questions.
     

    Attached Files:

    Last edited: Jan 26, 2016
  15. Jan 29, 2016 at 5:38 PM
    #15
    pbar617

    pbar617 [OP] Active Member

    Joined:
    Dec 6, 2015
    Member:
    #171600
    Messages:
    28
    Gender:
    Male
    First Name:
    Paul
    Vehicle:
    2016 Tacoma TRD Sport AC - Metallic Grey
    Ordered some generic mudflaps, as I couldn't bring myself over $50 for pieces of rubber that are just made to catch mud, slush, road salt, sand, and everything else that you don't want on your pant.

    Luckily I found a set of mudflaps for $28 for all four on Amazon.

    Here's the link for the ones that I got.

    http://www.amazon.com/gp/product/B0002NIJUS?psc=1&redirect=true&ref_=oh_aui_detailpage_o00_s00

    The install was so simple and only took me about 20 mins

    Here is what the mudflaps look like, they have a simple but nice mountain scene engraved in it

    The mudflaps did come with 2 packs of screws, however I used the stock screws

    [​IMG]


    There are three screws on the rear tire wells and 2 screws on the front tire wells

    [​IMG]

    [​IMG]

    As you can tell, there are no holes or markings on the mudflap, this is because they are generic, however no worries, here is the best way to mark the flaps in the perfect spot. Here is where some of your wife's stuff comes in handy, aka NAIL POLISH

    I took some nail polish and 'painted' the face of all bolts in every wheel well


    After all bolts are painted take each mud flap, line them up where you want it, I tried to take the top of the mud flap and line them up with the little notch in each wheel well, pictured here

    [​IMG]


    Now take the mud flap and press the flap against the bolts, and now you get this

    [​IMG]

    Now I took a 5/32" drill bit and drilled a hole in the middle of each marking, after all the holes were drilled in each flap I then took the screws and drilled them through the flap

    [​IMG]


    After all the screws are drilled into the flaps just install the flaps into the appropriate location, you can see how well the screws line up

    [​IMG]

    [​IMG]

    [​IMG]

    Tighten down all the screws, I started the top screw, and then the rest. Tighten down the bottom screw first and then the middle, then the top (for the rear flaps install).

    Here is what they look like installed

    [​IMG]

    [​IMG]

    [​IMG]
    [​IMG]
     
    Last edited by a moderator: Feb 20, 2018

Products Discussed in

To Top