1. Welcome to Tacoma World!

    You are currently viewing as a guest! To get full-access, you need to register for a FREE account.

    As a registered member, you’ll be able to:
    • Participate in all Tacoma discussion topics
    • Communicate privately with other Tacoma owners from around the world
    • Post your own photos in our Members Gallery
    • Access all special features of the site

Polyurethane Radiator Support Mounts (Cab Also)

Discussion in '2nd Gen. Tacomas (2005-2015)' started by 12TRDTacoma, Feb 1, 2015.

  1. Jan 9, 2016 at 12:53 PM
    #521
    12TRDTacoma

    12TRDTacoma [OP] Powered by Ford, GM, VW, and Mercedes

    Joined:
    Aug 20, 2012
    Member:
    #85133
    Messages:
    16,542
    Gender:
    Male
    First Name:
    Rob
    Concordia
    Vehicle:
    12 TRD Sport DCLB 4x4 Supercharged
    Boosted
    You didn't bend the support while jacking it up. A very significant amount of force is required to even make a dent or damage the lower crossbar on the radiator support, (that actually is the strongest area on the support). Your support is just bent because the battery has slightly caved in the fender well, which is also attached to the support. Leave the washers up top. You are fine.

    It sounds like he does.
     
    Soul Surfer[QUOTED] likes this.
  2. Jan 9, 2016 at 12:56 PM
    #522
    teamhypoxia

    teamhypoxia MichelinMan

    Joined:
    Aug 21, 2012
    Member:
    #85247
    Messages:
    9,627
    Gender:
    Male
    Colorado
    Vehicle:
    '12 DCSB TRD OR
    Can't say I agree with that... It's the bushing between the frame and radiator support that determines their relationship. The solid inner sleeve determines how much you can squish the bushings by tightening the bolt.
     
  3. Jan 9, 2016 at 1:12 PM
    #523
    12TRDTacoma

    12TRDTacoma [OP] Powered by Ford, GM, VW, and Mercedes

    Joined:
    Aug 20, 2012
    Member:
    #85133
    Messages:
    16,542
    Gender:
    Male
    First Name:
    Rob
    Concordia
    Vehicle:
    12 TRD Sport DCLB 4x4 Supercharged
    Boosted
    I don't disagree with that statement whatsoever.
     
  4. Jan 9, 2016 at 1:42 PM
    #524
    12TRDTacoma

    12TRDTacoma [OP] Powered by Ford, GM, VW, and Mercedes

    Joined:
    Aug 20, 2012
    Member:
    #85133
    Messages:
    16,542
    Gender:
    Male
    First Name:
    Rob
    Concordia
    Vehicle:
    12 TRD Sport DCLB 4x4 Supercharged
    Boosted
    Why the hell we are even having conversations about squished and unsquished heights in the first place?

    The whole purpose behind this mod is to remove the soft pliable rubber radiator support bushings and strengthen up the mounting points in the front. We are all very aware that the stock bushings are sloppy and that is one of the sources of all the pops, creaks, clunks as well as responsible for tweaking the mounting points on the frame because of their pliability alone allowing them to slide around in their mounting location. Allowing the sleeve to contact the frame and causing said tweak I mentioned above.

    Bottom line. I've done the mod, it fit, it is well within the "unsquished" height the rubber bushing is in between the frame and support and has caused no additional stress to my setup since I've installed it. If anything, it's kept my front end held together much better. I run the piss out of the truck so if any additional issues came up then I would not be running them. OE replacement ones included in the master 8.4xxx cab bushing kit are not the same height as OE either. I know that because I've measured it before. Polyurethane is much more consistent at maintaining it's height over rubber, which consistently proves to show that it comes apart unpredictably and in a different fashion when compared to another replacement piece and compresses itself down to unpredictable heights when tightened down.

    No one's front end height is equal to someone else's. Everyone is riding around at a different front end height when using stock bushings and by cutting those out and running the poly's it allows everyone to be just about the same cab running height.

    If there is some sort of concern or complaint about heights or what it will or will not do to the single layer sheetmetal radiator support and wheel well, then replace the old bushings with OE and keep it stock. Watch your front end collapse upon itself over time or replace the bushings ever 5-10,000 miles and don't mod the truck.

    Personally, you run more risk of tweaking, or damaging the cab or frame or even both by running the OE bushings and allowing all the weight of the battery on the inner fender to bounce while driving and seperate the front end from the frame. (Which I allowed to tear apart my front end and after 50,000 miles made me pay for it and made my install of the new ones even more difficult)

    Sorry, I had to get how I feel towards the matter and all the hair splitting out of the way.

    Back to your regularly scheduled microanalyzations.
     
    Last edited: Jan 9, 2016
    samiam and Airdog like this.
  5. Jan 9, 2016 at 1:53 PM
    #525
    Airdog

    Airdog did your Mom

    Joined:
    Dec 26, 2012
    Member:
    #93790
    Messages:
    4,547
    Gender:
    Male
    First Name:
    Tom
    SoCal
    Vehicle:
    https://www.tacomaworld.com/threads/airdogs-2012-prerunner-access-cab-slow-build.264263/
    FWIW. I have a couple of buddies who have trucks built and maintained by Solo Motorsports. Their fix was to just add a hunk of metal the same thicknesses of the poly bushings we are all currently running. And it is working just fine for them so far.
     
    12TRDTacoma[OP] likes this.
  6. Jan 9, 2016 at 1:54 PM
    #526
    DrFunker

    DrFunker Well-Known Member

    Joined:
    Feb 3, 2014
    Member:
    #122158
    Messages:
    42,967
    Wow. No give in those.
     
  7. Jan 9, 2016 at 4:33 PM
    #527
    Bman4X5

    Bman4X5 There is no substitute for square inches.

    Joined:
    Jan 4, 2015
    Member:
    #145616
    Messages:
    1,072
    Gender:
    Male
    First Name:
    Bruce
    Upland CA
    Vehicle:
    '15 AC/OR
    Bilstein, Dakar/Icon, Prinsu, CBI, Pelfreybilt, Tepui
    Per Roberto @12TRDTacoma, I reinstalled my polys with the fat one on top. No change to hood fitment. Used a 2x4 and my bottle jack to gain enough clearance to insert the bushings. Simple.
    IMG_1075.jpg


    IMG_1077.jpg
     
  8. Jan 9, 2016 at 6:22 PM
    #528
    12TRDTacoma

    12TRDTacoma [OP] Powered by Ford, GM, VW, and Mercedes

    Joined:
    Aug 20, 2012
    Member:
    #85133
    Messages:
    16,542
    Gender:
    Male
    First Name:
    Rob
    Concordia
    Vehicle:
    12 TRD Sport DCLB 4x4 Supercharged
    Boosted
    That looks lovely. :)
     
  9. Jan 10, 2016 at 3:36 AM
    #529
    DrFunker

    DrFunker Well-Known Member

    Joined:
    Feb 3, 2014
    Member:
    #122158
    Messages:
    42,967
    Looks good. :thumbsup:
     
  10. Jan 10, 2016 at 2:17 PM
    #530
    fla_sun

    fla_sun Well-Known Member

    Joined:
    Oct 15, 2015
    Member:
    #166710
    Messages:
    295
    Gender:
    Male
    Vehicle:
    2006 SR5 4X4 AC 4.0 Auto
    I see you used the smaller diameter washer on top of the larger bushing?
     
  11. Jan 10, 2016 at 4:24 PM
    #531
    Bman4X5

    Bman4X5 There is no substitute for square inches.

    Joined:
    Jan 4, 2015
    Member:
    #145616
    Messages:
    1,072
    Gender:
    Male
    First Name:
    Bruce
    Upland CA
    Vehicle:
    '15 AC/OR
    Bilstein, Dakar/Icon, Prinsu, CBI, Pelfreybilt, Tepui
    Yes, and not sure why. In retrospect, the other way 'round would have been better.
     
  12. Jan 10, 2016 at 6:10 PM
    #532
    12TRDTacoma

    12TRDTacoma [OP] Powered by Ford, GM, VW, and Mercedes

    Joined:
    Aug 20, 2012
    Member:
    #85133
    Messages:
    16,542
    Gender:
    Male
    First Name:
    Rob
    Concordia
    Vehicle:
    12 TRD Sport DCLB 4x4 Supercharged
    Boosted
    Yeah it would had.
     
  13. Jan 18, 2016 at 2:50 PM
    #533
    mascott

    mascott Member

    Joined:
    Dec 29, 2015
    Member:
    #173421
    Messages:
    10
    Gender:
    Male
    First Name:
    Mark
    Vehicle:
    2005 Tacoma - Silver, 4WD TRD Off Road, Double Cab Short Bed
    Icon stage 5 AllPro standard leaf pack Timbren bump stops ARB bullbar with Warn M8000S winch BFG KO2 285/75/16
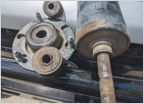
    Just installed mine. Starting with smaller bushing on top. Will swap if needed later. Also checked for sheet metal cracks like @12TRDTacoma, none noted. Mine is a 2005 with 136k miles. Done my share of off-road beatings on stock TRD suspension but not enough to cause that much damage.

    Used a crowbar to lift up and pull the old ones out. The ARB bumper bracket almost gets in the way but you can still slide an extension in there. It's a tight fit.

    Thank you @Pitchfork311 for pointing me to this thread!

    IMG_9645_zpsms2xsc8r_481da74cb2e46de9ddae1001fb40ae45c8209767.jpg

    IMG_0220_zpsngio807v_9ff69156dc223c380b6022184be58d12230e8247.jpg

    IMG_0224_zpsoh3mdodx_00db333e7df9f88e80a62e545727b105f7ebe9a0.jpg

    IMG_0225_zpsdmx672vb_54809bbccad5b3cf22196175e46475e0fa563bcf.jpg
     
  14. Jan 18, 2016 at 5:10 PM
    #534
    Incognito

    Incognito No better friend, no worse enemy

    Joined:
    May 25, 2009
    Member:
    #17626
    Messages:
    13,752
    Gender:
    Male
    VA
    Vehicle:
    2012 Pyrite AC TRD OR
    Spacer lift, bumper stickers, ejector seat, etc.
    Just installed the poly bushings on my 2012 today. Went with the bigger bushings on top without the washer , passenger side of the hood is ever so slightly higher than the driver side but managed to adjust the hood buffers to get it very close. The driver side bushing was a royal PITA, the bolt holes on the radiator support would not line up with the bushings. Turned a 30 min project into 3 hours with quite a bit of profanity. Any idea why the bolt would not line up? It was about 1/2" off but managed to pry it into place. My truck has 18K on it and has not been abused offroad or driven hard at all...
     
    Crom likes this.
  15. Jan 18, 2016 at 6:05 PM
    #535
    12TRDTacoma

    12TRDTacoma [OP] Powered by Ford, GM, VW, and Mercedes

    Joined:
    Aug 20, 2012
    Member:
    #85133
    Messages:
    16,542
    Gender:
    Male
    First Name:
    Rob
    Concordia
    Vehicle:
    12 TRD Sport DCLB 4x4 Supercharged
    Boosted
    Sounds like you worked way too hard to get it to fit.

    As I previously stated. It is because your support is bent, you may not have offroaded the vehicle or beat on it, but that battery nevertheless weighs 50lbs on the drivers side and you most likely have had to drive the truck some bumpy roads even if still on and not off road.
     
    AaronArf and Incognito[QUOTED] like this.
  16. Jan 18, 2016 at 6:57 PM
    #536
    Incognito

    Incognito No better friend, no worse enemy

    Joined:
    May 25, 2009
    Member:
    #17626
    Messages:
    13,752
    Gender:
    Male
    VA
    Vehicle:
    2012 Pyrite AC TRD OR
    Spacer lift, bumper stickers, ejector seat, etc.
    Thanks for the response Roberto :thumbsup:

    The bolt still wouldn't line up with the smaller bushing on top, tried it a couple different ways but ended up muscling the damn thing into place. Had to tap the bolt through the engine bay to get threads showing on the bottom of the bushings. Next on my list is battery relocation ASAP, would free up some room for an OBA setup down the road.
     
  17. Jan 18, 2016 at 8:17 PM
    #537
    12TRDTacoma

    12TRDTacoma [OP] Powered by Ford, GM, VW, and Mercedes

    Joined:
    Aug 20, 2012
    Member:
    #85133
    Messages:
    16,542
    Gender:
    Male
    First Name:
    Rob
    Concordia
    Vehicle:
    12 TRD Sport DCLB 4x4 Supercharged
    Boosted
    I also had to tap in the bolt through the engine bay side down with a hammer as well to make it all fit flush in there to get it to line up. Trust me, you and I are not the only one's who have had to do that upon replacing these bushings.

    Battery relocate, no matter where you locate it to other than the engine bay is a smart move.

    As a small word of advice when it comes to running the wiring, run two ground cables from the negative terminal of the battery. 4AWG or larger. One to the frame and one to the long block (you can hook it up to either the transfer case bolts or the t-case to transmission mating bolts) to prevent excessive voltage drop issues while cranking.
     
    Incognito[QUOTED] likes this.
  18. Jan 18, 2016 at 8:24 PM
    #538
    12TRDTacoma

    12TRDTacoma [OP] Powered by Ford, GM, VW, and Mercedes

    Joined:
    Aug 20, 2012
    Member:
    #85133
    Messages:
    16,542
    Gender:
    Male
    First Name:
    Rob
    Concordia
    Vehicle:
    12 TRD Sport DCLB 4x4 Supercharged
    Boosted
    I want to see better pictures of your overall support. Get in there with your camera and take pictures, if you can, behind the grille also right under the upper support crossbar. I found more cracking under my upper crossbar that I never saw before as I was about to install a new intake and it required I cut out some of the area that was already cracked.

    Also, do yourself a favor and install those washers. Those are really important to rest under the support crossbar, as without them, they can potentially warp over time with the movement the bushings allow.
     
    Incognito[QUOTED] likes this.
  19. Jan 19, 2016 at 4:12 AM
    #539
    simplehuman

    simplehuman Well-Known Member

    Joined:
    Aug 15, 2013
    Member:
    #110526
    Messages:
    2,256
    Thanks for the detailed pics! Definitely helps those of us who haven't done the fix yet.
     
  20. Jan 19, 2016 at 12:11 PM
    #540
    patbegley

    patbegley Well-Known Member

    Joined:
    Apr 7, 2014
    Member:
    #127234
    Messages:
    475
    The Kootenays
    Vehicle:
    '22 DCLB

Products Discussed in

To Top