1. Welcome to Tacoma World!

    You are currently viewing as a guest! To get full-access, you need to register for a FREE account.

    As a registered member, you’ll be able to:
    • Participate in all Tacoma discussion topics
    • Communicate privately with other Tacoma owners from around the world
    • Post your own photos in our Members Gallery
    • Access all special features of the site

rngr's Debatable Debacle Build

Discussion in '2nd Gen. Builds (2005-2015)' started by rngr, Nov 20, 2015.

  1. Jan 17, 2016 at 7:12 PM
    #41
    rngr

    rngr [OP] Aix sponsa

    Joined:
    Jan 13, 2015
    Member:
    #146258
    Messages:
    9,244
    Gender:
    Male
    Vehicle:
    01 SR5 4x4 2.7L
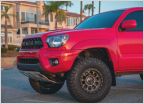
    A few cool pics from this weekend.
     
    RogueTRD and Crom like this.
  2. Jan 17, 2016 at 7:23 PM
    #42
    cstallings

    cstallings Well-Known Member

    Joined:
    Mar 25, 2013
    Member:
    #100538
    Messages:
    1,208
    Gender:
    Male
    Arkansas
    Vehicle:
    2013 MGM DCSB TRD Sport 4x4
    SOS Front Bumper, SOS Sliders, SOS skids, ARB Rear Air Locker, OME Lift (885x Coils, Nitro Charger Shocks, Dakar Leafs), LR UCAs, Leer Shell, OKLED 30" light bar, Wet Okle Seat covers, etc, etc
    Where is it going to go? I'm going to buy one this week, but I'm not sure where I will put it. Is it small enough to fit in the big side box on the left side of the bed?
     
  3. Jan 17, 2016 at 7:31 PM
    #43
    rngr

    rngr [OP] Aix sponsa

    Joined:
    Jan 13, 2015
    Member:
    #146258
    Messages:
    9,244
    Gender:
    Male
    Vehicle:
    01 SR5 4x4 2.7L
    It's 8" long 6" tall 4" wide. I can test fit it there for you tomorrow if you'd like. I think I'll mount mine under the hood on the fender well, but I'm not 100% sure yet.
     
  4. Jan 17, 2016 at 7:39 PM
    #44
    cstallings

    cstallings Well-Known Member

    Joined:
    Mar 25, 2013
    Member:
    #100538
    Messages:
    1,208
    Gender:
    Male
    Arkansas
    Vehicle:
    2013 MGM DCSB TRD Sport 4x4
    SOS Front Bumper, SOS Sliders, SOS skids, ARB Rear Air Locker, OME Lift (885x Coils, Nitro Charger Shocks, Dakar Leafs), LR UCAs, Leer Shell, OKLED 30" light bar, Wet Okle Seat covers, etc, etc
    No worries....I was just curious. Post up where you decide to mount it. Once I get mine I'll play with it.
     
  5. Jan 17, 2016 at 7:43 PM
    #45
    rngr

    rngr [OP] Aix sponsa

    Joined:
    Jan 13, 2015
    Member:
    #146258
    Messages:
    9,244
    Gender:
    Male
    Vehicle:
    01 SR5 4x4 2.7L
    I'm going to give it a test fit under the hood, behind the rear seats, and in that cubby tomorrow. I'll let you know.
     
  6. Jan 18, 2016 at 9:08 AM
    #46
    rngr

    rngr [OP] Aix sponsa

    Joined:
    Jan 13, 2015
    Member:
    #146258
    Messages:
    9,244
    Gender:
    Male
    Vehicle:
    01 SR5 4x4 2.7L
    @cstallings the compressor fits in that cubby just fine.
     
  7. Jan 18, 2016 at 11:58 AM
    #47
    cstallings

    cstallings Well-Known Member

    Joined:
    Mar 25, 2013
    Member:
    #100538
    Messages:
    1,208
    Gender:
    Male
    Arkansas
    Vehicle:
    2013 MGM DCSB TRD Sport 4x4
    SOS Front Bumper, SOS Sliders, SOS skids, ARB Rear Air Locker, OME Lift (885x Coils, Nitro Charger Shocks, Dakar Leafs), LR UCAs, Leer Shell, OKLED 30" light bar, Wet Okle Seat covers, etc, etc
    Perfect...just ordered mine from Toytec. Where are you going to install? Seems like that cubby might be the best place. Out of the elements and not a lot of heat like the engine bay.

    Thanks
     
    Last edited: Jan 18, 2016
  8. Jan 18, 2016 at 7:14 PM
    #48
    rngr

    rngr [OP] Aix sponsa

    Joined:
    Jan 13, 2015
    Member:
    #146258
    Messages:
    9,244
    Gender:
    Male
    Vehicle:
    01 SR5 4x4 2.7L
    I'm having trouble making up my mind. But I'm leaning toward bolting it to the driver side fender well under the hood just behind the fuse box.
     
  9. Jan 20, 2016 at 5:20 PM
    #49
    rngr

    rngr [OP] Aix sponsa

    Joined:
    Jan 13, 2015
    Member:
    #146258
    Messages:
    9,244
    Gender:
    Male
    Vehicle:
    01 SR5 4x4 2.7L
    I got the compressor installed on the driver side fender well this afternoon. Hopefully I can get it wired up this weekend.
    A few things I noticed that might help someone else doing the same project.
    1. Remove the bolts holding the fuse box. You'll need some extra room to work. This will allow you to push the box over enough to get your hands in there.
    2. Remove the battery. You have to do this before you can access one of the bolts holding the fuse box.
    3. The heads of the supplied carriage bolts for mounting were too big to fit into their slots. I took a grinder and shaved off one side of the bolt head so that it now looks like a D instead of an O. This allowed enough room to get the bolts into their slots without hitting the compressor.
     
    Crom likes this.
  10. Jan 20, 2016 at 5:23 PM
    #50
    rngr

    rngr [OP] Aix sponsa

    Joined:
    Jan 13, 2015
    Member:
    #146258
    Messages:
    9,244
    Gender:
    Male
    Vehicle:
    01 SR5 4x4 2.7L
    I found these "Gear Tie" things at TSC. Should have had them years ago. Highly recommend.
     
    Crom likes this.
  11. Jan 24, 2016 at 8:44 AM
    #51
    rngr

    rngr [OP] Aix sponsa

    Joined:
    Jan 13, 2015
    Member:
    #146258
    Messages:
    9,244
    Gender:
    Male
    Vehicle:
    01 SR5 4x4 2.7L
    Last edited: Jan 29, 2016
    Crom likes this.
  12. Jan 24, 2016 at 8:48 AM
    #52
    rngr

    rngr [OP] Aix sponsa

    Joined:
    Jan 13, 2015
    Member:
    #146258
    Messages:
    9,244
    Gender:
    Male
    Vehicle:
    01 SR5 4x4 2.7L
    I aired down to go play in the snow earlier (mainly so I could get to air back up with the new compressor). It aired up my 265/75/16 tires from 18lbs to 34 lbs in 1 min. 33 sec. That's with three or four pauses to check the pressure. I'm very pleased.
     
    Crom likes this.
  13. Jan 24, 2016 at 8:51 AM
    #53
    rngr

    rngr [OP] Aix sponsa

    Joined:
    Jan 13, 2015
    Member:
    #146258
    Messages:
    9,244
    Gender:
    Male
    Vehicle:
    01 SR5 4x4 2.7L
     
    Crom likes this.
  14. Jan 24, 2016 at 4:01 PM
    #54
    cstallings

    cstallings Well-Known Member

    Joined:
    Mar 25, 2013
    Member:
    #100538
    Messages:
    1,208
    Gender:
    Male
    Arkansas
    Vehicle:
    2013 MGM DCSB TRD Sport 4x4
    SOS Front Bumper, SOS Sliders, SOS skids, ARB Rear Air Locker, OME Lift (885x Coils, Nitro Charger Shocks, Dakar Leafs), LR UCAs, Leer Shell, OKLED 30" light bar, Wet Okle Seat covers, etc, etc
    Compressor looks good. Install go ok? I just got mine and trying to decide where to mount it.

    I installed a blue fuse box where you have yours, but may end of putting mine there as well. What did you mount it to. Did you use any pre-existing holes or did you make your own?
     
  15. Jan 24, 2016 at 4:26 PM
    #55
    rngr

    rngr [OP] Aix sponsa

    Joined:
    Jan 13, 2015
    Member:
    #146258
    Messages:
    9,244
    Gender:
    Male
    Vehicle:
    01 SR5 4x4 2.7L
    The install went very smoothly. The only tricky part to me was wiring the switch. That was only tricky because I am not very experienced with all things wiring related. I got some good tips on here and it was easy as pie. I mounted it right to the fender well. I set the backing plate on the top of the fender well and marked the holes with a sharpie, drilled the holes, and mounted it up.
     
  16. Jan 25, 2016 at 6:33 AM
    #56
    cstallings

    cstallings Well-Known Member

    Joined:
    Mar 25, 2013
    Member:
    #100538
    Messages:
    1,208
    Gender:
    Male
    Arkansas
    Vehicle:
    2013 MGM DCSB TRD Sport 4x4
    SOS Front Bumper, SOS Sliders, SOS skids, ARB Rear Air Locker, OME Lift (885x Coils, Nitro Charger Shocks, Dakar Leafs), LR UCAs, Leer Shell, OKLED 30" light bar, Wet Okle Seat covers, etc, etc
    Where did you connect the Red-Yellow wire and the Blue-White wire? The the two connected to the switch harness.

    32c51bfac36d4e5db60fafcf6b2d8b38_e1394cbda29b1ef920f23b501edffd08e4c499e4.jpg
     
  17. Jan 25, 2016 at 6:44 AM
    #57
    rngr

    rngr [OP] Aix sponsa

    Joined:
    Jan 13, 2015
    Member:
    #146258
    Messages:
    9,244
    Gender:
    Male
    Vehicle:
    01 SR5 4x4 2.7L
    I can't remember which wire is which, but it will tell you in the install manual. The one the manual calls "ignition" I spliced to the constant hot wire going to the cigarette lighter plug. This lights up the switch anytime you push the switch and the truck running or in the ON position. The wire the manual calls "illumination" I spliced to the wire going to the A/C controls that is only hot when the dash lights are on. I used a test light to find which wire it was. This illuminates the switch anytime your dash lights are on. I used quick splice connections for both. Does that make sense? Let me know if it doesn't or you have any more questions.
     
  18. Jan 25, 2016 at 6:49 AM
    #58
    cstallings

    cstallings Well-Known Member

    Joined:
    Mar 25, 2013
    Member:
    #100538
    Messages:
    1,208
    Gender:
    Male
    Arkansas
    Vehicle:
    2013 MGM DCSB TRD Sport 4x4
    SOS Front Bumper, SOS Sliders, SOS skids, ARB Rear Air Locker, OME Lift (885x Coils, Nitro Charger Shocks, Dakar Leafs), LR UCAs, Leer Shell, OKLED 30" light bar, Wet Okle Seat covers, etc, etc
    It makes sense. I was really trying to figure out the red-yellow (ignition). I'll look for the cigarette plug wire.

    Thanks
     
  19. Jan 28, 2016 at 2:58 PM
    #59
    rngr

    rngr [OP] Aix sponsa

    Joined:
    Jan 13, 2015
    Member:
    #146258
    Messages:
    9,244
    Gender:
    Male
    Vehicle:
    01 SR5 4x4 2.7L
    I picked up a safety siphon the other day. Wow, what a great little tool. A few quick shakes and away it goes. It's extremely fast too.
     
    Crom likes this.
  20. Jan 30, 2016 at 5:26 PM
    #60
    rngr

    rngr [OP] Aix sponsa

    Joined:
    Jan 13, 2015
    Member:
    #146258
    Messages:
    9,244
    Gender:
    Male
    Vehicle:
    01 SR5 4x4 2.7L
    I had a fun little project today with some organization/space optimization. First, I removed the behind the seats storage bins. Sooo much space.
    I used an old ammo can to store some recovery gear (2x 20ft tow straps and a couple shackles) plus my tire inflator. I painted it orange because, well, why not?
    I wanted to be able to secure my air hose and safety siphon to the backs of the seats so they take up very little space. My solution was Velcro.
    The surface of the seat backs is kind of dimpled. I sanded the dimples off so the adhesive on he Velcro would stick. It seems like it is going to hold very well.
    Finished product. I can't for the life of me figure out why toyota puts those bins in there to begin with. It's so much better without them.
     
    Loneknight5 and Crom like this.
To Top