1. Welcome to Tacoma World!

    You are currently viewing as a guest! To get full-access, you need to register for a FREE account.

    As a registered member, you’ll be able to:
    • Participate in all Tacoma discussion topics
    • Communicate privately with other Tacoma owners from around the world
    • Post your own photos in our Members Gallery
    • Access all special features of the site

Diet Taco... trying to keep things light

Discussion in '2nd Gen. Builds (2005-2015)' started by DVexile, Jan 7, 2016.

  1. Feb 16, 2016 at 11:56 AM
    #201
    Mtnflyer

    Mtnflyer I'm big in Japan

    Joined:
    Jun 28, 2015
    Member:
    #158366
    Messages:
    5,176
    Gender:
    Male
    First Name:
    Matt
    Las Vegas
    Most of the jets flying down that canyon are headed to Panamint Valley to do low-level training (200') and fly up and down the valley. You might get some good shots there as well. Also, if you make it to Saline Valley the jets will fly as low as 100'.
     
    DVexile[QUOTED][OP] likes this.
  2. Feb 16, 2016 at 12:18 PM
    #202
    sawbladeduller

    sawbladeduller semi-realist

    Joined:
    Oct 3, 2014
    Member:
    #139583
    Messages:
    1,140
    Gender:
    Male
    North Cal
    Vehicle:
    '15 DCSB '98 2.7L
    fully zip tied
    heading out soon with my dog. last fall in a narrow canyon of SV, the dog panicked with the jet thunder music, and started jumping around in the Dcab, 50lb frantic dog hard to calm. up on the plateau I waved and got a wing dip wave back
     
    Crom and DVexile[OP] like this.
  3. Feb 16, 2016 at 12:41 PM
    #203
    DVexile

    DVexile [OP] Exiled to the East

    Joined:
    Dec 17, 2014
    Member:
    #144469
    Messages:
    2,661
    Gender:
    Male
    First Name:
    Ken
    Vehicle:
    2015 DCSB V6 TRD OR 4X4
    The hot springs in SV are a jet attractor. Actually the springs are called out as a geo reference in the R-2508 Complex Users Handbook and are named "NUDY CAMP". I'd really like to get a shot of flyby over/through south pass one day. I've seen very low inverted passes through there and there is a composition I'd like to setup including the pass, a jet and the precarious section of SV road just south of the pass. But air traffic is much less frequent through there and it would probably be a multi-day attempt.

    I sort of lost my German Shepard to jets. She tended to freak out at thunder or jets. She like most Shepards was also very clever and an escape artist. Anyway, I'd finally gotten confident the escapes were under control and took down a variety of ad hoc containment methods. All was good for a few months. Then China Lake ran an unusual training pattern in the middle of the night right over my house while I was away for the night. Dog got out and was hit by car. Kill assist goes to Ridgecrest's retarded street lighting which are 1950's era cobra head fixtures which are unshaded resulting in drivers seeing the mercury vapor arc itself effectively blinding them such that the light fixture is essentially useless. On a similar note this same idiotic lighting configuration seems to be employed by many "security" lights people install on homes in the area. Provide nice lighting for criminals to work in while ensuring neighbors and police can't actually see the person breaking into the house. It just boggles the mind how much people and even municipalities suck at even rudimentary lighting design...

    Anywho - jets freak out a lot of dogs! Hope you didn't suffer too many scratches in your incident.
     
    Crom likes this.
  4. Feb 16, 2016 at 12:51 PM
    #204
    Mtnflyer

    Mtnflyer I'm big in Japan

    Joined:
    Jun 28, 2015
    Member:
    #158366
    Messages:
    5,176
    Gender:
    Male
    First Name:
    Matt
    Las Vegas
    You could probably get a transceiver and listen to some of the local published frequencies for R2508 to figure out when jets are headed to SV. Of the many times I've been to R2508, I've only flown LL in SV once because it's actually a bit cramped for a jet down low.
     
    DVexile[QUOTED][OP] and Crom like this.
  5. Feb 16, 2016 at 2:08 PM
    #205
    DVexile

    DVexile [OP] Exiled to the East

    Joined:
    Dec 17, 2014
    Member:
    #144469
    Messages:
    2,661
    Gender:
    Male
    First Name:
    Ken
    Vehicle:
    2015 DCSB V6 TRD OR 4X4
    Yeah, I've got a RXvr but the problem usually is the calls are hard to hear from the ground I expect because of poor LoS. When I took the photo earlier in the thread I and two other people on the ridge had RXvrs monitoring and we rarely heard calls. RXvr would squelch on maybe half the flyovers at best and only had voice copy on a couple. I think most pilots were making the call on the "JEDI Transition" from the floor of the Owens Valley at about 500ft AGL and we were on the other side of the mountain making reception dodgy at best! There was one Brit in a Tornado that was making nice clear calls though. Guests are always the most polite I guess ;)

    I've had similar experience when sitting for a few days down at the springs in SV. I think they probably call from Eureka Dunes before heading down Steel Pass and there is no way to hear that call when at the springs. Out of about ten flyovers I heard only two calls made from within SV itself.

    I was at the CA Science Center in Expo Park with my daughter in the fall and they had one of those cheesy little simulators that seat a few people and play one of a variety of programs you can choose. We chose "F-18" and I was amused to recognize the land portion of the flight was a descent into SV over the Inyos and then up Grapevine Canyon to South Pass.

    If you know you are going to do LL in SV again give me 6 hours or so heads up and you can make my South Pass photo a whole lot easier to coordinate ;)
     
    Crom and Mtnflyer[QUOTED] like this.
  6. Feb 16, 2016 at 2:42 PM
    #206
    Mtnflyer

    Mtnflyer I'm big in Japan

    Joined:
    Jun 28, 2015
    Member:
    #158366
    Messages:
    5,176
    Gender:
    Male
    First Name:
    Matt
    Las Vegas
    Yeah line-of-sight is sketchy at best down there. Usually had to get above the mountains to make radio calls.

    Tough to know ahead of time which valley you'll be flying in ahead of time as it's mostly FCFS. 90% of LL flights are in Saline and Panamint though and you're right, typically the transition is from Owens valley down to 500' through SW canyon.

    Unfortunately I retired from that kind of flying a few years ago so now I'm with you admiring from the ground :cheers:
     
    DVexile[QUOTED][OP] and Crom like this.
  7. Feb 17, 2016 at 12:24 PM
    #207
    DVexile

    DVexile [OP] Exiled to the East

    Joined:
    Dec 17, 2014
    Member:
    #144469
    Messages:
    2,661
    Gender:
    Male
    First Name:
    Ken
    Vehicle:
    2015 DCSB V6 TRD OR 4X4
    Well that is the much safer place to be! Most of the ex-flyers I've run into over the years (most of them Navy) if they stayed in long enough eventually had a moment that made them realize no matter how much skill and experience they had there is eventually just bad luck or situations made fubar by someone other than them. After such an incident they'd start to find their pathway to the ground. All of them said they loved it and missed it though!
     
    Mtnflyer[QUOTED] likes this.
  8. Feb 17, 2016 at 12:35 PM
    #208
    Crom

    Crom Super-Deluxe Member

    Joined:
    Jun 22, 2009
    Member:
    #18782
    Messages:
    9,618
    Gender:
    Male
    First Name:
    Nick
    San Diego, CA
    Vehicle:
    2009 4x4 DCSB Camp Supreme
    Millions
    So awesome!
     
    DVexile[QUOTED][OP] likes this.
  9. Feb 17, 2016 at 12:45 PM
    #209
    DVexile

    DVexile [OP] Exiled to the East

    Joined:
    Dec 17, 2014
    Member:
    #144469
    Messages:
    2,661
    Gender:
    Male
    First Name:
    Ken
    Vehicle:
    2015 DCSB V6 TRD OR 4X4
    ROKBLOKZ Mud Flaps
    January 2016

    During the past few trips I'd been hearing the stock mud flags drag more than once. Of course once the truck is lifted that will get the mud flaps a bit higher but from reading it seems most people still trim or replace the stock flaps even after a lift.

    There are of course a whole lot of options for mud-flaps and more than one thread showing some slick, functional installs using some really inexpensive generic flaps modified for the stock mounting points. In the end though I decided to just go with the well known, well regarded if rather expensive ROKBLOKZ flaps. I chose the regular length rather than the short length since the regular are already shorter than stock and as mentioned there will be a lift soon too! I'd like to have some decent function from the flaps to keep the number of rock chips reasonable. Besides making shorter flaps they also make wider flaps for over-sized tires, mine are for near-stock sized tires.

    Install is straight forward and easy and the flaps come with very good instructions including helpful photos. The flaps use a variety of different sized screws, washers and stand-offs to match the contour of the wheel well.

    Here I'll just show pictures of the front install which was done end of January. The front is easy to access by turning the steering wheel appropriately. After doing the front I realized the rear would be much more of a pain to do without taking off the wheels. You can do it if you have a low profile, ratcheting right angle screw driver. I didn't, but this made me realize I should order one for my tool kit. The wheels would all be coming off during the suspension install so I decided to leave the rear flaps for suspension install day.

    Installation was of course uneventful. Here are some pictures showing the relative size compared to stock both installed and off the truck along with a shot of the installation points.

    [​IMG]
    [​IMG]
    Stock vs. ROKBLOKZ

    [​IMG]
    Stock Flaps Installed at Stock Ride Height


    [​IMG]
    ROKBLOKZ Installed at Stock Ride Height

    [​IMG]
    ROKBLOKZ Mounting

     
    xsf18cdf and nikkerton like this.
  10. Feb 18, 2016 at 3:50 PM
    #210
    crazy joker

    crazy joker Well-Known Member

    Joined:
    Oct 11, 2012
    Member:
    #88787
    Messages:
    1,457
    Gender:
    Male
    First Name:
    Jesse
    Charlotte area, NC
    Vehicle:
    2014 DCLB sport 4x4
    Real men just call it camping
  11. Feb 18, 2016 at 4:34 PM
    #211
    DVexile

    DVexile [OP] Exiled to the East

    Joined:
    Dec 17, 2014
    Member:
    #144469
    Messages:
    2,661
    Gender:
    Male
    First Name:
    Ken
    Vehicle:
    2015 DCSB V6 TRD OR 4X4
    @crazy joker - Thanks, I was planning on posting a link to the new AT product and you beat me to it!

    It looks pretty darn slick so far. I had talked with Martyn back in Jan 2015 about their new product before ordering the Flip Pac. It was clear it wasn't going to be ready in time for my build and they were so early in the design they weren't even sure they would be able to do a DCSB version with their opening mechanism. Clearly they solved that issue by opening to the rear!

    I think there are some interesting trade-offs between the flip forward and flip backward design. As far as interior layout, flow and utility goes I definitely prefer the flip forward design. The backward design's primary benefits to my mind are elimination of the problematic torsion bar, rear cover when open for weather/shade and the ability to have a cab roof rack. I'd need to do more thinking and see one in person but I suspect with some thought my perceived flow issues with the backward design could be resolved - there are even a few potential advantages I can think of.

    In the end I'd expect far better customer service and likely better construction from AT as well. This thing looks like a major challenger to FRP and I'm really excited AT has developed the product. This kind of flip open shell tent is too dang great an idea for it to have been only offered through FRP for so long.

    At this point I expect I'm going to be sticking with the Flip Pac for the long term but I wouldn't rule anything out. I really want to see the AT product in person and wait and see field use from folks for a few years. Most all of my mods and planned mods would transfer over from a Flip Pac to the AT Tacoma Habitat with ease. As great as AT is in general I personally don't like being an early adopter.
     
    Jim Bob and crazy joker like this.
  12. Feb 20, 2016 at 5:16 PM
    #212
    eyeZen

    eyeZen Active Member

    Joined:
    Jan 21, 2016
    Member:
    #175691
    Messages:
    32
    Vehicle:
    2006 Silver Tacoma 4WD V6 6MT
    If nothing else, that bed shelf design is fantastic, and is good for even non-camping tacoma use. Significantly improved square footage for storage.
     
  13. Feb 26, 2016 at 12:17 PM
    #213
    DVexile

    DVexile [OP] Exiled to the East

    Joined:
    Dec 17, 2014
    Member:
    #144469
    Messages:
    2,661
    Gender:
    Male
    First Name:
    Ken
    Vehicle:
    2015 DCSB V6 TRD OR 4X4
    Suspension
    February 2016

    In early February it was finally time to do the big suspension installation. End of January and beginning of February was busy with work travel (also the reason this write up is a few weeks late) but I found time to sneak in the install before a planned Death Valley trip over President's Day weekend.

    You can find a write up of everything being installed and the rational for all the component choices in an earlier post.

    Do it yourself or take it to a shop?


    Obviously I could pay a variety of competent shops to do the work. This was my fall back option if nothing else seemed sane. Thing is I do like being involved in jobs like this and want to see and understand what is going on and all the steps. Certainly this is also the most expensive option too, but I'm not at all against spending money to get things done "right". It is just that dropping the truck and components off and coming back later to pick it up wasn't my first choice.

    I could do it all myself with jack stands and my own tools, I am certainly competent enough to do that based on previous mechanical work and reviewing many suspension install threads and videos. As everyone on TW will tell you, this is not a very technically challenging job. Problem with that option is that while I am "competent" there would still be a steep learning curve and it would undoubtedly take a long time as I would fuss over various steps and probably do somethings in a sub-optimal order. Right now for me "time is money" in the sense I have an employer who will gladly pay me good money for any spare hour I have to give them and I actually do mostly enjoy that work. So me wasting many hours reinventing the wheel is also not my first choice.

    I could make things better by getting help from some local TW members, I'm in the LA area so there is lots of help to be had. Having someone by my side that had done most of the steps themselves before would make things quicker and less error prone. Also there are many steps where two pairs of hands is almost mandatory. The issue here is I don't really have a good place to work. We are living in an apartment which is effectively campus housing so the job would be done in a random parking lot or maybe at some TW member's house if they were so generous and I could imagine a real risk of getting "stuck" along the way or the job running long and ending up with the truck stranded in an inconvenient place. If I had my own driveway I would have seriously considered this option.

    In LA there are also various DIY shops with a lift and tools provided plus the occasional expertise and extra hands of the shop manager. Maybe a TW member could come along for the day and we could make some real progress. This was what I had envisioned as the game plan for awhile now. The DIY shops aren't cheap, especially if I budgeted two days in the shop as a conservative estimate, so now I'm spending both money and my time. Still I liked this option the best and had been thinking this is the thing to do for some months.

    Then the reality of my lack of time and slow progress over the past few months while we are living in CA set in. The suspension needs to get done, like now. About the same time searching around the local forums and I discovered Jason, a.k.a. @Speed Freek, who is just down in Northern San Diego County and does a lots of work on trucks at his house. I chatted with him and he's got great pricing since he is low overhead and he clearly had lots and lots of experience. He was confident this would all get done in a day and was tolerant of me sticking around and trying to help out. This seemed like a great compromise between getting good expertise and professional experience so the job would get done quickly while also letting me stick my nose into things.

    Installation Day

    I left from Pasadena early in the morning to dodge traffic, had a hardy breakfast in Temecula and got down to Jason's at 9 am as planned. I had originally thought maybe I could start tackling the rear while Jason worked on the fussier front but Jason's setup was optimized for doing one end of the truck at a time. I could still get some prep work done like putting the shims on the leafs so I started in on that as Jason got ready to tackle the ECGS bushing first.

    It took all of fifteen minutes to realize how ridiculous my thought of "getting a head start" on the rear or really doing anything in parallel with Jason was going to be. He has done so many trucks that he is thinking three steps ahead and any effort I might make to "help" would mostly be getting in the way because I wasn't able to see three steps ahead with him. I'd occasionally bug him with questions or double check we weren't forgetting something and he'd patiently explain what the plan was. It wasn't that I didn't know all the steps, it was that he knew how to efficiently integrate all the various steps of the full install for the minimum effort and repetition.

    Some examples...

    I brought extra UCA bolts in case we had to cut them, I knew from many threads this was a very frustrating step and thought maybe cutting them would be a time saving step as many on TW have done that. He flatly stated that he had done probably forty or more UCAs and that while some trucks were tighter than others he never had to cut the bolts nor thought it would save any time to do so. And indeed, he knew exactly where to quickly bend a little metal and grind a little off the bolt flange such that the bolts were out in no time.

    For the ECGS bushing I probably would have tried to "save time" by only removing one end of the CV and disconnecting the LCA bolts to get enough space to work as has been shown in some TW threads. For Jason removing a CV is a routine thing and so he just did that quickly to get plenty of room to work. He's done a lot of ECGS bushings. One way he did save time was by lowering the passenger side jack stand when doing the bushing swap so the truck was tilted and no differential oil would leak out when the CV was removed.

    There were multiple points through the day where he clearly chose an order of operations to make things go a lot easier. I had seen many threads where people fought with getting the rear axle and leaf springs aligned and seated. Jason just took the obvious in hindsight step of loosening up the U-bolts on both sides of the axle before work so that you'd have plenty of play to align the leaf spring you were working on without fighting the U-bolts on the other side of the truck. Again, "duh" when you see it but I have no doubt that I'd have been struggling with a pry bar or something had I tried it on my own.

    We had a few minor hangups along the way. First was on the ECGS bushing install. We used the EGCS tool to remove the OEM needle bearing and when it came out it was missing some parts. Uh-oh. Jason had never seen a OEM bearing fail on removal like that before but he suspected the failure was from the process of tapping the removal tool into position. Jason quickly fished out a large piece of metal with a magnet but it was clear we were missing some still. I matched the fracture points on the part we retrieved and determined there were two smaller parts still to be found from either side of the larger piece we had. He got a second bit out quickly but the third was missing. After a long search Jason was quite confident the third piece was not in the diff. We looked through the drip tray we had below the diff and found nothing. Finally I disassembled the ECGS tool and very closely examined the OEM bearing only to discover the last bit of metal was inside the bearing adhered to it with some diff oil and tucked between two of the needle rollers where it was a little hard to see. I confirmed that all three pieces mated with each other and the rest of the bearing and we were back on track.

    [​IMG]
    High Quality OEM Part Certain To Stand Up to Years of Off Road Travel
    The other hang up on the front end was the Wheeler's Super Bumps. These were not threading into the chassis easily at all. Jason got the passenger side in with some backing in and out. He indicated he'd had a similar issue in a past install. I thought at first maybe it was just a coating on the threads or something similar and working the bolt back and forth would get things smooth. I tried to put the driver's side bump on and after progressing a little way things got really tight. At this point I compared the OEM bump stop threads with the Wheeler's threads and they were clearly different. The Wheeler's threads were coarser. In the end "re-cutting" the chassis threads with the Wheeler's bolt was working if frustrating so we proceeded with that. In hindsight probably the "right" thing to do was just leave the OEM stops on until I could swap in the correct bolts. I checked in with Wheelers later and they apologized saying that they had received a box of bolts from their vendor that was labeled with the correct specifications but inside the box were bolts with the wrong thread. They had thought they had tracked down all those bad bolts already but missed mine. Anyway, no need for Loctite on those bolts!

    With in three hours the whole front end was done - ECGS bearing, UCAs, coil-overs, brake lines and bump stops. My "help" mostly consisted of being an extra pair of arms occasionally, finding the last piece of the OEM bearing and getting one bump stop half way on. While my ego was at an all time low I was quite happy with the results so far.

    [​IMG]
    OEM Front Suspension

    [​IMG]
    ICON and JBA Front Suspension

    After a snack Jason started on the rear suspension. Not much to report on this other than leaf springs are indeed very heavy and you want two people for that. During this part of the install I managed to successfully install the rear bump stops all by myself as well as put the rear mudflaps on while the wheels were off. I also took the opportunity to grease the drive line though I discovered the Zerk on the front diff junction is extremely hard to access and the grease coupling on the end of Jason's gun was too large for me to access that Zerk.

    The only hang up was on the rear brake lines one of them had not been machined properly and so the retention clip would not seat. Jason said this was a common issue that he'd seen many times. We used a heavy duty zip tie in place of the retention clip.

    [​IMG]
    Zip Tie on Left, Retention Clip on Right
    After about three hours everything on the rear was all finished up as well. Again I noted seemingly simple tasks that Jason banged out in no time that I would have fussed about endlessly. For instance, mounting the remote reservoirs requires drilling a hole and then installing a self tapping bolt. Jason did this in about two minutes or less, because he's done it many times before and knows the correct size hole with his stepped bit and also knows the self tapping bolts are a pain to install and that's just the way it is.

    [​IMG]
    ICON and All Pro Rear Suspension
    After a little repacking and fussing on my part I was out of Jason's hair by around 4 pm. I left with a deeper appreciation for just how much time this would have taken on my own or even with another person helping. Jason was great to work with, I really appreciated seeing his experience and clear thinking on display throughout the installation. For reference he charged only $560 for the whole installation which as I'm sure anyone who has priced things knows is extremely competitive. He's got many years of experience working on these trucks and it shows. In the end I'm actually happy that my work schedule forced my hand into abandoning my original plan and finding this excellent middle road option of "helping" Jason with the installation.

    On the drive back the truck road quite well. Nothing was obviously wrong with the alignment and the truck tracked well. Steering force was perhaps a bit more than before possibly indicating higher caster, but that of course is the point of the JBA UCAs. I stopped for dinner in Temecula to let LA traffic die down a bit and got back home in the early evening. I was quite happy with the experience and give a hearty recommendation to having Jason do work on your truck!
     
    Last edited: Feb 26, 2016
  14. Feb 26, 2016 at 12:31 PM
    #214
    Bman4X5

    Bman4X5 There is no substitute for square inches.

    Joined:
    Jan 4, 2015
    Member:
    #145616
    Messages:
    1,072
    Gender:
    Male
    First Name:
    Bruce
    Upland CA
    Vehicle:
    '15 AC/OR
    Bilstein, Dakar/Icon, Prinsu, CBI, Pelfreybilt, Tepui
    This will all serve you well on the Mojave Road!
     
    Crom likes this.
  15. Feb 26, 2016 at 12:37 PM
    #215
    Crom

    Crom Super-Deluxe Member

    Joined:
    Jun 22, 2009
    Member:
    #18782
    Messages:
    9,618
    Gender:
    Male
    First Name:
    Nick
    San Diego, CA
    Vehicle:
    2009 4x4 DCSB Camp Supreme
    Millions
    Wonder why the wheelers super bumps had wrong threads. I did mine last year no probs. :notsure:

    Good job on the writeup. Pics look good. :thumbsup:
     
  16. Feb 26, 2016 at 12:46 PM
    #216
    Bman4X5

    Bman4X5 There is no substitute for square inches.

    Joined:
    Jan 4, 2015
    Member:
    #145616
    Messages:
    1,072
    Gender:
    Male
    First Name:
    Bruce
    Upland CA
    Vehicle:
    '15 AC/OR
    Bilstein, Dakar/Icon, Prinsu, CBI, Pelfreybilt, Tepui
    Same here. No problems at all.
     
  17. Feb 26, 2016 at 1:47 PM
    #217
    DVexile

    DVexile [OP] Exiled to the East

    Joined:
    Dec 17, 2014
    Member:
    #144469
    Messages:
    2,661
    Gender:
    Male
    First Name:
    Ken
    Vehicle:
    2015 DCSB V6 TRD OR 4X4
    Alignment
    February 2016

    I had an appointment the morning after the big suspension install at my local Firestone to get it aligned. The truck drove fine the evening before on the way back from San Diego, no obvious alignment problems, but of course there are plenty of things that might feel fine while slowly ripping the tread off the tires. I checked that there were plenty of Firestone shops in Las Vegas where the truck will spend much of its life after this year and then went ahead and purchased a lifetime alignment plan for about $170 at the Pasadena location just up the street from me. That seems like money well spent on a truck meant to be off road for most of its life.

    Firestone is one of those mixed bag kinds of places, lots of reviews of them up-selling things to anyone they might think is vulnerable, insisting on replacing tires that every other shop in town would just repair and so on. As to alignments many people on TW seem happy with their lifetime alignment plan as long as they don't have a really tricky alignment problem. Since I've got wheels small enough to not rub no matter what I won't require trading alignment specs for clearance and with the JBA arms I should in theory easily get the numbers I want. So it seemed like a good fit for me. I made sure to snap pictures of all the alignment cams/tabs and their starting positions in case the techs suddenly claimed they were damaged once I got there.

    They pulled my truck up on the alignment machine within a few minutes of my appointment time and I kept my eye on the progress from time to time at a distance. The tech was clearly taking his time and being careful. The alignment took a bit over an hour. I had asked for 3/0/0 as the specs and that is essentially what I got.

    [​IMG]

    I did not talk to the tech afterwards so I'm not sure if the 3.1 caster rather than 3.0 was due to hitting any adjuster limits though I did witness mark and photograph them afterwards and the most extreme adjuster was the passenger side front cam which was on the fourth tick of nineteen which means there was some wiggle room left. As you can see the post-install but pre-alignment numbers had good caster and camber but toe was way out of range.

    One thing that I still have not done but needs to be done is apply anti-seize to the cams. We didn't need to remove those bolts during the install and I didn't feel comfortable asking Firestone to do it. So I'll need to make sure that gets done sometime in the next few months.

    Post lift and alignment the truck handles wonderfully. The JBA arms did exactly what they were suppose to do alignment wise.

    I did this alignment Thursday morning before our President's Day weekend Death Valley trip and so now the race was on to get a few more things done before we headed out!

    UPDATE: It seems this alignment and the reported numbers were probably bogus. There was probably huge toe left on this alignment which resulted in wicked wear on the front tires over the following 6K miles. Corrected alignment reported here.
     
    Last edited: Jun 2, 2017
  18. Feb 26, 2016 at 1:50 PM
    #218
    DVexile

    DVexile [OP] Exiled to the East

    Joined:
    Dec 17, 2014
    Member:
    #144469
    Messages:
    2,661
    Gender:
    Male
    First Name:
    Ken
    Vehicle:
    2015 DCSB V6 TRD OR 4X4
    Thanks guys, I forgot to mention that in the write up! I just edited the install post to mention it, but I'll repeat here that I talked to Wheelers and they apologized saying they had recently gotten a mislabeled box of bolts from their vendor. They thought they had tracked down all the wrong threaded bolts but mine got through.
     
    Bman4X5[QUOTED] and Crom[QUOTED] like this.
  19. Feb 26, 2016 at 1:54 PM
    #219
    Crom

    Crom Super-Deluxe Member

    Joined:
    Jun 22, 2009
    Member:
    #18782
    Messages:
    9,618
    Gender:
    Male
    First Name:
    Nick
    San Diego, CA
    Vehicle:
    2009 4x4 DCSB Camp Supreme
    Millions
    :cheers:
     
  20. Feb 26, 2016 at 3:59 PM
    #220
    DVexile

    DVexile [OP] Exiled to the East

    Joined:
    Dec 17, 2014
    Member:
    #144469
    Messages:
    2,661
    Gender:
    Male
    First Name:
    Ken
    Vehicle:
    2015 DCSB V6 TRD OR 4X4
    Rear Differential Breather Extension
    February 2016

    This is already a very well documented modification here on TW so I won't add much beyond some pretty pictures and a quick description of my specific routing. I wanted to get this done before we headed to Death Valley in case the Amargosa crossing on Harry Wade Road was deep enough to dunk the diff.

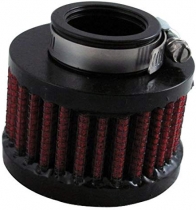
    This is a very simple mod, here is a slightly blurry picture of all involved:

    [​IMG]
    I started with about six feet of 5/16" ID fuel line and I hose clamped the new breather on the end of that. The only real question in this mod is where you choose to locate that breather. Many people put it by the fuel cap, some put it either on the inside or outside of one of the bed cubbies. Most of those require drilling a hole or unbolting something. I wanted this done pretty quickly so I looked around for a place up high that I could access easily and had a way I could attach with a heavy duty zip tie.

    I found a good spot right behind the tail light on the driver's side of the truck. I started routing by mounting the breather at this point with a zip tie that ran through two holes in the sheet metal behind the tail light. The zip tie is below the rather tight hose clamp at the end of the line so there is no way it could slip back down. The tail light cable harness crosses and is attached to the frame just below this point so I zip tied the fuel line to that harness right at the frame and followed the harness back up towards the axle.

    [​IMG]
    Breather Mounting Behind Tail Light
    From that point the tail light harness runs along the frame above the spare. I followed that harness with the fuel line and that harness again attached to the frame just in front of the spare. Once again I zip tied the fuel line to the wiring harness right where the wiring harness attaches to the frame. I didn't even have to drop the spare tire to do this. This point is right above the differential so next I just dropped the line down to the differential, made sure I had plenty of slack for droop and cut the excess line. In the top left of the picture below the line is zip tied to a wiring harness just above the spare. I've marked the line with green dots in the photo to be easy to follow. The line then drops to the differential out of focus at the bottom of the picture. It is hard to see from this perspective but the line has plenty of slack to allow for droop of the axle.

    [​IMG]
    Breather Line From Above Spare to Differential - Marked Green
    (top of picture is rear of truck, bottom of picture is front)

    Prior to routing the line I had already removed the old breather from the diff, applied Teflon tape to the threads of the new nipple and tightened that down. Obviously you want to put the nipple on the differential before attaching the hose or you will twist the hose a lot! I was quite proud of myself for remembering to put the hose clamp over the line before fitting it onto the nipple (not that it would be the end of the world). This 5/16" ID tubing has a nice very snug fit and required quite a bit of shoving to get it fully seated. I then slid down the hose clamp and tightened. A really easy mod!

    [​IMG]
    Breather Extension Attached to Differential
     

Products Discussed in

To Top