

-
Welcome to Tacoma World!
You are currently viewing as a guest! To get full-access, you need to register for a FREE account.
As a registered member, you’ll be able to:- Participate in all Tacoma discussion topics
- Communicate privately with other Tacoma owners from around the world
- Post your own photos in our Members Gallery
- Access all special features of the site
Quick Links: Are YOU Tired of Your WIMPY Stock Horn? Put in 4 Cadillac Horns!
  FS: Trek Deck Stove Mount for Decked
 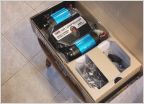 ARB lockers available RD121 RD129 + twin compressors.
  Spiker Engineering Ultimate Lift Hood Strut Black Friday Sale! DeMello Rock crushers 2005-2018 Tacoma sliders
  *Feeler* 3rd Gen SideRide Bike Mounts
Switch-Pro 8 switch panel group buy!
Discussion in 'Automotive Group Buys' started by Spixelz, Sep 3, 2015.
Page 10 of 46
Page 10 of 46

