1. Welcome to Tacoma World!

    You are currently viewing as a guest! To get full-access, you need to register for a FREE account.

    As a registered member, you’ll be able to:
    • Participate in all Tacoma discussion topics
    • Communicate privately with other Tacoma owners from around the world
    • Post your own photos in our Members Gallery
    • Access all special features of the site

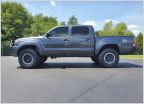
2015 TRD Offroad Mid- Travel build

Discussion in '2nd Gen. Builds (2005-2015)' started by nazepp1, Oct 31, 2015.

  1. Apr 10, 2016 at 5:48 PM
    #21
    KaptainH

    KaptainH Well-Known Member

    Joined:
    Aug 16, 2015
    Member:
    #161948
    Messages:
    2,276
    Gender:
    Male
    First Name:
    Kris
    Gainesville, GA
    Vehicle:
    Black 2013 DCLB Sport
    PMed you but need MOAR pics of the process of how you did the side walls
     
  2. Apr 10, 2016 at 7:17 PM
    #22
    nazepp1

    nazepp1 [OP] Member

    Joined:
    Oct 31, 2015
    Member:
    #168235
    Messages:
    22
    Gender:
    Male
    First Name:
    Nico
    Estero, FL
    Vehicle:
    2015 TRD Offroad Prerunner
    Removed mud flaps, flat black badging, Sportmans seat covers, Icon 2.5" RR ext travel coil-overs, Icon 2.5" RR rear shocks, Total Chaos UCA's, Icon AAL. FN Wheels BFD 18"x9", BFG KO2 285/65 R18.
    The deep satoshi was a labor of love, not exactly sure how many hours I have in it but it's between 30 - 40 from start to finish. Here's how it went.

    1. Cut the factory grill will Dremel tool. (Dremel makes a project like this much easier)

    2. Creat cardboard templates (4 separate pieces to achieve the shape you see on mine)

    3. Transfer cardboard templates to the stock piece you cut out of the middle of grill and cut out with Dremel.

    4. Test fit pieces an refine the shape with Dremel for the best fit.

    5. Use 3m panel bond to glue all the pieces into the corners.

    6. Sand smooth thin skin coat with thickened epoxy resin. ( I used West Systems epoxy resin with the 404 high density filler)

    7. Sand and repeat previous step until you are happy with the results.

    8. Prime and sand again

    9. Lay down whatever color you choose.

    The key is to take your time with sanding and filling. The truth will come out when you paint. Don't rush this process and it will look like a factory part after paint.

    10. Cut mesh to fit

    11. Attach mesh with zip ties and mounting pads

    image.jpg
    image.jpg
    image.jpg
    image.jpg
    image.jpg
    image.jpg
    image.jpg
    image.jpg
    image.jpg
    image.jpg
    image.jpg
    image.jpg
     
  3. Apr 14, 2016 at 6:05 PM
    #23
    IamJorgeEdward

    IamJorgeEdward Well-Known Member

    Joined:
    Oct 26, 2009
    Member:
    #24932
    Messages:
    770
    Gender:
    Male
    First Name:
    Jorge Edward
    Orlando, FL
    Vehicle:
    2015 Toyota Tacoma TRD Sport
    Completely stock
    Love the build. Satoshi is sick! Thanks for postings the construction pics. I've searched so many threads looking for pics on a newer second gen. Subscribed!!!!!
     
  4. Apr 16, 2016 at 8:29 AM
    #24
    nazepp1

    nazepp1 [OP] Member

    Joined:
    Oct 31, 2015
    Member:
    #168235
    Messages:
    22
    Gender:
    Male
    First Name:
    Nico
    Estero, FL
    Vehicle:
    2015 TRD Offroad Prerunner
    Removed mud flaps, flat black badging, Sportmans seat covers, Icon 2.5" RR ext travel coil-overs, Icon 2.5" RR rear shocks, Total Chaos UCA's, Icon AAL. FN Wheels BFD 18"x9", BFG KO2 285/65 R18.
    Thanks bro! I have my old stock grill if you want to buy it and build one of your own! Let me know if you have any specific questions on the build process.
     
  5. Apr 20, 2016 at 9:54 PM
    #25
    ecotecin

    ecotecin Wait, whut........

    Joined:
    May 17, 2014
    Member:
    #129998
    Messages:
    2,471
    Gender:
    Male
    WV
    Vehicle:
    2014 DCSB sold (2020 Chevy Silverado Crew Cab)
    Looks good man!!!! Been thinking about doing one to mine.
     

Products Discussed in

To Top