1. Welcome to Tacoma World!

    You are currently viewing as a guest! To get full-access, you need to register for a FREE account.

    As a registered member, you’ll be able to:
    • Participate in all Tacoma discussion topics
    • Communicate privately with other Tacoma owners from around the world
    • Post your own photos in our Members Gallery
    • Access all special features of the site

PsiMan's Overland build

Discussion in '2nd Gen. Builds (2005-2015)' started by psiman, May 1, 2016.

  1. May 1, 2016 at 8:07 PM
    #1
    psiman

    psiman [OP] Member

    Joined:
    Jan 31, 2016
    Member:
    #176724
    Messages:
    12
    Gender:
    Male
    First Name:
    Matt
    Sac, CA
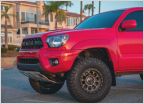
    Sooooo this is the build log of my 2015 Tacoma TRD Off Road, 6 speed manual (and my 1st post!)

    The plan is to make the truck a vacationing machine. The short term goal is to enhances the travel-bility of truck. Adding the second battery for always on charging of devices and backing up the main. Adding the radios for communication outside of cell coverage, and adding winch for self recovery.

    At the end of June, my Gf, her daughter and I will be driving from Sacramento California to the Florida keys on a road trip, about 8500 miles round trip.

    some of these pic are from when I started the project back in November 2015

    Installed
    Custom bed rack
    ARB Bumper
    Bird Dawg Tech Deck​

    Waiting to install
    Off-Grid Engineering Battery trays
    Bussmann RTMR
    Blue Seas ML-ACR
    all ways on usb charging ports
    Cobra 75 WX CB radio
    Yaesu FT-8900 ham radio
    CBI Ditch light, antenna bracket
    Warn XD-9000
    IPF bumper Lights​

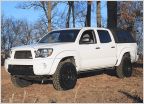
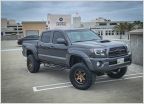
    As it sits now (yeah yeah it needs a lift lol)

    Tac_26.jpg

    Tac_28.jpg
    Tac_27.jpg
     
    Last edited: May 1, 2016
  2. May 1, 2016 at 8:15 PM
    #2
    psiman

    psiman [OP] Member

    Joined:
    Jan 31, 2016
    Member:
    #176724
    Messages:
    12
    Gender:
    Male
    First Name:
    Matt
    Sac, CA
    I used to work at a fab shop and I have stayed friends with the owner who lets me use his shop.. I didnt care much for the bed rack available for roof top tents. so I built my own.

    Designed in Solidworks 1st
    Tac_18.jpg


    Cut out the pieces on my old bosses 5 axis plasma cutter
    Tac_19.jpg

    deburred them:
    Tac_20.jpg

    The legs are tapered in 2 directions which is sorta pain in the a$$ to do with out a fixture or a fancy press break... I added tabs, so it bent parallel to the back gauge, later I cut the tabs off
    Tac_21.jpg

    All bent up and ready to go
    Tac_22.jpg
     
    Last edited: May 2, 2016
    trekker likes this.
  3. May 1, 2016 at 8:19 PM
    #3
    psiman

    psiman [OP] Member

    Joined:
    Jan 31, 2016
    Member:
    #176724
    Messages:
    12
    Gender:
    Male
    First Name:
    Matt
    Sac, CA
    Ohhhh Ive gotten spoiled.. I cut all the box tubing on a programmable band saw..
    Tac_23.jpg

    Tacked up and attempting to keep it flat
    Tac_24.jpg
     

    Attached Files:

  4. May 1, 2016 at 8:21 PM
    #4
    Sje1124

    Sje1124 Well-Known Member

    Joined:
    Nov 1, 2010
    Member:
    #45564
    Messages:
    5,023
    Gender:
    Male
    First Name:
    Sean
    Louisiana
    Vehicle:
    2010 DBL Cab TRD OR 4x4
    Just a few
    Very nice. Welcome to TW!
     
    psiman[OP] likes this.
  5. May 1, 2016 at 8:23 PM
    #5
    psiman

    psiman [OP] Member

    Joined:
    Jan 31, 2016
    Member:
    #176724
    Messages:
    12
    Gender:
    Male
    First Name:
    Matt
    Sac, CA
    I tig welded the box tube section together then weld the legs on.. Next I bolted the bed rail piece on.. then spent forever aligning the top half..
    Tac_2.jpg

    I ended up not using the round tube, It was a idea that got scraped
    Tac_3.jpg

    tacked it in place, then took it off and finished welding it up.. luckily it stayed flat
    Tac_4.jpg
     
    Last edited: May 1, 2016
    trekker likes this.
  6. May 1, 2016 at 8:30 PM
    #6
    psiman

    psiman [OP] Member

    Joined:
    Jan 31, 2016
    Member:
    #176724
    Messages:
    12
    Gender:
    Male
    First Name:
    Matt
    Sac, CA
    Here she is before our first trip.. I painted gray just because I wanted to use it first before I had it powder coated.. The roof top tent is a CVT Mt. Shasta (you can see where the tabs got cut off)
    Tac_6.jpg

    Tac_7.jpg

    Tac_8.jpg

    Tac_9.jpg

    Joshua tree thanksgiving week 2015
    Tac_25.jpg
     
    Last edited: May 2, 2016
    trekker and Sje1124 like this.
  7. May 1, 2016 at 8:40 PM
    #7
    psiman

    psiman [OP] Member

    Joined:
    Jan 31, 2016
    Member:
    #176724
    Messages:
    12
    Gender:
    Male
    First Name:
    Matt
    Sac, CA
    lol not even 5k miles on the truck when I cut the bumper valance in half
    10.jpg

    got the ARB bumper and fogs installed
    Tac_15.jpg

    I hacked off the stock fog light harness connector and replaced it with a metripack connector to the arb fogs
    Tac_13.jpg
     
    Last edited: May 1, 2016
    trekker and Pirhett like this.
  8. May 2, 2016 at 1:09 AM
    #8
    psiman

    psiman [OP] Member

    Joined:
    Jan 31, 2016
    Member:
    #176724
    Messages:
    12
    Gender:
    Male
    First Name:
    Matt
    Sac, CA
    I had those horrendous "pin strips" removed

    *pic out of order lol*
    Tac_1.jpg
     
  9. Jun 4, 2016 at 12:43 AM
    #9
    psiman

    psiman [OP] Member

    Joined:
    Jan 31, 2016
    Member:
    #176724
    Messages:
    12
    Gender:
    Male
    First Name:
    Matt
    Sac, CA
    I really like the Piranha Dual battery system, but far as I can tell its no longer made so I tried to build my own with a group 34 battery.
    after messing around and building a prototype I really wasn't happy with the location.. There probably isn't 3/16 to spare between both side. In my opinion that's way to close to something as vital as the radiator
    IMG_0302.jpg

    after pondering this conundrum for a while I found Off Grid Engineering's battery tray.. and quickly bought them....
    they fit awesome.. I did have to add a few more degrees of bend to the fuel resistor tab.. but the fit is pretty amazing

    I painted them white to blend.
    IMG_0673.jpg

    I decided to build a little bracket to hold the grounding bus bar.. to hide the mess of grounding wires
    IMG_0690.jpg


    the battery trays were not designed for the Optima 34's but I had I already had 2 brand new ones and wasn't going to replace them. The battery hold downs that Off Grid Engineering makes looks nice, but a little to wide for the 34's battery post. I wanted to run the fuse there anyways for the bluesea's ACR. I made new hold downs with the fuse.
    IMG_0647.jpg

    The wiring ended up a little messier than I wanted but it will work, and is safe

    IMG_0738.jpg
    IMG_0737.jpg

    I put the Bluesea's ACR switch and Peak DBI voltage gage in the stock dummy switch slots. I had to file out the spot for the ACR switch a little, then put a spot of epoxy so it wouldn't rattle.

    The Peak DBI voltage gage as no stock way of mounting, so I drilled a hole thru the dummy plug and epoxied it on. I added a on/off switch, in case I get tired of it aways being on
    IMG_0755.jpg

    IMG_0707.jpg
     
    Last edited: Jun 4, 2016
    trekker likes this.
  10. Jun 4, 2016 at 1:14 AM
    #10
    psiman

    psiman [OP] Member

    Joined:
    Jan 31, 2016
    Member:
    #176724
    Messages:
    12
    Gender:
    Male
    First Name:
    Matt
    Sac, CA
    My plan is to install Bussmann RTMR in the engine compartment, with relays and fuse for offroad lights, bed lights, house aux and air compressor but with the road trip impending in a few weeks, I have to put that on hold..

    I've been planing on running a separate fuse panel for the interior, its easier to run 2 heavy wires than a whole bunch of little ones. I decided on a Bussmann RTMR fuse only box because they are cheapish, I have the crimpers, they have 2 banks, in case I want to make one "always on" or "engine running" and its similar parts.

    I looked all over for a good place to install it... I figured the center consol was good.. since its a central location
    Made this panel out of .090 aluminum
    IMG_0741.jpg

    Had to figure out out to drill thru the plastic...
    IMG_0744.jpg


    there is some 1 by 1/4 aluminum epoxied other side of the plastic
    IMG_0754.jpg
    a very important item for me on this roadtrip is to keep my GF's daughter entertained driving... its going to be rough to spend 7000 miles in the back of a Access cab, providing power for her devices is the least I can do.

    I went old school building the trim panel, cut it out on my dads scroll saw.. Normally I would have machined it (its my trade) but its nice to remember not everything requires a $40k piece of machinery
    IMG_0739.jpg

    the 120v receptacle will be wired to the stock inverter, middle is bluesea's 12v receptacle, right is bluesea's dual usb charging port. The two end "protectors" are 2 inch drawer pulls from McMaster Carr
    IMG_0771.jpg
     
    Last edited: Jun 4, 2016
    trekker, Pirhett and Sje1124 like this.

Products Discussed in

To Top