1. Welcome to Tacoma World!

    You are currently viewing as a guest! To get full-access, you need to register for a FREE account.

    As a registered member, you’ll be able to:
    • Participate in all Tacoma discussion topics
    • Communicate privately with other Tacoma owners from around the world
    • Post your own photos in our Members Gallery
    • Access all special features of the site

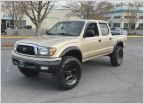
CStoy's loaded taco with extra beef; build

Discussion in '1st Gen. Builds (1995-2004)' started by CStoy, Mar 23, 2016.

  1. Mar 23, 2016 at 7:28 PM
    #1
    CStoy

    CStoy [OP] mountain-top maniac.

    Joined:
    Jun 11, 2015
    Member:
    #157225
    Messages:
    381
    Gender:
    Male
    Vehicle:
    majestic gold 4x4... 1/4 million miles and counting!
    improved toyota goodness.
    so after being on tacomaworld and owning an 2001 tacoma for awhile now I've decided to start a build page...
    nothing too radical for me but a lot of useful little stuff that others may be able to use for build ideas of their own and to build on from there.
    I'm not sure in what order to go first so i will go as chronologically as possible and that means (ugg...) taking pics of what i have already done and not photo documented during the process... so here goes and please forgive me if I get somewhat out of order!

    mod's I have done;
    - Astro 1800 series color matching topper. (dealer optioned in 2001 by the PO)
    - topper roof rack.
    - tundra brake swap.
    - 2 low mod.
    - diff, t-case and transmission breather(s) relocate to engine bay.
    - custom 3''stainless steel air intake tube.
    - 4.5'' deck plate mod.
    - replace all rubber hoses(fuel, vac. and radiator)
    - replace all spring clamps with stainless steel screw clamps.
    - minor functional body work.
    - heavy duty steel bed rail caps.
    - bed-liner coated the rear lower bedside's and tailgate bottom.
    - local shop's hand made "mad genius" muffler.
    - 265/75/16 good year wrangler authority A/T's.
    - optima yellow top battery.
    - transmission cooler.
    - para-cord wrapped grab handles.
    - others also and I will update this list as I retro-document the build process i have done so far.

    minor mod's so far I know... but I tend to work on little details first before i prep for any major changes.
    toyota did a pretty good job in the first place so I haven't needed to change much.

    future mod's to do;
    - I love to tinker so for now I'll just say "lots more on the way"!

    I am pretty particular about my truck and so I try to use all the best fluid's and parts I can when I need to change them or repair anything;

    - transmission; I use royal purple synthetic MAX ATF - D&Fill every 2nd oil change.
    - oil; mobil 1 10-w30 full synthetic and a K&N oil filter every 4k-4500 miles.
    - front differential; mobil 1 full synthetic 75-w90 every 5-6 oil changes.
    - rear differential; mobil 1 full synthetic 75-w90 every 3-4 oil changes.
    - T-case; royal purple full synthetic 75-w90 every 5-6 oil changes.
    - U-joint; I grease every 1 oil change with lucas oil U-joint/CV/chassis grease.
    - ball joints and chassis bushings; I use the same grease as the U-joints.
     
    Last edited: May 18, 2016
  2. Mar 23, 2016 at 7:45 PM
    #2
    CStoy

    CStoy [OP] mountain-top maniac.

    Joined:
    Jun 11, 2015
    Member:
    #157225
    Messages:
    381
    Gender:
    Male
    Vehicle:
    majestic gold 4x4... 1/4 million miles and counting!
    improved toyota goodness.
    blue plug.jpg 2lowdone.jpg rplug.jpgleftplug.jpg

    so this is the 2 low mod...
    for my particular truck all I needed to do was to unplug one connector and cap the ends off to prevent muck and debris getting in in case I wanted to re attach it later and bring it back to stock operation.
    all this does is remove a indicator sensor that tells the ADD actuator to engage the right front axle shaft... helping to remove binding issues when turning in low range on hard surfaces. as I currently live with a very steep paved driveway that has a full-lock turn at the very top -that sometimes caused trouble when towing my loaded trailer home. problem solved!

    edit; it needs to be mentioned that the 4 low remained fully and completely operational with no adjustments needed other than this connector...you just push the button on the side of the 4wd selector stick -same as if engaging 4wd hi and it can be engaged and disengaged on the fly just like 4wd hi- but in the low range gear ratio.
    the factory 4wd drivetrain shaped indicator light also lets you know weather in 4wd or 2wd while in the low range.
     
    Last edited: Mar 24, 2016
  3. Mar 23, 2016 at 8:18 PM
    #3
    CStoy

    CStoy [OP] mountain-top maniac.

    Joined:
    Jun 11, 2015
    Member:
    #157225
    Messages:
    381
    Gender:
    Male
    Vehicle:
    majestic gold 4x4... 1/4 million miles and counting!
    improved toyota goodness.
    0818152034a.jpg
    0818152035a.jpg 0818152035b.jpg

    I'm pretty sure this was one of the first mods I did to the truck after I got it. I took 1.5''x 1.5''x 0.125'' 90* angle iron and made bed rail caps after I coated the rails with spray on bed liner to fix where the camper shell had ate through the paint to expose bare metal on the rails.
    as you can see it was nearly the perfect dimensions to cover the rail properly... just under 1/4'' showing outside on the top and same showing below on the inside of the bed rail.

    the first pic shows the new rail cap while the coat was drying after top spraying... the other two are a piece of scrap leftover to show what was used. pretty easy job...

    it could be done better than what you see here but it is functional and at the time I had only a hand hacksaw and a cordless drill to work with.

    I bolted it in place with 4, 3/8'' stainless steel bolts, washers, and ny-nuts. I put 2 rows of 3M 3/8'' wide 2 sided foam tape between the rail and the rail cap I crafted to keep it from rubbing -and to seal out water and salt from entering between the parts or getting into the bed when i put my camper shell back on.

    tacco .jpg taccoo copy.jpg

    I took no pic's of the aftermath and during part of this... this was a hurry-up-and-fix project brought on by myself a O-$h!t moment with a burst oil filter and a sandstone retaining wall...

    the marks on the drive coming from under the truck (2nd pic) are 3 weeks and several rains old. I lost about 3 quarts of oil in 30 sec's or so as soon as I started it up to head to work.
    I noticed the trail of oil as I was backing up and while watching it trying to figure out what it was; I backed into a retaining wall with just enough speed to shove the bumper into the rear fender, bust the tail light lens and push the bumper about 2'' into the fender.
    i had changed the oil and filter the night before with mobil1 synthetic and a fram filter... the threaded top part of the filter stayed on the engine but the can part detatched and was laying on the lower control arm covered in brand new oil.

    so I pounded the bumper and fender back into shape, cleaned it, taped it, sanded it, 2 coats primer,light sand, 2 coats paint, light sand, and 4 coats of spray on bedliner later... I also did the tailgate bottom, and undercoated the rear receiver assembly and inside the rear bumper while i had everything taped off.
     
    Last edited: Apr 16, 2016
  4. Mar 23, 2016 at 9:09 PM
    #4
    CStoy

    CStoy [OP] mountain-top maniac.

    Joined:
    Jun 11, 2015
    Member:
    #157225
    Messages:
    381
    Gender:
    Male
    Vehicle:
    majestic gold 4x4... 1/4 million miles and counting!
    improved toyota goodness.
    note that I did the fenders before i did the steel bed rail caps... I had coated the rails with bed liner within a week of buying the truck and it wore through that in a couple of months. the fender bed liner over coating is great as i find myself on gravel roads alot and my current tires have a thing for throwing rocks at the fenders the first ones didn't have so much.
     
  5. Mar 24, 2016 at 5:35 PM
    #5
    CStoy

    CStoy [OP] mountain-top maniac.

    Joined:
    Jun 11, 2015
    Member:
    #157225
    Messages:
    381
    Gender:
    Male
    Vehicle:
    majestic gold 4x4... 1/4 million miles and counting!
    improved toyota goodness.
    0108161156.jpg

    para-cord wrapped the grab handles :cool:
     
  6. Mar 24, 2016 at 5:56 PM
    #6
    CStoy

    CStoy [OP] mountain-top maniac.

    Joined:
    Jun 11, 2015
    Member:
    #157225
    Messages:
    381
    Gender:
    Male
    Vehicle:
    majestic gold 4x4... 1/4 million miles and counting!
    improved toyota goodness.
    0315161215a.jpg

    on sunday; 1/4 million miles! all on the original engine and transmission and no rebuilds for either the engine or transmission.
     
  7. Mar 27, 2016 at 11:46 AM
    #7
    CStoy

    CStoy [OP] mountain-top maniac.

    Joined:
    Jun 11, 2015
    Member:
    #157225
    Messages:
    381
    Gender:
    Male
    Vehicle:
    majestic gold 4x4... 1/4 million miles and counting!
    improved toyota goodness.
    0327161254.jpg
    this is a pic of the intake tube... it is actually made out of a piece of stainless steel 3'' exhaust tube that was laying around at a local shop... it helps a lot with the new "mad-genius" muffler that the owner of the same shop made as an experiment.

    the muffler is interesting... it has a very "unique" sound. it is not a particularly bad sound but it is a very odd tone that I have never heard anything like it from a car or truck... the best way i can describe it is the sound from the old alien abduction movies made by the flying saucer. you can feel the walls vibrating in the house when I am idling in the driveway


    0327161255 2.jpg
    the standard 4.5'' deckplate.
     
    Last edited: Mar 27, 2016
  8. Mar 27, 2016 at 4:14 PM
    #8
    CStoy

    CStoy [OP] mountain-top maniac.

    Joined:
    Jun 11, 2015
    Member:
    #157225
    Messages:
    381
    Gender:
    Male
    Vehicle:
    majestic gold 4x4... 1/4 million miles and counting!
    improved toyota goodness.
    I did not change the engine side upper radiator hose clamp out to stainless screw type yet as it is a new hose and clamp but that will be done at the next coolant flush about 3200 miles away.
    I'm also going to swap out the black iron "T" to a brass "T" on the vent lines. this "T" is connecting 2 lines that originally weren't together but both are just breathers and will not effect each other by being connected.
    yes, anal I know but like I said I'm Very particular about my truck.

    edit; all done! also the heater lines have screw clamps now. they temporarily had squeeze type as I had got the wrong size line to replace them with and was waiting on it too come in.
     
    Last edited: Apr 15, 2016
  9. Apr 15, 2016 at 11:29 PM
    #9
    CStoy

    CStoy [OP] mountain-top maniac.

    Joined:
    Jun 11, 2015
    Member:
    #157225
    Messages:
    381
    Gender:
    Male
    Vehicle:
    majestic gold 4x4... 1/4 million miles and counting!
    improved toyota goodness.
    0329161740a.jpg

    I modified the roof rack from a grand caravan too fit on my camper shell while I had it off of the truck to fix a leaky window seal... I ended up removing nearly half of the track at 31'' removed per side... I also removed 7 inches from the crossbar width as well. half of that x2 per bar so as to retain the factory arch.
    4 stainless bolts, washers & ny-nuts along with 8 neoprene washers and some epoxy hold it on the topper.
    it worked great hauling an pelican 1650 case full of camera gear (approx 80 lbs) for a recent trip including 200 miles of freeway there and back. it also looks as if it was factory IMO.
     
    Last edited: Apr 15, 2016
  10. Apr 23, 2016 at 9:19 AM
    #10
    CStoy

    CStoy [OP] mountain-top maniac.

    Joined:
    Jun 11, 2015
    Member:
    #157225
    Messages:
    381
    Gender:
    Male
    Vehicle:
    majestic gold 4x4... 1/4 million miles and counting!
    improved toyota goodness.
    0419161734a.jpg
    this is what it looked like stock. the brakes stopped the truck ok when unloaded but when I towed my trailer they came up short on stopping power.

    0419161802.jpg
    I got the tundra brakes on!
    they bolted right up!
    the rotors are 7 lbs heavier than stock- although new rotors may weigh more than mine did as i was about 2.3 mm below the minimum thickness spec.
    the calipers are only 1/2 lb heavier than stock after I drained the stock calipers
    0419161817.jpg

    here you can see how much larger the tundra calipers are than stock tacoma calipers.
    0419161745.jpg

    and the rotors are larger as well. a solid 3/4 of an inch larger in diameter and at least 4/3rd's as thick.
     
  11. Jun 2, 2016 at 1:52 PM
    #11
    T4RH33L

    T4RH33L Helping to find Jimmy since 2017

    Joined:
    Nov 3, 2015
    Member:
    #168524
    Messages:
    891
    Gender:
    Male
    First Name:
    Al
    Raleigh, NC
    Vehicle:
    2013 MGM DCSB TRD OR
    5100s with Eibach coils and zombie Dakars.
    Hey, I'm interested in the Tundra brake mod. Did you buy them somewhere online or pull them from a junkyard? If you bought them online, what was the part number? Thanks!
     
  12. Jun 4, 2016 at 7:16 AM
    #12
    CStoy

    CStoy [OP] mountain-top maniac.

    Joined:
    Jun 11, 2015
    Member:
    #157225
    Messages:
    381
    Gender:
    Male
    Vehicle:
    majestic gold 4x4... 1/4 million miles and counting!
    improved toyota goodness.
To Top