1. Welcome to Tacoma World!

    You are currently viewing as a guest! To get full-access, you need to register for a FREE account.

    As a registered member, you’ll be able to:
    • Participate in all Tacoma discussion topics
    • Communicate privately with other Tacoma owners from around the world
    • Post your own photos in our Members Gallery
    • Access all special features of the site

Bored Clerk's Rear Bumper Build

Discussion in 'Armor' started by 1 Bored Clerk, Mar 12, 2016.

  1. Jun 7, 2016 at 7:01 AM
    #221
    Timbo's Customs

    Timbo's Customs Well-Known Member

    Joined:
    Aug 8, 2013
    Member:
    #110078
    Messages:
    7,266
    Gender:
    Male
    First Name:
    Timothy
    Lakeland FL
    Vehicle:
    2019 f250 6”lift 37s deleted 1997 T4r, tons and 4ds
    1997 t4r has super duty axles, 5.13s locked front and rear. 3 link front with 14" kings. Rear 63s.
    Looking good man been. Watching
     
  2. Jun 7, 2016 at 7:36 AM
    #222
    1 Bored Clerk

    1 Bored Clerk [OP] Well-Known Member

    Joined:
    Sep 18, 2013
    Member:
    #112786
    Messages:
    1,999
    Gender:
    Male
    Vancouver, WA
    Vehicle:
    '13 4x4 AC TRD OR
    Thanks! I'll be back on it tonight. I want to wrap up the other spring pin mount and drill the holes for the license plate. Still going to be pretty hot but much better than this last weekend!
     
  3. Jun 7, 2016 at 9:51 PM
    #223
    1 Bored Clerk

    1 Bored Clerk [OP] Well-Known Member

    Joined:
    Sep 18, 2013
    Member:
    #112786
    Messages:
    1,999
    Gender:
    Male
    Vancouver, WA
    Vehicle:
    '13 4x4 AC TRD OR
    Finished up a little item tonight. Well, it's finished but not tested. It may prove to be an issue in the future but it's easy change should it be necessary.

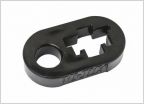
    I figured out my rubber bumper issue! If you recall, I've been stressing about the 'bumper' that will be in compression when the swing out is being held by the giant clamps. I ordered urethane die springs...high durometer, high spring rate. So far I really like them.

    Here's how I attached them:

    image.jpg
    Die spring. They come in a lot of different sizes, rates, and working loads. These seem perfect and the size is exactly right. Now, how to attach them... I already have a 5/16" hole drilled and tapped that I can use...so I used it.

    image.jpg
    Here's the kit: 5/16" bolt, 1/4" washer, 3/8" heater hose, die spring.

    image.jpg
    Lube it up! The heater hose is a press fit into the center of the die spring. So, hitting it with some lube lets it slide right in.

    image.jpg
    See!

    image.jpg
    Now, drop the bolt and washer into place.

    image.jpg
    Now you see why I used a 1/4" washer. I used a 1/4", grade 8, cut washer...it was the perfect size. It still fit over the 5/16" bolt but the OD fit exactly into the ID of the die spring.

    image.jpg
    You only push the rubber tubing in far enough to be flush with the bottom of the die spring. Not super critics as the bolt will pull it flush. The most critical part is cutting the tubing to the right length. Too short and it won't work, too long and it'll pop the die spring off.

    image.jpg
    Now, bolt it in place. Because I lubed the tubing, if you over tighten the bolt, it'll pop the die spring off. If I had left it dry, it would work better. I'm hoping that, over time, the two will sort of seize up together. The bolt squishes the heater hose causing it to expand (since it can't go anywhere else) which, in turn, puts pressure on the ID of the die spring. So far, so good. However, only time will tell. I have a few more options for securing these but I thought this was clever (and easy!) so I tried it first.

    I'll report back if it turns out to be no good.
     
  4. Jun 10, 2016 at 6:22 AM
    #224
    Michgnxj24

    Michgnxj24 Well-Known Member

    Joined:
    Mar 8, 2014
    Member:
    #124845
    Messages:
    218
    Gender:
    Male
    First Name:
    Matt
    Virginia Beach
    Vehicle:
    2010 DCSB
    Jeraco Cap, Viair OBA
    Is it possible to get the urethane springs with a 5/16" or 3/8" ID and drill down 3/4 the way to create an internal flange that would catch the washer? I'd be worried that the urethane would eventually pop off the bolt and hose.
     
  5. Jun 10, 2016 at 8:15 AM
    #225
    1 Bored Clerk

    1 Bored Clerk [OP] Well-Known Member

    Joined:
    Sep 18, 2013
    Member:
    #112786
    Messages:
    1,999
    Gender:
    Male
    Vancouver, WA
    Vehicle:
    '13 4x4 AC TRD OR
    Short answer? Yes...kinda...sorta. I'm not sure if you can get a urethane die spring in the exact measurements I'd need. You could, potentially, drill/machine out a piece of urethane with a step (which would be ideal). I believe you have to freeze it before any drilling/machining so that it actually cuts instead of tearing and flopping around. That's what you do for rubber, anyway. I could also possibly cast my own in whatever form I like.

    As far as the bumper popping off? Yeah, it totally could...and likely will. I can drill it and safety wire it, put a pin or bolt through it, or any number of other options. However, it can only fall off while the swing out is open and you'll immediately notice its not there when you go to latch it closed. It's unlikely that it will have gone far at that point. I'll likely secure it so it wont fall off...I just haven't yet because, well, it's just another damn thing to do when I'm just trying to get this thing done! It's time to bring the cows home on this one. Haha.
     
    GHOST SHIP likes this.
  6. Jun 10, 2016 at 9:01 AM
    #226
    GHOST SHIP

    GHOST SHIP hates you.

    Joined:
    Mar 9, 2015
    Member:
    #150537
    Messages:
    22,399
    First Name:
    GHOST
    A simple solution might be to dab a little weatherstripping adhesives not between the two. I honestly don't think it will be required though. Might be a pain down the road if it does pop off occasionally, but a small hurdle to deal with for something so useful.
     
  7. Jun 10, 2016 at 9:07 AM
    #227
    Timbo's Customs

    Timbo's Customs Well-Known Member

    Joined:
    Aug 8, 2013
    Member:
    #110078
    Messages:
    7,266
    Gender:
    Male
    First Name:
    Timothy
    Lakeland FL
    Vehicle:
    2019 f250 6”lift 37s deleted 1997 T4r, tons and 4ds
    1997 t4r has super duty axles, 5.13s locked front and rear. 3 link front with 14" kings. Rear 63s.
    Last edited: Jun 10, 2016
    Michgnxj24 and GHOST SHIP like this.
  8. Jun 10, 2016 at 11:19 AM
    #228
    mach1man001

    mach1man001 eh whatever

    Joined:
    Nov 4, 2009
    Member:
    #25415
    Messages:
    22,338
    Gender:
    Male
    First Name:
    Rob
    Bellingham, MA
    Vehicle:
    2024 Tundra Limited
    I love my new truck but miss my Tacoma
    You measure stuff in inches?

    @1 Bored Clerk Very nice build!
     
  9. Jun 10, 2016 at 11:31 AM
    #229
    OZ-T

    OZ-T I hate my neighbour

    Joined:
    Dec 15, 2009
    Member:
    #27584
    Messages:
    50,587
    Gender:
    Male
    First Name:
    Peter North
    British Columbia
    Vehicle:
    Mag Grey 09 Trd Sport DCLB 4x4
    OME 885x , OME shocks and Dakars , Wheelers SuperBumps front and rear , 275/70/17 Hankook ATm , OEM bed mat , Weathertech digifit floor liners , Weathertech in-channel vents , headache rack , Leer 100RCC commercial canopy , TRD bedside decals removed , Devil Horns by Andres , HomerTaco Satoshi
    Yep , I work in fractions , and decimal inches too
     
  10. Jun 10, 2016 at 12:18 PM
    #230
    mach1man001

    mach1man001 eh whatever

    Joined:
    Nov 4, 2009
    Member:
    #25415
    Messages:
    22,338
    Gender:
    Male
    First Name:
    Rob
    Bellingham, MA
    Vehicle:
    2024 Tundra Limited
    I love my new truck but miss my Tacoma
    I would have thought that most of your stuff was done in the metric system
     
  11. Jun 10, 2016 at 12:21 PM
    #231
    OZ-T

    OZ-T I hate my neighbour

    Joined:
    Dec 15, 2009
    Member:
    #27584
    Messages:
    50,587
    Gender:
    Male
    First Name:
    Peter North
    British Columbia
    Vehicle:
    Mag Grey 09 Trd Sport DCLB 4x4
    OME 885x , OME shocks and Dakars , Wheelers SuperBumps front and rear , 275/70/17 Hankook ATm , OEM bed mat , Weathertech digifit floor liners , Weathertech in-channel vents , headache rack , Leer 100RCC commercial canopy , TRD bedside decals removed , Devil Horns by Andres , HomerTaco Satoshi
    Not in residential construction , its pretty much still all imperial
     
  12. Jun 11, 2016 at 11:38 AM
    #232
    1 Bored Clerk

    1 Bored Clerk [OP] Well-Known Member

    Joined:
    Sep 18, 2013
    Member:
    #112786
    Messages:
    1,999
    Gender:
    Male
    Vancouver, WA
    Vehicle:
    '13 4x4 AC TRD OR
    OZ-T,

    I just assumed you were doing me a favor by converting it for me! Haha.
     
  13. Jun 11, 2016 at 11:46 AM
    #233
    1 Bored Clerk

    1 Bored Clerk [OP] Well-Known Member

    Joined:
    Sep 18, 2013
    Member:
    #112786
    Messages:
    1,999
    Gender:
    Male
    Vancouver, WA
    Vehicle:
    '13 4x4 AC TRD OR
    Getting stuff done this morning. Got a bit of a late start but that's okay.

    image.jpg
    Got the second spring pin mounted. Works great!

    I also cleaned up the hitch pin hole. It was a little too small (considering the powdercoating that will be on there). Cleaned up a few welds and drilled the holes for the license plate.

    image.jpg
    This is my punch list to finish the main bumper. This IS going for powdercoat on Monday!

    image.jpg
    image.jpg
    So close! I'm ready to get this thing mounted on the truck for good. Still have to do the wraparounds but that's a much smaller project.
     
    Acerwin, GHOST SHIP and Nickel like this.
  14. Jun 11, 2016 at 5:19 PM
    #234
    1 Bored Clerk

    1 Bored Clerk [OP] Well-Known Member

    Joined:
    Sep 18, 2013
    Member:
    #112786
    Messages:
    1,999
    Gender:
    Male
    Vancouver, WA
    Vehicle:
    '13 4x4 AC TRD OR
    That's it. I'm done with the main part of the bumper!!

    image.jpg
    image.jpg
    image.jpg
    Clamp, drill, tap, counter sink. Repeat. 7 times. It's not quite as clean as I would like around the edges but it works well and I can always nerd out over the edge finish of the UHMWPE before I mount it for good.

    Did some other welding/grinding to finish it off.

    Took it all apart and cleaned out the bearing areas with brake kleen and knocked off as much of the little welding balls as I could get to. I imagine sandblasting will do a good job of finishing that off.

    image.jpg
    A couple of months worth of work sitting in a heap on the floor.
     
    Acerwin likes this.
  15. Jun 11, 2016 at 5:22 PM
    #235
    1 Bored Clerk

    1 Bored Clerk [OP] Well-Known Member

    Joined:
    Sep 18, 2013
    Member:
    #112786
    Messages:
    1,999
    Gender:
    Male
    Vancouver, WA
    Vehicle:
    '13 4x4 AC TRD OR
    Looks like I'll have an OEM chrome rear bumper with hitch and a nice white tailgate for sale next weekend!
     
  16. Jun 11, 2016 at 6:11 PM
    #236
    Michgnxj24

    Michgnxj24 Well-Known Member

    Joined:
    Mar 8, 2014
    Member:
    #124845
    Messages:
    218
    Gender:
    Male
    First Name:
    Matt
    Virginia Beach
    Vehicle:
    2010 DCSB
    Jeraco Cap, Viair OBA
    How much does that beast weigh?
     
  17. Jun 11, 2016 at 6:15 PM
    #237
    1 Bored Clerk

    1 Bored Clerk [OP] Well-Known Member

    Joined:
    Sep 18, 2013
    Member:
    #112786
    Messages:
    1,999
    Gender:
    Male
    Vancouver, WA
    Vehicle:
    '13 4x4 AC TRD OR
    Unsure. Let's just say it weighs 'a lil bit'.

    Remember it'll be offset by the loss of the not inconsiderable factory bumper and hitch. Of course I still have to add the wings. The All Pro Expo springs can handle ALL the weight. Haha.
     
  18. Jun 13, 2016 at 4:24 PM
    #238
    1 Bored Clerk

    1 Bored Clerk [OP] Well-Known Member

    Joined:
    Sep 18, 2013
    Member:
    #112786
    Messages:
    1,999
    Gender:
    Male
    Vancouver, WA
    Vehicle:
    '13 4x4 AC TRD OR
    A week to ten days and I should have my parts back from powdercoat. That's all til then. I'll likely bask in the glory (assuming it all goes back together smoothly) of the finished main bumper for a week or so before I get into the wraparound parts.
     
    GHOST SHIP likes this.
  19. Jun 13, 2016 at 4:30 PM
    #239
    GHOST SHIP

    GHOST SHIP hates you.

    Joined:
    Mar 9, 2015
    Member:
    #150537
    Messages:
    22,399
    First Name:
    GHOST
     
    Timbo's Customs likes this.
  20. Jun 23, 2016 at 9:29 PM
    #240
    1 Bored Clerk

    1 Bored Clerk [OP] Well-Known Member

    Joined:
    Sep 18, 2013
    Member:
    #112786
    Messages:
    1,999
    Gender:
    Male
    Vancouver, WA
    Vehicle:
    '13 4x4 AC TRD OR
    Picked up the bumper today.

    Let's get this party started!

    image.jpg
    image.jpg
    image.jpg
    Tear down complete. Takes about 8 minutes now...I've done it a few times. Haha.

    image.jpg
    Fluid film on any frame or bumper surface that will be hidden.

    image.jpg
    Yep, can't see a thing. Phone camera + shooting into the light = crap. Deal with it...I have to.

    Anyway, the above pic shows the main bumper in place.

    image.jpg
    Time to put the UHMWPE slide plate on.

    image.jpg
    Done! Would have loved to machine one from a solid chunk as it would look perfect. But, this semi hack job will be just fine.

    image.jpg
    image.jpg
    Stainless steel glide plates for the spring pins that lock the swing outs at 90 degrees. Nice touch...keeps the pin from killing the powdercoat.

    That's it for today. I got some longer hardware for the pivots and will resume the build tomorrow after work. I would imagine that'll wrap it up for the main bumper!
     

Products Discussed in

To Top