1. Welcome to Tacoma World!

    You are currently viewing as a guest! To get full-access, you need to register for a FREE account.

    As a registered member, you’ll be able to:
    • Participate in all Tacoma discussion topics
    • Communicate privately with other Tacoma owners from around the world
    • Post your own photos in our Members Gallery
    • Access all special features of the site

Battleship Jones: 2015 Tacoma DCLB Build Thread

Discussion in '2nd Gen. Builds (2005-2015)' started by Adventurous, Aug 23, 2016.

  1. Aug 23, 2016 at 7:24 AM
    #21
    Adventurous

    Adventurous [OP] Well-Known Member

    Joined:
    Apr 22, 2014
    Member:
    #128214
    Messages:
    820
    Gender:
    Male
    Colorado
    Vehicle:
    15 DCLB SR5
    The electrical fun continued today. I made it my goal to get the relay mounted, the wiring harness extended, and the switch hooked up and mounted in the cab. So with that being said, here we go!

    The relay was a piece of cake to mount. As much as I would have preferred to make a mounting block for it so I didn't have to drill into the fender, I couldn't see any way of making a good mount for it that would have been worth the effort. So out came the self drilling sheet metal screw. In it goes! I hit the bare metal with a little bit of primer, a quick spray of dark grey gloss enamel, then remounted the relay. Nice.

    20150125-P1010295_zpsz38y4ui9_2ee79cbf190d472e39d1d3bac7bc9bc9d812e9d6.jpg

    After that it was onto the other side of the vehicle to extend the ARB wiring harness. This part of the process proved to be a little bit more difficult as it appears the wiring harness uses a thinly insulated 8 gauge wire. What I had on hand happened to be a rather thickly insulated 8 gauge marine cable. Despite the mismatch, I was able to get it all to work with a little bit of brute force. See, there seems to be a bit of a gap in the tools that I have been able to find. I found a crimper for 10 gauge and smaller cables, and a lug crimper for 6 gauge and larger cables, but no crimper for 8 gauge. I'm sure one exists, but it seemed foolish to get a tool for that express purpose. So I improvised by using the 10 gauge side of my ratcheting crimpers and squeezing til I almost crapped my pants. It took a ton to get the 8 gauge butt connectors set. But in the end I managed to get a good enough crimp to where a hefty tug on it did not yield.

    20150124-P1010291_zpspgo1mqnx_c47b5fd4acfd9dc68328a87bc97b4f9fa5524480.jpg

    While the joint was already sealed on accounts of the heat shrink butt connector I added another piece of heat shrink on top for good measure and to make things look nice and clean.

    20150124-P1010292_zpsjbrwayna_f1f2f32e4d6a060946dbbb8a14843062330af923.jpg

    A simple couple of screws later and tada! The second black wire you see going to the negative terminal from the ARB harness is an additional ground wire used during a dual battery set up.

    20150124-P1010294_zpsuzxuf2rh_ba5705d860ff719e76032e850755e7278d39b5b2.jpg

    As the positive cable is already fused over by the compressor, I don't need another fuse at the power block. Now came time to run the in-cab portion of the wiring harness.

    Disassembly of the interior is pretty straight forward. The first piece to come up is the sill panel. It simple pulls straight up.

    20150125-P1010300_zpsgtu5nfij_8490c147dbc19235840fd3e4973be375aa3570e1.jpg

    Next you can remove the dummy pedal by giving it a good solid yank.

    20150125-P1010301_zpsycdfg9zp_7d97a142e15792b6b730cd1e89aa6f687afd228c.jpg

    Remove the little black nut holding down the edge of the kick panel then pull it towards the back of the vehicle. There are two clips along the side to disengage then you should be able to access the wiring loom behind.

    20150125-P1010302_zpsq004ptbe_507af72bc589e98d6a44052f458e06608085ed2d.jpg

    Now comes the fun part. In order to run the wires out of the cab I decided to go through the main firewall grommet. This meant poking a hole. A quick jab with a screw driver and I now have said hole.

    20150125-P1010296_zpsr827xvqm_b19b8014dfb060bb72f6530451874e31ace53a15.jpg

    Tape your wires to the tip of the screwdriver, line it up with the hole you previously made, and give it a good push.

    20150125-P1010297_zpsxyso9ely_ca49858500c368a3ad7a923d16887c590e3ae9e0.jpg

    After fishing it out from under the dash I hooked up the quick connector and then plugged that into the in-cab wiring harness.

    20150125-P1010303_zps6xmxx4kc_15c87194cb23ff85879e01948bb10936a2c1dcde.jpg

    Now here is where I deviated a little bit from the ARB recommendations. There are two wires coming off the wiring harness, one intended to be run to the ignition, the other to a dimming circuit to the control the switch brightness. As I want the potential to run the compressor with the truck off (mainly for airing up bicycle tires), I chose to extend the power wire and run it back through the firewall where I will hook it up to the fuse block. Once again, crimped heat shrink butt connector + marine heat shrink gives me a solid, sealed connection.

    20150125-P1010304_zpstwfrdznv_26504fd41d6c408ffdf0549d49f0ca51dda92a57.jpg

    For ease of mounting I chose to put it in the black slot between the traction control and the RSCA switches. They are pretty easy to access, open that little cubby beneath and pull out towards you. This should allow you to reach up and push the blank switch out. You'll be left looking at something like this.

    20150125-P1010305_zpsarflhl4p_aaf378f80e0d1c198729408a6db601eff8f0bc92.jpg

    Looking at the two switches side by side, it is evident that the Carling style ARB switch is significantly wider than the Toyota switches.

    20150125-P1010306_zpsnf4btctj_a19f77fb23fc9d6bf42375014124da4178a1984f.jpg

    That, my friends, means that some material needs to be removed from the dash. As always, when opening up the hole, go slow and test fit often. I used a combination of a file and a utility knife to carve away at the sides until I could push the switch in with some resistance. The post-trim hole looks like such.

    20150125-P1010308_zpsfxxttpou_dcfccd44677a664d316422e887e216ca0ec15ac6.jpg

    Snake the wiring harness up behind the dash and pull the 5 wires through the blank slot.

    20150125-P1010307_zpsyxetzaxj_12121dec32f629d88d8eedf42f93a0f7d3478262.jpg

    Hook them up to the right terminals per ARB's wiring diagram and you can reinstall the switch and the rest of the panels you removed while running the wires. You'll be left with a clean looking install.

    20150125-P1010309_zpslxczepkz_307df66f1590f030c76fc4701c7c1829b82e93a3.jpg

    I dare say I'm pretty pleased with the end result. Now to get busy wiring up the Hellas up front and the CB radio.
     
  2. Aug 23, 2016 at 7:24 AM
    #22
    Adventurous

    Adventurous [OP] Well-Known Member

    Joined:
    Apr 22, 2014
    Member:
    #128214
    Messages:
    820
    Gender:
    Male
    Colorado
    Vehicle:
    15 DCLB SR5
    Red braided sheathing came in today, so it was back to work I went. Luckily all I had to do was pull the power cables, trim the sheathing to length, and heat shrink the ends. Everything is nice and clean now.

    20150126-P1010310_zpsbnzif4zf_8958bfb8a8e0524426d86bd40f44183878ab10d3.jpg
     
  3. Aug 23, 2016 at 7:25 AM
    #23
    Adventurous

    Adventurous [OP] Well-Known Member

    Joined:
    Apr 22, 2014
    Member:
    #128214
    Messages:
    820
    Gender:
    Male
    Colorado
    Vehicle:
    15 DCLB SR5
    To give the proper credit where it's due, I must mention that I was inspired to do this by the fella who sells the Anti-Dark kit for the Tacoma. If you want something already put together and simple, he sells a nice neat package.

    Given that I have been working a lot under the hood recently in the dark I got a bit tired of wearing a head lamp or holding a flashlight in my mouth. Since I happened to have all the materials on hand to do an under hood LED strip, I took the time tonight to get everything wired up. Somehow it ended up being a bit of a frustrating process as the first time I tried to bend the strip around a curve and came to the realization that it wasn't going to happen. No bueno. Had to scrap out the wiring harness I had made for that configuration and start again. It is a fairly straight forward install, extend the wires so one of them reaches power and the other to a hood pin switch. You open the hood, it goes on. You shut the hood, it goes off.

    20150127-P1010315_zpseeio2chg_d37ec17d48c528bba1234303484d4bc91d47c0b1.jpg

    Unfortunately I ran out of butt connectors mid way through the install so I looped the wires together for illustrative purposes.

    20150127-P1010317_zpsiwwvjwi7_3efb7fef5b6f6d2b93d2de415ad14c0da40ea353.jpg

    I ran the wires down behind one of the hood supports and out through a hole at the bottom of the hood. Connected everything up to the power block (pardon the mess, I was test fitting the CB radio wires and coax cable and have a bit of spaghetti wiring at the moment) and the other end up to the hood switch. I don't have any pictures of the hood switch at the moment but will take some in the next couple of days and update the thread.

    20150127-P1010318_zpsti5iogpe_965bceb0bf8aeed553d8ed0c7a5d8a5e9b3f9fed.jpg

    And a little up picture! It does a great job at illuminating under the hood. Definitely enough light to see and work on stuff.

    20150127-P1010314_zpsrcvv2sou_f6e03c523fba03c00c7ead3ca6a5bdcd8e8265ae.jpg

    Now to get the coax cable through the firewall. The last time I purchased a cable the connector wasn't attached to the wire and had to be soldered on. This time it is connected and makes the whole assembly a 1/2" proposition. Any suggestions?
     
  4. Aug 23, 2016 at 7:25 AM
    #24
    Adventurous

    Adventurous [OP] Well-Known Member

    Joined:
    Apr 22, 2014
    Member:
    #128214
    Messages:
    820
    Gender:
    Male
    Colorado
    Vehicle:
    15 DCLB SR5
    So I got around to installing the CB radio this weekend. The goal going into it was to mount it in a place that did not impact comfort, visibility, or safety, and still allowed the radio to be easily viewed by the driver. I evaluated mounting it a few places, inside the center console, on the dash, separating the face plate from the body of the radio to do a remote mount, but in the end, mounting it in the little cubby forward of the cup holders. Mock up mounting had it like so

    20150131-P1010320_zpsveed5sod_b3a2b0d9291a629bb7e08e3fd154d30b782a689c.jpg

    Now of course this leads to a particular problem of you know, the dash being in the way. Although a bit intimidating to start hacking up pieces of the center console, it made for a seamless install that I ended up being happy with, so in the end it worked out well.

    Anyway, step one was to disassemble the center console stack. There are two bolts in the center console hidden under the rug that need to be removed.

    20150131-P1010325_zpsfpdbeien_d8e23c4191189e06b7932d65108f1dc4dfef73d9.jpg

    Remove the rubber part of the cup holders then pry up the plastic try. It is held on by a couple of spring clips that should release with a good tug.

    20150131-P1010326_zpsl4zzthvd_7221597f74d8dceb20b1ea0a8a281cca8ea66cc0.jpg

    Now you can remove the shifter bezel. There is not enough clearance to maneuver it off with the shifter in Park, so I put on the e-brake to shift it into Neutral and that gave me enough roam to coax it off.

    20150131-P1010327_zpss9wbrz0z_fe8836b4194f30ccf5e9fcdf91e44fb57cac47c6.jpg

    Lastly, remove the four screws holding the two pieces of the center console together, and the shifter to the center console. You should be able to remove it as an assembly, or, disconnect the front half from the back half and remove just that part by itself. The front section will disengage from the center cluster by tugging backwards to disengage the snap clips.

    After laying out the position of the radio in the dash I transferred the profile of the back of the radio to the back wall of the cubby and went to town with a Dremel, a cut off wheel, and a file.

    The CB mounting bracket was attached to the vehicle using a couple of self drilling sheet metal screws into the plastic. The radio and it's wires were threaded through the space I made and I reversed the steps to re-install all of the trim pieces. All wires were tucked up behind the center console and run across to the main firewall grommet and through to the fuse block. The final install looks like so.

    20150131-P1010328_zpshq8txyjp_e21c45c7c92b4c64c0d4b417e17db1a5cdd57289.jpg

    The final thing I got accomplished was to hook up the Hellas on the front bumper. Despite having owned these for about a year, I have never had them wired up at all. The wiring was pretty straight forward, connect to the protruding wires from the back of the lights, run them to the fuse block and relay then wire to the in-cab switch.

    I had to do several wire merges to get everything into a single cable for ease.

    20150131-P1010321_zps9jids1k7_7ec500e3643976acae20e77985bc3289a03f5dab.jpg

    I got a Carling style switch similar to what comes stock with the ARB stuffs. Once again I had to trim away some of the dash to fit the switch in there. I mounted in the upper holes this time to get all of the light related stuff on a single row. In order to get everything wired up right I had to make my own wiring harness. Using some marine quick disconnects and wire that I had laying around I came up with the following.

    20150131-P1010322_zpsfvulm1ro_5dae6b390121ae8cc10b9186b0afb8bba31cd629.jpg

    And the switch in the dash. Nice and clean. Although it looks like it would be close to interfering with the top lip of the dash (it is) when activated, it does clear.

    20150131-P1010323_zpsff6neidt_4c726e9c5b798233472a88cfe184260e8088e1d2.jpg

    I spent probably 6 or so hours out there getting everything wired, connected, tucked away, and yada yada. Seems like a long time for what I accomplished, but everything is together again. The final payoff was hitting that light switch and seeing that I had indeed done everything correctly.

    20150131-P1010323_zpsff6neidt_4c726e9c5b798233472a88cfe184260e8088e1d2.jpg

    I still have to get them aimed properly and tuck the rest of the wires into looms for neatness sake, but I'm pretty pleased.
     
  5. Aug 23, 2016 at 7:26 AM
    #25
    Adventurous

    Adventurous [OP] Well-Known Member

    Joined:
    Apr 22, 2014
    Member:
    #128214
    Messages:
    820
    Gender:
    Male
    Colorado
    Vehicle:
    15 DCLB SR5
    In other news, I have a small Friday update to make. As someone who is a big fan of lights and seeing in the dark, I decided to upgrade the dome light and map lights to LED. Nothing ground breaking, but a pleasing change none the less. Install is pretty straight forward, so unless someone wants to see the steps I'll skip to the good stuff.

    Put in these little guys.

    20150205-P1010332_zpshpalieq3_09ab476f2c7a37e49749baece6bb1f754e89b680.jpg

    A comparison of an LED next to stock.

    20150205-P1010333_zpsoxlobfdj_3f858538e567bc7ce24b99afe609d28725202a88.jpg

    And a shot of the interior from outside.

    20150205-P1010334_zpsjwut7iml_bea3d0567255f855ba42dc6410a68437c6a5568c.jpg
     
  6. Aug 23, 2016 at 7:26 AM
    #26
    Adventurous

    Adventurous [OP] Well-Known Member

    Joined:
    Apr 22, 2014
    Member:
    #128214
    Messages:
    820
    Gender:
    Male
    Colorado
    Vehicle:
    15 DCLB SR5
    A couple of small updates. I started collecting some recovery gear for this upcoming season. Got a few shackles, a recovery strap, shovel, and a Hi-Lift jack. I'm quite impressed with the beefiness of the receiver shackle, looks like it should serve me faithfully when I undoubtedly get stuck.

    20150210-P1010337_zpskye9meju_e1aa76bd9955682616bd1b90c600361ff88dd5bb.jpg

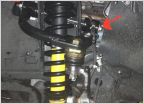
    I also, taking the queue from Zidaro's build thread, decided to put some shock boots on my Icons. Even though the exposed shafts look cool, they were getting super dirty and I was worried about them pitting or chipping from debris. No matter, a pair of shocks boots later and they should hopefully be good to go for a while!

    20150212-P1010342_zpshmc6lzcm_e16210f99babdc9e99b73c68a03df8b63b51dea9.jpg
     
  7. Aug 23, 2016 at 7:27 AM
    #27
    Adventurous

    Adventurous [OP] Well-Known Member

    Joined:
    Apr 22, 2014
    Member:
    #128214
    Messages:
    820
    Gender:
    Male
    Colorado
    Vehicle:
    15 DCLB SR5
    So my work schedule flip flopped for a few days to the graveyard shift, so I had a few hours today to play around with the truck and get a few things accomplished.

    First off I was able to install the ARB fog lights I had ordered up after my experiment to find a cheap alternative failed. The ARBs feel like a quality light and as to be expected, they were more or less plug and play. Owing to my getting an aftermarket fog light harness, it was as simple as splicing a few wires and plugging into the stock harness. The toughest part was having melting snow dripping down into my face as I was under the truck getting everything back on the bumper.

    20150217-P1010344_zpsakq0amue_48abf89ff30e39ce00615c43ea4e600fb5ae9d9b.jpg

    Second task for the day was to clean up the wiring to my auxiliary fuse block. Having what felt like a billion wires coming to and fro was messy and unacceptable. Thankfully they practically give away 100 feet of wiring loom through Amazon so I went to town with that and some electrical wire and have everything tucked away safely.

    20150217-P1010343_zps2pgoldzx_239a921ad57dc112a37db036c86173ff4c4a320c.jpg

    Finally I completed the yellow wire mod I referenced a few pages ago. For those who are unaware, it essentially gives the truck TRAC in 4Lo as it tricks it into thinking it is in 4Hi. I have yet to try it out off road but can confirm that it works.

    20150217-P1010345_zpsk8iuhemb_52c061497df232b82e54d8f6c152a70fe2f53c3e.jpg

    As you can see, I chose to unplug the wire rather than switch or snip it. This way it is all perfectly reversible if I decide for some reason that I want to plug things back in. That being said, getting the wire out was a bit of a pain. I tried a myriad of things to stuff down in the connector to depress the catch holding it in to no avail. Finally I chopped up the cap of a beer bottle into a rectangular piece that was thin enough to slide down and it came out easily. Just an FYI for those who intend to do the same mod and don't want to cut.
     
  8. Aug 23, 2016 at 7:28 AM
    #28
    Adventurous

    Adventurous [OP] Well-Known Member

    Joined:
    Apr 22, 2014
    Member:
    #128214
    Messages:
    820
    Gender:
    Male
    Colorado
    Vehicle:
    15 DCLB SR5
    So my AllPro sliders arrived on Wednesday and I spent the past few days getting them on the truck. Luckily (or not luckily depending on your point of view), I had flip flopped shifts at work and was working graveyards. That gave me the majority of the day to work uninterrupted on the installation.

    First task was to mock the sliders up to the frame and figure out where I needed to drill holes. Each slider requires 4 holes to be drilled in the bottom of the frame for installation. The mock up was fairly straightforward as the holes in the L-brackets match up extremely well to the holes on the frame. After using a hammer and center punch to mark the hole locations I whisked the sliders off to my makeshift paint booth and started hitting them with primer and paint.

    Meanwhile I drilled the holes in the frame. Although some people have reported having difficulty with this process I must have had good luck as I used progressively larger cobalt drill bits (starting at 7/32 and moving up to 3/8") and had all 8 done in fairly quick order. To protect myself from a potentially expensive mistake, I clamped a 2x4 on top of the frame rail on the drivers side to prevent punch through of the bit from destroying the brake/fuel lines in that area. All holes were chamfered, primed, and painted.

    20150220-P1010346_zps7btzmkbu_0b9a32e5c80f4ddcb433fe6d9fe540ebaf9caf20.jpg

    The sliders were painted with Rustoleum glossy enamel auto paint. I have found this to be very durable and it did a good job matching the ARB bumper.

    20150220-P1010347_zpst1nvizt7_8cfecba81d9aba0c9a64c642f1c5500af2077690.jpg

    After patiently waiting 24 hours for the paint to dry, I set about installing the sliders on the truck. Although AllPro has tech documents on their site outlining the installation procedure, they are a bit outdated and don't do a great job at going over all of the steps in the process. Hopefully my experiences can save people a significant amount of trouble.

    I did the passenger side first as I knew from prior experience that it would be the easiest. Using a floor jack I raised the sliders into place and maneuvered them around with a dead blow until everything lined up properly. Mistake #1 was not putting one of the nut plates into the cross member for that mounting leg. Oops. I discovered this mistake after I had installed most of the other bolts and had to remove everything, lower the slider, and put that in. Just a word to the wise.

    20150220-P1010348_zpsysdnefce_ac3259c17132a395c42ae365e1819f9ef1b56aaa.jpg

    I installed the 4 flat head cap screws first using a washer, lock washer, and nut on the back side. Next came the un-fun part; the 2 bolts that go inside the boxed part of the frame. The first one isn't too bad to access, I was able to reach my arm into the frame and get that one together. The forward one on the other hand was significantly more difficult and after ~10 minutes of cursing, going elbow deep in the frame, and jockeying things around I got the second nut plate on. The rest of the bolts kind of fall into place and I gave everything a good turn with the wrench to tighten it up.

    The driver's side poses some additional challenges with the presence of the brake lines and hardware. This made it impossible for me to reach my arm into the frame like on the passenger side to get those forward brackets together. After scratching my head for a bit and trying various solutions I used a magnetic pick up to ferry the nut plates into the boxed portion of the frame. It went beautifully and I had things together in fairly short order.

    20150220-P1010350_zpsklwetyup_b77aa0a253ca57d535bf9cfacd4599775557ddac.jpg

    The other challenge is dealing with the brake lines. It's easiest to pop the clips out and put them back into place after, though one of the nut plates interferes with the brake lines in the back. I used a combination of finessing it in there, gently bending the brake line, and protecting them with some tubing to get everything settled again. Once again, tighten everything up and you are good to go.

    All installed!

    20150220-P1010351_zpsttkqgztv_1298ecd3ec3c5d90bc58daf9f6678f1414d84f4b.jpg

    Now I need to get out and do some glamour shots with the truck. It's been a while since I've taken anything other than install pics.
     
  9. Aug 23, 2016 at 7:29 AM
    #29
    Adventurous

    Adventurous [OP] Well-Known Member

    Joined:
    Apr 22, 2014
    Member:
    #128214
    Messages:
    820
    Gender:
    Male
    Colorado
    Vehicle:
    15 DCLB SR5
    Welp, had the chance today to go out and work on the truck some more. As I mentioned in one of my prior posts, the sliders were contacting the pinch weld. So today I went out and notched the pinch weld to gain a little bit more clearance. Slightly unfortunate as I wasn't anticipating having to drop the sliders again which is a bit of a pain. Anyway, out come all the bolts, in comes the angle grinder with the cutoff wheel, an adjustable wrench to bend the weld back, a bit of hammering to get it out of the way, a shot of primer and paint, and the sliders go back up. The end result was a gap about yay big around each of the slider legs.

    20150228-P1010357_zpsheryzxde_411330d215765e665028d3c2fd683b5fa5cfb051.jpg

    I was also fortunate enough this past week to pick up a set of Spidertrax spacers on Craigslist for cheap. I have wanted to throw a set on the front wheels for a while to gain back some of the width lost when doing the IFS lift. The install is super straight forward and the instructions on the Spidertrax site are adequate, so I won't go through that part. Here are a few pics of the results.

    Spacers:
    20150228-P1010355_zpsi19v3npi_f81b03937e5abbbc2c90e96c58f5c7e2db0cc66d.jpg

    Before:
    20150228-P1010354_zpscnzyhwx8_dff5c9100a6840a48501857626828dd195c76677.jpg

    During:
    20150228-P1010358_zpsuasw3oju_9b56f4330b801024df872f0219a4e437b14ce3ca.jpg

    After:
    20150228-P1010359_zpskzz8zjcw_314039e91a2268c607ac2642211c5c3cd8cbce8b.jpg

    Much better. Now to thaw out my hands after freezing and beating on them all day.
     
  10. Aug 23, 2016 at 7:29 AM
    #30
    Adventurous

    Adventurous [OP] Well-Known Member

    Joined:
    Apr 22, 2014
    Member:
    #128214
    Messages:
    820
    Gender:
    Male
    Colorado
    Vehicle:
    15 DCLB SR5
    In other news, to prepare for fitting the 33" spare tire in the stock location, the cross member required a little modification. I removed the two ears that help to hold the stock size in the right location. This should buy me enough clearance to get the larger tire in there.

    Before:
    20150303-P1010360_zpsluwniq76_edb2cc35847a664680845e1ddf448dc83b6beaf3.jpg

    After:
    20150303-P1010361_zpsmntecv73_9a7e8c04c044640fe94bb1b2da4244430eb6b021.jpg

    Cut flush, flap disked smooth, and painted over.

    My Hellas sh*t the bed recently. I have not changed the wiring at all since the last time they worked so I'm operating under the assumption that the recent snows have compromised the relay and killed it. I can see nothing else in that time period that could possibly have led to their failure.

    I also ordered up a Prinsu designs CABRAC. The intention is to put some Rotopax, recovery gear, Maxtrax, and some other odds and ends up there to cut down on the clutter in the bed once that is transformed into the sleeping area.
     
  11. Aug 23, 2016 at 7:30 AM
    #31
    Adventurous

    Adventurous [OP] Well-Known Member

    Joined:
    Apr 22, 2014
    Member:
    #128214
    Messages:
    820
    Gender:
    Male
    Colorado
    Vehicle:
    15 DCLB SR5
    Got the 33" spare up there and managed to take some pictures this evening. It's tight, real tight. Despite what the pictures show it is up against the driver's side shackle hanger, up against the exhaust hanger (doesn't touch the exhaust), is close to the trailer hitch, and is close to the path of the rear axle. I'm going to keep an eye on it to make sure it doesn't shift, if not, it looks like a viable option.

    20150311-P1010362_zpsnhmx8hr0_b3c24aca74ffb84bc7986be5547431e96ad0d07f.jpg

    20150311-P1010363_zpskvjhdkbt_32f271791f0e934c60f12c70924f19b7b663289c.jpg

    20150311-P1010365_zps1jt98w8q_bec4a670d6b2c9d2fb01a8b7d2911564e877a83d.jpg

    20150311-P1010364_zpsinsdwjy6_64a7032a902f1149f44976a8380533edd1bf6eef.jpg
     
  12. Aug 23, 2016 at 7:31 AM
    #32
    Adventurous

    Adventurous [OP] Well-Known Member

    Joined:
    Apr 22, 2014
    Member:
    #128214
    Messages:
    820
    Gender:
    Male
    Colorado
    Vehicle:
    15 DCLB SR5
    Buncha smart cookies y'all are. After having an additional bumpstop for my ride to work today I got under the truck again tonight and stuffed the rear tire as far backwards as it would go. It opened up a bit more room for the diff to clear the tire. It was kissing before, but now there looks to be adequate room for full travel.

    20150312-P1010367_zpsg1wx5z4g_6c1e2c1bac9ec48b2d869a9b663f835546c7865e.jpg

    Although it just occurred to me that I didn't think to take a picture of the pumpkin -> tire clearance like before. I'll have to snap another one.

    The question also, rightly so, arose as to the clearance with the exhaust. Once again, I'm not going to lie, it's a pretty tight fit.

    20150312-P1010369_zpsuiiqzult_e56594d6785ea2c77ad21a0ded22ba99138b2775.jpg

    That's the point where the tire comes the closest to the exhaust. Luckily it's where the heat shield is, so the tire is somewhat protected, but I'm going to watch it closely anyway.

    Lastly I decided to clear up my differential breather. The clear hose didn't quite fit on the axle barb as well as I wanted it to which kind of defeats the purpose. I had 5 or so feet of 1/4" fuel line laying around that I re-routed things with. It fits rather snugly over the axle barb but as some insurance I added a piece of heat shrink to protect the hose-to-barb interface and then added a hose clamp for insurance on my insurance. At the other end it took a big of finagling to get the hose over the breather cap stem but in the end I triumphed there to. I personally think it looks, and should function, much better.

    20150312-P1010368_zpshbqlygj2_3f3e7016ebb331cf6694ab67b4029274f53b987a.jpg

    So, nearly final verdict is that the 255/85 fits up under the bed, but just barely. I'm going to see how it works out in practice as I'm not 100% sold on having it under there given how tight things are. At some point a few years down the road when I add a rear bumper with a tire carrier I'll get it on there.
     
  13. Aug 23, 2016 at 8:17 AM
    #33
    Adventurous

    Adventurous [OP] Well-Known Member

    Joined:
    Apr 22, 2014
    Member:
    #128214
    Messages:
    820
    Gender:
    Male
    Colorado
    Vehicle:
    15 DCLB SR5
    Given the inevitability of ripping off the 7-pin trailer plug, I decided to do something about it. The two ways most people get around it are to make a bracket that puts the connector facing the ground, or, find a way to put it in the bumper. I went the bumper route as it looks cleaner and more OEM'ish. To the install!

    First off was disassembling the Toyota 7-pin plug. I don't have many pictures of this as it was a bit of a pain, but the basic steps are.

    1. Unbolt the plug and bracket from the truck.
    2. There are 4 tabs around the perimeter of the plug that need to be depressed. These hold a cover on in the inside of the connector. It sucks trying to hold the cover open while fishing the cover out and making sure all of the tabs stay depressed, but, with enough manipulation you can get it pulled out.
    3. Remove the O-ring behind the cover.
    4. Pull the white plastic cover out. Once again, it is snapped into place and requires some work to get it out.
    5. The wires will now pull out of the back and you should be left with the separated plug and the wiring harness.

    Tada!

    20150313-P1010370_zpspvoqxnhw_6dc37499c8ea15f9f767a31e84471a133a2d73d3.jpg

    Not wanting to re-use the Toyota plug due to the weird shape, I sourced one from Amazon. It was a sealed Pollak connector. It was the right shape so I grabbed it. Feels like a quality unit.

    20150313-P1010371_zps9urav7i4_9ac44e83308587b4aebefc0e9cc7f8ac6e0a59b7.jpg

    I chose to mount it right next to the license plate. Taped up the bumper for cleanliness, marked the center of the hole, then gave it a whack with a center punch to keep the drill bit from wandering.

    20150313-P1010372_zpswwsmv6p8_19a685c235d7caa7c21e384dffe6f15ed54561b8.jpg

    I drilled out the center with a bit slightly smaller than the hole saw arbor bit to make it a little bit easier to get things going. There's no going back now!

    20150313-P1010373_zpsroprvvce_717a62980b1207fe001ccfef08ac7004922541f0.jpg

    Even more now going back now. Took a 2" hole saw to the bumper and cut out a big ole' circle to fit the plug.

    20150313-P1010374_zpskbzpl0lb_c99dae394ac7b78cd0284a5c843e9b1c0ffce135.jpg

    Test fit the plug to figure out where I needed to drill the mounting holes. Drilled all 4 and primed them up to hopefully prevent any rusting. Done! Time to mount the plug.

    20150313-P1010375_zpsstwx8ge4_0859c9f44cc95cdf22cdd4e1373d94658fa6e88b.jpg

    Like an idiot I forgot to take a picture of where the stock wires connected to the plug to figure out what color wires went to what terminals. After a bit of googling I came up with following:
    White = Ground
    Red - Left Turn
    Brown = Right Turn
    Black = 12V hot
    Blue = Brakes
    Yellow = Reverse Lights
    Green = Tail Lights

    All wired up. Things aren't all twisted up so I'd wager that it's right. Not to mention I rarely tow anything, so if it's wrong I guess I'll find out in a few years.

    20150314-P1010376_zpsif8nfv8z_a447824315d93c748bfda244fa9eb46be824d5d9.jpg

    4 5mm button head cap screws later and it's done! Very good looking.

    20150314-P1010377_zpsbpcsm9ui_d4e2f6548b363b1bf2d8679efac5a23b41cb82e7.jpg
     
  14. Aug 23, 2016 at 8:17 AM
    #34
    Adventurous

    Adventurous [OP] Well-Known Member

    Joined:
    Apr 22, 2014
    Member:
    #128214
    Messages:
    820
    Gender:
    Male
    Colorado
    Vehicle:
    15 DCLB SR5
    Tonight I did the topper mod. I have been perusing Craigslist for about 5.5 months now and have seen only 3 or 4 toppers for a 6' bed Tacoma. Unfortunately none have been color matched, and all of the sellers have been flaky or unresponsive. Not very encouraging. Earlier this week I had resigned myself to purchasing a brand new topper. I got a quote for a Leer 180 that came in a hair under $1700, which becomes $1800 something once taxes are factored in. Not really in the budget at the moment but the lady friend was spoiled camping in the back of the truck and didn't want to go back to tent camping.

    Imagine my surprise then when I half-heartedly checked Craigslist this morning and saw a Leer topper for a second gen Tacoma up for sale. The guy was asking $500 and the almost immediately after inquiring he went down to $400 with his reasoning being that one pane of glass in the front window was broken, it had no mounting hardware and it came with no keys. I was perfectly fine with both though as the 14 Benjamins worth of savings kept rolling through my head. He then offered to source a new lock with keys and get the window fixed for $450. Hell. Yes.

    I made a plan to head down after work and he was gracious enough to hold it for me with the assurance that as long as nothing was amiss I would 100% buy it from him. He turned out to be a stand up dude who just wanted it gone as he had no use for it and not only did he replace the lock and get some new keys, he also sourced some mounting hardware. The window the shop gave him didn't end up fitting but I was more than okay with that. Especially as he talked himself down to $400 again. He and his wife helped me get it on and I drove away one happy customer. Here are some pics...

    20150318-P1010378_zpsl43wmly8_77668a7803aa615560ce7a695b14b702d9ebf345.jpg

    20150318-P1010379_zpsm4lhspj5_12fcb5de478b69abf0bf5faddb301f17c1407274.jpg

    20150318-P1010380_zpszz8vs4jb_5c6661cdeeed838258a250f422ba0da05a5bebab.jpg

    Impressions after it was installed are I can definitely notice its presence in the handling of the truck. I can feel the weight while driving/braking though the additional weight has helped to smooth out the Dakars out back. I guess you win some and you lose some.

    I'm still up in the air on whether or not to paint it or Plastidip it. For some reason a matte black color would appeal much more to me over the silver tone. Given that long term I'd like to get a high topper to provide some additional space for sleeping in the back, the Plastidip is more the more appealing option to me as it's cheap and can be removed when its time to move on. Thoughts?

    Lastly, topper = platform time. The current plan is to make a half-assed platform for this year to properly evaluate our needs. When said high topper comes along I'd like to raise it up a bit and make a drawer system. All in good time however.

    I'm still pretty stoked about the great deal. Now I'm figuring out what to do with all the money I saved.
     
    arkywally likes this.
  15. Aug 23, 2016 at 8:18 AM
    #35
    Adventurous

    Adventurous [OP] Well-Known Member

    Joined:
    Apr 22, 2014
    Member:
    #128214
    Messages:
    820
    Gender:
    Male
    Colorado
    Vehicle:
    15 DCLB SR5
    Wouldn't you know it, after searching around for the past 5.5 months and barely seeing any toppers for a 6 foot bed up for sale on Craigslist I found two within a week. Both of which I bought. Guess I'm starting a topper collection.

    This time around I found another Leer. Color matched, roof rack rails, carpet, power block, and sliding windows. Much like the first time around I jumped on it and went to pick it up that evening. After a quick walk around I had it up and on the truck and was on my way home. Guess I don't have to worry about drilling holes for roof racks rails or getting it color matched now do I?

    20150328-P1010385_zps83jutfy2_d85a456fe04b914ddc435c250cd2400c3a789630.jpg

    20150328-P1010386_zps3wg900dk_635bd26d9f345cd30c6defd5d7bd611df8860e0b.jpg

    I also got started with getting all of the wiring set up for the switches and power needs in the topper. First off was to get the 3rd brake light working. It is fairly simple, pull the tail light, tap into the green wire with the red stripe for your +, the white wire with the black stripe for your -, run some jumpers up to the LED 3rd brake light with a small in-line fuse (I went with a 2A fuse in there, Leer spec'd a 5A which IMO is way too high for what appears to be 18ga wire and 6 small LEDS).

    20150324-P1010382_zpsbw9k3nkm_89b103ea9f674c75108d0c5e79363ad8aafb6861.jpg

    20150324-P1010383_zpsiztyetbr_7de791b550f479569138d82a32f2c2c564b89af3.jpg

    Loom the wires for aestethics, drill a hole to feed the wire loom through, grommet said hole, and go on my merry way! Once again I was surprised to see the brake light go on when I hit the brake. Somehow I think I've got the hang of this electrical stuffs.

    Anyway, next up on the list is building a switch box for the topper to activate some LEDs inside the topper as well as camp lights that should illuminate the area around the truck. It's a little bit of a tricky space to fit something into with some angles and the likes. Now, owing to a bit of insomnia, I'm going to head back out and finish re-doing the in-cab electrical to accommodate another switch for an LED light bar, tap into power to illuminate my switches, get some quick disconnects on the power leads for the CB so it is easily removed, and clean up all of the wires I ran into the cab. Short of re-routing the CB coax cable under the truck instead of through the main firewall grommet to cut down on the feedback I think I'm more or less done with in cab electrical until I decide to get a second battery in there.
     
  16. Aug 23, 2016 at 8:19 AM
    #36
    Adventurous

    Adventurous [OP] Well-Known Member

    Joined:
    Apr 22, 2014
    Member:
    #128214
    Messages:
    820
    Gender:
    Male
    Colorado
    Vehicle:
    15 DCLB SR5
    I know it's been a while since I last updated this but as I alluded to in the prior post, I have been busy playing home owner and renovating our upstairs bathroom. Total buzzkill I know but I have sneaked away to work on the truck a little bit.

    At this point I am kind of running into a time crunch so I'm trying to get a bundle of stuff around the house and on the truck done. We are heading out Memorial Day for a little staycation to visit some ghost towns around the state and a few weeks later host all of my siblings where we will be spending some time in the San Juans.

    First up was installing my roof rack. I know they tend to be a contentious mod but for me it is necessary. Being that the bed of the truck will be 1/2 occupied by the sleeping platform and mattress, I needed a place to relocate some of the recovery gear and bikes to. Although I have a nice Thule hitch mount bike rack, managing that with climbing in and out of the bed is a giant pain. The roof rack system on the topper is one that I made back at my old job. It was a quick way of getting some Thule bars on the roof so I could haul some stuff up there. The upside to my system is it is very low profile and doesn't sit 6" off the roof like the commercial solutions do. It is just some basic aluminum blocks hogged out to about the right direction. Nothing too fancy, it does the job but certainly doesn't look the prettiest. Oh well, it'll do for now.

    20150329-P1010392_zpsibjkyzs0_73a3700fcd6c368fe0ebe95cc438d88d865db123.jpg

    20150329-P1010391_zps6pshbur0_cbeb70f89c1f73e4e576ff0b6d980f9f25d6f018.jpg

    20150329-P1010390_zpsherwimre_98b740edd16bfd3f38b84f4503cdd937eccb6662.jpg

    I got a bit better of a system for the cab of the truck. I was lucky enough to be in the market the same time a group buy popped up on Tacomaworld for the Prinsu Designs roof rack. Personally I think this is the coolest and most adaptable rack on the market and I was only too happy to fork over a few bucks for the system. After patiently waiting 2 months for the rack to arrive I came home yesterday to find a big box at my door step. I proceeded to drop the rest of my responsibilities and installed the rack right then and there. This is what I found when I opened the box.

    20150427-P1010396_zpsc4xytszw_9656b56928ed77ebcf803818c360bab197746703.jpg

    A couple of 1/4" aluminum side rails, a wind deflector, 6 standard duty bars, 2 heavy duty bars, and a hundred bazillion fasteners. There are two ways of installing the rack. The first involves removing the weather stripping entirely, the second involves punching holes for the spacers to fit through. Given that I am not a fan of water in the cab, I opted for the second method. After pulling up the weather stripping to mark the location of the mounting holes on a piece of painters tape, I transferred the hole pattern back to the weather stripping.

    20150427-P1010397_zps4qcatiil_88b27830b3ae4c1dd99c691a1fda05441dcf69de.jpg

    Using a 19mm punch I knocked holes out of the weatherstripping to accept the 3/4" OD spacers.

    20150427-P1010398_zpsaisq0zxu_1d0f251741b7c58ca33e09b3bd29449a1d2dd7f2.jpg

    Once again, totally not a big fan of water in the cab, so I proceeded to go bonkers with a tube of silicone and pumped the bolt holes and the spacer holes full of clear silicone caulking.

    20150427-P1010399_zpsxtlwoozx_af58310e85d1e325966077864b552f6030f254a2.jpg

    10 bolts later and I had the side rails on the truck.

    20150427-P1010400_zps7bzlpvvh_dfd155f2d627bd9140890f7b68e4eabc04975dc7.jpg

    I installed a few of the crossbars to give the rack some support and shape, spaced it evenly from side to side, then snugged the mounting bolts down. I then proceeded to install the rest of the crossbars and the wind deflector. All in all it probably took 3 hours to get everything buttoned up including the time necessary to prep the charcoal grill and put some pork loins on there.

    I am very, very pleased with the outcome. Given that the crossbars are 80-20 extrusions, there are a ton of mounting options for the accessories I intend to put up there. At this point, the pile in the garage that needs to go up there is a 4 gallon Rotopax gas can, Hi-Lift jack, shovel, and bike rack, but I will detail the install of the most interesting parts of those in a later post.

    20150427-P1010402_zpse48kfhvg_52666a41ca42ba59011f96b89bc3517e208c3d67.jpg

    20150427-P1010403_zpsfe9cps57_dc86b6f8fb1449fc8dcdd92fa32757b554aac8d8.jpg

    20150427-P1010404_zps37oh893u_0a40ee2db293b20c290510c988570e8da7f202bd.jpg

    You may notice a rectangular cutout in the wind deflector. That is for the seamless integration of an LED light bar. Once again, I'll detail that install in a later post.

    At the same time I was installing the roof rack, I got busy replacing the window struts on the topper. Given that they were 6 years old at this point, they had lost a little steam. My poor window could only achieve half mast on a good day.

    20150427-P1010394_zpsfigfze5d_933459f6a227c1bd099dcc302122934f69f49a04.jpg

    Fresh SUSPA C16-14195 struts and I could once again get that puppy all the way up!

    20150427-P1010395_zps6wuy89ko_375f509a49339e980a01dc5332902d6e52bbd1bd.jpg

    More to come over the next few days as I get the roof rack dialed in to my preferences.
     
  17. Aug 23, 2016 at 8:20 AM
    #37
    Adventurous

    Adventurous [OP] Well-Known Member

    Joined:
    Apr 22, 2014
    Member:
    #128214
    Messages:
    820
    Gender:
    Male
    Colorado
    Vehicle:
    15 DCLB SR5
    I made the opportunity over this past weekend to finally take the truck out. Between fixing my heater, unclogging overflowing drains, doing a bathroom renovation, and ripping out walls to stem the inflow of water into my finished basement, I have been very busy with the house.

    Anyway, the lady friend and I decided last minute to make the 4 hour drive to western CO and run the first portion of the Kokopelli trail. It was a whirlwind kind of trip with preparations beginning on Thursday night with the expectation that I would finish the sleeping platform in the bed before we left Saturday morning. I was able to do so and will share some more details in a subsequent post on what I did and some dimensions if anyone wants to replicate it. The same goes for some additional mods I have done since I last updated this post. I apologize for the slacking.

    We started the 4x4 journey near Mack, CO and the Rabbit Valley entrance. It is really the first put in for the 142 mile (Fruita to Moab) journey as the first segment is singletrack only. I aired down in anticipation of what lay before us.

    20150523-DSC_9866_zpswenewrot_9ab981f4b43e3bad3d97ec00a095f9d34779c503.jpg

    Route finding proved to be a little bit challenging at times as the various offshoots were not always well marked. Even when they were marked, the only differentiation between trails was a small label across the top of the sign post in size 12 font that gave the name of the trail. That in addition to the fact that the map was not entirely comprehensive made for a little bit of difficulty in a few sections where we got lost. The GF and dogs were having a great time as we crawled in relative peace through the cliffs and rock formations. The only mishap we had along the way was coming down a little ledge when one of the rocks stacked on the other side shifted as I landed on it and I came down on the cross member. Relatively speaking it wasn't so bad as it just nicked the back side. It completely and totally justified my recent purchase of skid plates and I wished terribly that I had them on this trip (more on that later). After taking some side trails that were clearly not for trucks, we managed to turn things around and ended up on the bluffs above the Colorado River just in time to see some ominous looking clouds rolling in.

    20150523-DSC_9872_zpsfpqsbamp_3c3f4eace02ca3e9ef89962ce443ae3e4f80f247.jpg

    As a novice offroader, the potential for slick rocks and flooded washes was a bit intimidating and for anyone who knows the Kokopelli trail, I had the shelf road section ahead of me. Unfortunately I don't have any pictures through this section as it was quite trying at spots for my inexperienced self. The track was barely wider than the vehicle, had a decent sized drop off one side, and had boulders sticking out at points along the uphill side that just wanted to reach out and grab some sheet metal. Some careful spotting got us through that section just as the rain rolled in. The trail was slightly easier after this point with the exception of a short, steep, downhill that required careful tire placement to get down without dragging something. After that it was relatively tame again with the trickiest sections being a few soft washes and some healthy sized mud holes courtesy of the recent rains. We slogged through those and finally made it out to the road after 6 hours on the trail. Exhausted, we pulled over into the first dispersed camping site we found and set up shop.

    20150523-DSC_9886_zpsqg4wkbhd_3d79c59e1826647507cd8685917d2c1060c6ec2c.jpg

    Now I'll be perfectly honest. This trip was dual purpose. In addition to wanting to get out camping, exploring, and break in the truck, I had also been intending to do the engagement mod for a while. I waited until the sun was setting over a nice vista before setting up the DSLR on a tripod and recording a video under the guise of taking a picture of us both. Romantically enough, this hill top must be used to graze cattle as it was covered in poop. Never the less, I got down on one knee and she said yes! :smiley_drive:

    Proposal%20copy_zpsxl1ud7fg_a94950a93ecb21773d28e72a362e9190641775a6.jpg

    After that we just sat around for a little while talking and watching the sun set before heading to bed. It was comfy back there and all once you got over the lack of space, having a high topper would be ideal for this type of arrangement.

    20150524-DSC_9909_zpspx95emfk_bb4ce8adc04d90e888fc3485e2757958d239865a.jpg

    I had mentioned to my GF..er, fiance, on several occasions how much I wanted to do the Top of the World trail. Given that we were only 45 minutes away, she suggested that we head down there and give it a shot. Not wanting to pass up a good opportunity, I pointed the truck in the direction of Moab and soon enough we were at the entrance.

    20150524-DSC_9910_zpshc2tszvh_19f93ccc7a478f0b694a5a72cc59a8dfecb80728.jpg

    I didn't really know what to expect out of this trail other than what I could find on TrailDamage. The first 2.5 miles were pretty straightforward and didn't require any spotting to get through. After that things turned a bit more technical, honestly, a lot more technical than I expected and was comfortable with. As hard as it was to bow out at that point, my lack of body armor, experience, and desire to be able to drive home influenced my decision to throw in the towel on driving the rest. We found a place to pull over off the trail and just happened to be in the right place at the right time to hitch a ride to the top in some friendly stranger's 4 seater RZR. The rest of the journey to the top reinforced my decision to stop where we did as there were some serious ledges and rocks that would have eaten my underbelly alive.

    On the way up!

    20150524-DSC_9918_zpsluz71ra6_6a1ea2d5bd6e223ca4e3a8095a2f17f7bc5c5e83.jpg

    This trail is an absolute must. The views from the top are so breathtaking you must find a way to get up there, whether by foot, two wheels, or 4 wheels. We hung out on the top for a while taking pictures and soaking it all in. What an absolute treat.

    20150524-DSC_9930_zpsvhys1yth_c4112a27f93dc7dae81cd64051b360971a496e75.jpg

    We decided to hike back down which in hindsight wasn't a bad decision. We arrived about the same time as our companions on their RZR and the ATVs up there did. On the way back down I put the lady behind the wheel and walked in front of the truck spotting her down any sections where she was iffy. As we are intending to do the Alpine Loop in a few weeks, I figured it was imperative she know how to pilot the truck through some moderately technical terrain. She did great heading down the rest, though it was funny not only being outside of the vehicle for it all, but out in front looking back to see the lines she chose.

    After getting back to the road we trucked it back up to Rabbit Valley where we met up with a few of my buddies who were out there dirt biking. We set up shop overlooking the valley, and relaxed for a night of good food, good booze, and awesome company. Not that you guys will ever see this, but thanks for the toast. We also ran into a bunch of Yotas that were on their way to Rock Therapy in Moab. It was great to meet you Bob and Kayla, hope the event goes off without a hitch!

    Things I learned from this trip:
    - having the ARB on board air was awesome. The compressor did an admirable job filling my 255/85s up from 20 to 38 PSI and made it through all 4 without having to shut off.
    - I very much need some skid plates. That cross member hit let me know that I best be careful in the future as the majority of my truck is exposed.
    - My Rotopax gets a meh rating. As I was tossing the full container up on the roof and trying to line up the two handles with the slots it came down while the handles weren't perfectly aligned and bent each of those bolts. I can't say I'm very pleased with that and will be contacting Rotopax to see if those are replaceable.
    - I guess it's a right of passage as I now have some pinstriping down the side of my truck
    - Does anyone have tips on silencing a Hi-Lift? It sounded like I had an aluminum box of bolts welded to the roof of my truck.

    We hoofed it home yesterday morning to give some time to get unpacked, settled, and ready to head back to work. We also had to let our families know of the engagement. It was a bitter sweet announcement as I found out when talking to my parents that my grandmother has terminal cancer. She's lived a good long 98 years and I'm hoping she can hold on long enough to make it to my wedding. She did say at Christmas that she wanted to go to at least one more before she kicked off.
     
    lynyrd3 and P2W like this.
  18. Aug 23, 2016 at 8:21 AM
    #38
    Adventurous

    Adventurous [OP] Well-Known Member

    Joined:
    Apr 22, 2014
    Member:
    #128214
    Messages:
    820
    Gender:
    Male
    Colorado
    Vehicle:
    15 DCLB SR5
    As mentioned in a prior post, I had a few goodies coming my way courtesy of Pelfreybilt and Wheelers. It was already in the works prior to my trip to Moab a few weeks ago but after doinking some of the undercarriage on rocks it re-affirmed my decision to put a little bit of armor on my belly.

    I got home last Thursday to 100lbs of 3/16" steel. I can only imagine the Fedex guy is starting to dislike me at this point for having to shuttle all these heavy packages to my door. Oh well. What kind of goodies are inside!?

    20150529-P1010405_zpsohsfdwrd_9c1f0ad6442d40e33712180df087053514374fc6.jpg

    Tada! One very nicely finished IFS and mid skid. I did a test fit to see how everything lined up and was pleasantly surprised to find that no grinding or massaging was necessary to get bolts through all of the holes.

    20150529-P1010406_zpswfvdk0gh_6929337f04340d765900362bf3959d70eaf7ac89.jpg

    Now came the difficult part. I have always struggled with the patience aspect of painting things. It's always much more fun to install and play with them than it is to watch paint dry. Literally. So I cleaned them up real good with scotch brite, some acetone, and layed down a coat of metal primer.

    20150529-P1010407_zpsosgilfdl_41ca92a833404b47262f38a7232e2d15e841157d.jpg

    I actually waited the recommended amount of time before top coating too! All in the hopes that it would set up nice and hard and not just peel away when I installed the bolts.

    Turned out to be all in vain as the enamel paint doesn't cure enough in the 48 hours they recommend to withstand the torque of tightening bolts. Oh well, they are skidplates after all, a component whose sole purpose is to get beat on rocks.

    20150603-P1010413_zpswv9k2e93_b2ec59d94827b5d88c0ff99d49385bcfd7c4e990.jpg

    20150603-P1010414_zpsmh4vttxp_a03b608779608639479e39d7c534d1088b139c71.jpg

    20150603-P1010415_zpsalmuvy55_9352162b6967af2092fe5929f348b00217bd9e26.jpg

    I did not measure before and after but clearance definitely improved a little bit. Everything bolted on smoothly with the exception of getting the nuts off the driver's side of the transmission cross member. Clearance was too tight with the exhaust hanger and I did not have either a 16mm socket to turn the head of the bolt, or a ratcheting wrench (ratchet + socket didn't fit) to get at the nut. It was a painful exercise with two open ended wrenches. It really makes me wish I had my toolbox that is just sitting in my parents garage on the East Coast. I really need to get that out here.

    I followed up the installation of the skid plates with a set of Wheeler's Superbumps. I was never totally pleased with the ride up front, I'm not sure if the ARB bumper alone just isn't enough weight to get the OME 886 coils moving, but it never felt quite as controlled as I would have liked. I was hoping the longer, softer Superbumps would add some progressiveness to the front suspension and reduce the tendency to pogo a bit.

    Installation was pretty straightforward, unscrew the old bump stops, cut about an inch off the long end of the provided 8mm allen key, and screw the new ones in. I tried to engineer a way around cutting down the allen key but no combination of allen key, hex drive socket, u-joint, or extension worked. After cutting it down I was able to swap them out in 5 minutes.

    I took it for a spin after everything was buttoned up and was quite pleased with the outcome. I can't attribute the perceived increase in ride quality to the additional weight or the Superbumps, but the combination of the two left the front end feeling a lot more planted and in control. There was, as expected, less of the pogo effect and a reduction in harshness through larger bumps. I now fully intend to put a set of Superbumps in the rear once I gather the parts to do the u-bolt flip.

    Unfortunately I do not have pre/post numbers for the increase in clearance due to the new skids or the decrease in ride height due to the additional weight.

    And for those wondering, no, my truck does not have a super advanced case of rust. I know the pictures make it look particularly awful but rest assured that that is just the red mud of Moab coating the underside.
     
  19. Aug 23, 2016 at 8:23 AM
    #39
    Adventurous

    Adventurous [OP] Well-Known Member

    Joined:
    Apr 22, 2014
    Member:
    #128214
    Messages:
    820
    Gender:
    Male
    Colorado
    Vehicle:
    15 DCLB SR5
    So my siblings came out to visit for the first time since I moved here two years ago. As part of their introduction we took a trip around Colorado. The itinerary was to head down to Southwest Colorado to Silverton/Ouray, then up to Crested Butte, camp a night in Granby, then head up over Trail Ridge Road and back home. 5 days and a little over 900 miles.

    Here are a couple of pictures from our travels.

    One direction of our views from Molas Lake Campground outside of Silverton, CO.

    20150613-DSC_0070_zps0gzb93x8_55ae8099ddc17e4863dffb68500c0c878d05b3be.jpg

    Turning 180 degrees...

    20150614-DSC_0332_zpsou7enokk_c84bbf8a4b5caad9ffcc5371b78b3bb2ba0f976d.jpg

    Part of the goal of going down to Southwest Colorado was to try and do the Alpine Loop. The idea was to split the group up into two trips as the GF's Civic was in no way going to make that trip. We started off with a brief visit to the Animas Forks ghost town.

    20150614-DSC_0142_zps4ewsf77s_dc1be610882e9630e978f067842871735bef1575.jpg

    As with most of the ghost towns, it has an interesting boom-bust history to it. We wandered around for a little bit taking pictures before airing down and getting ready to hit Engineer Pass. I don't have many pictures of the trail on the way up as I was driving, it is a pretty narrow shelf road, and the fact that it had just opened up a week ago made for slow going. I definitely felt the length of the DCLB going around a few of the switchbacks, but it was nothing a 3 point turn couldn't take care of. I am still impressed with how easily the Tacoma walks up the steep rocky sections.

    We made it to the top of the pass before realizing that doing the entire Alpine Loop would take the better part of 8+ hours. As the rest of Engineer Pass is a 2wd road into Lake City, we decided to turn around and come back down the way we came up.

    20150614-DSC_0153_zpsiszbauyp_41fa454c0bae7fbb09ad95ae78b2079ab5b016d1.jpg

    Things got a little bit more interesting as we encountered traffic coming the other direction. The trail is simply not wide enough to fit two vehicles in most places, so when I ran into two other trucks I had the pleasure of backing down the shelf road, through healthy sized ruts and in the snow/ice, while the other guy was essentially on my front end. I found it quite rude actually.

    The rest of the encounters along the way were nothing to mention. We made it back down in fairly short order and headed back into town. I fully intend to come back and do the entire loop at some point. I know we will be back in the Fall to check out the Aspens, so we'll see if the weather cooperates.

    As with any trip, the more you get out, the more you learn about what works and what doesn't work. I keep a mental list of things to work on/improve and this is what I came up with from this trip:

    - The weather was less than optimal the entire time we were out with scattered showers every day. I really need to get an awning to provide some sort of shelter in those instances.
    - I also need to find a better solution for airing down. Whether it is the ARB quick deflator or a set of Stauns, I need to save myself the trouble of finding that perfect stone to depress the valve stem and save the 10+ minutes airing down.
    - I happened to see the elegant way that Paul from Equipt integrated the Expedition One Geri can into his rear platform setup. I happened to stumble upon one while in Ouray and picked it up with the intentions of doing something similar. At the very least it provides a low profile, easy to pack additional 4 gallons of water capacity.
    - Curtains are now on the list for the topper windows. Getting blasted in the face at 6am from the rising sun is a major buzzkill.
    - I also need to research navigation setups. Although I was well prepared with the Funtreks guide book, a paper map, and a GPS unit, I need to consolidate that all into a good, single, easy to read package with a paper map backup.

    Now to try and sneak in some time to work on the truck before the next camping trip. Hopefully the rainy season is now over so some of the house related items on the to-do list move down on priority from mission critical.
     
    Pirhett likes this.
  20. Aug 23, 2016 at 8:40 AM
    #40
    Adventurous

    Adventurous [OP] Well-Known Member

    Joined:
    Apr 22, 2014
    Member:
    #128214
    Messages:
    820
    Gender:
    Male
    Colorado
    Vehicle:
    15 DCLB SR5
    Just a little update for today. So I have a serious issue with chrome and shiny stuffs. The chrome grill has always bothered me and I decided to do something about it the other day. I took everything off, cleaned it up real good, then hit it with a coat of Plastidip. IMO it looks much better.

    20150626-P1010416_zpsauzjul3c_f0f57f00fbc38ebbfcab018ade001528a13e388f.jpg

    20150626-P1010417_zpswz4szgp1_af16b7fb704403423b7b99315f79ab33e77e7f2e.jpg

    20150628-P1010418_zpsi8zzrw3l_3382529b342bb564882f0b1f3f654654cd6961eb.jpg

    The wheels are up next once I have an opportunity and the weather cooperates. Then all that's left is the giant chrome rear bumper!
     

Products Discussed in

To Top