1. Welcome to Tacoma World!

    You are currently viewing as a guest! To get full-access, you need to register for a FREE account.

    As a registered member, you’ll be able to:
    • Participate in all Tacoma discussion topics
    • Communicate privately with other Tacoma owners from around the world
    • Post your own photos in our Members Gallery
    • Access all special features of the site

1st Gen Suspension Install

Discussion in '1st Gen. Tacomas (1995-2004)' started by JDMcQ, Oct 7, 2009.

  1. Sep 4, 2013 at 5:59 PM
    #141
    soup101

    soup101 Active Member

    Joined:
    Dec 6, 2012
    Member:
    #92585
    Messages:
    41
    Gender:
    Male
    First Name:
    Joe
    Maryland
    Vehicle:
    04 SR5 TRD DC 4x4
    OME 882 Coils, OME Dakars with D6XL AAL, Nitrocharger Sport Shocks, Sky Manufacturing rear axle relocation plate set 3/4 inch towards rear, BAMF BPV Relocation Bracket, Leer 100R Shell, Trail Gear Sliders, Trail Gear Low Profile Front Bumper, CBI Outback 1.0 Rear Bumper w/ tire swing-out, Cornfed Suspension Diff Drop
    Thanks for this write-up. I just completed my new suspension (882's and Dakar with AAL) on my 2004 TRD DC 4X4 and used this as a basis for my install. Below are a few tips/advice to add that may help others. I wished I had taken pictures to help describe but once I got into it I didnt want to stop for pics. :(

    - Make sure you have a grinder. I took the advice from John and bought one prior to this install. I needed it for 1 of the front bolts on the leaf. I also decided to use it on the u-bolts since I wasn't reusing them and the nuts proved to be a bitch to get off a 10 year old truck.

    - The rear brake line will need to be disconnected or changed for a new longer one when installing the Dakars with the AAL. It is very tough getting to the upper connection with the flare nut. This was probably the toughest/longest part of the install for me. I eventually had to take the bracket off and remove the clip so I could slide the bracket up the hose so I could actually get wrenchs on the flare. If you dont think you can complete this then get it done before you do your swap.

    - Use a c clamp and 2 pieces of wood to install the bushing into the rear shocks. I tried for 15 minutes just pushing them in and wasn't anywhere near getting them in. :eek: Perhaps theres a better method?

    The rear took me a good solid 8 hours. 2 of them was monkeying around with the rear brake line

    - Use your stock jack to push down the UCA to line-up the bottom hole of the front shock. I saw it in another thread when I was researching the install and it worked like a charm. Put the base up in the wheel well and get the other end behind the top spindle nut to keep it from slipping.

    - As John said the ratcheting wrenches work great on this. For me I had the stock 14mm but didn't have the 17mm for the OME.

    Thanks again John and if anyone has any questions PM as this is all fresh in my head as of 8/4/13

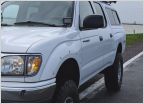
    Before:
    DSC_0677_zps6ec1d1bc_374ca1c57d35723290dc3987dc5b6af1d1347e63.jpg

    After:
    IMG_0125_zpsd01f4c8e_c1ddb986ff4e865477d2fcc96bf91a328de3e772.jpg

    DSC_0677.jpg
    IMG_0124.jpg
     
    Last edited: Sep 5, 2013
    indowaver likes this.
  2. Sep 4, 2013 at 6:04 PM
    #142
    JDMcQ

    JDMcQ [OP] Well-Known Member

    Joined:
    Nov 7, 2008
    Member:
    #10561
    Messages:
    39,046
    Gender:
    Male
    First Name:
    John
    The Mushroom Capital of the World
    I am glad that I could help Joe. Post up some before/after pictures of your truck. We would love to see it!
     
  3. Sep 4, 2013 at 6:13 PM
    #143
    soup101

    soup101 Active Member

    Joined:
    Dec 6, 2012
    Member:
    #92585
    Messages:
    41
    Gender:
    Male
    First Name:
    Joe
    Maryland
    Vehicle:
    04 SR5 TRD DC 4x4
    OME 882 Coils, OME Dakars with D6XL AAL, Nitrocharger Sport Shocks, Sky Manufacturing rear axle relocation plate set 3/4 inch towards rear, BAMF BPV Relocation Bracket, Leer 100R Shell, Trail Gear Sliders, Trail Gear Low Profile Front Bumper, CBI Outback 1.0 Rear Bumper w/ tire swing-out, Cornfed Suspension Diff Drop
    Just added
     
  4. Sep 4, 2013 at 6:15 PM
    #144
    JDMcQ

    JDMcQ [OP] Well-Known Member

    Joined:
    Nov 7, 2008
    Member:
    #10561
    Messages:
    39,046
    Gender:
    Male
    First Name:
    John
    The Mushroom Capital of the World
    Looks fantastic!


    I always wanted a cap for my truck.
     
  5. Jul 21, 2014 at 10:21 PM
    #145
    TacoBrah

    TacoBrah Well-Known Member

    Joined:
    Dec 31, 2013
    Member:
    #119596
    Messages:
    1,517
    Gender:
    Male
    First Name:
    Sean
    Icon stage 1, 255/85/16 KM2
    So based on what I read in the OP, I can swap my struts out just by removing the top 3 nuts and the bottom bolt, then slide the strut out?
     
  6. Jul 22, 2014 at 12:21 AM
    #146
    LogCabins

    LogCabins Well-Known Member

    Joined:
    Apr 30, 2014
    Member:
    #128878
    Messages:
    2,310
    Gender:
    Male
    First Name:
    Robert
    Oahu
    Vehicle:
    99 SR5 3.4L 4WD
    Correct, as long as your replacing it with a whole new strut assembly, very simple.
     
  7. Jul 22, 2014 at 9:53 AM
    #147
    scocar

    scocar hypotenoper

    Joined:
    Nov 11, 2009
    Member:
    #25814
    Messages:
    39,431
    To be clear, the coil spring and shock are mounted together as a single assembly. You can remove and replace the entire assembly very easily: three nuts around the perimeter of the top mount, and the bottom shock bolt on the lower control arm.

    However, you cannot replace the shock itself without using a spring compressor to remove it from the coil. Never remove the top center nut on the shock unless you are using a spring compressor. You can rent one or have any decent shop dot his for you.
     
  8. Jul 22, 2014 at 12:19 PM
    #148
    TacoBrah

    TacoBrah Well-Known Member

    Joined:
    Dec 31, 2013
    Member:
    #119596
    Messages:
    1,517
    Gender:
    Male
    First Name:
    Sean
    Icon stage 1, 255/85/16 KM2
    Thanks guys, its a strut for coilover swap so should be easy.
     
  9. Jul 22, 2014 at 1:13 PM
    #149
    dispatch55126

    dispatch55126 Well-Known Member

    Joined:
    Mar 12, 2014
    Member:
    #125193
    Messages:
    976
    Gender:
    Male
    MN
    Vehicle:
    2004 Xtracab SR5
    Complete OME kit w/ 881's and dakars. All-Pro Sliders, CB, HAM Radio and various other minor stuff.
    Maybe I just had the mechanic fairy blessing my vehicle that day but a complete OME kit took mt 3.5 hours with hand tools and a battery powered impact wrench.

    One trick that helped me was to use ratchet straps to hold the axle while swapping the leaf packs. It made locating the axle very easy and ensured that I wouldn't stretch any lines.
     
  10. Jul 22, 2014 at 4:53 PM
    #150
    NOLA ItsNotOva

    NOLA ItsNotOva Well-Known Member

    Joined:
    Jun 3, 2013
    Member:
    #105503
    Messages:
    1,113
    Gender:
    Male
    First Name:
    Brandon
    New Orleans, LA
    Vehicle:
    2011 DCSB TX TRD
    Thanks for posting this. Will be putting the same kit on mine pretty soon. What were extra things you had to get to do this? While I'm under there, I will be replacing the lower and upper ball joints as well.
     
  11. Jul 22, 2014 at 6:34 PM
    #151
    Bino9905

    Bino9905 Well-Known Member

    Joined:
    Sep 7, 2012
    Member:
    #86461
    Messages:
    73
    Gender:
    Male
    TX
    Vehicle:
    99 ExtCab 4X4 V-6 TRD
    Is it just me or does the stock coil spring look more "heavy duty" than the new OME one? It looks like less coils but thicker
    Just wondering
     
  12. Jul 22, 2014 at 7:49 PM
    #152
    dispatch55126

    dispatch55126 Well-Known Member

    Joined:
    Mar 12, 2014
    Member:
    #125193
    Messages:
    976
    Gender:
    Male
    MN
    Vehicle:
    2004 Xtracab SR5
    Complete OME kit w/ 881's and dakars. All-Pro Sliders, CB, HAM Radio and various other minor stuff.
    OEM coil rate is around 420lbs. OME 881 coils are 500lbs. Looks are deceiving.
     
  13. Jul 27, 2014 at 9:37 AM
    #153
    JDMcQ

    JDMcQ [OP] Well-Known Member

    Joined:
    Nov 7, 2008
    Member:
    #10561
    Messages:
    39,046
    Gender:
    Male
    First Name:
    John
    The Mushroom Capital of the World
    I dealt with a lot of rust issues, that slowed things down a bit. I also clearly did not drink enough beer that weekend. :eek:
     
  14. Jun 11, 2015 at 8:26 PM
    #154
    04tacoma trd

    04tacoma trd Well-Known Member

    Joined:
    Oct 16, 2014
    Member:
    #140466
    Messages:
    424
    Gender:
    Male
    OP - did you install a spacer to lower the center driveshaft support bearing?
     
  15. Oct 1, 2015 at 8:13 PM
    #155
    deckeda

    deckeda Well-Known Member

    Joined:
    Aug 18, 2015
    Member:
    #162133
    Messages:
    380
    Vehicle:
    '04 Double Cab PreRunner SR5

    There are a few videos online, specifically of Tacomas, showing how to safely do it on the truck without a spring compressor. With a floor jack supporting the LCA, you unbolt where the LCA connects to the knuckle. 2-4 bolts depending on which generation Tacoma. Don't remove castle nut/ball joint.

    Leave the 3 nuts on the top hat alone and instead you can now remove the center nut from the strut. When you lower the jack the spring safely decompresses and the strut rod will lower down into the top hat. Spring tension is removed.

    In other words the weight of the truck pushes the spring out, but the spring can only expand when the floor jack does. By the time it's out of the top hat it's no longer under tension.

    I have a standard 2-piece spring compressor and have used it twice for older Accords (basically the same design here) but never considered this method until now. I hate using the spring compressor/getting wrench or socket or compressor jammed up ... and these Tacoma coils don't appear to have their coil turns any farther apart than the Hondas do.

    Every method takes work, and one potential "gotcha" with this is that the strut rod would just spin and not allow the nut to loosen without using Vise Grips on the rod. You can deal with that scenario easily enough on a workbench but it'd be harder up under the fender well.
     
  16. Aug 26, 2016 at 5:47 PM
    #156
    JDMcQ

    JDMcQ [OP] Well-Known Member

    Joined:
    Nov 7, 2008
    Member:
    #10561
    Messages:
    39,046
    Gender:
    Male
    First Name:
    John
    The Mushroom Capital of the World
    The no compressor method does not work on a first gen Tacoma. On a second gen, the spindle unbolts from the LCA, allowing the LCA to drop far enough to remove the spring.
     
  17. Feb 27, 2018 at 4:03 PM
    #157
    Oldred92

    Oldred92 Well-Known Member

    Joined:
    Jun 21, 2017
    Member:
    #222050
    Messages:
    93
    Gender:
    Male
    First Name:
    Austin
    Boston, MA
    Vehicle:
    2003 White SR5 Double Cab Tacoma TRD 4x4
    Front Suspension: 882 w/ Nitrocharger Sport Rear Suspension: Dakar HD w/ Nitrocharger Sport ARB Front Bumper w/ winch Extruded aluminum roof rack Tires: Discoverer ST Maxx LT255/85/R16 on Tacoma Steelies Additional Fuse Box and Upgraded Wiring
    Just installed my rear OME lift yesterday. It took 2:15 because this thread was so helpful. I am getting a slight clunking noise when turing into driveways or lifting one tire. I havent had a chance to troubleshoot but any ideas where the noise is coming from?
    For the shock retainers, does the concave side cup the bushing or face away from it?
    I am waiting for the front comonants to come. I am having them pre-assembled.

    Before:
    IMG_3495.jpg
    IMG_3484.jpg

    After:
    IMG_3496.jpg IMG_3498.jpg IMG_3499.jpg IMG_3503.jpg IMG_3502.jpg
     
    CmdrDaniels likes this.
  18. Sep 22, 2019 at 7:32 PM
    #158
    808toyotaco

    808toyotaco Member

    Joined:
    Aug 18, 2019
    Member:
    #302559
    Messages:
    11
    Gender:
    Male
    Vehicle:
    2000 black tacoma trd
    none
    nice ! truck look like its ready for the trails
     
  19. Sep 23, 2019 at 10:15 AM
    #159
    indowaver

    indowaver Well-Known Member

    Joined:
    Jan 6, 2013
    Member:
    #94606
    Messages:
    124
    Gender:
    Male
    Great write up, thx!!
     
  20. Sep 23, 2019 at 12:07 PM
    #160
    cornbread_wy

    cornbread_wy Well-Known Member

    Joined:
    Jan 14, 2019
    Member:
    #279350
    Messages:
    81
    Gender:
    Male
    First Name:
    W
    San Rafael, CA
    Vehicle:
    98 xtracab 3.4l Sr5 4x4 - copper mica
    5100 w/ 881

Products Discussed in

To Top