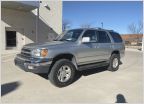
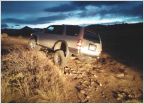
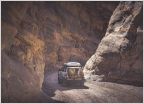
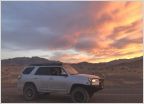
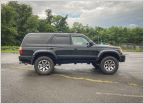
ramonortiz55 4runner build: La Venenosa - For Sale!

Discussion in '4Runner Builds' started by ramonortiz55, Apr 9, 2015.

  1. Sep 11, 2016 at 11:23 AM
    #441
    Speedytech7

    Speedytech7 Toyota Cult Ombudsman

    Joined:
    Feb 20, 2014
    Member:
    #123587
    Messages:
    52,750
    Gender:
    Male
    First Name:
    ゼイン
    5520 E Sprague Ave, Spokane Valley, WA 99212
    Vehicle:
    93 80 Series LC & 96 Turbo V6 Taco 4WD
    I've done a mod or two
    I've got 4 of those kits (2 inner and 2 outers) sitting in my garage, I'll send em' to ya on the cheap if you want. PM me
     
  2. Sep 11, 2016 at 11:35 AM
    #442
    Nicko

    Nicko beach bum

    Joined:
    Mar 4, 2012
    Member:
    #74169
    Messages:
    1,047
    Gender:
    Male
    First Name:
    Nicolas
    South Florida
    Yes still alive. :thumbsup:

    Been crazy busy with relocating to Orlando, FL. Its great here
     
  3. Sep 11, 2016 at 4:01 PM
    #443
    RedRunner87

    RedRunner87 Mall Crawler LVL Expert

    Joined:
    Jul 12, 2015
    Member:
    #159321
    Messages:
    4,249
    Gender:
    Male
    First Name:
    Vince
    The Springs, CO
    Vehicle:
    16 4Runner SR5
    255/80 Falken Wildpeak AT3W
    What's a 4Runner? Haven't seen one in awhile lol
     
    3378jakesr5 likes this.
  4. Oct 10, 2016 at 6:03 AM
    #444
    3378jakesr5

    3378jakesr5 AOF, trucks, guns, repeat....

    Joined:
    Oct 25, 2014
    Member:
    #141018
    Messages:
    13,860
    Gender:
    Male
    First Name:
    jake
    littleton colorado
    Vehicle:
    2006 DCLB silver taco. Soild axle swapped, Bumpers, armor, expo..... Money pit. Yata yata yata
    Better to ask what I have not done.
  5. Oct 10, 2016 at 6:05 AM
    #445
    ramonortiz55

    ramonortiz55 [OP] Not A Well-Known Member

    Joined:
    Nov 28, 2012
    Member:
    #92013
    Messages:
    34,696
    Gender:
    Male
    First Name:
    Ramon
    Texas
    Vehicle:
    2015 DCSB Offroad 4x4
    stock
    :spy:
     
    3378jakesr5[QUOTED] likes this.
  6. Oct 10, 2016 at 6:06 AM
    #446
    ramonortiz55

    ramonortiz55 [OP] Not A Well-Known Member

    Joined:
    Nov 28, 2012
    Member:
    #92013
    Messages:
    34,696
    Gender:
    Male
    First Name:
    Ramon
    Texas
    Vehicle:
    2015 DCSB Offroad 4x4
    stock
    I do have some rear bumper pics I haven't uploaded :spy:
     
    3378jakesr5 likes this.
  7. Oct 10, 2016 at 6:06 AM
    #447
    3378jakesr5

    3378jakesr5 AOF, trucks, guns, repeat....

    Joined:
    Oct 25, 2014
    Member:
    #141018
    Messages:
    13,860
    Gender:
    Male
    First Name:
    jake
    littleton colorado
    Vehicle:
    2006 DCLB silver taco. Soild axle swapped, Bumpers, armor, expo..... Money pit. Yata yata yata
    Better to ask what I have not done.
    :wave::washing:
     
  8. Oct 10, 2016 at 9:56 AM
    #448
    ramonortiz55

    ramonortiz55 [OP] Not A Well-Known Member

    Joined:
    Nov 28, 2012
    Member:
    #92013
    Messages:
    34,696
    Gender:
    Male
    First Name:
    Ramon
    Texas
    Vehicle:
    2015 DCSB Offroad 4x4
    stock
    This happened over the weekend

    20161007_181537.jpg
     
  9. Oct 12, 2016 at 6:18 AM
    #449
    ramonortiz55

    ramonortiz55 [OP] Not A Well-Known Member

    Joined:
    Nov 28, 2012
    Member:
    #92013
    Messages:
    34,696
    Gender:
    Male
    First Name:
    Ramon
    Texas
    Vehicle:
    2015 DCSB Offroad 4x4
    stock
    I received my Savage Rear bumper with swingout a few months ago, I barely had the time to have it sent for powdercoating and getting it installed.

    I decided to do a writeup on the installation since the vendor didn't provide any. Hopefully this helps anyone that is interested in buying this setup in regards to installation.

    This will be installed on a 2001 4runner.

    The morning sunlight was not good with me - So I apologize in advance if any of the pictures are too dark. I try to make this as comprehensive as possible.

    Here is the powdercoated bumper and swingout assembly:


    First step is to obviously remove the rear bumper and hitch:


    Drop the spare and get it out of the way:


    Since the hitch is the first thing to go, I made sure the trailer wiring harness bracket was disconnected from the hitch:


    The hitch receiver is held in place to the frame with a total of 8 bolts - 4 on each side:


    Removing the eight bolts will drop the hitch receiver:


    Next remove the mudflaps, there are about 3 screws that hold the mudflaps onto the 4runner. They are located against the wheel well:


    Removing the mudflaps will reveal a bolt, take it out:


    Once that bolt is off, remove the bumper cover. These are held firmly in place with tabs, crawl underneath the vehicle and push the tabs out with a flathead, pliers, etc.


    Once that black bumper cover is gone, it will reveal a black bracket with two bolts, remove the top two bolts on EACH side of the bumper:


    The bumper is now being held in place by four bolts underneath the vehicle, two on each side on this bracket:


    Oooops.. found two more bolts - The bolts are located where the bumper ends at the mudflap - notice the fuel filler neck cover - One on each side - These are a little hidden.


    The bumper should now come off:


    Inside of the frame rails, a long rod with a bolt welded on it will be seen, pull them out:


    In order to get the bumper in, the rubber grommet that holds the exhaust tail piece must be removed:


    When the bumper was removed, this black bracket was revealed - one on each side. Remove this also:


    Feed your cat:


    Once you're finished feeding the cat, it is time to install your bumper:


    This is the hinge bracket where the swingout attaches to. Make sure this gets installed FIRST before installing. When the bumper is purchased, Savage only drills pilot holes for the hinge bracket. Drill them out BEFORE getting the bumper powdercoated or painted.


    Hinge hardware:


    Assemble and bolt on like this:


    Install bumper:


    Picture of hinge for the swingout:


    Only FOUR bolts were used to set the bumper. In the bumper kit, these two brackets were included:


    These go into the frame rail:


    The first and last bolt now threads into that bracket:


    This plate is used to install the locking lever:


    Install the "anchor" for the locking lever:


    Install the locking lever:


    Now the gas strut is installed:


    Strut bracket that is attached to the arm:


    Pop open a beer and enjoy your progress:


    Behold the tire carrier stand:


    Next, the license plate bracket is installed.


    Hmm.. time to run some wiring:


    I decided to tap into the trailer wiring, good thing they were labeled. I tapped into "Tail" and "Ground", black and white:


    Run wiring and attached using quick splices - I made sure it was well wrapped in electrical tape:


    Clamped it to the rear tube of the bumper, where it is hidden. No, I don't mind the hose clamps. It cant be seen unless you are looking for it.


    Now complete:


    Enjoy the rest of that six pack!
     
  10. Oct 12, 2016 at 7:50 AM
    #450
    RedRunner87

    RedRunner87 Mall Crawler LVL Expert

    Joined:
    Jul 12, 2015
    Member:
    #159321
    Messages:
    4,249
    Gender:
    Male
    First Name:
    Vince
    The Springs, CO
    Vehicle:
    16 4Runner SR5
    255/80 Falken Wildpeak AT3W
    Nice write up and great looking bumper!
     
  11. Oct 12, 2016 at 7:51 AM
    #451
    ramonortiz55

    ramonortiz55 [OP] Not A Well-Known Member

    Joined:
    Nov 28, 2012
    Member:
    #92013
    Messages:
    34,696
    Gender:
    Male
    First Name:
    Ramon
    Texas
    Vehicle:
    2015 DCSB Offroad 4x4
    stock
    thanks bud!
     
  12. Oct 13, 2016 at 3:22 AM
    #452
    omaguz

    omaguz Well-Known Member

    Joined:
    Aug 15, 2014
    Member:
    #136202
    Messages:
    669
    Gender:
    Male
    First Name:
    Omar
    Puerto Rico
    Vehicle:
    2016 4Runner Trail Edition, NON KDSS, Pirelli Scorpion's ATR 265/70/17 E Load, Canvas Back, BROG Built Roof Attic, Thule Roof Rack and a few other stuff!!!
    Ramon why did you installed the spare in the bottom and not in the swing out. Beautiful bumper BTW, truck is looking tits!!!:thumbsup:
     
  13. Oct 13, 2016 at 3:36 AM
    #453
    ramonortiz55

    ramonortiz55 [OP] Not A Well-Known Member

    Joined:
    Nov 28, 2012
    Member:
    #92013
    Messages:
    34,696
    Gender:
    Male
    First Name:
    Ramon
    Texas
    Vehicle:
    2015 DCSB Offroad 4x4
    stock
    haha, because i dont have the lug nuts to install it on the swingout yet.

    ill have it setup this weekend
     
    omaguz[QUOTED] likes this.
  14. Oct 17, 2016 at 8:27 AM
    #454
    ramonortiz55

    ramonortiz55 [OP] Not A Well-Known Member

    Joined:
    Nov 28, 2012
    Member:
    #92013
    Messages:
    34,696
    Gender:
    Male
    First Name:
    Ramon
    Texas
    Vehicle:
    2015 DCSB Offroad 4x4
    stock
    Finally got the spare tire mounted.
    Yes, I know the stock spare is still down there.

    IDGAF.

     
    Ugly Betty and BYJOSHCOOK like this.
  15. Oct 17, 2016 at 8:57 AM
    #455
    BYJOSHCOOK

    BYJOSHCOOK Mr. Mojo Risin

    Joined:
    Jun 9, 2013
    Member:
    #105887
    Messages:
    27,705
    Gender:
    Male
    First Name:
    Josh
    Woodstock and Alpharetta Ga
    Vehicle:
    2000 SR5 4WD Lunar Mist
    Check Out My Builds
    Can't go wrong with 2 spares tho :thumbsup:
     
  16. Oct 17, 2016 at 8:57 AM
    #456
    ramonortiz55

    ramonortiz55 [OP] Not A Well-Known Member

    Joined:
    Nov 28, 2012
    Member:
    #92013
    Messages:
    34,696
    Gender:
    Male
    First Name:
    Ramon
    Texas
    Vehicle:
    2015 DCSB Offroad 4x4
    stock
    im probably going to install a tank for OBA down there.
     
    Ugly Betty and Watt maker like this.
  17. Oct 17, 2016 at 9:00 AM
    #457
    BYJOSHCOOK

    BYJOSHCOOK Mr. Mojo Risin

    Joined:
    Jun 9, 2013
    Member:
    #105887
    Messages:
    27,705
    Gender:
    Male
    First Name:
    Josh
    Woodstock and Alpharetta Ga
    Vehicle:
    2000 SR5 4WD Lunar Mist
    Check Out My Builds
    I've seen most people run it in that spot
     
  18. Oct 17, 2016 at 1:51 PM
    #458
    RedRunner87

    RedRunner87 Mall Crawler LVL Expert

    Joined:
    Jul 12, 2015
    Member:
    #159321
    Messages:
    4,249
    Gender:
    Male
    First Name:
    Vince
    The Springs, CO
    Vehicle:
    16 4Runner SR5
    255/80 Falken Wildpeak AT3W
    IMG_1236.jpg
     
  19. Oct 17, 2016 at 2:49 PM
    #459
    ramonortiz55

    ramonortiz55 [OP] Not A Well-Known Member

    Joined:
    Nov 28, 2012
    Member:
    #92013
    Messages:
    34,696
    Gender:
    Male
    First Name:
    Ramon
    Texas
    Vehicle:
    2015 DCSB Offroad 4x4
    stock
    nahhh
     
  20. Oct 24, 2016 at 8:59 AM
    #460
    JWaldz

    JWaldz It puts the Joe Dirt in the hole

    Joined:
    May 23, 2012
    Member:
    #79405
    Messages:
    2,013
    Gender:
    Male
    First Name:
    Waldo
    Colo Springs
    Vehicle:
    99 4Runner LTD
    This build is fruitier than a fruit cake
     

Products Discussed in

To Top