1. Welcome to Tacoma World!

    You are currently viewing as a guest! To get full-access, you need to register for a FREE account.

    As a registered member, you’ll be able to:
    • Participate in all Tacoma discussion topics
    • Communicate privately with other Tacoma owners from around the world
    • Post your own photos in our Members Gallery
    • Access all special features of the site

2016 Tacoma build, parts, and truck review

Discussion in '3rd Gen. Builds (2016-2023)' started by NSA, Jan 11, 2017.

  1. Jan 11, 2017 at 8:53 AM
    #1
    NSA

    NSA [OP] Active Member

    Joined:
    Jan 11, 2017
    Member:
    #207208
    Messages:
    36
    Gender:
    Male
    First Name:
    Jerry
    Vehicle:
    2016 Tacoma TRD Off Road Quicksand
    Way too many to list: CBI Aluminum Front bumper CBI Rock Sliders with kickouts CBI Rear Bumper CBI Skid Plates CBI Ditch Light Brackets Smittybuilt 10k pro Winch KC Ditch Lights Rigid 20" LED Light Bar Tekonsha P2 Trailer Brake Controller Softtopper Toytec adjustable lift Spidertrax wheel spacers 285 75 16 BFG MT tires
    For as long as I can remember, I've had a thing for the little Yotas. I distinctly remember drooling over the SR5's on the dealer lots back when they looked like the truck below:

    1981_Toyota_Pick_Up_Truck_SR5_4x4_For_Sale_Front_1.jpg

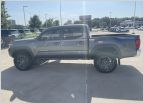
    I've owned several Tundras in the last few years, but finally broke down and bought the 2016 Tacoma TRD OR access cab in Quicksand color.
    I knew, as I was purchasing it, that I would be putting oversize tires on it, which would require a small lift. I also knew I wanted a winch so I could go off roading with confidence.
    I brought it home, had a single 285/75/16 BFG Mud Terrain mounted on the spare wheel, and started test fitting it. No problem for the rear with stock suspension. Rubbing on the UCA in front. Ordered a set of spidertrax wheel spacers to get the tires off the UCA, and 2" lift spacers (temporary) to get the wheels off the cab mount during turning, and a little clearance.
    Once installed, I took it to the local tire shop with 4 more tires, and had them mounted and balanced on the stock wheels.
    I also ordered a softtopper just like I've had on previous Tundras, because they rock!
    Before I could even get good photos of it, a friend dropped his dirt bike against the side of the bed, putting a sizable dent in it.

    IMG_3419.jpg

    IMG_3413.jpg

    More to come...
     

    Attached Files:

    JoeCOVA and Woodrow F Call like this.
  2. Jan 11, 2017 at 9:26 AM
    #2
    NSA

    NSA [OP] Active Member

    Joined:
    Jan 11, 2017
    Member:
    #207208
    Messages:
    36
    Gender:
    Male
    First Name:
    Jerry
    Vehicle:
    2016 Tacoma TRD Off Road Quicksand
    Way too many to list: CBI Aluminum Front bumper CBI Rock Sliders with kickouts CBI Rear Bumper CBI Skid Plates CBI Ditch Light Brackets Smittybuilt 10k pro Winch KC Ditch Lights Rigid 20" LED Light Bar Tekonsha P2 Trailer Brake Controller Softtopper Toytec adjustable lift Spidertrax wheel spacers 285 75 16 BFG MT tires
    I took the truck to the dealer body shop and was quoted $1200 to repair the dent, which included repainting and such. I really didn't want to raise my ins rates, nor did I want a repair/repaint on the truck, as they never seem to be as good as stock. So, I took it home and took a plunger to it, and was able to hide most of the dent. The bed sides on this truck are really soft! In fact, there seems to be a light dent on the other side just from me leaning against it to tie dirt bikes into the back.

    So, now I am settled that I have the look I'm after, it's time to make it functional as well as good looking. It started innocently enough... I wanted a winch, and to replace the front bumper with one that wouldn't dig into the ground on every hill. Soooo.... off to the CBI Off Road website I go. I ordered their full hoop front winch bumper. I decided to order it in Aluminum, to try to keep front end weight down, and powder coated so I wouldn't have to deal with getting that done. Additionally, I ordered a smittybuilt winch, and went with a pro version for the synthetic rope and lite weight. The bumper was going to take 6 weeks or so to build, so the waiting began...

    As I'm waiting, I realize that there are other things I want, and buying and shipping seperately doesn't make a lot of sense, so I place a call. Before I come to my senses, I've ordered a rear bumper (I really wanted one with a swing out tire carrier, but I haul dirt bikes and those aren't usable with the tailgate down), rock sliders, skid plates, and ditch light brackets. I order these all at once, because they are willing to combine them into the front bumper shipping for very little extra $

    Next, I set out on a search for lighting. I recently added a set of Cyclops lights to my ADV bike, and realized the value of LED lighting off road. So, I figured I could beat CBI's pricing by searching online. NOPE. Again, another call back to CBI for the 20" light bar (rigid) and 2 sets of flood lights (KC's) for ditch lights and backup lights. They had those drop shipped, and were at my door the next day! (That's good, because the bumper was arriving, and I wanted to get the light bar in before mounting the bumper)

    I will write my next post as the review I wrote up and sent to CBI along with pictures, so hang in there.
     
    Taylor@KC HiLiTES and mthopton like this.
  3. Jan 11, 2017 at 9:47 AM
    #3
    NSA

    NSA [OP] Active Member

    Joined:
    Jan 11, 2017
    Member:
    #207208
    Messages:
    36
    Gender:
    Male
    First Name:
    Jerry
    Vehicle:
    2016 Tacoma TRD Off Road Quicksand
    Way too many to list: CBI Aluminum Front bumper CBI Rock Sliders with kickouts CBI Rear Bumper CBI Skid Plates CBI Ditch Light Brackets Smittybuilt 10k pro Winch KC Ditch Lights Rigid 20" LED Light Bar Tekonsha P2 Trailer Brake Controller Softtopper Toytec adjustable lift Spidertrax wheel spacers 285 75 16 BFG MT tires
    Below is a brief review of my installation experience for the various components, along with a few opinions. Take them for what they’re worth and share them with whom you wish… maybe they will be useful to CBI. As you read, please know I’m not complaining or trying to change anything, just being totally honest. I did not get a chance to do an install photo shoot, as I was scrambling to get all this installed for an upcoming trip. Here are some photos of the products after installation.


    Ordering:

    When I initially placed my order, it was for just for the front bumper, mainly because I wanted a winch so I wouldn’t be dependent upon others to bail me out of bad situations. I spent weeks agonizing over whether to cut the front bumper, or go with a replacement that didn’t require cutting. I really would have like to have been able to sell my stock bumper to recoup some of the cost, but ultimately the look I wanted only could be achieved by cutting. The front bumper CBI had listed was the best looking one available, and the cost was very fair. I went online and placed my order, where I was presented with a few options. I opted for the full headlight guard/hoop bumper, although I could not find one pictured anywhere. I was hopeful that it would look OK and provide the protection I wanted. I also opted for the aluminum option, to try to keep weight down since I was adding a winch up front. I also opted for powder coating, so I wouldn’t have to deal with a paint shop locally.

    After placing that order, and playing off road a bit, I found that the factory rear bumper was just too low with the hitch package, and was dragging constantly. In addition, I was concerned about smashing my rockers because of the trucks long wheelbase. So, I placed a call to Mike @ CBI to find out if I could order some additional protection and combine the shipping with the front bumper. Mike was extremely helpful and agreed to help me save on shipping. He went out of his way to send me quote after quote as I modified and changed what I wanted – lights, no lights; swing out rear bumper, no swing out; etc, etc… Finally, I settled on a rear bumper with no swing out, rock sliders with kick outs, and a full skid plate package. Oh, and ditch light brackets. Shipping was combined on all of these, along with the front bumper, which saved hundreds of dollars. (it’s not cheap to ship that much steel across the country)

    Later, right before the bumper shipped, I realized I probably would have an easier time installing the 20” light bar in the bumper above the winch while the bumper was off, so I called and placed another order for the light bar, ditch lights, and another set of flood lights for reverse. Mike had these drop shipped and they were on my doorstep the next day! CBI’s pricing on all of these quality lights was better than I could find online anywhere. (and I was right about the light bar… you’d have a heluva time getting it in after the bumpers installed)


    The wait:

    The wait was long and painful, but not out of line with what Mike said to expect. I believe he said to expect 6 weeks, and to contact him after 4 to check on the production. @ 4 weeks, I did make contact, and was told the front bumper (ordered first) was in powder coat, and the rest was still in fab. @ 6 weeks, I contacted again, and was informed the items were being crated to ship that week. All in all, from order to my doorstep was about 8 weeks. In hindsight, that’s very reasonable, but weeks seem like months when you’re waiting for toys to arrive. It would have been really neat to have a way to follow the progress online, via email, or have an excited rep contact me with progress reports.


    Shipping:

    The parts arrived via Estes freight. I was genuinely concerned they’d have issues delivering my parts to my remote location when I’m at work all day. I received shipping status reports regularly as the parts moved across the country, and when they got to Tulsa, a phone call from an Estes dispatcher. She informed me I could sign online for the parts, and I informed her there was no way they were getting a truck into my residence for delivery. They agreed to meet me in a remote parking lot where we’d transfer the parts from the truck to my pickup bed by hand. The driver was awesome! Friendly, helpful, and willing to work with me to get the parts delivered.

    The parts were all wrapped nicely in foam paper padding and secured to the pallets via screws. Unfortunately, the front bumper had broken free of it’s pallet and laid over on the rear bumper in the only spot the two were not protected, scratching the powder coat on the front bumper bull bar, right in the front. I will have to attempt to touch that up manually, but ultimately it’s a 4x4 and I’m not too worried about it. Everything else arrived in great condition and secured well. The back of my truck was well squatted down for the ride home will all this in the bed, along with the two oversize pallets it was secured too.

    IMG_3451.jpg

    IMG_3452.jpg

    First impression:

    I cannot over emphasize this: the construction and weld quality is mind blowing! The aluminum and steel is bent where it can be bent, and welded only where it has to be welded. The dimensions are perfect in every way. The powder coat was high quality semi-gloss. These are not some home built parts… They are strong and absolutely beautiful. Quality that exceeds anything I’ve ever seen anywhere. With 1 exception – at the back of the front bumper, below the winch, there is a hole that looks like it was cut out with a cutting torch. It appears to be to allow access to the winch plate bolt, and it does serve the purpose. You can’t see it when installed, and it’s not structural. It’s just weird that in all this perfection there’s this out of place hole. I’m sure that whatever laser/water machine they use to cut the templates will be updated to include this hole in the future.

    I drive a Toyota. It’s metric. I can’t stand it when someone sends me parts that require standard tools. For one thing, the standard system is an inferior system. Even the American car manufacturers know this, and have switched over to metric for the most part. I also do not want to have to carry two sets of tools. Yet, these parts showed up with standard hardware. GRRRR. To make matters even worse, they actually use a mix of both… in some places re-using the stock metric hardware, and in others using standard nuts and bolts. The hardware was quality – grade 8 stuff it appears, but the washers were a sloppy fit. To top it off, the license plate light that came with the rear bumper was metric, as was the winch I ordered separately (smittybuilt)

    GUYS – if you’re going to sell parts for a metric truck, ship it with metric hardware. Just do it; it’s the right thing to do!

    No instructions were included – anywhere. I searched several times. I went online and looked for instructions, and only found ones for installation of the rock sliders. Nothing for the front or rear bumpers, and nothing for the skid plates. This is a huge omission, as cutting the front bumper would be disastrous with guidance. Fortunately, I was starting installation on a Fri, and was able to get ahold of Mike @ CBI who emailed front bumper installation instructions while I was on the phone with him. I would later wish I’d ask for all instructions, as I didn’t get to installing the other parts until the weekend when CBI was closed. I did leave a voicemail and email on Saturday asking for the skid plate instructions, and those arrived promptly in my email mon morning. More on that follows in the skid plate install section.

    The instructions I did receive pretty much sucked. They were vague in detail, the pictures were hard to see, and they omitted a LOT. However, the information that was there was valuable and did help to complete the install. I’ll rate them better than nothing and not as good as a box of Legos.


    Installation:

    Front bumper:

    The hardest part of the installation of the front bumper was, by far, the disassembly of the factory front of the truck. I’m sure an experienced tech who’d worked on Toyota front ends regularly would have had no trouble. On the other hand, I had a helluva time. For one, I thought I’d be cutting the bumper with it on the truck. Once I received the instructions, I realized I was actually removing the bumper and cutting it off the truck. That made a big difference in how things get dis-assembled. There’s lot of clips and screws and maneuvering to get it all apart, and since I was cutting the bumper I allowed myself to break some of it in the removal process. If I’d have been trying to save the bumper to re-sale, I’d probably still be out there pondering it’s removal. A factory service manual would be your best friend here!

    Installation of the winch was a breeze. My winch (Smittybuilt x20 comp 10k lb – for lite weight, synthetic rope, and wireless) bolted right up. The holes aligned perfectly. The winch came with bolts to bolt the fairlead on. In order to use them, I had to compress the fairlead, winch cover plate, and winch bumper together with huge C clamps while putting the nuts on. I later realized that CBI had provided longer bolts/nuts to put the fairlead on. But, there was no way to know this until after you’ve installed the bumper, used all the bolts, and found the two left-overs. These longer bolts would come in really handy later when installing the skid plates.

    Installation of the light bar was also a breeze, with one nut on each end to tighten. I added a couple of washers for shims to ensure it was a snug fit in the brackets. Easy-peasy.

    Installation of the fog lights was equally as simple. The don’t line up flush with the face of the bumper, and once you accept that, they basically screw to the supplied brackets and bolt to the bumper. Nothing special to note here.

    The aluminum bumper, with comp winch was actually a pretty light combo, and I was able to lift it into place myself. It was such a snug fit on the frame rails that it held itself in place while I got a couple of bolts into it. I realized it was sitting a little low, and jacking it up would get it snug to the bottom of the frame. But, there was no way to secure it there other than tightening the bolts on the sides of the frame. I’ve seen that go bad before, when dropping off a rock or pulling with a winch and the bumper shifts up or down crushing fender sheet metal, so I decided to improvise a little bit to secure it from any possibility of movement. During the dis-assembly, two frame cross member “ears” had been removed. I took these to the bench, cut them down, and put them back in place. The new front bumper already had holes here, so I threaded the factory bolts back in, which pulled the bumper up tight against the bottom of the frame. No way it’s moving up or down now. The rest of the factory bolts then secured the bumper from any forward and backward movement. I guess just for good measure, they included another set of brackets that also get installed and bolted to both the frame and the bumper. With all this in place, you’ll rip the truck in half before you’ll shift that bumper. I am impressed!

    With everything in place and bolted up, the bumper fits beautifully. It lined up really nice with the cuts I made per the instructions. It lines up with the wheel wells, the factory body lines, the grille, etc. Also, the grill is removable with the bumper in place (although it’s really tight). This proved important, as the winch controller couldn’t be mounted on top of the winch with this setup, so I used the brackets that come with the winch to installed the controller behind the grill, with the wireless switch and plug in facing up where they’re easily accessible with the hood open. If it wasn’t a wireless winch, I’d have made more of an effort to make the plug in accessible without having to open the hood, but since it is, that wasn’t so important to me. Anyway, it was MUCH easier to mount and wire with the grill out.

    I haven’t wired the light bar yet, but that’s just basic electrical stuff.

    IMG_3459 - Copy.jpg

    IMG_3460.jpg


    Rock Sliders:

    Installation of the rock sliders was straight forward, and the instructions were actually good. The driver’s side was the most difficult, as the brake lines present a significant obstacle. However, by following instructions, unclipping the lines, unbolting what needed unbolted, it was pretty simple. There is a sticker over one of the holes in the frame that needs to be removed, then they just bolt in place. The passenger side is even easier, with just peeling the sticker and installing the sliders. Once bolted up, they are insanely rigid. I weigh 270lbs, and can jump on them without even getting them to flex. They tuck pretty tight up against the body, and stick out just enough to protect the truck from any ground obstacles, and even the occasional soccer mom in the Wally World parking lot. I ordered them with kickouts because I run 1.25” wheel spacers on stock wheels with oversize tires. They look perfect. Without the spacers, I’d skip the kickouts.

    IMG_3461.jpg

    IMG_3463.jpg

    IMG_3467.jpg


    Rear Bumper:

    Removal of the stock rear bumper is really easy. There’s two slotted holes in the back of the bumper brackets. Loosen the bolts on those holes. Then remove all the other bolts. The bumper is retained in place by two welded on pins and those two back bolts. Unplug the trailer wiring harness and the license plate light harness. Then lift up on the bumper and slide back. It’ll come right off.

    Move the trailer light plug from the old bumper to the new. Install the license plate light (included), and the included license plate hinge (a very nice touch!) that allows the plate to cover the receiver. Go ahead and install the plate now.

    Installation is equally easy. The bumper bolts up using the stock bumper bolts, to the stock bumper locations. It doesn’t get any easier than that! It lined right up, and I was able to install it all myself.

    NOTE: You’ll need to create a harness to go from the license plate light to the factory plug. This is not included, and the wiring is not long enough. I stripped the factory bumper harness, and used the original wires so they would be correctly color coded, along with the factory plug.

    ALSO NOTE: The trailer wiring does not reach to the location provided in the new rear bumper. I haven’t solved this yet. I have been searching online for an extension, but haven’t found one. I really don’t want to cut the factory truck harness, so I’m still researching options.
    EDIT: CBI contacted me to let me know that if you cut the wire ties holding the harness to the frame, it can be pulled back enough to reach. I did so, and it works. However, I'm not confident it will stay in place long term with my zip-ties holding it. I think a 6" pigtail extension would be a much better solution.

    The bumper still allows me to run my oversize spare underneath the truck (which I only do while mall crawling). It has a sturdy receiver hitch, and most importantly, WAY more ground clearance. It looks great too, and matches the body lines perfectly!

    IMG_3464.jpg

    IMG_3465.jpg

    IMG_3466.jpg


    Skid plates:

    I’m not sure the instructions work on the 3rd gen. I generally consider myself a pretty competent mechanic, but either the hardware was not exactly correct, or I missed something altogether. I did manage to get them installed, but there was some deviations from what’s in the instructions. I’ll list them out:

    1) There are several brackets that have to be removed and ditched. In particular, there are two from the lower radiator support to the front cross member that need to be removed, and two (45 degree) from the frame to transmission cross member.

    2) The skid plates cannot be installed one at a time. The mid and rear sections are held on by a single bolt. I found installing the rear first, using the two mid section bolts, and leveraging it against the rear section, helped hold it up for the installation of the mid section.

    3) The supplied carriage bolts, which go through the two sections of mid-skids, were not long enough to reach through the cross member to get a nut on them. Using a magnet, I was able to put one of the big squares down into the cross member, then tried to use a carriage bolt with the nut inside the cross member. Unfortunately, there was no way to get a wrench or socket in there to tighten the nut. I ended up using a couple of spare winch bolts, with your supplied flange nuts, because the flange nuts would hold inside on their own, while I tightened the bolt from outside. Probably going to need a blue wrench to remove them if I ever have to though.

    4) The skid plates sit really low. More than an inch below the exhaust and cross member by the transfer. Is there a reason for this? From what I could see, there’s no other way they could go on, since they are butted up against the bottom of the frame in parts. I had a couple people over looking at it with me, and we all agreed that It would make sense to take a plasma to the brackets, cut them down and re-weld them to gain back that clearance. We didn’t do it, but likely will in the future. 1” might as well be a mile on a yota.

    My opinion: These were probably designed for the 2nd gen and it was "assumed" they worked on the 3rd gen. They do, but they're not the quality fit I'd come to expect from CBI.

    IMG_3471.jpg


    Conclusion:

    All in all, the installation was great, with the exception of the skid plates. The quality, fit and finish is awesome, again, with the exception of the skid plates. The functionality is also exceptional (again with that exception of the skid plates). I hate to keep harping on that, but the skid plates really don’t fit well, they’re a b!$&# to install, they sacrifice ground clearance, and they weigh a ton. WITH A FEW MODIFICATIONS, THEY WILL BE GREAT! But as they come out of the box, I don’t think they’re worth the $ spent or the headache to install. Some better fitting plates in aluminum would be a much better investment. Actually, I’d like to be able to get all the parts in aluminum, as Toyotas just don’t like hauling a lot of weight around.

    The truck has gained massive approach and departure angle. It’s gained a solid winch mount and the ability to drag itself through any conditions. It’s well protected from anything that could harm the body at this point. Short of an exo-cage, you just can’t do any more to protect the truck. I’m thrilled with the products, I’m thrilled with the customer service I received from CBI, and I’m confident that I can now take this truck anywhere I want to go with no worries of tearing it up.

    Prior to the installations, I had installed 2” lift spacers over the front coil-overs to gain a little clearance. These were never meant to be permanent, as I knew I’d be adding weight and wanted to see where the truck ended up before investing in suspension. After the installation of all these products, I re-measured. The front is now 1” higher than stock, and 1” lower than it was with the spacers. The rear is now 5/8” lower than stock. So, I now have on order adjustable coil-overs with rear add-a-leafs from Toytec, where I’ll be able to bring the front up 2” (the equivalent of 3” on the pre 2016 trucks) from stock, and the rear up 1.5” from stock. Perfect for an overlander, and the add-a-leafs should help with hauling trailers/dirt bikes, etc.


    IMG_3472.jpg
     
  4. Jan 11, 2017 at 10:03 AM
    #4
    NSA

    NSA [OP] Active Member

    Joined:
    Jan 11, 2017
    Member:
    #207208
    Messages:
    36
    Gender:
    Male
    First Name:
    Jerry
    Vehicle:
    2016 Tacoma TRD Off Road Quicksand
    Way too many to list: CBI Aluminum Front bumper CBI Rock Sliders with kickouts CBI Rear Bumper CBI Skid Plates CBI Ditch Light Brackets Smittybuilt 10k pro Winch KC Ditch Lights Rigid 20" LED Light Bar Tekonsha P2 Trailer Brake Controller Softtopper Toytec adjustable lift Spidertrax wheel spacers 285 75 16 BFG MT tires
    This was all done in a scramble prior to the Xmas holidays. At the same time, I purchased and outfitted a small toybox where everything would see it's first adventure from Xmas to New Years.
    I proceeded to hook up the toy hauler, with two bikes and all the associated gear, and pulled it from Tulsa, OK to San Diego, CA to visit my daughters over the holidays. We spent that time out in Rockatilla (Ocatilla Wells) riding dirt bikes, kickin' it with friends, and beating the poor Yota sensless.
    I then hauled it to Colorado Springs, Co to visit my brother, where we went out wheelin' in the snow and beautiful Rockies. Here's some photos, to be followed by longer term reviews:

    IMG_3473.jpg

    IMG_3474.jpg

    IMG_3475.jpg

    IMG_3476.jpg

    IMG_3480.jpg

    Muddy:

    IMG_3481.jpg

    IMG_3482.jpg

    IMG_3483.jpg

    IMG_3490.jpg

    IMG_3491.jpg

    Pumpkin Patch:

    IMG_3493.jpg

    IMG_3494.jpg

    Yeah, that's my 14 year old girl on the XR600.
    IMG_3499.jpg

    Colorado:

    IMG_3503.jpg

    IMG_3504.jpg

    IMG_3508.jpg
     
  5. Jan 11, 2017 at 10:53 AM
    #5
    NSA

    NSA [OP] Active Member

    Joined:
    Jan 11, 2017
    Member:
    #207208
    Messages:
    36
    Gender:
    Male
    First Name:
    Jerry
    Vehicle:
    2016 Tacoma TRD Off Road Quicksand
    Way too many to list: CBI Aluminum Front bumper CBI Rock Sliders with kickouts CBI Rear Bumper CBI Skid Plates CBI Ditch Light Brackets Smittybuilt 10k pro Winch KC Ditch Lights Rigid 20" LED Light Bar Tekonsha P2 Trailer Brake Controller Softtopper Toytec adjustable lift Spidertrax wheel spacers 285 75 16 BFG MT tires
    That pretty well brings me up to date.
    So, what do I think of it all so far???

    Interior:
    The seating in the truck is a little small for my big American A$$. I'm 6'3" tall and 270lbs. I find that the seat bolsters dig in a bit where I'm a bit too wide. Is that the trucks fault, or mine? ;)
    Otherwise, the interior is awesome! Great layout and a quality feel.

    Exterior:
    The sheet metal on the bed is ridiculously thin. It bends way too easy. I get the lightweight thing, but damn... it's supposed to be a truck.
    Otherwise, the body looks great and even after all the pounding, everything still lines up properly.
    If I'd have known I was buying a trailer to haul bikes, I'd have gone for a quad cab short bed.

    Suspension:
    I never got to use the stock suspension for anything more than a few commutes, so can't say much about it.
    The Toytec shocks in the front are freaking awesome. Even with all the weight I've added up front (200lbs?), the truck just rocked through the woop sections, twisted in the rocks, and was smooth as could be on the pavement. Likewise, the Toytec add a leafs and shocks in the rear sucked up everything I've thrown at them. That was with 300+lbs of tools, winch gear, high lift, fuel, etc in the bed. They weren't too stiff or too soft for nearly anything. If I asked for more out of the truck, I'd be looking at long travel and it not being a daily driver.

    Engine:
    Ewwww.... this is not my favorite subject. The engine is low on torque and high on horsepower. Pulling a 5500lb trailer with it on oversize tires SUCKS!!!!!!! Most of the trip was spent in 3rd gear reving the truck higher than I would have liked. If it did go into 4th, it was too low an RPM and couldn't hold it for long. Hard pulls it was best to just slow down and pull them in 2nd. To be clear, the horsepower is there if you're willing to rev the crap outta the truck. The torque to pull down low in the R's is not. I really wish they would've put the 4.3 v8 from the old Tundra into this truck (with a timing chain instead of belt). That was a 300k mi motor that got the same fuel mileage and had gobs of torque.
    Speaking of fuel mileage... I got between 8 and 10 mpg for the whole trip. If I'd have expected it to be that low, I'd have made a different plan. It does good (16-17 city) unloaded, but any kind of a load kills the mileage. How about a small diesel??? (Toyota, are you listening?)

    Transmission:
    Holy gear hunt! 5-3-4-3-5-3.... What gear will it be in next? I've heard there's an update for the trans, but I don't know if it addresses that issue. Pulling a load, it just can't seem to find the right gear. To make matters worse, you can't turn on the cruise in 3rd gear manual, only 4th or 5th. So, you turn on the cruise in 4th, and let it hunt between 3rd and 4th. YUK. Once you learn to ignore it, you stop noticing it even changing gears, but if you're paying attention it's obnoxious. Doesn't seem like it would be healthy for the trans either. I found I had to run 55mph and set the cruise in 4th gear, then ignore what all the truck was doing from there. It generally pulled in 3rd most of time at 3700 rpm.

    Off road:
    The trucks pretty well unstoppable :) Not really, but I kept pushing it further and further, and never did get to where I needed the winch or had to turn back. It drug itself on it's belly across mud, twisted up with 2 wheels in the air, and climbed over everything in it's path. I was able to prove the crawl control actually can be better than me as a driver, but it's a close margin. On one rocky hill climb, I couldn't get the truck any further. I turned on crawl control, and it managed to walk itself on over the loose rocks I couldn't get it over. Mostly by locking brakes when wheels started to spin. The BFG MT's rock too! (and they are nice on the road as well)

    CBI armor:
    I saved a special section for this.
    Skid Plate:
    Despite me being irritated by the low hanging skid plate, I used the hell out of it. I drug it over rocks, sand, and anything else. I'm glad it was there, because a lot of that wouldn't have been great for the transfer. It was tough and solid, and is now nicely scratched up and still doing it's job wonderfully. (at some point I will cut and weld on it to get that 1" of clearance back though)

    Rock sliders:
    These saved my bacon in Rockatilla. Big shout out to CBI on this... I forwarded my self into a position where I really couldn't back out (1/4 mile of goat trail I'd come up with cliffs on both sides), and the trail ended with a shear drop to my left after a large dirt wall. If I'd have tried to turn down the drop, the truck would have rolled for sure. This could have been a REALLY bad place. But, I was able to turn in early, jam the sliders into the dirt wall to support the left side of the truck, and pivot the truck around on the slider and off the shear drop front wheels first, then ride it to the bottom. Without the sliders, trying that would have destroyed that side of the truck. Surprisingly, it didn't leave so much as a mark on the sliders. They got used several other places as well, more in their intended way of actually sliding the rockers over rocks when required. They are so freaking solid.

    Rear Bumper:
    I had concerns about using a weight distribution system on the trailer with a non stock rear bumper. I no longer have those concerns. The bumper took it all in stride with no signs of trouble. The powder coat made putting a hitch in a bit tight, but with a 5lb hammer, it went in and out as required and eventually wore the powder coat down to where I don't really need the hammer now. It's a nice tight fit with no slop. The extra clearance of the bumper was absolutely a requirement in the places I took the truck, so I'm stoked on it! I love the hidden hitch setup too.

    Front Bumper:
    I wish I had action shots of the truck in the crazy places I put it. I don't, but trust me... a stock bumper would have been laying back at the beginning of the very first trail. With the CBI bumper, however, I had great approach angle even in the steep stuff, and could always place a tire directly into anything I wanted to climb over. And, if I did, the truck would climb up and over it without question. The bumper also looks BAD ASS! I didn't get to try the winch though, so I'll keep looking for more difficult places to go :)

    Lights:
    I had very little opportunity to use the lights, so can't give a fair review. But, from what I've seen, I'd prefer a large light bar over the cab for some really long range spots, along with what's on there. The bumper light, being just a little lower than the headlights, doesn't have the beam range that something higher would. It sure does light up the night at a range about as far as stock brights though!
     
    JoeCOVA, Chrome Beer and mthopton like this.
  6. Jan 11, 2017 at 11:45 AM
    #6
    NSA

    NSA [OP] Active Member

    Joined:
    Jan 11, 2017
    Member:
    #207208
    Messages:
    36
    Gender:
    Male
    First Name:
    Jerry
    Vehicle:
    2016 Tacoma TRD Off Road Quicksand
    Way too many to list: CBI Aluminum Front bumper CBI Rock Sliders with kickouts CBI Rear Bumper CBI Skid Plates CBI Ditch Light Brackets Smittybuilt 10k pro Winch KC Ditch Lights Rigid 20" LED Light Bar Tekonsha P2 Trailer Brake Controller Softtopper Toytec adjustable lift Spidertrax wheel spacers 285 75 16 BFG MT tires
    One thing worth mentioning:
    I made a half ass attempt to go up Blowsands with the truck. The tires were @ 55lbs air pressure, I didn't lock the diff, I was in 4 high, and as soon as I got axle hop, I quit. So, I didn't make it and didn't feel like airing down (otherwise I'm confident it would have without issue). When I decided to do a backup U turn (it wasn't very steep in this spot), I slammed the rear diff up onto the top of a smooth sloped rock. I then had to drag the truck back down off that rock still sitting on it's diff. I got REALLY luck, as it was on the ring that protects the drain plug, not directly on the center of the diff. Cudos to Yota for putting that added protection on there, or I could have been hunting a rear end out in Cali. Needless to say, a diff skid plate is way up high on my list now.
    also on my list:
    A CB
    Modify the seat to fit me better (or replace if required)
    Above cab light bar

    I may consider some re-gearing. I have a feeling the truck would have pulled the trailer just fine on stock tires. Maybe deeper gears would make it do so on these oversize tires. I'd love to go really deep gears and 35's, but with the amount of rubbing 33's do, I'm not sure how that would work out.
     
    ~SunDog~ likes this.
  7. Jan 11, 2017 at 12:16 PM
    #7
    BAMA-256

    BAMA-256 Well-Known Member

    Joined:
    Oct 14, 2015
    Member:
    #166658
    Messages:
    520
    Gender:
    Male
    First Name:
    Rex
    Huntsville Alabama
    Vehicle:
    2017 SR 4x4 5 speed manual Past-2016 TRD Offroad 4x4
    Great post and welcome to TW!
     
  8. Jan 12, 2017 at 9:53 PM
    #8
    Taylor@KC HiLiTES

    Taylor@KC HiLiTES Well-Known Member Vendor

    Joined:
    Nov 11, 2016
    Member:
    #202104
    Messages:
    1,056
    Gender:
    Male
    First Name:
    Taylor
    Arizona
    Vehicle:
    2010 DCSB TRD OR 4x4
    See build thread
    Wow, those are some very detailed and well written reviews and comments. Your truck looks great with the recent additions! I'd love to hear which lights from us you chose and your thoughts on them when you have a chance to try them.

    To you address your comment about the lower mounted light bar- you are absolutely correct. To get the maximum distance of light coverage, a roof mounted bar with larger reflectors would be your best bet for a long range solution. But, for best total coverage, the proper 20" in a bumper is important too. Which is why we highly recommend people get a short/mid range lighting solution when the purchase our windshield mounted Pro6 light bar that is for distance.
     
  9. Jan 13, 2017 at 10:20 AM
    #9
    NSA

    NSA [OP] Active Member

    Joined:
    Jan 11, 2017
    Member:
    #207208
    Messages:
    36
    Gender:
    Male
    First Name:
    Jerry
    Vehicle:
    2016 Tacoma TRD Off Road Quicksand
    Way too many to list: CBI Aluminum Front bumper CBI Rock Sliders with kickouts CBI Rear Bumper CBI Skid Plates CBI Ditch Light Brackets Smittybuilt 10k pro Winch KC Ditch Lights Rigid 20" LED Light Bar Tekonsha P2 Trailer Brake Controller Softtopper Toytec adjustable lift Spidertrax wheel spacers 285 75 16 BFG MT tires
    Thanks Taylor!
    I went with two sets of 3" cube lights (C3) I believe. I have only mounted the one set on my ditch light brackets so far. The other set will serve as rear facing lights for reversing and camping and such. I still haven't worked out a mounting for them that I'm happy with yet. If I went with overland bars, that would be easy, but since I want to keep my bed usable, I'm trying to sort a way to mount them right at the top corners over the tail-lights. The light bar was from Rigid Industries.

    My thoughts so far...
    I live in OK, way out in the sticks, down miles of dirt road. I run them every night on the drive home, and every morning on my way out. I purchased them in a "flood" pattern. I did so, because I figured I would aim them down toward my front wheels to light up anything I was turning into on in the rocks. In this configuration, they do a great job. While I was out in the desert, I tried aiming them up the trail toward the sides, to give me better visibility at speeds. They really didn't do so great at that, because of the "flood" configuration, so I aimed them back down. I've also tried aiming them up and out a bit, to help with watching for deer on the road, but they don't have the long beam for that either.

    The Rigid 20" light bar is not the configuration I would choose now that I've seen the light pattern. It seems short to mid range with a narrow focus. Almost like long beams aimed to low to the ground.

    So, combined, right now, the light bar is really bright at short narrow distance, the KC's are lighting up the area around the front tires out to the ditches nicely, and the brights of the truck sort of fill in between the two. I'm missing the mid range wide beam and the long beams in my configuration.

    If I had it to do over again, I'd love to do the KC Pro6 Light bar for distance, the KC C3 clear 20" light bar in the bumper ( think it would fill in better than the rigid does), and stack ditch lights with the C3 floods facing the way they are, and c3 8 degree for deer spotting. That would fill up in front of the truck VERY nicely. then the c3 reverse lights in the rear (I didn't know there was a set for that, so I ordered the standard 90 degree floods - and didn't get the longer harness or brackets you have). I'd also wire them differently, where I didn't have so many switches to flip to get lights. I'd put all forward lights on 1 switch, and reverse on another. I can't think of a scenario where I want to run one forward light but not another.

    Ultimately, my thoughts are, the lights are amazing! So much brighter than anything I've experienced. My design left something to be desired. My wallet can't take those kind of errors LOL. I should have just called KC and let y'all help me get the configuration I wanted from the get go. I did that on a previous truck years ago, and had the finest lighting available at the time. Now I'm at least a year away from being able to afford to re-sort lights.

    Also, the Tacoma extended cab does not have provisions for roof mount lights the way the double cab does. I don't know how to deal with that, as I don't picture myself drilling holes through my roof anytime soon.
     
  10. Jan 13, 2017 at 10:27 AM
    #10
    JoeCOVA

    JoeCOVA Well-Known Member

    Joined:
    Nov 15, 2016
    Member:
    #202463
    Messages:
    9,656
    First Name:
    Joe
    Colorado Springs
    Vehicle:
    Ford F350, Lexus RX450h, FZJ80, Jeep YJ, Jeep LJ
    Holy smokes! Nice write up, huge wall of text. I appreciate you putting this all out here.
     
  11. Jan 13, 2017 at 10:35 AM
    #11
    NSA

    NSA [OP] Active Member

    Joined:
    Jan 11, 2017
    Member:
    #207208
    Messages:
    36
    Gender:
    Male
    First Name:
    Jerry
    Vehicle:
    2016 Tacoma TRD Off Road Quicksand
    Way too many to list: CBI Aluminum Front bumper CBI Rock Sliders with kickouts CBI Rear Bumper CBI Skid Plates CBI Ditch Light Brackets Smittybuilt 10k pro Winch KC Ditch Lights Rigid 20" LED Light Bar Tekonsha P2 Trailer Brake Controller Softtopper Toytec adjustable lift Spidertrax wheel spacers 285 75 16 BFG MT tires
    I have a REALLY boring IT job :) Thanks for reading it. I hope it helps some people down the road as they consider changes to their trucks. Also, I feel I owe it to the parts suppliers to give straight reviews of their products. When they're good, I want the world to know. When they're not, I want them to have the opportunity to improve.
     
  12. Jan 13, 2017 at 10:42 AM
    #12
    Taylor@KC HiLiTES

    Taylor@KC HiLiTES Well-Known Member Vendor

    Joined:
    Nov 11, 2016
    Member:
    #202104
    Messages:
    1,056
    Gender:
    Male
    First Name:
    Taylor
    Arizona
    Vehicle:
    2010 DCSB TRD OR 4x4
    See build thread
    I think you've about nailed it with everything you've said above. Our C-Series 20" bar (named C20; letter C followed by whatever size product you're looking at basically) would be a good short/mid range solution, but our FLEX series 20" array would have even greater light control and distance coverage, at a clear trade off of cost. However, that's still only a midrange solution. In the future if you do want to readjust your lighting set up, feel free to give us a call or contact me and we can help you out however possible.

    To mount your rear lights, I'll tell you what I'd do. Use some T-Slot nuts that would go in the bed rail to mount a bracket that you can make fairly easily. I would do an L shaped bracket (out of some flat stock steel, maybe 2" wide, bent in a vise with a BFH, or if you can find something similar at the store) that would go up vertically from the bed rail then be a 90deg bend horizontally over the bedsides. Then just a hole for mounting the light and a hole and some hardware (washers, lock washers, rubber fender washers for vibrations, bolt, and the tslot nut) to attach the bracket to the bed. Then just a small hole in the bedside below where you want the light for the wires and run them from underneath the vehicle for a very clean design that would keep the bed highly usable.

    EDIT: and if you want links to those t-slot nuts I can find it for you in one of my old posts on my personal account on here. They, if I remember right, are like $2-4 each.
     
  13. Jan 13, 2017 at 10:50 AM
    #13
    NSA

    NSA [OP] Active Member

    Joined:
    Jan 11, 2017
    Member:
    #207208
    Messages:
    36
    Gender:
    Male
    First Name:
    Jerry
    Vehicle:
    2016 Tacoma TRD Off Road Quicksand
    Way too many to list: CBI Aluminum Front bumper CBI Rock Sliders with kickouts CBI Rear Bumper CBI Skid Plates CBI Ditch Light Brackets Smittybuilt 10k pro Winch KC Ditch Lights Rigid 20" LED Light Bar Tekonsha P2 Trailer Brake Controller Softtopper Toytec adjustable lift Spidertrax wheel spacers 285 75 16 BFG MT tires
    Thanks!
    I think we have very near the same idea for mounting. Only, I need the plate to come back a bit so it will come out under the soft-topper to where the lights will mount. They'll have to be back behind the bed rails just a bit, but it will be worth it I think. The softtopper hides my recovery goodies from prying eyes while I'm at work or the grocery, so it's mandatory, and left up most of the time.
    Any idea where a person can buy those T nuts? I was looking at carriage bolts and grinding sides down, but if the T nuts can be bought, that would be better.

    Wow! Digging on those flex lights!
     
    Last edited: Jan 13, 2017
  14. Jan 13, 2017 at 11:17 AM
    #14
    Taylor@KC HiLiTES

    Taylor@KC HiLiTES Well-Known Member Vendor

    Joined:
    Nov 11, 2016
    Member:
    #202104
    Messages:
    1,056
    Gender:
    Male
    First Name:
    Taylor
    Arizona
    Vehicle:
    2010 DCSB TRD OR 4x4
    See build thread
    Gotcha! Didn't think about the softtopper.

    Yep, here's the link to the nuts. These work great on my 2010, but I'm not sure on the new gen. I can run over to Toyota today and see if those slide in on a new Tacoma if you want?
     
  15. Jan 13, 2017 at 11:28 AM
    #15
    NSA

    NSA [OP] Active Member

    Joined:
    Jan 11, 2017
    Member:
    #207208
    Messages:
    36
    Gender:
    Male
    First Name:
    Jerry
    Vehicle:
    2016 Tacoma TRD Off Road Quicksand
    Way too many to list: CBI Aluminum Front bumper CBI Rock Sliders with kickouts CBI Rear Bumper CBI Skid Plates CBI Ditch Light Brackets Smittybuilt 10k pro Winch KC Ditch Lights Rigid 20" LED Light Bar Tekonsha P2 Trailer Brake Controller Softtopper Toytec adjustable lift Spidertrax wheel spacers 285 75 16 BFG MT tires
    I'm sure they'll fit, as the rails are the same. But, the linky is MIA :(
     
  16. Jan 13, 2017 at 11:46 AM
    #16
    Taylor@KC HiLiTES

    Taylor@KC HiLiTES Well-Known Member Vendor

    Joined:
    Nov 11, 2016
    Member:
    #202104
    Messages:
    1,056
    Gender:
    Male
    First Name:
    Taylor
    Arizona
    Vehicle:
    2010 DCSB TRD OR 4x4
    See build thread
  17. Jan 13, 2017 at 11:56 AM
    #17
    NSA

    NSA [OP] Active Member

    Joined:
    Jan 11, 2017
    Member:
    #207208
    Messages:
    36
    Gender:
    Male
    First Name:
    Jerry
    Vehicle:
    2016 Tacoma TRD Off Road Quicksand
    Way too many to list: CBI Aluminum Front bumper CBI Rock Sliders with kickouts CBI Rear Bumper CBI Skid Plates CBI Ditch Light Brackets Smittybuilt 10k pro Winch KC Ditch Lights Rigid 20" LED Light Bar Tekonsha P2 Trailer Brake Controller Softtopper Toytec adjustable lift Spidertrax wheel spacers 285 75 16 BFG MT tires

Products Discussed in

To Top