1. Welcome to Tacoma World!

    You are currently viewing as a guest! To get full-access, you need to register for a FREE account.

    As a registered member, you’ll be able to:
    • Participate in all Tacoma discussion topics
    • Communicate privately with other Tacoma owners from around the world
    • Post your own photos in our Members Gallery
    • Access all special features of the site

Piecing Together An Aux Fuel Tank Setup

Discussion in '2nd Gen. Tacomas (2005-2015)' started by HolyHandGrenade, Feb 14, 2017.

  1. Mar 4, 2017 at 9:44 AM
    #61
    Wheelspinner

    Wheelspinner Coco Customs

    Joined:
    Jul 6, 2013
    Member:
    #107741
    Messages:
    4,370
    Gender:
    Male
    First Name:
    Steve
    Northern NJ
    Vehicle:
    '13 4x4x4cyl
  2. Mar 4, 2017 at 4:32 PM
    #62
    HolyHandGrenade

    HolyHandGrenade [OP] NOOB

    Joined:
    Mar 25, 2013
    Member:
    #100579
    Messages:
    11,797
    Gender:
    Male
    First Name:
    Tim
    Garage Most Likely
    Vehicle:
    DCFB (RIP)
    Some Stuff
    @colinb17 did you drop the tank down to get the fill hose off?
     
  3. Mar 4, 2017 at 6:09 PM
    #63
    HolyHandGrenade

    HolyHandGrenade [OP] NOOB

    Joined:
    Mar 25, 2013
    Member:
    #100579
    Messages:
    11,797
    Gender:
    Male
    First Name:
    Tim
    Garage Most Likely
    Vehicle:
    DCFB (RIP)
    Some Stuff
    Well... I didn't get anywhere near as much done as I would've liked to. Got sidetracked with house, kids, and dog stuff.

    First hiccup was that I couldn't mount the tank completely under the toolbox without running the fuel hose through the toolbox. I may end up doing this at at some point with a flush remote fill in the side of the box.

    For today though, I wasn't going to let not having remote fill parts on hand stop the project. I can do everything and move the tank later easily with some hose and four new 5/16" holes.

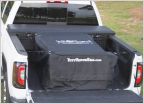
    Here it is. Tank, filter, fuel pump, and 12v valve mounted.

    IMG_0246.jpg

    I put the tank in the middle because I don't want all that extra weight on the drivers side. As it is now, I can stand on the rear tire (easily with the cut fenders and 315's) to fill the aux tank. I didn't put it on the passenger side because I wouldn't be able to reach the fill from the drivers side.

    I actually don't really care about bed space. I might just leave the tank as is.

    Tomorrow I'll start by getting the fill hose off the filler neck and tank and figure out what I need for the T. Then, start wiring everything.

    Why I don't care about bed space

    IMG_0156.jpg
     
    Last edited: Mar 4, 2017
  4. Mar 4, 2017 at 6:28 PM
    #64
    dumontrider

    dumontrider Well-Known Member

    Joined:
    Jan 26, 2012
    Member:
    #71464
    Messages:
    2,999
    Gender:
    Male
    First Name:
    Jason
    La Habra, CA
    Vehicle:
    14 GX460
    Its alive :bananadance: That fuel line going out, can you put a 90* fitting on it to allow it to slide under?
     
  5. Mar 4, 2017 at 7:20 PM
    #65
    colinb17

    colinb17 If at first you don't succeed, don't try skydiving

    Joined:
    Jan 6, 2008
    Member:
    #4127
    Messages:
    19,200
    Gender:
    Male
    First Name:
    Colin
    Charleston, SC
    Vehicle:
    '07 TRD Sport 4x4
    Build thread in sig...
    Yes. Didn't disconnect everything and bring it to the ground, but I did have to take off the straps and lower it about a foot on a floor jack to get to what I needed.
     
  6. Mar 4, 2017 at 7:23 PM
    #66
    HolyHandGrenade

    HolyHandGrenade [OP] NOOB

    Joined:
    Mar 25, 2013
    Member:
    #100579
    Messages:
    11,797
    Gender:
    Male
    First Name:
    Tim
    Garage Most Likely
    Vehicle:
    DCFB (RIP)
    Some Stuff
    I can, but it's the fill that's the problem. Right now the tank is only about 3/16" away from the front of the bed.
     
  7. Mar 4, 2017 at 7:24 PM
    #67
    HolyHandGrenade

    HolyHandGrenade [OP] NOOB

    Joined:
    Mar 25, 2013
    Member:
    #100579
    Messages:
    11,797
    Gender:
    Male
    First Name:
    Tim
    Garage Most Likely
    Vehicle:
    DCFB (RIP)
    Some Stuff
    That's what I though. That's why I left it for the AM. Thank you :thumbsup:
     
    colinb17[QUOTED] likes this.
  8. Mar 4, 2017 at 7:58 PM
    #68
    colinb17

    colinb17 If at first you don't succeed, don't try skydiving

    Joined:
    Jan 6, 2008
    Member:
    #4127
    Messages:
    19,200
    Gender:
    Male
    First Name:
    Colin
    Charleston, SC
    Vehicle:
    '07 TRD Sport 4x4
    Build thread in sig...
    Shoot me a PM if you have any questions tomorrow. I'll be in the garage most of the day and should be pretty quick to respond.
     
  9. Mar 4, 2017 at 7:58 PM
    #69
    HolyHandGrenade

    HolyHandGrenade [OP] NOOB

    Joined:
    Mar 25, 2013
    Member:
    #100579
    Messages:
    11,797
    Gender:
    Male
    First Name:
    Tim
    Garage Most Likely
    Vehicle:
    DCFB (RIP)
    Some Stuff
    Will do. Thank you Sir
     
  10. Mar 5, 2017 at 9:46 AM
    #70
    Bobcdn

    Bobcdn Well-Known Member

    Joined:
    Mar 20, 2016
    Member:
    #181827
    Messages:
    284
    Gender:
    Male
    Vehicle:
    WTB; 2nd gen well built Tacoma
    I am enjoying the progress so far!:thumbsup: Lots of pics of how you tie into the oem fuel system please.

    Looking at the tank in the (plastic) bed makes me wonder if it needs a ground strap to prevent fire from static electricity, the same as not filling your jerry cans while they are in the truck bed- they need to be placed on the ground- to avoid this:bananadead:;
     
    Last edited: Mar 5, 2017
  11. Mar 5, 2017 at 9:48 AM
    #71
    HolyHandGrenade

    HolyHandGrenade [OP] NOOB

    Joined:
    Mar 25, 2013
    Member:
    #100579
    Messages:
    11,797
    Gender:
    Male
    First Name:
    Tim
    Garage Most Likely
    Vehicle:
    DCFB (RIP)
    Some Stuff
    I'm going to put a grounding strap from one of the mounting strap bolts to the frame.
     
    Bobcdn[QUOTED] likes this.
  12. Mar 5, 2017 at 5:27 PM
    #72
    HolyHandGrenade

    HolyHandGrenade [OP] NOOB

    Joined:
    Mar 25, 2013
    Member:
    #100579
    Messages:
    11,797
    Gender:
    Male
    First Name:
    Tim
    Garage Most Likely
    Vehicle:
    DCFB (RIP)
    Some Stuff
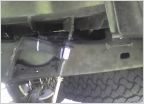
    I was able to get the T installed without dropping the tank by removing the filler neck from the bed.
    IMG_0251.jpg
    IMG_0250.jpg

    I didn't want to risk dropping a towel into the tank, so a rubber glove and rubber band kept debris out of the tank while I was screwing around above it. I also blew everything off with compressed air best I could prior.
    IMG_0253.jpg

    Cutting fill hose and installing T. First time I ever sweat a joint. Well, second actually. I'm not sharing my first attempt...
    IMG_0254.jpg
    IMG_0255.jpg
    IMG_0256.jpg
    IMG_0257.jpg
    IMG_0260.jpg

    Fuel line through the front of bed and into T.
    IMG_0261.jpg
    IMG_0263.jpg

    Cut my "poor man's" bed mat to fit around tank
    IMG_0264.jpg

    Grounding strap. 4AWG is overkill, but I have a bunch left from doing my in cab winch switch. I bought a 25' roll then.
    IMG_0265.jpg
    IMG_0266.jpg

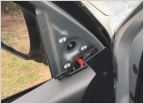
    Gauge is going to work in 4x4 switch location. Hard to tell in the Pic, but it's a silver faced gauge. There were parts missing, including the black trim ring that was supposed to be included. Jegs is sending me a new gauge. I'll be using the black ring when it arrives. I don't care for the chrome looking one.
    IMG_0271.jpg

    Had to break out the body saw to make a little room behind the fuel gauge.
    IMG_0270.jpg

    Fits now.
    IMG_0269.jpg

    I like my CB mic mounted where it was. Plus, there are already screw holes there. I spaced it out with a couple brass couplers, also left over from my winch switch project, and longer screws.
    IMG_0282.jpg
    IMG_0283.jpg
    IMG_0285.jpg

    Wiring begins. I forgot to pick up wire while I was out, so I'll finish it up another day.
    IMG_0287.jpg
    IMG_0288.jpg
     
    Last edited: Mar 5, 2017
    Large, trekker, colinb17 and 3 others like this.
  13. Mar 6, 2017 at 10:13 AM
    #73
    Bobcdn

    Bobcdn Well-Known Member

    Joined:
    Mar 20, 2016
    Member:
    #181827
    Messages:
    284
    Gender:
    Male
    Vehicle:
    WTB; 2nd gen well built Tacoma
    Thats nice that you didn't have to drop the tank. Thanks for the pics!

    Liking the auxiliary tank fuel gauge, our old auxiliary tank set up was great- but you had to get used to the fuel gauge- or knock on the tanko_O
     
    HolyHandGrenade[OP] likes this.
  14. Mar 6, 2017 at 11:39 AM
    #74
    Wheelspinner

    Wheelspinner Coco Customs

    Joined:
    Jul 6, 2013
    Member:
    #107741
    Messages:
    4,370
    Gender:
    Male
    First Name:
    Steve
    Northern NJ
    Vehicle:
    '13 4x4x4cyl
    I know you have links to parts and peices on the OP but it looks like you went a different route on a few things. Once you have this all squared away and working would it be possible to get an updated list? :boink:I don't think it needs to be links but just a list of the parts and where you got them.
     
  15. Mar 6, 2017 at 12:26 PM
    #75
    HolyHandGrenade

    HolyHandGrenade [OP] NOOB

    Joined:
    Mar 25, 2013
    Member:
    #100579
    Messages:
    11,797
    Gender:
    Male
    First Name:
    Tim
    Garage Most Likely
    Vehicle:
    DCFB (RIP)
    Some Stuff
    Why must you make everything difficult Steve?

    I SUPPOSE I can pour myself a big cuppa coffee and sit down to do that at the end.
     
    raco.the.taco and colinb17 like this.
  16. Mar 6, 2017 at 3:10 PM
    #76
    Wheelspinner

    Wheelspinner Coco Customs

    Joined:
    Jul 6, 2013
    Member:
    #107741
    Messages:
    4,370
    Gender:
    Male
    First Name:
    Steve
    Northern NJ
    Vehicle:
    '13 4x4x4cyl
    I'm not making it difficult. I'm thinking ahead before a bunch of people ask. Think of it as the cream rising to the top
     
  17. Mar 7, 2017 at 2:13 PM
    #77
    SGTCap

    SGTCap Well-Known Member

    Joined:
    Oct 30, 2013
    Member:
    #115529
    Messages:
    3,834
    Gender:
    Male
    First Name:
    Cap
    Summerville, SC
    Vehicle:
    4x4 6-spd,
    37s, 4x4 6-spd, OME 886s, Allpro Expos, SOS sliders and front/rear bumpers,Rack,Skids, 4.56s, Lockers,Recon Winch, TJM RTT, Lots of tools, boxes and gear. Shaggy mutt behind the seat
    I was gonna drill and JB Weld. I'll probably be using a brass fitting anyhow
     
  18. Mar 9, 2017 at 4:58 PM
    #78
    JPT4x4ac

    JPT4x4ac Well-Known Member

    Joined:
    Oct 6, 2015
    Member:
    #165945
    Messages:
    136
    Gender:
    Male
    First Name:
    Jon
    Broadalbin , NY
    Vehicle:
    2012 Grn Tacoma AC 2.7 MT
    Love the idea here! But the copper sweat tee is not the right fitting, a barbed fitting would be much better. The hose on the fitting has the potential to pop off when the pump comes on to transfer the fuel. Combined with road vibrations...
     
  19. Mar 9, 2017 at 5:00 PM
    #79
    HolyHandGrenade

    HolyHandGrenade [OP] NOOB

    Joined:
    Mar 25, 2013
    Member:
    #100579
    Messages:
    11,797
    Gender:
    Male
    First Name:
    Tim
    Garage Most Likely
    Vehicle:
    DCFB (RIP)
    Some Stuff
    I agree 100%. I'm searching for a 1"x3/8" copper barbed T to replace the current one. Can only find plastic ones and that's no good.
     
  20. Mar 9, 2017 at 8:01 PM
    #80
    HolyHandGrenade

    HolyHandGrenade [OP] NOOB

    Joined:
    Mar 25, 2013
    Member:
    #100579
    Messages:
    11,797
    Gender:
    Male
    First Name:
    Tim
    Garage Most Likely
    Vehicle:
    DCFB (RIP)
    Some Stuff
    Finished.

    First, I ditched the solenoid valve. The fuel pump came with a check valve. I'm going to see if that'll keep the CELs at bay.

    Fuel gauge in 4x4 selector location. The red switch covers will be switched out for black like the ones in my fuse cover. The red is a little too Fast and Furious for me...
    IMG_0308.jpg
    IMG_0306.jpg
    IMG_0309.jpg
    IMG_0315.jpg

    IMG_0310.jpg
     
    Chipskip, Bobcdn and dumontrider like this.

Products Discussed in

To Top