

-
Welcome to Tacoma World!
You are currently viewing as a guest! To get full-access, you need to register for a FREE account.
As a registered member, you’ll be able to:- Participate in all Tacoma discussion topics
- Communicate privately with other Tacoma owners from around the world
- Post your own photos in our Members Gallery
- Access all special features of the site
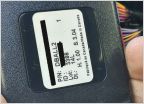 Identifying Remote Start?
 Add a Circuit Question (2012 Tacoma TRD)
 Need sliders but not for that reason..
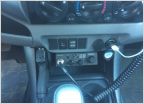 USB Power
 AFe Pro Dry cleaner solution
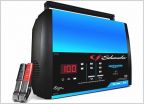 What battery charger are you using?
Camper shell wiring step-by-step (Picture Load warning!!)
Discussion in 'Technical Chat' started by majorhavok, May 27, 2013.
Page 3 of 4
Page 3 of 4
Products Discussed in


