

-
Welcome to Tacoma World!
You are currently viewing as a guest! To get full-access, you need to register for a FREE account.
As a registered member, you’ll be able to:- Participate in all Tacoma discussion topics
- Communicate privately with other Tacoma owners from around the world
- Post your own photos in our Members Gallery
- Access all special features of the site
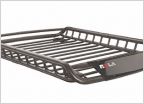 Time to Accessorize: Cargo Basket and/or Roof Racks!
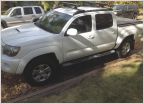 Roof rack from stealership $246. GOOD PRICE?
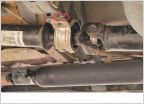 SOLVED: Loose bearing chirping/squealing sound driving me insane!
 Toyota tacoma 2008 cigarette lighter
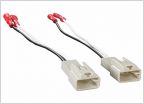 When changing rear 6.5" speakers.....
 Setup for 1000 lbs loads?
2012 Reverse Camera Switch
Discussion in '2nd Gen. Tacomas (2005-2015)' started by nut, Feb 13, 2012.
Page 4 of 5
Page 4 of 5
Products Discussed in


