

-
Welcome to Tacoma World!
You are currently viewing as a guest! To get full-access, you need to register for a FREE account.
As a registered member, you’ll be able to:- Participate in all Tacoma discussion topics
- Communicate privately with other Tacoma owners from around the world
- Post your own photos in our Members Gallery
- Access all special features of the site
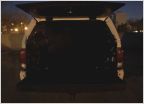 Factory lights or add own later?
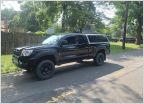 Scored this cap today for $100, can anyone identify it?
 Security for odd loads on your roof rack?
 Antenna pass-through connectors for FWC Project M
 Yakima Exo
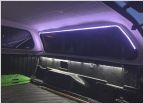 Mounting LED Strips to Uncarpeted Shell Interior
Tonneau tent
Discussion in 'Tonneau Covers, Caps and Shells' started by MGGzcar, Apr 14, 2017.
Page 1 of 2
Page 1 of 2


