1. Welcome to Tacoma World!

    You are currently viewing as a guest! To get full-access, you need to register for a FREE account.

    As a registered member, you’ll be able to:
    • Participate in all Tacoma discussion topics
    • Communicate privately with other Tacoma owners from around the world
    • Post your own photos in our Members Gallery
    • Access all special features of the site

HOW TO: Headlight Retrofit W/HID, Demon Eyes, Halos Install

Discussion in 'Lighting' started by kustom54lighting, May 10, 2017.

  1. May 10, 2017 at 11:44 PM
    #1
    kustom54lighting

    kustom54lighting [OP] Well-Known Member Vendor

    Joined:
    Jun 28, 2015
    Member:
    #158371
    Messages:
    1,293
    Gender:
    Male
    Hello all, we had our truck for 4 days and ripped the lights out already and while installing the new retrofits we decided to do a step by step on the installation.

    Tools Needed
    -10MM socket and ratchet or 10MM wrench
    -Phillips head screw driver
    -Flat head screw driver
    -Pliers

    Recommended
    -Multimeter or Test Light

    1. This is all the parts generally included in our packages, we always recommend laying everything out before the install to get familiar with what you are about to install.
    DSC03244-2 copy.jpg
    2.After looking over all the parts we started removing all the top bolts for the grille and the headlights along with some plastic push connectors on the grille. Headlights will have 2 10MM bolts on tops and grill will have 2 10MM bolts in the middle and push connectors on the outside.
    Untitled.jpg
    3. Next step is removing the grill to do so just pull up on the grill from the bottom and it should unclip from the headlights and come out without an issue.
    4. Remove the lower headlight trim pieces. To do so you need to remove the single push pin from the lower trim and carefully pull towards your body until it unclips. When it unclips you will need to pull it away from the fender toward the grill for the trim to unclip from the fender.

    Untitled2.jpg
    5. Remove 10MM bolt that is located under the lower trim piece.
    DSC03253-2 copy.jpg
    6. We then moved on to the bumper/fender portion of the install. There is on bolt holding the headlights inside the fender. You will need to partially unclip your fender liners to get to this bolt and while you are at this portion also unbolt the bumper 10MM bolt from the fender on driver side and passenger side.
    DSC03249-2 copy.jpg
    DSC03254-2 copy.jpg
    7. At this point the headlights are free to come out. Takes a little wiggling to get them out so be patient. Don't forget to disconnect all the bulbs from the headlights.
    8. This is now a perfect time to route all the wiring for your retrofits and tuck it and make it look nice. There is no particular order of which harness you should run first or anything. We installed all three harnesses at the same time because they shared a common ground and power and it was easier. After we did that then we proceeded to route all the wiring.
    9. Common ground for the harnesses was an OEM location on the inside of the fender. (Our truck is a Supercharged TRD so your tacoma might not have some of wires or lines we have)
    DSC03257-2 copy.jpg
    10. HID harness and Demon Eyes controller just need a common power strait from the battery.

    DSC03258-2 copy.jpg
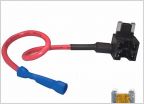
    11.This is the DRL Fuse tap for our halos. We used a multimeter to find which fuse we can tap that would only power our halos when vehicles was on and shut them off when its off. For our truck it was fuse labeled EFI2DSC03262-2 copy.jpg
    12. Next we connected our Harness to the OEM bulb socket on the truck and also connected the ballast to the HID harness and tucked it away. The passenger side bulb sock does not connect to anything now and is left unconnected, so just wrap it on some electrical tape and tuck it or however you'd like to get it out of the way.
    DSC03263-2 copy.jpg
    DSC03260-2 copy.jpg 13. Next we tapped our blinker wire to give signal to our halos for the switchback function. At this point it is good to have a multimeter or a test light because all truck are not the same and colors are different. For our tacoma number three wire from the left on each plug was the signal wire. **NOTE** Tacoma with all time DTRL need to disable the DTRL for the switchback function to work.
    DSC03261-2 copy.jpg
    DSC03259-2 copy.jpg
    14. We didn't take any pictures of the next step but it was running all the wiring from driver side to passenger side and making it look nice and neat.
    15. Finally ready for the install of the lights! We set a light on the bumper but didn't bolt it in while connecting everything and don't forget the factory DTRL bulbs need to be plugged back in. Make sure you test everything before bolting the light in. At this point having an extra hand to hold the lights from falling is help full.

    Connect the HIGH Beams, Demon eyes and/or Halos to the appropriate labeled plugs. DSC03266-2.jpg
    DSC03264-2 copy.jpg DSC03265-2 copy.jpg
    16. TEST EVERYTHING! before bolting anything back in test everything. If everything is good and functioning properly you can start bolting the lights back in. Do reverse of how you took them off and thats it! All you have left to do now is wait till its night time and adjust your headlights vertically to make sure they are to your liking and specs. Total time it took about one hour with taking pictures. We missed a lot of pictures so we apologize, we don't usually do How-To so its a learning curve.
    DSC03267-2.jpg

    Disclaimer:
    Kustom 54 Lighting is not responsible for any damage done to your vehicle, your headlights or injury to yourself during the install. When purchasing our products be aware that these are aftermarket products that need professional installation, this includes our headlight retrofits units. Any aftermarket modifications done to your vehicle and headlights may not be DOT compliant.
     
    Last edited: May 11, 2017
  2. May 11, 2017 at 4:04 AM
    #2
    LSC15

    LSC15 Southern Retrofits

    Joined:
    Feb 13, 2013
    Member:
    #97458
    Messages:
    7,045
    Gender:
    Male
    First Name:
    Logan
    Vehicle:
    2008 TRD D-Cab
    2008 Double Cab - Current 2002 4runner - Sold 2001 Double Cab - Sold 1995 Xtra Cab - Sold
    Good write up! Shows how simple the process really is. What brand harness and ballasts are you using?
     
    ChadsPride likes this.
  3. May 11, 2017 at 4:06 AM
    #3
    ChadsPride

    ChadsPride Tacoma Owner & Enthusiast

    Joined:
    Nov 26, 2014
    Member:
    #143119
    Messages:
    127,315
    Vehicle:
    Sponsored by TacomaWorld.com
    :popcorn:
     
    rmepilot likes this.
  4. May 11, 2017 at 6:07 AM
    #4
    kustom54lighting

    kustom54lighting [OP] Well-Known Member Vendor

    Joined:
    Jun 28, 2015
    Member:
    #158371
    Messages:
    1,293
    Gender:
    Male
    We used our budget kit we sell, it's a fastbright hid kit with a no name harness. Also to show that we have no problem running any of the products we sell :)
     
    Biscuits, TacoTRD78 and ChadsPride like this.
  5. May 11, 2017 at 6:08 AM
    #5
    ChadsPride

    ChadsPride Tacoma Owner & Enthusiast

    Joined:
    Nov 26, 2014
    Member:
    #143119
    Messages:
    127,315
    Vehicle:
    Sponsored by TacomaWorld.com
    Any pics of em on the truck?​
     
  6. May 11, 2017 at 6:26 AM
    #6
    kustom54lighting

    kustom54lighting [OP] Well-Known Member Vendor

    Joined:
    Jun 28, 2015
    Member:
    #158371
    Messages:
    1,293
    Gender:
    Male
    DSC03267-2.jpg
     
    ChadsPride[QUOTED] likes this.
  7. May 11, 2017 at 6:43 AM
    #7
    ChadsPride

    ChadsPride Tacoma Owner & Enthusiast

    Joined:
    Nov 26, 2014
    Member:
    #143119
    Messages:
    127,315
    Vehicle:
    Sponsored by TacomaWorld.com
    So sweet! ​
     
  8. May 23, 2017 at 10:28 PM
    #8
    TRlPPlN

    TRlPPlN Pavement Cruiser

    Joined:
    Jan 14, 2009
    Member:
    #12595
    Messages:
    1,308
    Gender:
    Male
    Bay Area, CA South SF to be precise
    Vehicle:
    MGM DCSB 09 DC TRD Sport 4x4 - Family Hauler
    Perfect. I have a 09 and I can use this. This should be stickied . Thank you for this write up with pics.
     
  9. May 24, 2017 at 8:12 AM
    #9
    kustom54lighting

    kustom54lighting [OP] Well-Known Member Vendor

    Joined:
    Jun 28, 2015
    Member:
    #158371
    Messages:
    1,293
    Gender:
    Male
    We hope it's helpful this was our first write up so we could of missed a few things
     
  10. May 26, 2017 at 11:16 AM
    #10
    gj7501greg

    gj7501greg Member

    Joined:
    May 8, 2016
    Member:
    #186388
    Messages:
    9
    Gender:
    Male
    First Name:
    G
    Vehicle:
    2005 Prerunner DoubleCab V6
    Upgrade gas to 97 octane, tire pressure 40#, Wiper blades Ultrasmooths.
    ?? I want to do retro to my 2005 Taco prerunner.

    I will buy a new set of headlight housings (Anzo/Spyder/SpecD, etc).
    Does the name matter if one is to retrofit Projectors in the new housings? I mean are one company lights housings better than the other. I will need to re seal them so that is most of the complaints and the poor Projectors. And I want to use badarse ones in the new lights....

    Cheers for the help in advance.
     
  11. May 26, 2017 at 11:33 AM
    #11
    kustom54lighting

    kustom54lighting [OP] Well-Known Member Vendor

    Joined:
    Jun 28, 2015
    Member:
    #158371
    Messages:
    1,293
    Gender:
    Male
    Honestly if you plan to retrofit brand doesn't matter with those lights just get the cheapest thing they all have the same flaws that when retrofitting you will address anyway.
     
  12. May 26, 2017 at 5:43 PM
    #12
    Sicyota04

    Sicyota04 Slowly but surely.

    Joined:
    Jan 9, 2015
    Member:
    #145940
    Messages:
    3,491
    Gender:
    Male
    First Name:
    Morgan
    California
    Vehicle:
    04 DC 4x4
    How bout some 1st gen love? How to wire dual switchbacks & demon eyes with an existing retrofitsource HID system already wired up? Super simple? Just a matter of power, grounds and certain wires for the way you want the switchbacks to work. Then with the demon eyes you wire power & ground to the battery and mount the driver to the inside of the engine bay of the truck? Am I close? @kustom54lighting
     
  13. May 27, 2017 at 7:19 AM
    #13
    gj7501greg

    gj7501greg Member

    Joined:
    May 8, 2016
    Member:
    #186388
    Messages:
    9
    Gender:
    Male
    First Name:
    G
    Vehicle:
    2005 Prerunner DoubleCab V6
    Upgrade gas to 97 octane, tire pressure 40#, Wiper blades Ultrasmooths.
    Thanks Kustom54.

    Is there a best way to seal the darn things to keep average rain water out or moisture?
    I was thinking Silicone as stated many times.
    And how about like a drain tube on the back instead of Vents with sponge stuck in them? Could fix same size dia tube to the vent holes and loop them to keep out H20 Bobbie Buscha!
     
  14. May 27, 2017 at 2:02 PM
    #14
    kustom54lighting

    kustom54lighting [OP] Well-Known Member Vendor

    Joined:
    Jun 28, 2015
    Member:
    #158371
    Messages:
    1,293
    Gender:
    Male
    Yes actually it's fairly simple as long as you lay everything out before install
     
  15. May 27, 2017 at 2:03 PM
    #15
    kustom54lighting

    kustom54lighting [OP] Well-Known Member Vendor

    Joined:
    Jun 28, 2015
    Member:
    #158371
    Messages:
    1,293
    Gender:
    Male
    Honestly we don't like silicone and add extra vents which seams to help a lot but moisture isn't always water issue. It's sometimes a temp change or it did get water once and never had a chance to evaporate
     
  16. Jul 17, 2017 at 5:47 PM
    #16
    The Boat Oar

    The Boat Oar Well-Known Member

    Joined:
    Dec 17, 2013
    Member:
    #118758
    Messages:
    176
    Gender:
    Male
    Vehicle:
    2014 Blacked Out TRD Off-Road
    I recently received a custom retrofit for my 2014 Taco and am trying to figure out how to install. I know almost nothing about car electronics so forgive my ignorance but how do I connect the switchback box to the truck? The plug that connects to the headlights is obvious but how do the White, black and orange wires pictured below connect? The white and black go to the battery and the orange to the blinker? Could anyone explain how it connects as if I was a first grader?

    [​IMG]
     
  17. Jul 17, 2017 at 6:01 PM
    #17
    kustom54lighting

    kustom54lighting [OP] Well-Known Member Vendor

    Joined:
    Jun 28, 2015
    Member:
    #158371
    Messages:
    1,293
    Gender:
    Male
    Did we send this out? Just want to make sure cause we always have plugs on ours.

    So black is ground. Out a terminal ring on it and ground it no big deal.

    White is power but for the "white" halo so you need to decide how you want them and when you want them turn on. After you made that decision splice it into the desired power source.

    The yellow is for "amber/yellow" that's your blinker. This you would tap into your blinker signal wire
     
  18. Jul 17, 2017 at 6:41 PM
    #18
    The Boat Oar

    The Boat Oar Well-Known Member

    Joined:
    Dec 17, 2013
    Member:
    #118758
    Messages:
    176
    Gender:
    Male
    Vehicle:
    2014 Blacked Out TRD Off-Road
    Thank you for your response. No, I got them from the retrofit masters I just found this thread in a google search. Ideally I would like the halos to come on with the car white and then have them turn amber with the blinker. How do I find the power source and how do I "splice into it"? I have never messed with electronics before so I am really new to this.
     
  19. Jul 17, 2017 at 6:46 PM
    #19
    Oreo Cat

    Oreo Cat Worst Member

    Joined:
    Sep 19, 2016
    Member:
    #197755
    Messages:
    5,042
  20. Jul 17, 2017 at 7:30 PM
    #20
    kustom54lighting

    kustom54lighting [OP] Well-Known Member Vendor

    Joined:
    Jun 28, 2015
    Member:
    #158371
    Messages:
    1,293
    Gender:
    Male
    I'll be home in a bit, still at the shop and I'll send you links to stuff that will make life easier.

    You will need to run wires to your fuse box to have them come on with the car but the parts list I'll link you too should make it very easy.
     
    TRlPPlN likes this.
To Top