1. Welcome to Tacoma World!

    You are currently viewing as a guest! To get full-access, you need to register for a FREE account.

    As a registered member, you’ll be able to:
    • Participate in all Tacoma discussion topics
    • Communicate privately with other Tacoma owners from around the world
    • Post your own photos in our Members Gallery
    • Access all special features of the site

2014 TRD Off Road 6 Speed Asphalt Assasin

Discussion in '2nd Gen. Builds (2005-2015)' started by SanPedroSynthetics, May 14, 2017.

  1. May 14, 2017 at 4:34 PM
    #1
    SanPedroSynthetics

    SanPedroSynthetics [OP] Member

    Joined:
    Mar 17, 2017
    Member:
    #213591
    Messages:
    9
    Gender:
    Male
    First Name:
    Gary
    Vehicle:
    2014 Tacoma TRD OffRoad
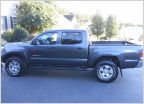
    My first Tacoma was a 2007 TRD Sport 4x4 and I purchased it in Seattle WA

    IMG_3911_zpslolsgnjk_dce3e5f7fdc537ac401bea25f37ef99840d75dd8.jpg

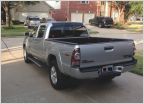
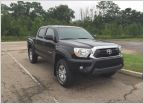
    The blue was very hard to keep clean and I always wanted a 6 speed Tacoma. So I finally found the truck I had been looking for and flew to Arizona to pick her up. This is how she looked at the original owners house. 2014 TRD Off Road 6 Speed 4x4.

    IMG_3792_zpsof0lxqou_61123db4485b9a242191f8393e0c30780ef07cc4.jpg

    Now for the mods to start....
     
  2. May 14, 2017 at 4:52 PM
    #2
    SanPedroSynthetics

    SanPedroSynthetics [OP] Member

    Joined:
    Mar 17, 2017
    Member:
    #213591
    Messages:
    9
    Gender:
    Male
    First Name:
    Gary
    Vehicle:
    2014 Tacoma TRD OffRoad
    First thing I had to do was change that grill to the PRO version

    Before:

    stockgrill_zpsp1w1zwox_63b73aa81fa8927d92effaa5709ecad7c35a9ae3.jpg

    During:

    nogrill_zpsowcx8ifx_7bb8f72721967d1bb472be235db88edeffb47089.jpg

    After:

    TRDprogrill_zpswcjkd0nz_55a9d592bbe4b55e1c333489109464a2a2e1fa0b.jpg

    [​IMG]
    You might notice I also swapped out the grill surround to the painted version. I bought a factory Toyota Part from Village Toyota Parts. I plan on swapping the black mirrors and door handles also to white.

    Also did an oil change the night before:

    IMG_3811_zpsbjujb4sg_475eb229ee93e711bda9ae4794c8e77b1d8af851.jpg

    Used 5.5 quarts of Amsoil Synthetic

    5W-30 Synthetic

    And an Amsoil Ea oil filter

    Ea oil Filter
     
    Last edited: May 14, 2017
  3. May 17, 2017 at 8:12 PM
    #3
    SanPedroSynthetics

    SanPedroSynthetics [OP] Member

    Joined:
    Mar 17, 2017
    Member:
    #213591
    Messages:
    9
    Gender:
    Male
    First Name:
    Gary
    Vehicle:
    2014 Tacoma TRD OffRoad
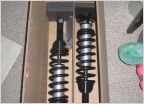
    I purchased the King coilover lift kit from Toytec which included front coilovers, total chaos UCAs, rear king shocks, and an add a leaf pack.

    KSTAC05 - King Complete Kit for 05+Tacoma

    Rear install,

    What it looked like before

    IMG_4261_zpsy77aajqq_b8a3d880643c45bbeadfa0ffe369187886362921.jpg

    After:I removed the drums to give them a fresh coat of flat black


    IMG_4275_zpsz3ugeehg_8dc396c4df1478bbe5ac601f26186cb6c2879b32.jpg


    I had to grind a notch at the lower shock mount due to the new shock rubbing. you can see the shiny part in the pic below where it was rubbing and not allowing me to insert the mounting bolt

    IMG_4267_zpsupar4uvm_33a5592189148a7d6de7d1248b95ee99377df301.jpg

    This also shows were it was hitting/rubbing

    IMG_4270_zpstij2fljv_6dd9a84430c435d504c68dffc4fb4e22c49e65fc.jpg


    With notch cut out

    IMG_4277_zpscnohhtss_61a3732f351c983becb4f043665d1938f297850d.jpg
     
  4. May 17, 2017 at 8:28 PM
    #4
    SanPedroSynthetics

    SanPedroSynthetics [OP] Member

    Joined:
    Mar 17, 2017
    Member:
    #213591
    Messages:
    9
    Gender:
    Male
    First Name:
    Gary
    Vehicle:
    2014 Tacoma TRD OffRoad
    I knew adding a lift and bigger tires would require more stopping power so I called Tom at SOS Performance (AKA Tundra Racing) and purchased the Stoptech Big Brake kit with larger rotors and 6 piston calipers.

    I will be installing this during my front king lift install. I also have stainless braided brake lines for the front and rear

    6 PISTON STOPTECH FRONT BIG BRAKE KIT fits 2005-17 TOYOTA TACOMA

    I picked up some brake fluid to help during the bleed process:

    DOT 3 and DOT 4 Synthetic Brake Fluid

    BFLV_zpslknssyyz_30bd71eb83094df6d9f78b19f3617f1737324617.jpg
     
    Lord Helmet likes this.
  5. May 27, 2017 at 7:14 PM
    #5
    SanPedroSynthetics

    SanPedroSynthetics [OP] Member

    Joined:
    Mar 17, 2017
    Member:
    #213591
    Messages:
    9
    Gender:
    Male
    First Name:
    Gary
    Vehicle:
    2014 Tacoma TRD OffRoad
    Now for the front King coilover install

    Before pics

    IMG_4315_zpsjrtyjdvv_af8ef9530d04f89279f5162454bfa6d65bc28347.jpg

    IMG_4316_zpsaiuvbzw9_7d1558af504b178ab340daf65bcd14d2971346f7.jpg

    Remove front skid plate for access to the sway bar

    IMG_4320_zpsqdvc8yap_71dbcb98b24c52404697edc228118d2a16d88181.jpg

    remove sway bar end links both sides

    IMG_4318_zps88hvpsiw_0e77f4bc9932d50c046fe60fafda0975a218a06e.jpg

    remove sway bar front mounts on both sides and move sway bar out of the way to allow shock removal

    IMG_4321_zpsraukuf7u_7507a9e83f7fe0cef6f21d88b38d98bc7945957b.jpg

    IMG_4322_zpsatbektfa_99cd48864966498b5e1c33e774ab8c51cbed3b96.jpg

    take apart spindle from upper control arm. first remove cotter pin from castle nut and then loosen castle nut.

    IMG_4333_zpsx1cieiup_ea8a9011dfcfdf184196ec1ebceccf8b01999594.jpg

    IMG_4334_zps5gnmdog5_a64ef6d3f967fe84d1f93ff549d2500a2f696168.jpg

    support the lower control arm with a floor jack

    IMG_4335_zpsusgx1yhq_41700e4261e42bad85448b4e0dbf922b5bbb72d4.jpg

    I unthreaded the castle nut until it only had a few threads and then hit it with a hammer to break the spindle loose from the upper control arm

    IMG_4336_zpsmgpbf6wr_53b6dadd1e0db44fde6b189af9497d89238d0be6.jpg

    i started pulling the spindle away and noticed the brake like was getting tight so it was time to remove it. Im also installing the StopTech big brake kit with stainless brake lines so this needs to be removed anyways.

    disconnect the rubber line at both hard lines

    IMG_4340_zpszpqkg36n_e1cf63f780994e1b825d37c4ff4427204b528de9.jpg

    IMG_4344_zpsvl0hfu0n_b71d333f0ad1a69af6f59c7884cc49d523daaf8e.jpg

    After i removed the brake line I used zip ties to secure the spindle out of the way and made sure the abs wire was not tight

    Now to remove the stock shock

    remove upper shock mount bolts

    IMG_4325_zpsufksogph_2be489e77f253a72d5e46ee7812706ebb9e07f9f.jpg

    remove lower shock bolt

    IMG_4326_zps5ltz1g2l_70c6287af28044dd1a91b828205af7b38d125847.jpg

    I used my floor jack to lower the lower control arm and the stock shock was removed

    IMG_4347_zpsd011hoym_001d8efdb0248ddfb1c707c5b71b130eea0d46e8.jpg

    IMG_4348_zpsx6wkkmap_76218ae15446821587b77ae763bb7623e19da068.jpg

    to be continued...
     
    Lord Helmet likes this.
  6. May 27, 2017 at 7:19 PM
    #6
    asuchemist

    asuchemist My Hamstrings Hurt!

    Joined:
    Mar 29, 2013
    Member:
    #100895
    Messages:
    1,965
    Gender:
    Male
    South South Dirty Gilbert
    Vehicle:
    11' TRD Sport V6, 23' TRD Pro 4Runner, 23' Tacoma TRD Pro
    NONE
    you make it all look so easy. looking real good. you upgrading the wheels?
     
  7. May 28, 2017 at 12:13 PM
    #7
    Lord Helmet

    Lord Helmet Prepare To Attack

    Joined:
    Aug 30, 2012
    Member:
    #85875
    Messages:
    39,093
    Gender:
    Male
    First Name:
    Nick
    Vehicle:
    '24 GX550 Overtrail+
    Nice build so far man :thumbsup:
     
  8. Jun 13, 2017 at 8:40 PM
    #8
    SanPedroSynthetics

    SanPedroSynthetics [OP] Member

    Joined:
    Mar 17, 2017
    Member:
    #213591
    Messages:
    9
    Gender:
    Male
    First Name:
    Gary
    Vehicle:
    2014 Tacoma TRD OffRoad
    asuchemist[QUOTED] likes this.
  9. Jun 13, 2017 at 9:12 PM
    #9
    SanPedroSynthetics

    SanPedroSynthetics [OP] Member

    Joined:
    Mar 17, 2017
    Member:
    #213591
    Messages:
    9
    Gender:
    Male
    First Name:
    Gary
    Vehicle:
    2014 Tacoma TRD OffRoad
    Next was to remove the stock upper control arm. I didnt take any photos of the process as it was a pain in the ass. You have to use a set of pliers to pry the inner fender well out the way in order to remove the UCA bolt.
    You can see in the picture below where the fender well is bent and scratched up. The stock UCA was already removed when this picture was taken.

    IMG_4359_zpskiwnvasz_b27728ef2635d659f9a6dd7f6f005de3b61c7f20.jpg

    Another pic with the UCA removed

    IMG_4360_zpsgotftagh_3664d4511f46a1a7836371d5394fb6f1b7c1e018.jpg

    The new King coil over is set in place.

    IMG_4361_zpsckgtjcon_520b722dff9cfdb9e980f51b351b54cab0060c82.jpg

    I used my floor jack to align the bottom hole and inserted the mounting bolt. Then I installed and tightened the top 3 shock mount nuts (not shown in picture).

    IMG_4362_zpsm6uuvhlc_0ef9074c74014888b5767a8591e5bdf8f65c5a3d.jpg

    Now to prep the new Total Chaos Uniball Upper Control Arms

    I installed the bushings with a mallet and then used AMSOIL Synthetic Polymeric Grease to lube the components before installation. DO NOT grease the outside of the bushings before installation. They should be installed dry according to Total Chaos.

    IMG_4377_zpskysujqi7_5b25aa0aa0adc2ad484e7bb82e377f7db601f1b7.jpg

    Grease the bushings and then install the inserts

    IMG_4379_zpswcuyxhxc_5580a8d7900d18833cba6950149311ad5c2e99ed.jpg

    IMG_4380_zpsgr37cgfj_b55cd94a42ee8539717b9a9a7a9ac601ecc9fef1.jpg

    IMG_4381_zpswkyggsfn_558f5a889fd90d151270d21575abcfc1d756f4c6.jpg

    Install the grease fittings with the fitting pointing out.

    IMG_4385_zpsxs9zfab9_0f441021962db1933df7a0f0e8c7d892532cd0bd.jpg

    The grease fittings do not need to be bottomed out and only snug them up.

    IMG_4386_zpsaikd4jyr_066f04c5f63c21c28d0e7a05185866568d6edd95.jpg

    Stock vs Total Chaos UCA

    IMG_4373_zpsb9iretna_cfd1c5b7c007d35b800467c9864e0d91b684252a.jpg

    Install the new UCA using the factory mounting bolt.

    IMG_4363_zpsnmwitmkp_f32fa6ebb411212fd5d78b84fc373a0cb9066a5d.jpg

    I bolted up the new remote reservoir mount and used the clamps to install remove reservoir. It was getting late by now but I wanted to see how the new brakes would look so I decided to throw them on. I noticed the brake dust cover would need to be removed in order to fit the big brake kit. I removed the axle nut cover and used a 35mm socket to remove the nut. I proceeded to beat the hell out of the hub and it would not come off. I tried pry bars and bigger beaters. It would not budge. I even phoned a friend and we still both could not remove the hub to remove the dust shield. We decided to cut the dust shield off and used tin snips and pliers to slowly cut it away.

    IMG_4364_zpsr4q7qq3f_3d468a02edb4eca29ae7b2c99dca587a163e912b.jpg

    IMG_4365_zpsndy4bl2t_b6e7680dacfab28a697e53cd676b1837cfbee340.jpg

    After the dust shield was removed I re tightened all the hub bolts and connected the spindle to the UCA uniball mount. The new rotors slide right on followed by the new 6 piston Stop Tech rotors. I also installed the new stainless braided lines. I didnt take any pics because I was ready to see the finished product. I love it!

    IMG_4366_zpsx9td2gcy_b4bca1187e70e66e614acb2c167ea6db9fd38296.jpg
     
    avitaco likes this.
  10. Jun 14, 2017 at 10:57 AM
    #10
    avitaco

    avitaco Well-Known Member

    Joined:
    Sep 9, 2016
    Member:
    #196822
    Messages:
    1,019
    Gender:
    Male
    First Name:
    A
    Vehicle:
    2017 DCSB 4x4

    I'm struggling with the fender on the passenger side. Such a pain
     
  11. Jun 14, 2017 at 11:14 AM
    #11
    SanPedroSynthetics

    SanPedroSynthetics [OP] Member

    Joined:
    Mar 17, 2017
    Member:
    #213591
    Messages:
    9
    Gender:
    Male
    First Name:
    Gary
    Vehicle:
    2014 Tacoma TRD OffRoad
    Yeah the passenger is definetly harder than the driver side. I never was able to easily remove the bolt. I used a hammer and punch to beat the bolt out. And again used a hammer to reinstall the bolt.
     
    avitaco[QUOTED] likes this.
  12. Jun 14, 2017 at 11:22 AM
    #12
    Lord Helmet

    Lord Helmet Prepare To Attack

    Joined:
    Aug 30, 2012
    Member:
    #85875
    Messages:
    39,093
    Gender:
    Male
    First Name:
    Nick
    Vehicle:
    '24 GX550 Overtrail+
    Truck is looking good Gary :thumbsup: BTW love Amsoil stuff when I can afford it :D
     
  13. Jun 14, 2017 at 11:23 AM
    #13
    avitaco

    avitaco Well-Known Member

    Joined:
    Sep 9, 2016
    Member:
    #196822
    Messages:
    1,019
    Gender:
    Male
    First Name:
    A
    Vehicle:
    2017 DCSB 4x4

    Ok. That's what I was about to do. I cannot get the fender bent enough to get the bolt past. Driving me crazy for the last hour.

    Thanks for that info
     
  14. Jun 14, 2017 at 11:26 AM
    #14
    Lord Helmet

    Lord Helmet Prepare To Attack

    Joined:
    Aug 30, 2012
    Member:
    #85875
    Messages:
    39,093
    Gender:
    Male
    First Name:
    Nick
    Vehicle:
    '24 GX550 Overtrail+
    I used a deadblow on the inner fender wheel to clear the bolt to slide through. Easy money!
     
  15. Jun 14, 2017 at 11:28 AM
    #15
    avitaco

    avitaco Well-Known Member

    Joined:
    Sep 9, 2016
    Member:
    #196822
    Messages:
    1,019
    Gender:
    Male
    First Name:
    A
    Vehicle:
    2017 DCSB 4x4

    How??? There's the ac lines and other random wires that I can't get anything in there to hit the area let alone get a hammer in there?

    I have vice grips to try to pull it back but there's one tight spot I can't get it past
     
  16. Jun 14, 2017 at 11:31 AM
    #16
    Lord Helmet

    Lord Helmet Prepare To Attack

    Joined:
    Aug 30, 2012
    Member:
    #85875
    Messages:
    39,093
    Gender:
    Male
    First Name:
    Nick
    Vehicle:
    '24 GX550 Overtrail+
    Use a long cheater bar. Braced it against that fenderwell wall and use a BFH or deadblow. It only needs to clear 3/8-1/2"
     
  17. Jun 14, 2017 at 1:45 PM
    #17
    avitaco

    avitaco Well-Known Member

    Joined:
    Sep 9, 2016
    Member:
    #196822
    Messages:
    1,019
    Gender:
    Male
    First Name:
    A
    Vehicle:
    2017 DCSB 4x4
    I got it out. I bent it the fender but it wasn't enough. I put an socket extension on the other side and hit it out with that through the upper. I was able to get it out and called TC to make sure I could thread it through the opposite way to not have to hit it back in. I spent more time trying to figure that out then anything else. I hope that someone else will read that to find your solution or my "forced" way so they don't spend 1.5 hours working on it haha
     
  18. Jun 14, 2017 at 6:12 PM
    #18
    Lord Helmet

    Lord Helmet Prepare To Attack

    Joined:
    Aug 30, 2012
    Member:
    #85875
    Messages:
    39,093
    Gender:
    Male
    First Name:
    Nick
    Vehicle:
    '24 GX550 Overtrail+
    I thought changing out those bolts on both sides were easy to do but I must be in the minority :notsure:
     

Products Discussed in

To Top