1. Welcome to Tacoma World!

    You are currently viewing as a guest! To get full-access, you need to register for a FREE account.

    As a registered member, you’ll be able to:
    • Participate in all Tacoma discussion topics
    • Communicate privately with other Tacoma owners from around the world
    • Post your own photos in our Members Gallery
    • Access all special features of the site

Caliraised Lightbar Install 32 inch

Discussion in 'Lighting' started by xcessiveforce, Jun 25, 2017.

  1. Jun 25, 2017 at 5:34 PM
    #1
    xcessiveforce

    xcessiveforce [OP] Active Member

    Joined:
    Apr 1, 2017
    Member:
    #215096
    Messages:
    27
    Gender:
    Male
    First Name:
    s
    Vehicle:
    2017 taco
    none
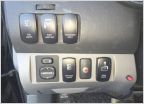
    Ok folks, so here is the skinny on the install. I decided to install myself as I was waiting on the LED LIGHT BAR Pushbutton to be sent in the mail but the box I received had something else completely and I will explain in a bit. So I decided to save myself the 250 bucks for install and do it Han Solo. If you watch the new video caliraised just posted on youtube it does a pretty good job covering the details. Let me now give you my point of view. Unless you have your own shop, its going to take longer than 45 minutes. My perspective, average garage Dad, Each bolt you must break like the frame support will require additional leverage like a long extended wrench or break bar. The challenge is that they are in difficult spots to get leverage. So yeah, I had to grab a few other items at autozone to help break them. Second note, the water cooler bolts are not optional, they have to be removed. And like the others are incredibly difficult to break and difficult to reach for leverage. Suck would be a kind word and it would be more accurate to state they pissed me off beyond reckoning on a Sunday. Finally got all the bolts removed and began the light bar install. Here is where the fun began. The big box I received with the light bar had all the brackets and stuff. I chose the mount which is supposed to be hidden behind the bumper. 2 days later I received another box with 2 more brackets and smaller screws with instructions to use those instead. So I used them and they took almost 20 minutes to get them aligned to mount the light bar. I swore more than Richard Pyror on the sunset strip. So finally got that done and routed the included wire kit, which is honestly really well done. To get the wires through the firewall there is a rubber plug behind which I believe is a reservoir. Pull that and use a phillips to push through to the interior. Then use a hanger or something with electrical tape to run it through. The included switch, I used the blank power button and dremel to create a space and mount it. All in all it took most of Sunday but still better than 250 bucks. My advice is to give yourself plenty of time, get some breaker wrenches or bars and OH YEAH, deep socket 14mm. It's much easier than a wrench. Anyway I'm going to test out the light throw tonight and I will begin the chore of finding the correct positioning. The kit is good and I know its tough to organize the amount of orders but if you chose the hidden mount set make sure you get another box or confirm with Caliraised you received the right brackets and screws. Good Luck !!!
     
    Last edited: Jun 26, 2017
  2. Jun 25, 2017 at 5:35 PM
    #2
    xcessiveforce

    xcessiveforce [OP] Active Member

    Joined:
    Apr 1, 2017
    Member:
    #215096
    Messages:
    27
    Gender:
    Male
    First Name:
    s
    Vehicle:
    2017 taco
    none
    Caliraised posted a new Video on Saturday 6/24.
     
  3. Jun 25, 2017 at 8:12 PM
    #3
    siznarf

    siznarf Everyone my age is older than me...

    Joined:
    Sep 3, 2016
    Member:
    #196375
    Messages:
    2,930
    Gender:
    Male
    First Name:
    Francis
    Kommiefornia
    Vehicle:
    08 Taco
    91 Octane
    Paragraphs are your best friend. :boom:
     
  4. Jun 25, 2017 at 8:17 PM
    #4
    Tcoma16

    Tcoma16 Galatians 2:20

    Joined:
    May 18, 2016
    Member:
    #187347
    Messages:
    1,230
    Gender:
    Male
    California
    Vehicle:
    2016 TRD Sport
    Yeah. I gave up.
     
    siznarf[QUOTED] likes this.
  5. Jun 25, 2017 at 8:29 PM
    #5
    siznarf

    siznarf Everyone my age is older than me...

    Joined:
    Sep 3, 2016
    Member:
    #196375
    Messages:
    2,930
    Gender:
    Male
    First Name:
    Francis
    Kommiefornia
    Vehicle:
    08 Taco
    91 Octane
    lol i got to the 4th sentence
     
  6. Jun 25, 2017 at 8:38 PM
    #6
    Broccoli

    Broccoli Well-Known Member

    Joined:
    Oct 16, 2015
    Member:
    #166833
    Messages:
    2,096
    Gender:
    Male
    Airdrie Alberta
    Vehicle:
    2016 trd sport blazing blue,
    I dont understand why you had so much trouble with this install, it took me longer to pop the grille off and cut the plastic wind guards than getting the lightbar installed. Super easy, hardest part was getting the allen screws into the slot and the lightbar assembly blind.
    I also added a small peice of rubber on each side between the bracket and bar because no matter how tight it was i could still move the bar up and down easily.
     
  7. Jun 25, 2017 at 8:47 PM
    #7
    sigrooms

    sigrooms Well-Known Member

    Joined:
    Feb 10, 2017
    Member:
    #210194
    Messages:
    433
    Gender:
    Male
    First Name:
    Sam
    Vehicle:
    2017 MGM Tacoma TRD Off Road 4x4 Auto DCSB w/JBL
    Holy wall-o-text Batman!

    Couldn't make it past the second sentence.
     
  8. Jun 25, 2017 at 9:42 PM
    #8
    RIDERED67

    RIDERED67 Well-Known Member

    Joined:
    Oct 22, 2016
    Member:
    #200382
    Messages:
    2,327
    Gender:
    Male
    Vehicle:
    2017 TRD OFFROAD QUICKSAND, DCLB, TECH
    Don't sweat it brah....I read your entire post because I was interested. I'll be installing mine tomorrow.

    Not sure what you mean by "hidden" brackets or whatev....I just ordered the dual row kit. Hopefully mine shows up with correct bracketry!
     
    xcessiveforce[OP] likes this.
  9. Jun 26, 2017 at 6:22 PM
    #9
    xcessiveforce

    xcessiveforce [OP] Active Member

    Joined:
    Apr 1, 2017
    Member:
    #215096
    Messages:
    27
    Gender:
    Male
    First Name:
    s
    Vehicle:
    2017 taco
    none
    RideRed67, what I mean is that the 34 inch box you receive has a set of bracket and screws. 2 days later I received a small box, roughly 12 x 12 that had another set of bracket and shorter screws. Inside that box it gave instructions to use the shorter screws and those brackets instead of the original long box. The new video posted by Cali references this as well I believe. I received my Blue Dash Button in the mail today and wired into the spot. The whole setup looks amazing. I got the light adjusted the way I need it, which is to see reptiles and amphibians on the road. With my auxbeam headlights and fogs I have approx. 40k lumens up front on demand. Good Luck on the install! (and I don't sweat the forum kids trying to bully me into posting into sheeple sized segments. I post the way I want. I'm too old and gray for that mess)


  10. Jun 26, 2017 at 7:06 PM
    #10
    CaliRaisedLed

    CaliRaisedLed Well-Known Member Vendor

    Joined:
    Apr 23, 2015
    Member:
    #153803
    Messages:
    9,014
    Gender:
    Male
    First Name:
    Jake
    Texas (DFW)
    Here is the video in case anyone is looking for it. If you have any questions please let us know and we will be happy to help.
     
  11. Jun 26, 2017 at 7:06 PM
    #11
    ICU1

    ICU1 Well-Known Member

    Joined:
    Sep 3, 2016
    Member:
    #196340
    Messages:
    4,544
    Gender:
    Male
    No big issues here. Install straight forward. Great product. Intense light output.
     
    CaliRaisedLed likes this.
  12. Jun 26, 2017 at 8:19 PM
    #12
    xcessiveforce

    xcessiveforce [OP] Active Member

    Joined:
    Apr 1, 2017
    Member:
    #215096
    Messages:
    27
    Gender:
    Male
    First Name:
    s
    Vehicle:
    2017 taco
    none
    @CaliRaisedLed - I had a chance to test and calibrate the positioning last night and tonight. I have to tell you, this is the most intense light I have seen on front of a truck. It completely compliments my setup and I'm sure anyone would agree the brightness is outstanding. With 12k lumens from my lows and fogs this completely blows them away. Thank you for an outstanding product.
     
  13. Jun 26, 2017 at 8:31 PM
    #13
    CaliRaisedLed

    CaliRaisedLed Well-Known Member Vendor

    Joined:
    Apr 23, 2015
    Member:
    #153803
    Messages:
    9,014
    Gender:
    Male
    First Name:
    Jake
    Texas (DFW)
    Thank you, we are glad you like the product!
     

Products Discussed in

To Top